Chat with AI
Install the AI Assistant plugin
This functionality relies on the AI Assistant plugin, which you need to install and enable.
Press Ctrl+Alt+S to open settings and then select .
Open the Marketplace tab, find the AI Assistant plugin, and click Install (restart the IDE if prompted).
Use the AI Assistant tool window to have a conversation with the LLM (Large Language Model), ask questions about your project, or iterate on a task.
AI Assistant takes into consideration the language and technologies used in your project, as well as local changes and version control system commits. You can search for files, classes, and element usages.
Start a new chat
Click
AI Assistant on the right toolbar to open AI Assistant.
In the input field, type your question and press Enter to submit your query.
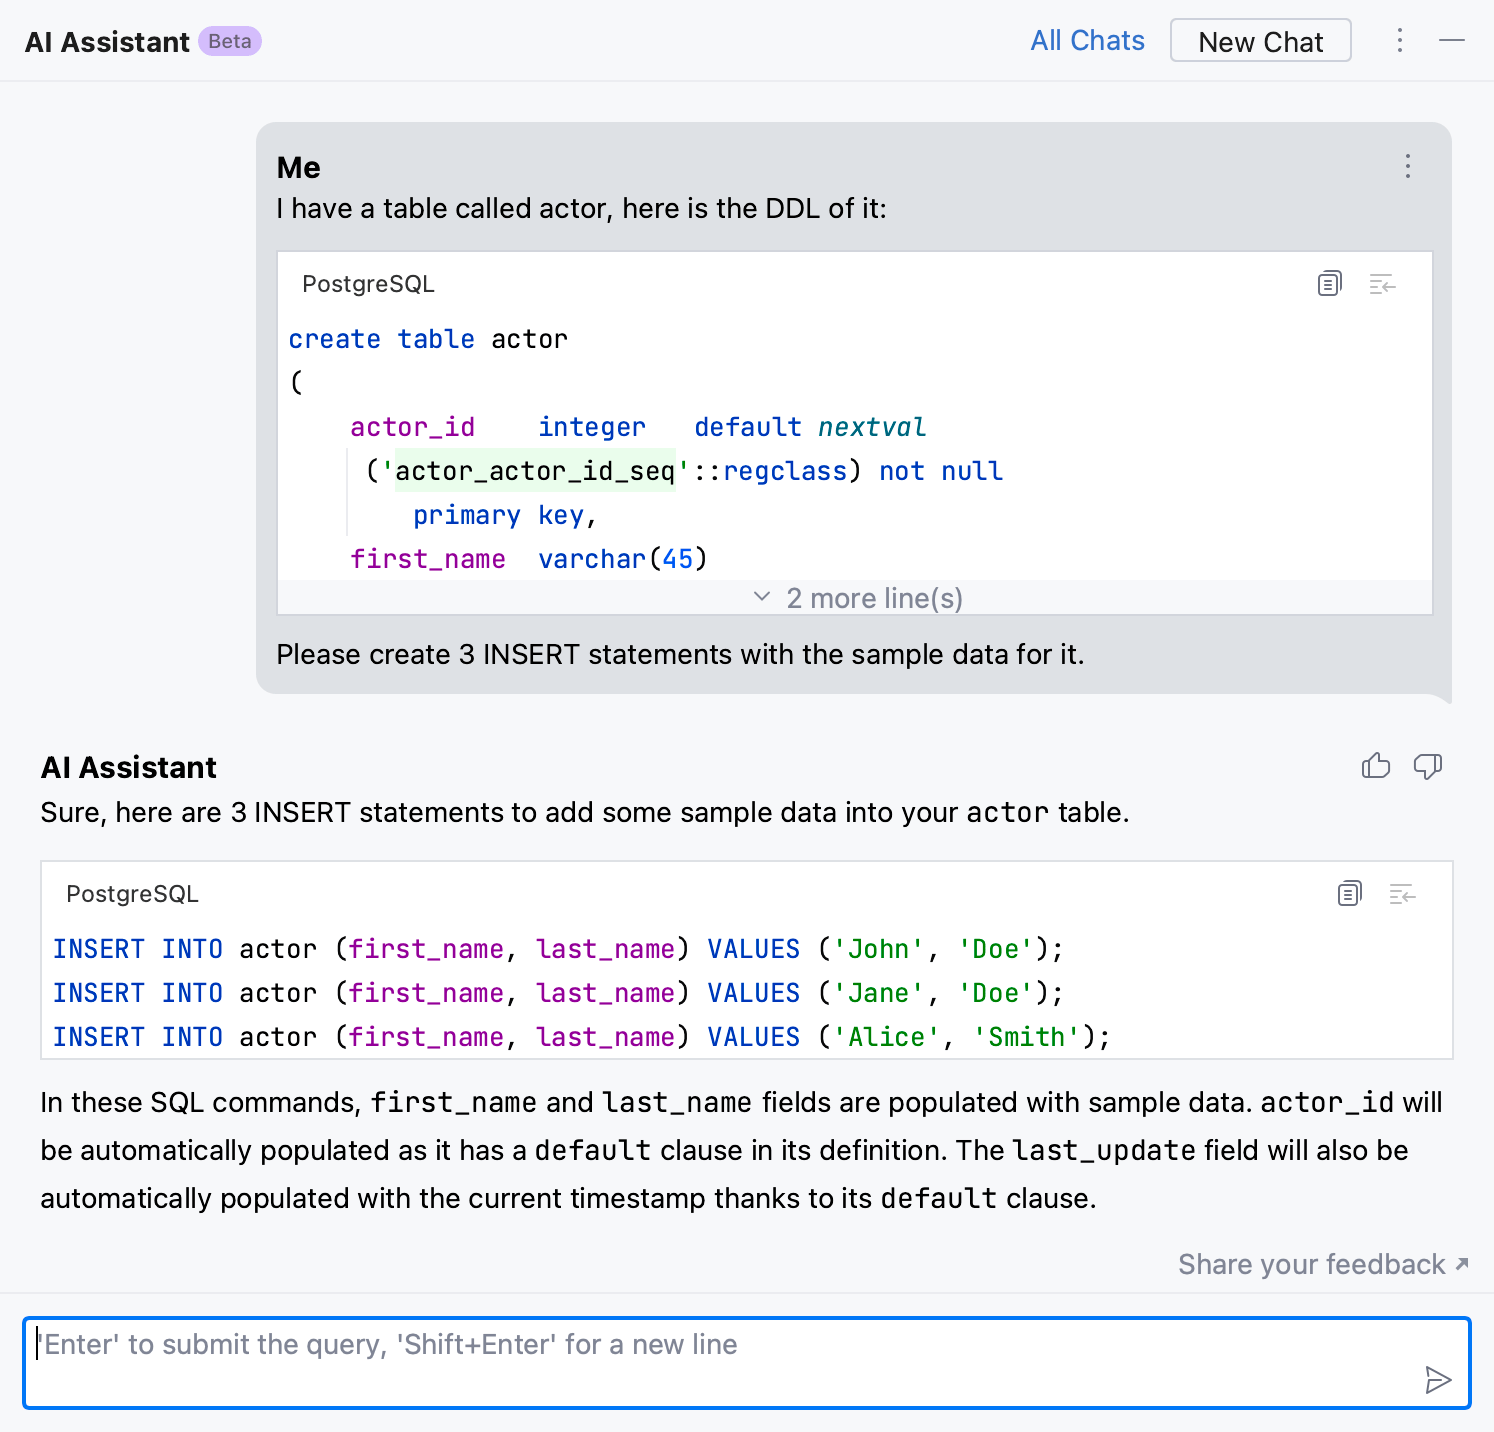
AI Assistant keeps the chats during one IDE session. You can find the saved chats in the All Chats list.
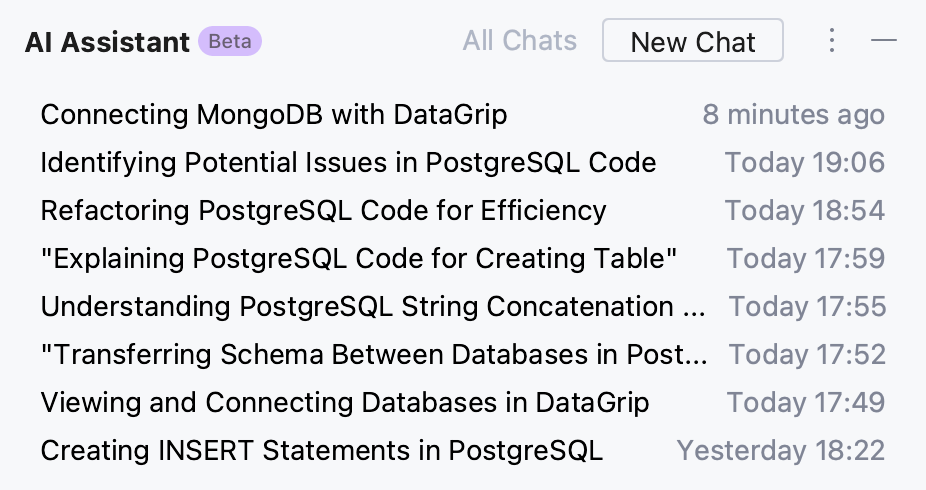
Names of the chats are generated automatically and contain the summary of the initial query.
If you want AI Assistant to provide you with a bit more precise answers, you can enable the smart chat mode in .

With this option enabled, AI Assistant might send additional details, such as file types, frameworks used, and any other information that may be necessary for providing context to the LLM.
Create file from snippet
You can create a new file with the AI-generated code right from the AI Assistant chat.
In the upper-right corner of the field with the generated code, click
Create File from Snippet.
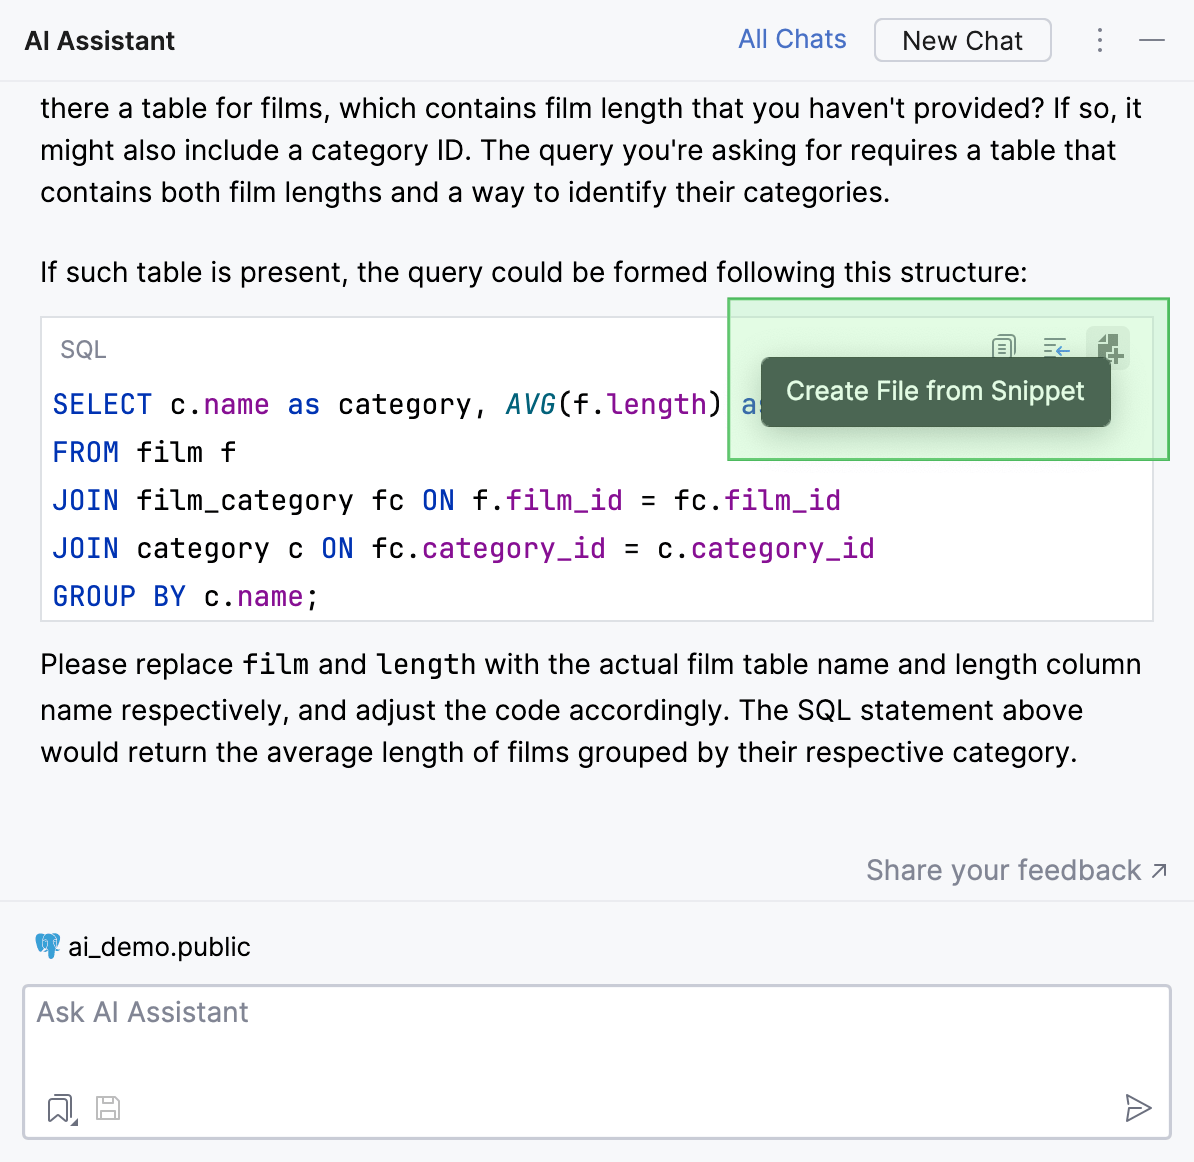
AI Assistant will create a file with the AI-generated code.

If you have any file opened or selected in the Files tool window Alt+2, the new file will be created in the same folder as the selected file.
In other cases, the new file will be created in the root project folder.
Add schema context to the generated SQL queries
You can enhance the quality of generated SQL queries with the context of a database schema that you are working with. To do that, attach the schema in AI Assistant tool window. AI Assistant will get access to the structure of the attached schema, providing the LLM with information about it.
To use this feature, you need to grant AI Assistant consent to access the database schema.
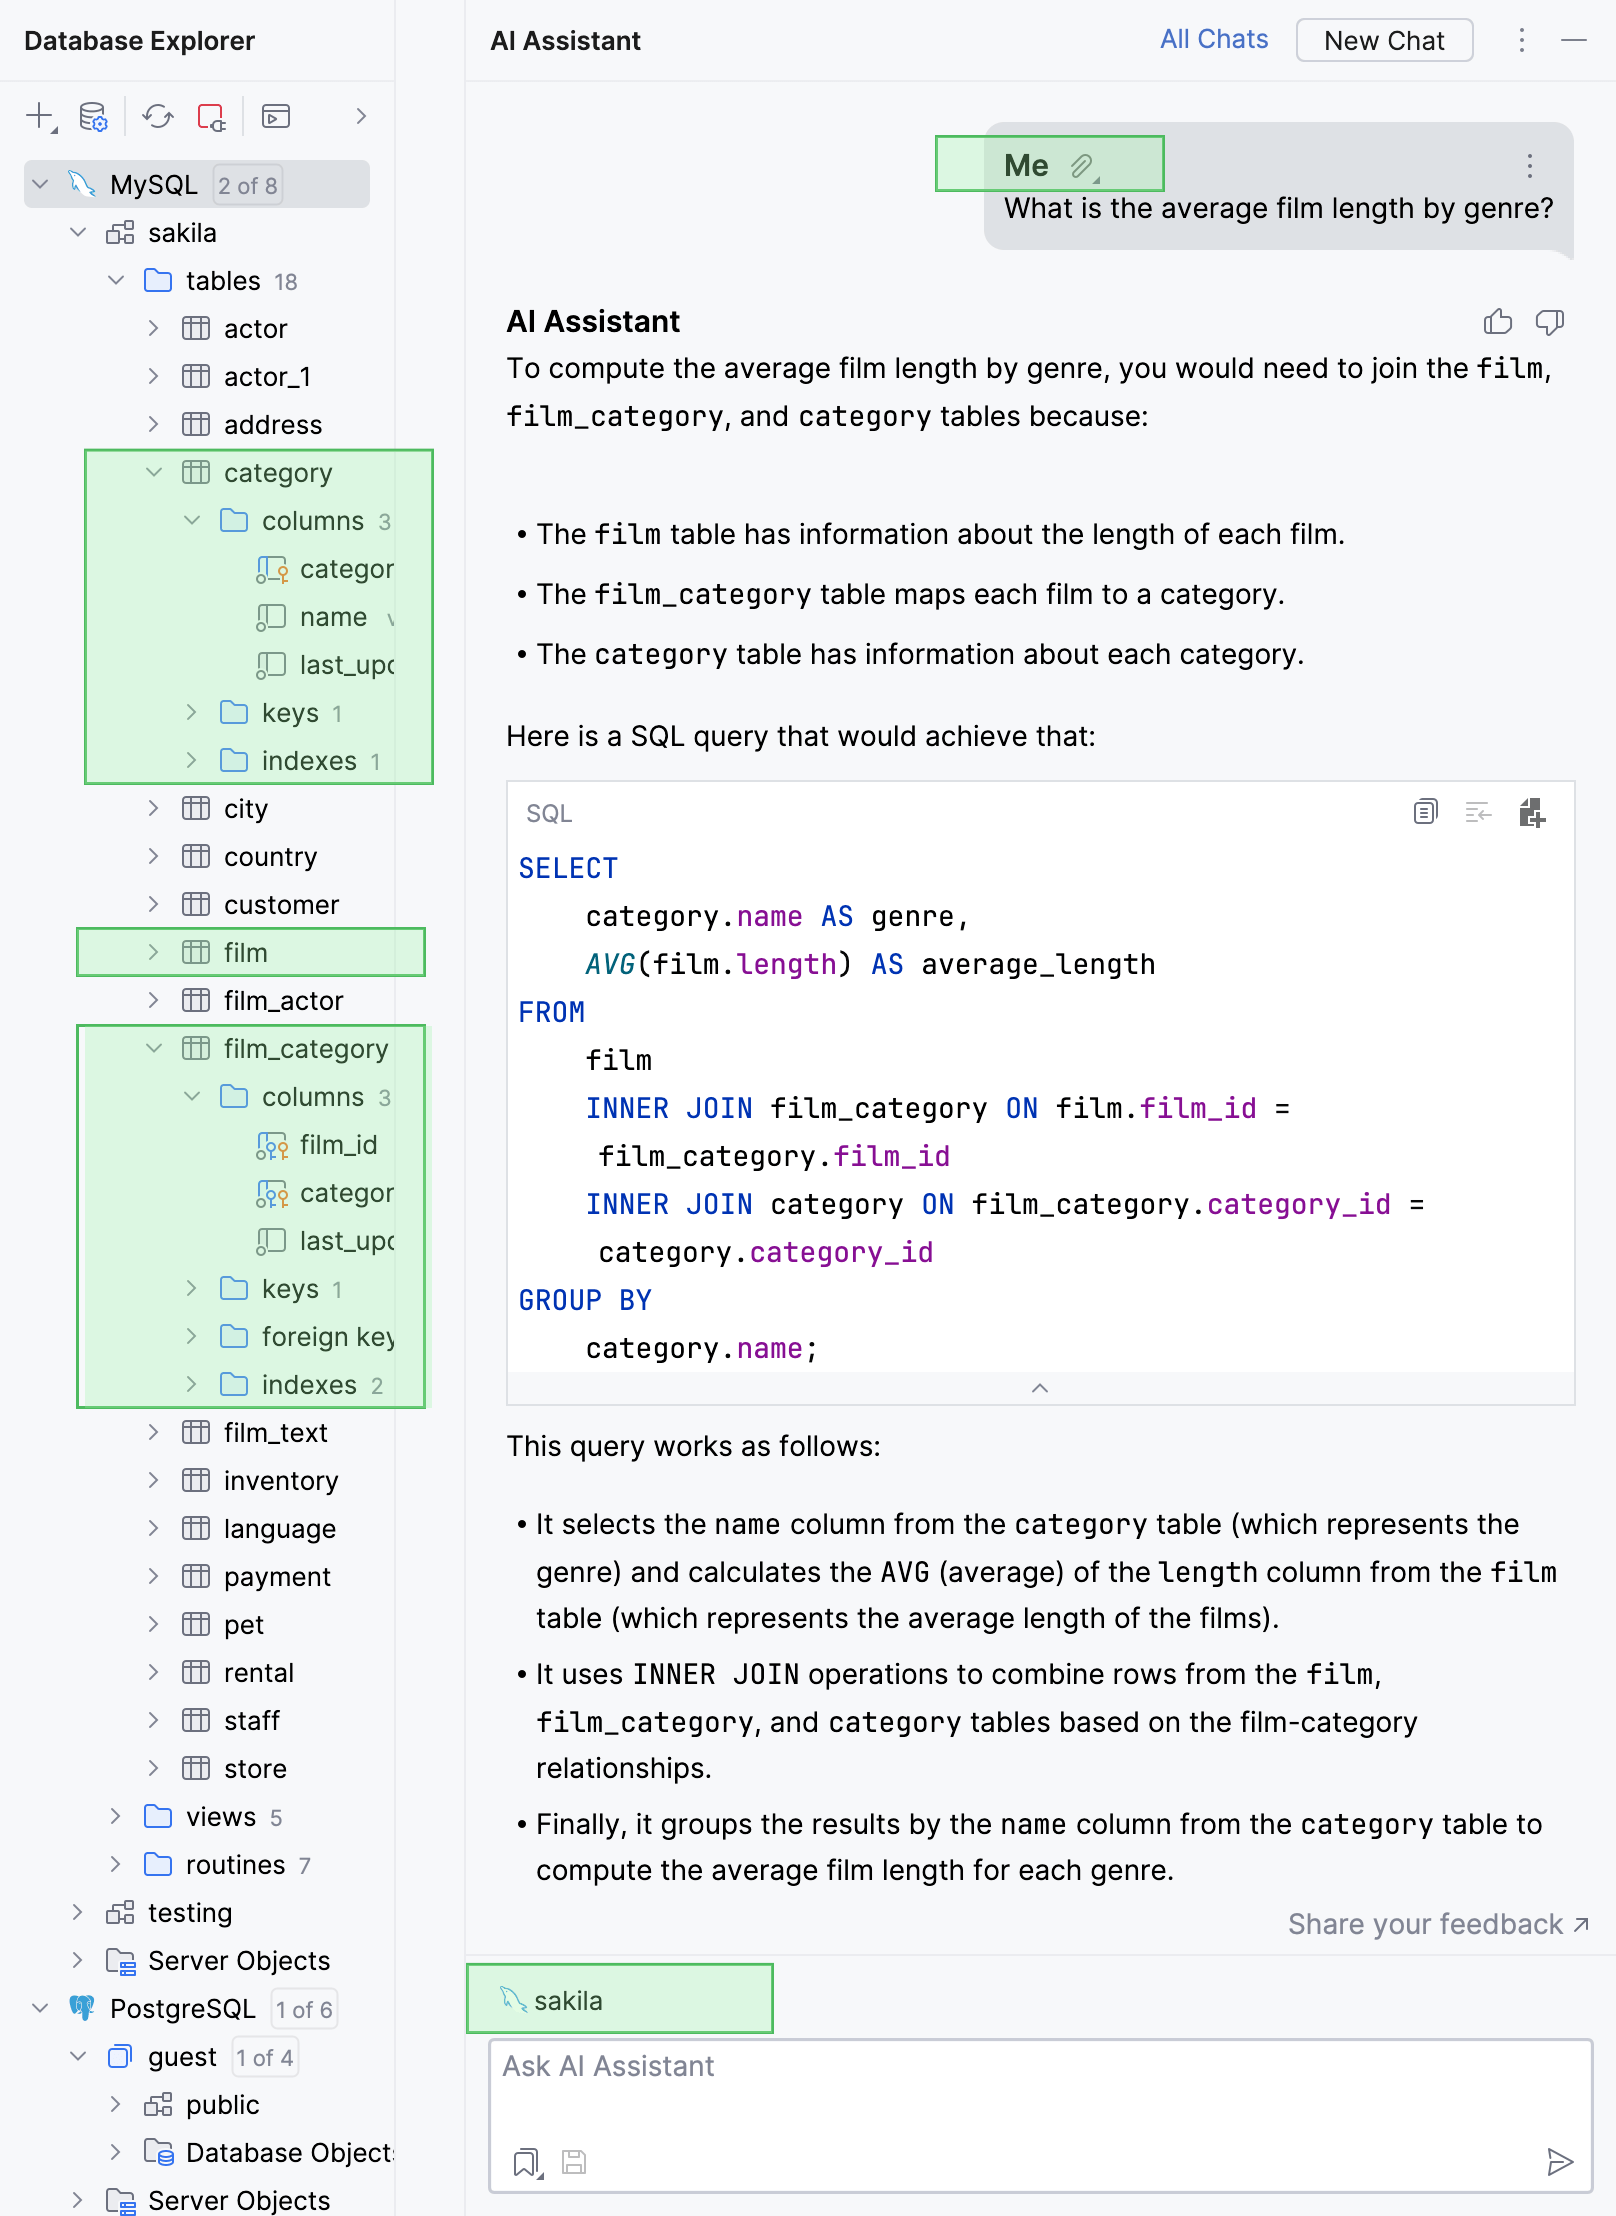
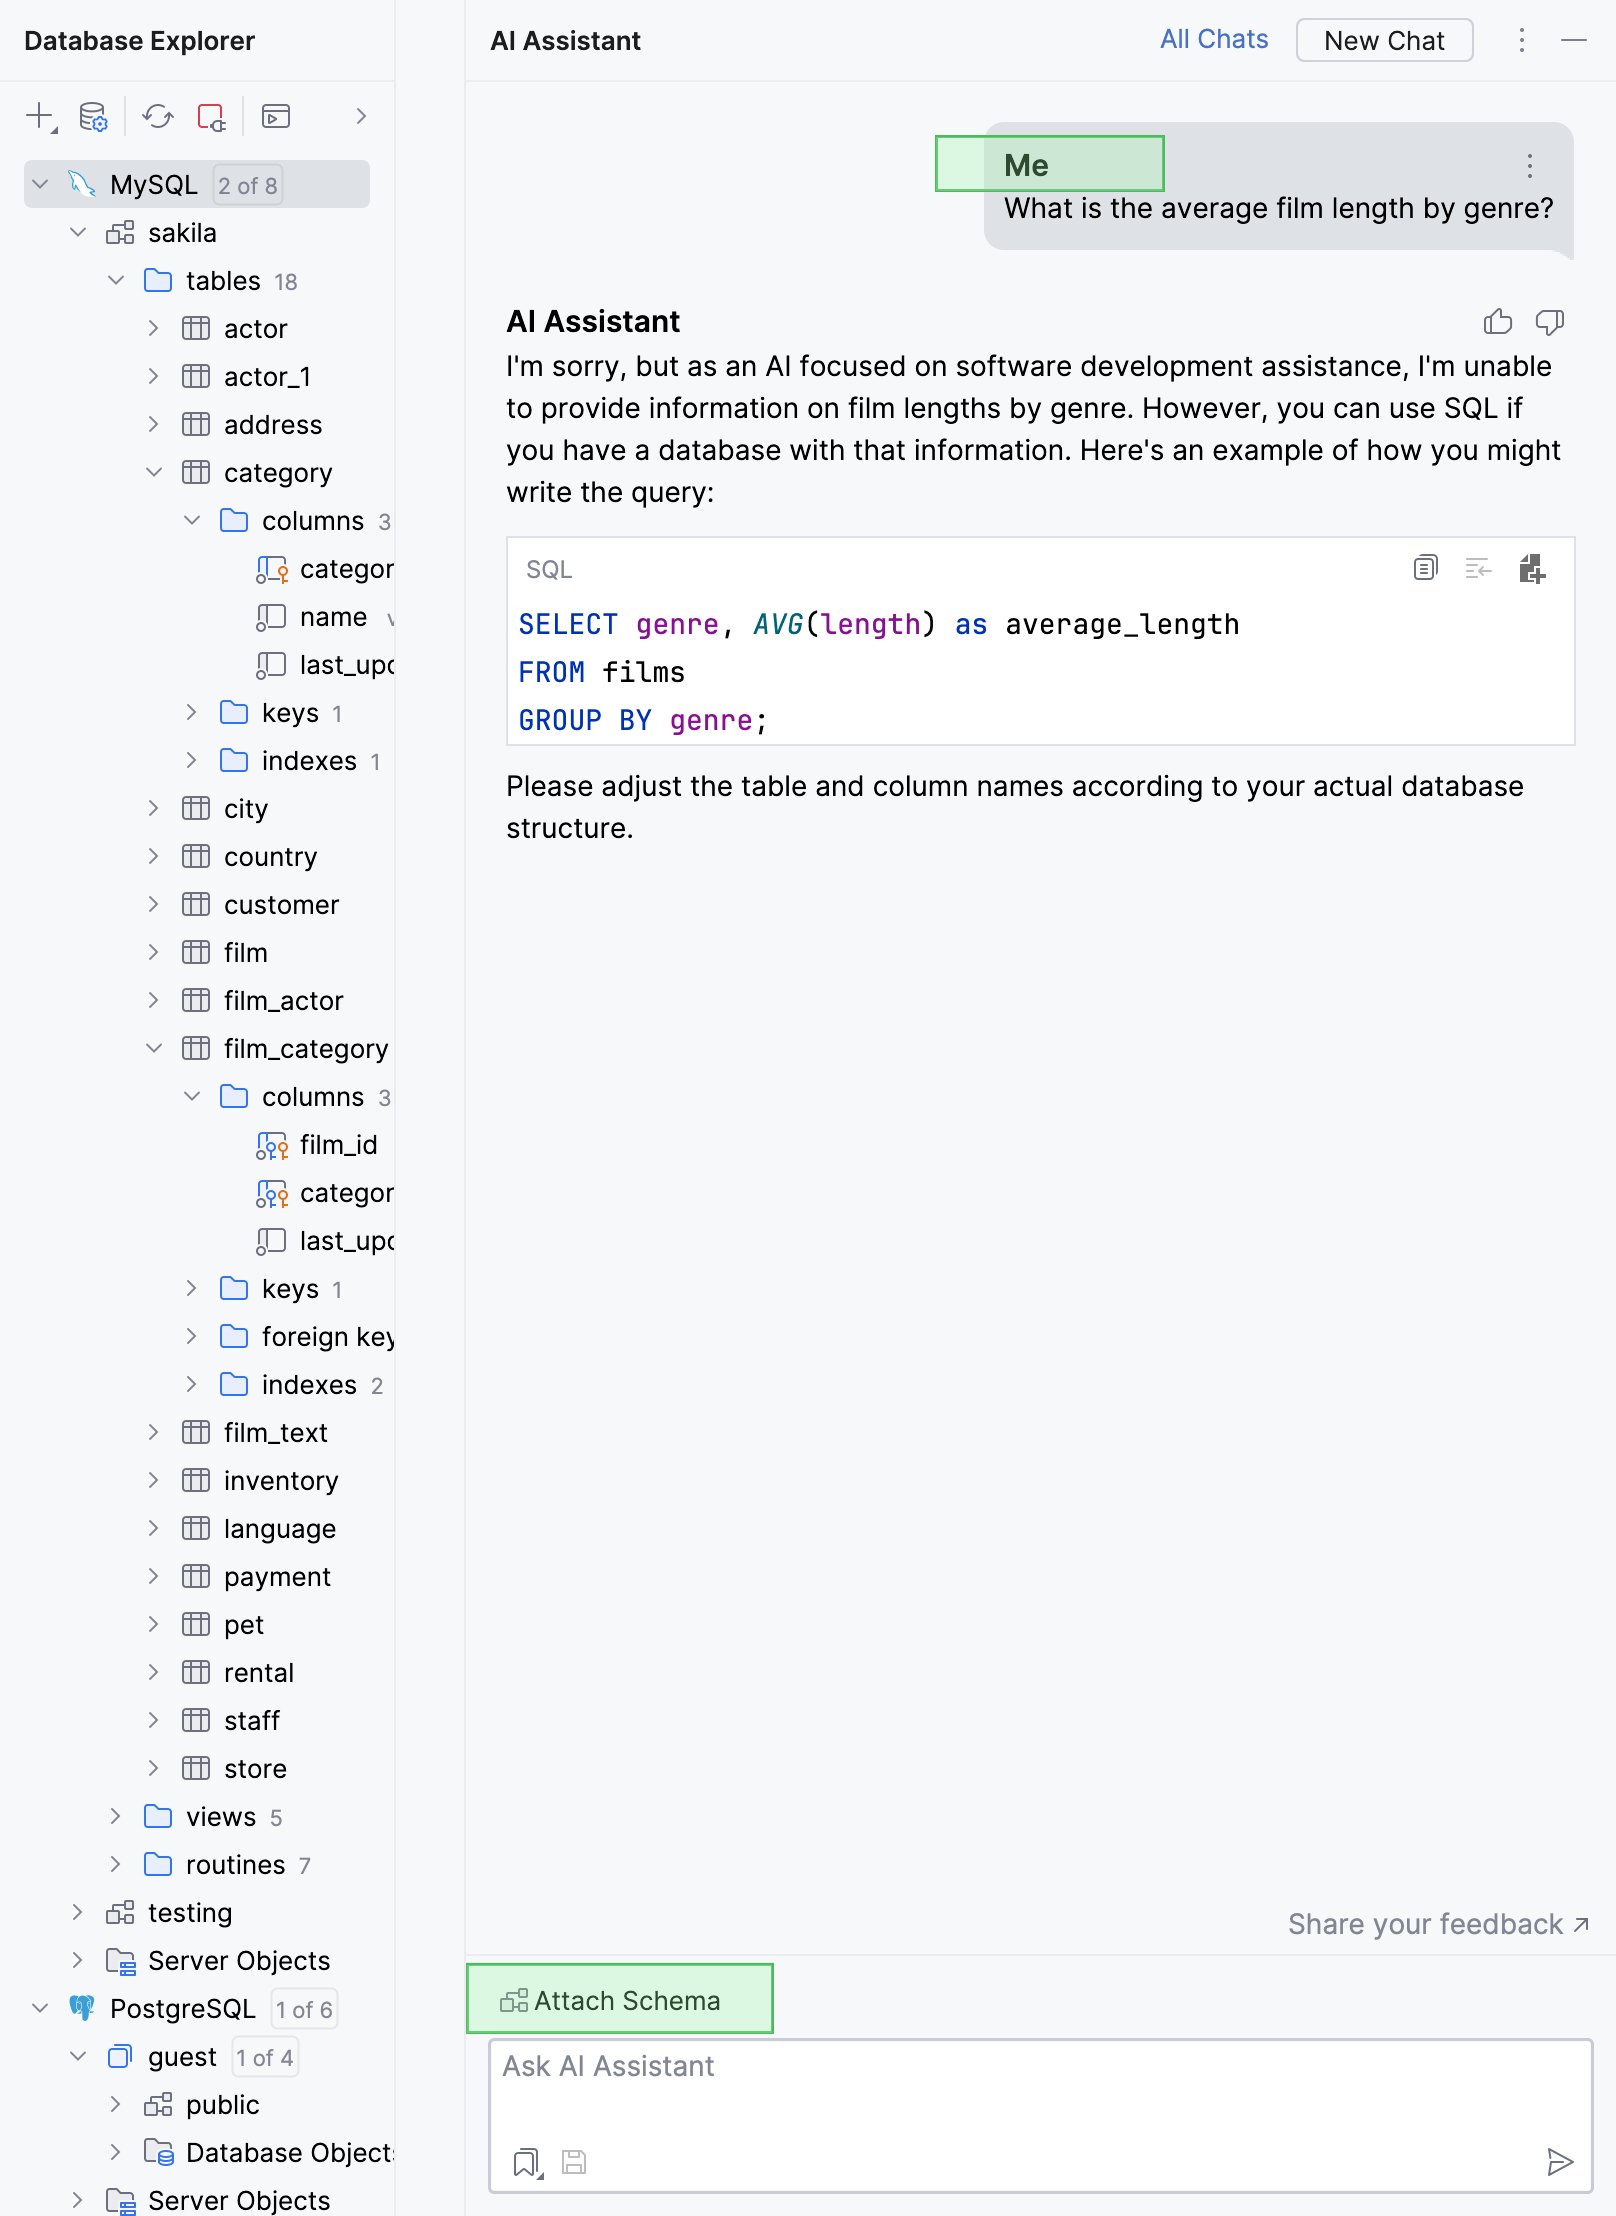
Attaching a schema will also improve the results of the context menu AI Actions actions group, for example, Explain Code, Suggest Refactoring, and so on. For more information about those actions, refer to Use AI prompts to explain and refactor your code.
Attach database schema
In the AI Assistant tool window, click
Attach Schema above input field and select the schema that you want to attach.
If the Attach Schema dialog appears, click Attach to attach the schema.
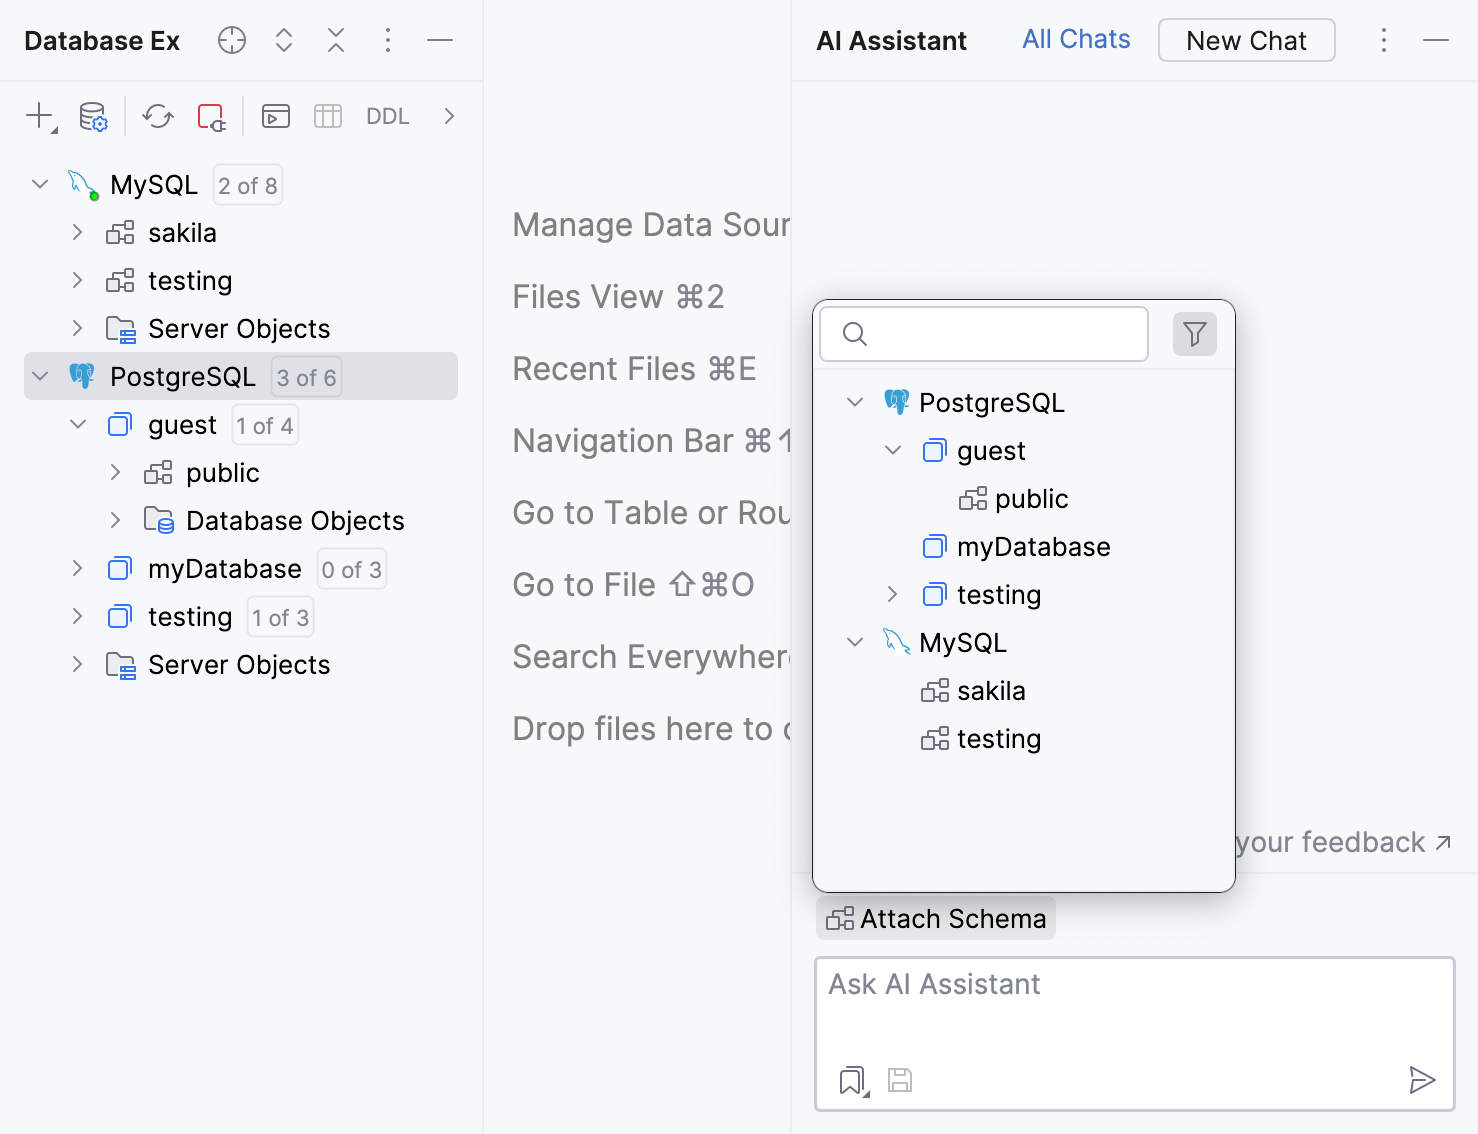
If you want to allow AI Assistant to always attach the selected schemas, select the Always allow attaching database schemas checkbox in the Attach Schema dialog. Alternatively, enable the Allow attaching database schemas setting in .
You can see which schema was attached to your message, and also navigate to that schema in Database Explorer. To do that, click Attached elements in your message, then click the schema name.