Use Files tool window
In this tutorial, you will learn how to work in the Files tool window . The tool window acts as a file browser window, providing access to the files and directories that are attached to the IDE project, access to the project root directory, and also to the IDE special file types: query consoles, data processing scripts, and scratch files.
For example, you can attach new directories, create new items (directories and files), open files in the editor, run SQL files, view the local history of a file, put directories under VCS, and so on. You can rearrange files and directories by dragging them, and also import data from files to database.
For more information about the tool window, refer to Files tool window WIP.
Quick overview
You can open the Files tool window by doing one of the following:
In the main menu, go to .
On the tool window bar, click
Files.
Press Alt+2.
By default, the tool window is located on the right side of the main window:

Files Alt+2
Attached directories and the user files that they contain
For more information about attaching directories, refer to Attach a directory with SQL files.
For more information about creating a console, refer to Create a query console.
Data processing scripts: extractors, aggregators, and loaders
For more information about data extractors and loaders, refer to Data extractors and Data loaders topics.
For more information about using scratch files, refer to Scratch files.
Attach Directory to Project header button
For more information about attaching directories, refer to Attach a directory with SQL files.
Jump to Query Console toolbar button
For more information about opening and creating query consoles, refer to Query consoles.
User files
In the Files tool window , you can access the files stored both in a project root directory and in attached directories.
Project root directory
The DataGrip project root directory is always shown at the top of the Files tool window .
If you want to be able to quickly access certain files for your current project in the IDE, and also to share them along with the project, you can copy the files into the project directory and have access to them in the Files tool window .
Attached directory
You can attach any directory to your DataGrip project and have access to it and its files in the Files tool window . Here are the options of working with user files once the directory is attached to the DataGrip project:
Use the existing files already located in the attached directory.
Create new files in the attached directory in Files tool window .
Copy the existing files located elsewhere to the attached directory in Files tool window .
Also, you can either store all your queries in a single SQL file or in several separate ones.
In this tutorial, we will consider the following example. There is a query_book directory where you already store the SQL files, and you want to have access to that directory and its files in the IDE. We will use the following sets of queries as file contents:
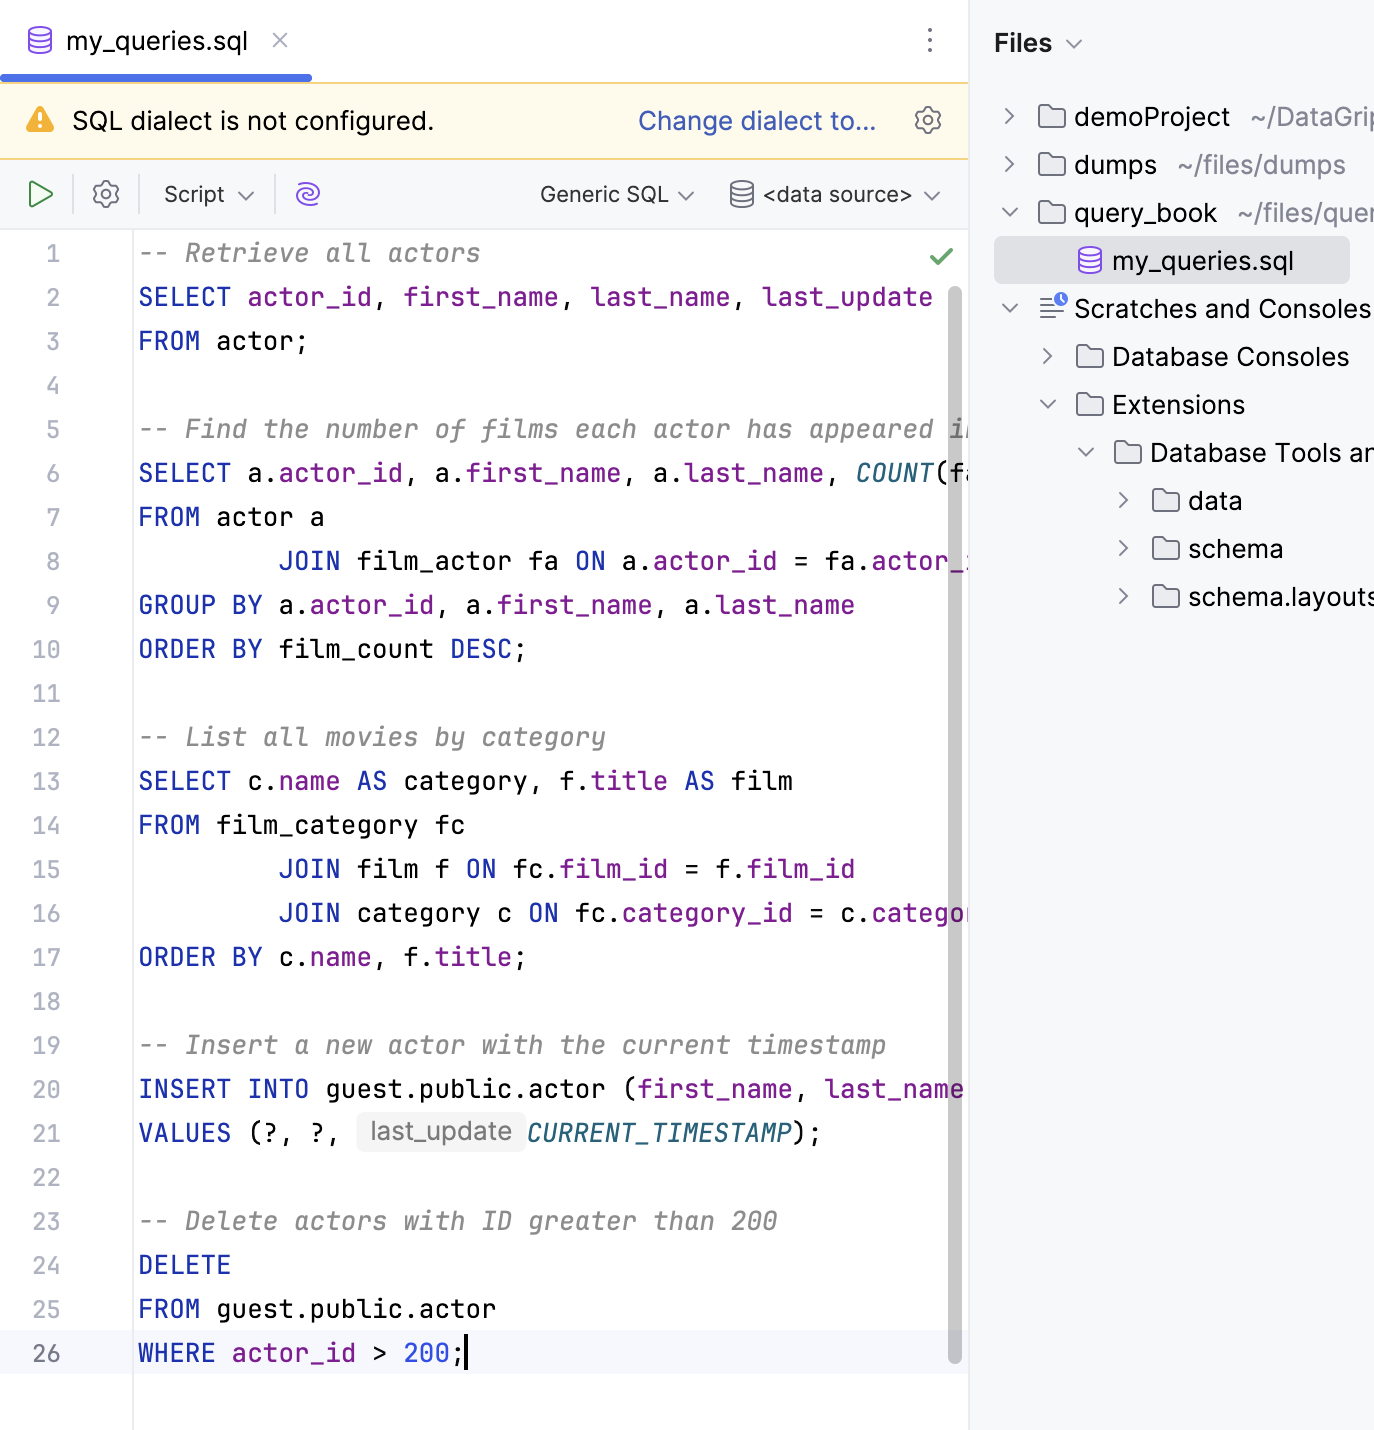
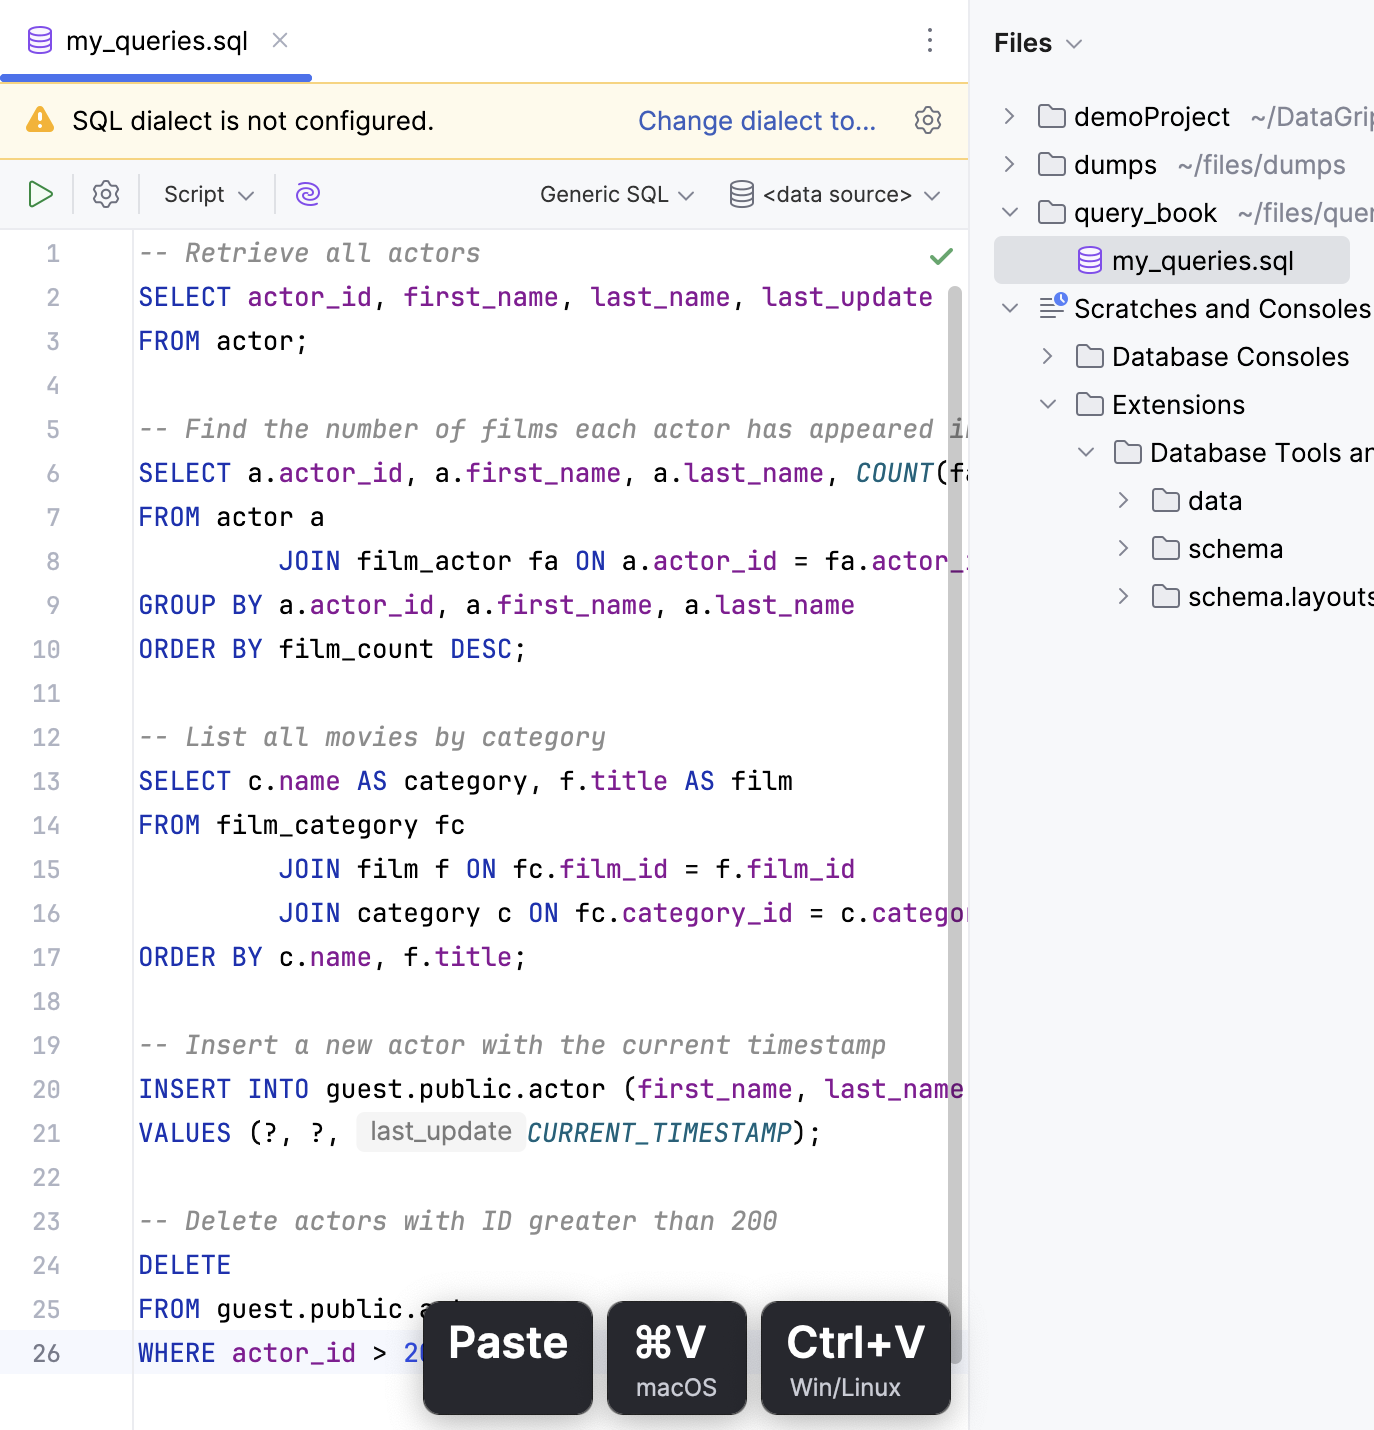
Single SQL file: my_queries.sql
-- Retrieve all actors SELECT actor_id, first_name, last_name, last_update FROM actor; -- Find the number of films each actor has appeared in SELECT a.actor_id, a.first_name, a.last_name, COUNT(fa.film_id) AS film_count FROM actor a JOIN film_actor fa ON a.actor_id = fa.actor_id GROUP BY a.actor_id, a.first_name, a.last_name ORDER BY film_count DESC; -- List all movies by category SELECT c.name AS category, f.title AS film FROM film_category fc JOIN film f ON fc.film_id = f.film_id JOIN category c ON fc.category_id = c.category_id ORDER BY c.name, f.title; -- Insert a new actor with the current timestamp INSERT INTO guest.public.actor (first_name, last_name, last_update) VALUES (?, ?, CURRENT_TIMESTAMP); -- Delete actors with ID greater than 200 DELETE FROM guest.public.actor WHERE actor_id > 200;Several SQL files: :
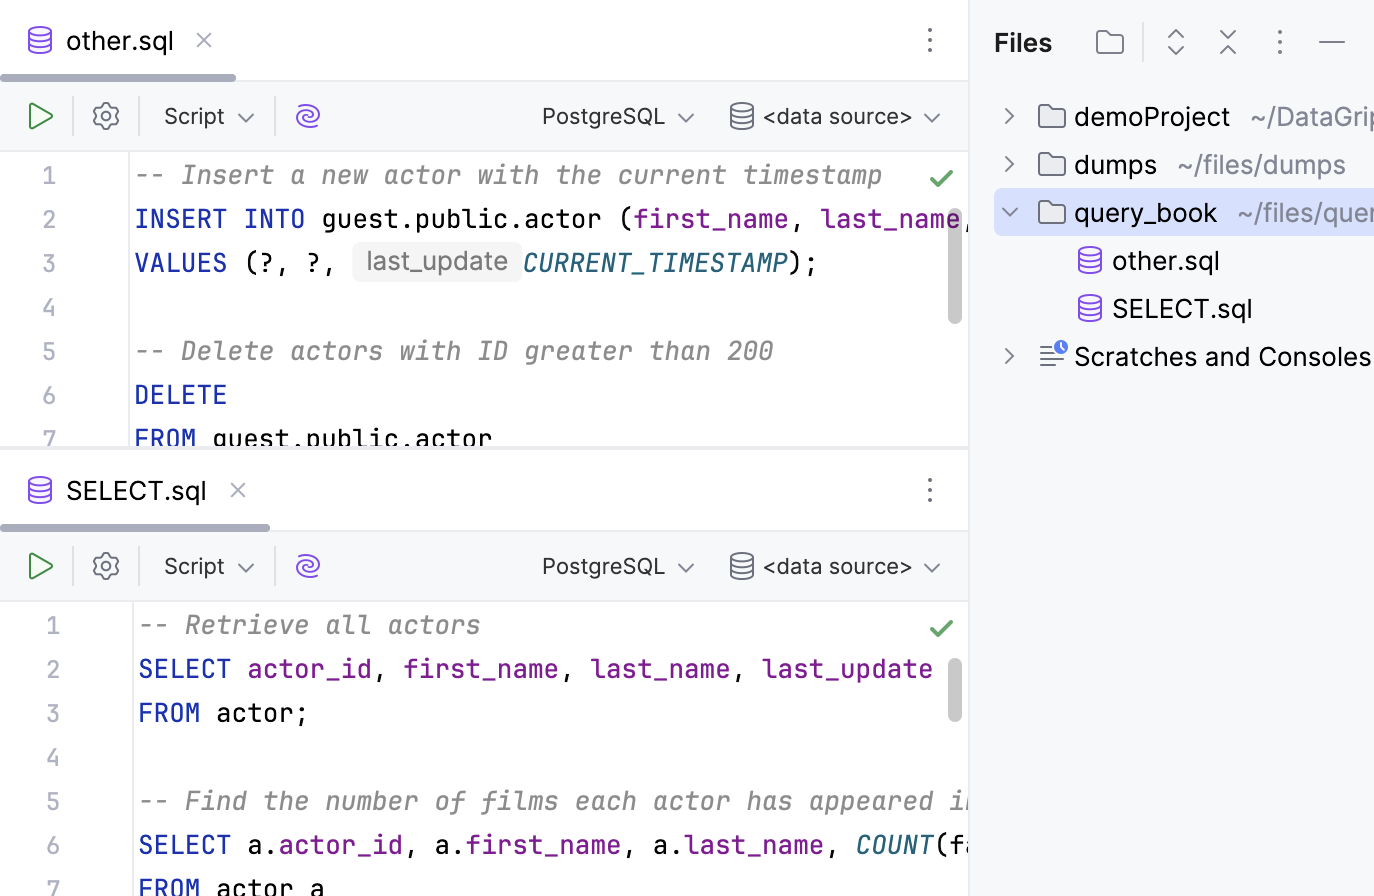
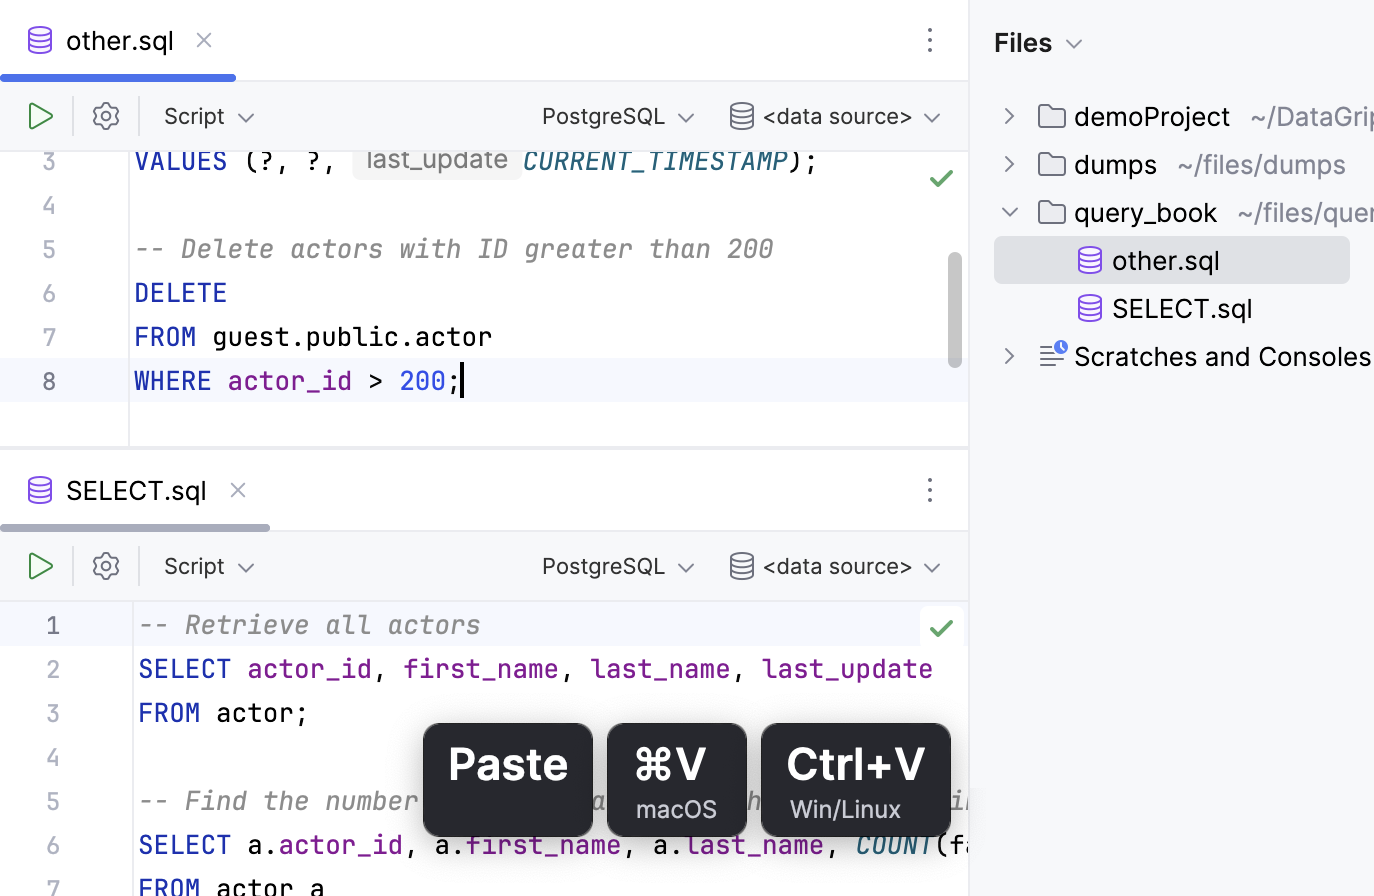
SELECT.sql
-- Retrieve all actors SELECT actor_id, first_name, last_name, last_update FROM actor; -- Find the number of films each actor has appeared in SELECT a.actor_id, a.first_name, a.last_name, COUNT(fa.film_id) AS film_count FROM actor a JOIN film_actor fa ON a.actor_id = fa.actor_id GROUP BY a.actor_id, a.first_name, a.last_name ORDER BY film_count DESC; -- List all movies by category SELECT c.name AS category, f.title AS film FROM film_category fc JOIN film f ON fc.film_id = f.film_id JOIN category c ON fc.category_id = c.category_id ORDER BY c.name, f.title;other_queries.sql
-- Insert a new actor with the current timestamp INSERT INTO guest.public.actor (first_name, last_name, last_update) VALUES (?, ?, CURRENT_TIMESTAMP); -- Delete actors with ID greater than 200 DELETE FROM guest.public.actor WHERE actor_id > 200;
To access the directory with its SQL files in DataGrip, you need to attach the directory to the project first.
Open existing files
In the Files tool window , click the Attach Directory to Project button (
) in the toolbar.
Alternatively, right-click in the area of the Files tool window and select Attach Directory to Project.
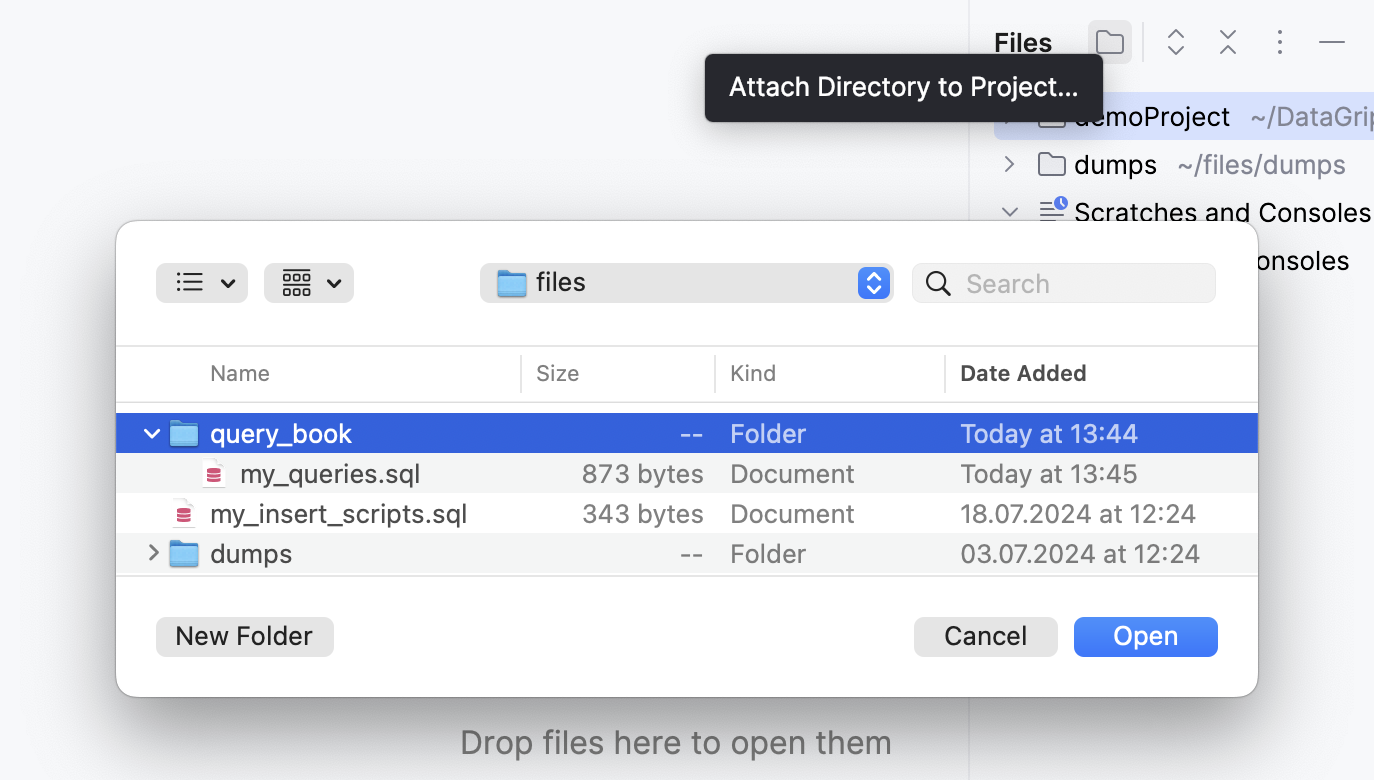
In the file browser, navigate to the directory that you want to attach. In our case, it is the query_book directory.
Click Open.
The directory will become available in the Files tool window . To open your SQL file in the editor, expand the attached directory node and double-click the filename.
In the Files tool window , click the Attach Directory to Project button (
) in the toolbar.
Alternatively, right-click in the area of the Files tool window and select Attach Directory to Project.
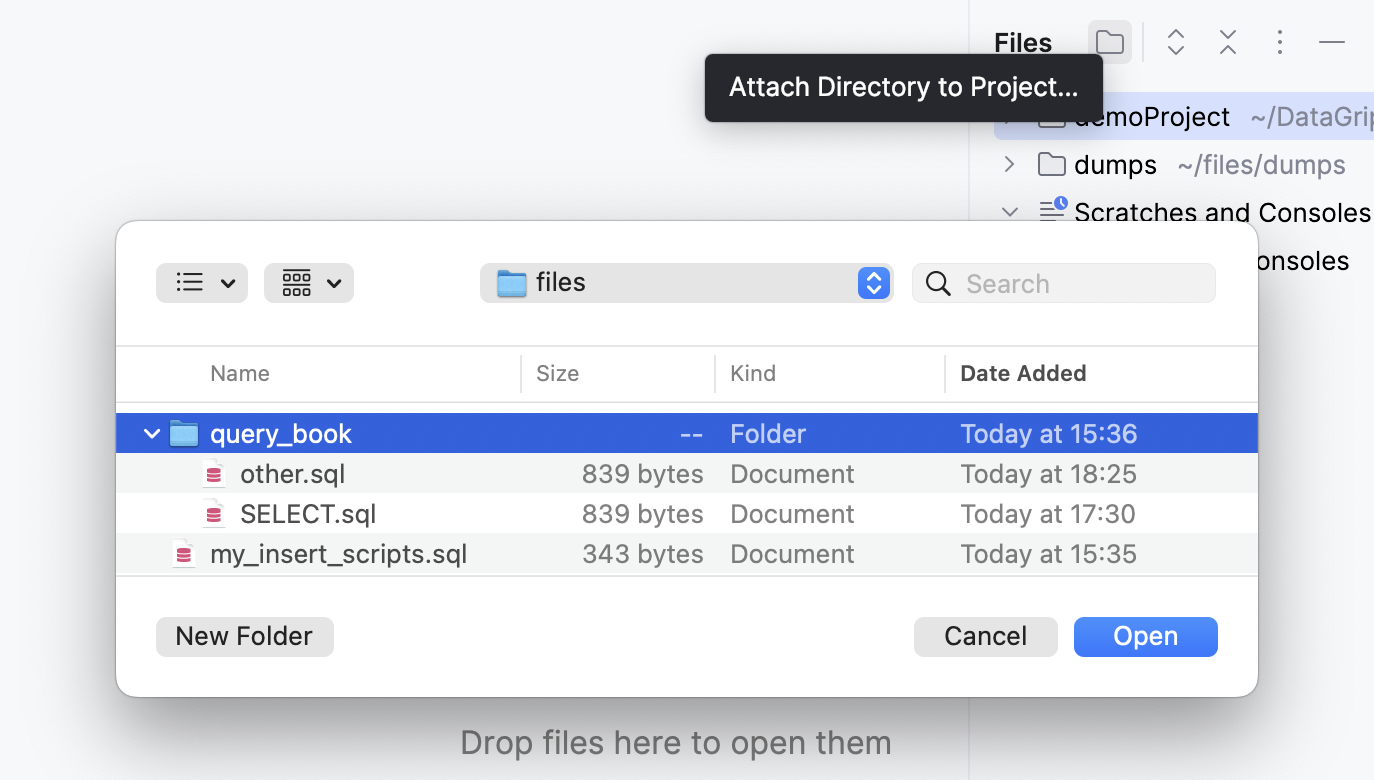
In the file browser, navigate to the directory that you want to attach. In our case, it is the query_book directory.
Click Open.
The directory will become available in the Files tool window . To open your SQL file in the editor, expand the attached directory node and double-click the filename.
You can also create new files in the attached directory. For example, if your queries are stored in various places, and you want to store them in a dedicated query_book directory on your local machine. You can attach that directory to the DataGrip project, create new SQL files in it, and copy your SQL query sets into those files.
Create new files
In the Files tool window , click the Attach Directory to Project button (
) in the toolbar.
Alternatively, right-click in the area of the Files tool window and select Attach Directory to Project.
In the file browser, navigate to the directory that you want to attach. In our case, it is the query_book directory.
Click Open.

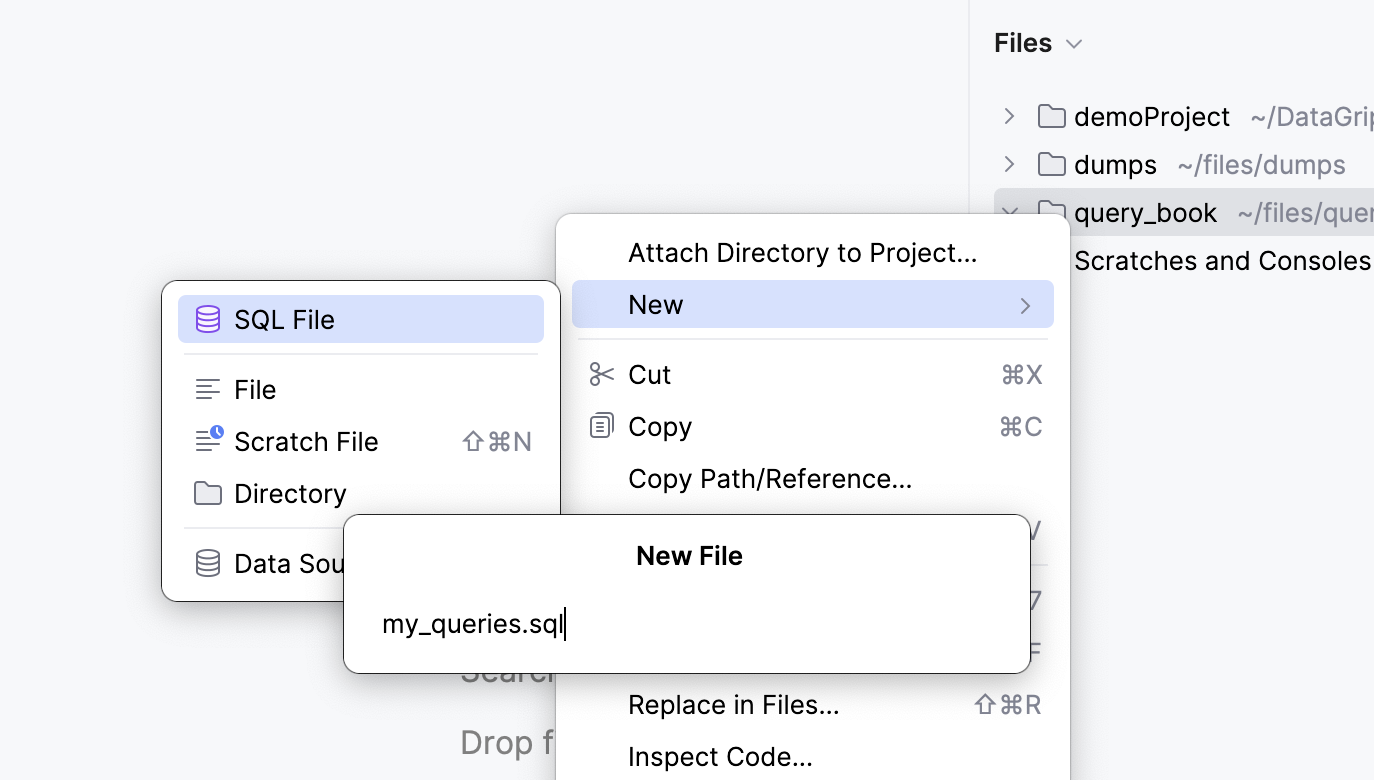
Right-click your attached directory and select .
In the New File popup window that appears, enter the file name. For example, my_queries.sql.
Your new SQL file will appear under the attached directory node in the Files tool window file tree. DataGrip will also open it in a code editor tab.
In the editor, paste your queries set into the file.
In the Files tool window , click the Attach Directory to Project button (
) in the toolbar.
Alternatively, right-click in the area of the Files tool window and select Attach Directory to Project.
In the file browser, navigate to the directory that you want to attach. In our case, it is the query_book directory.
Click Open.

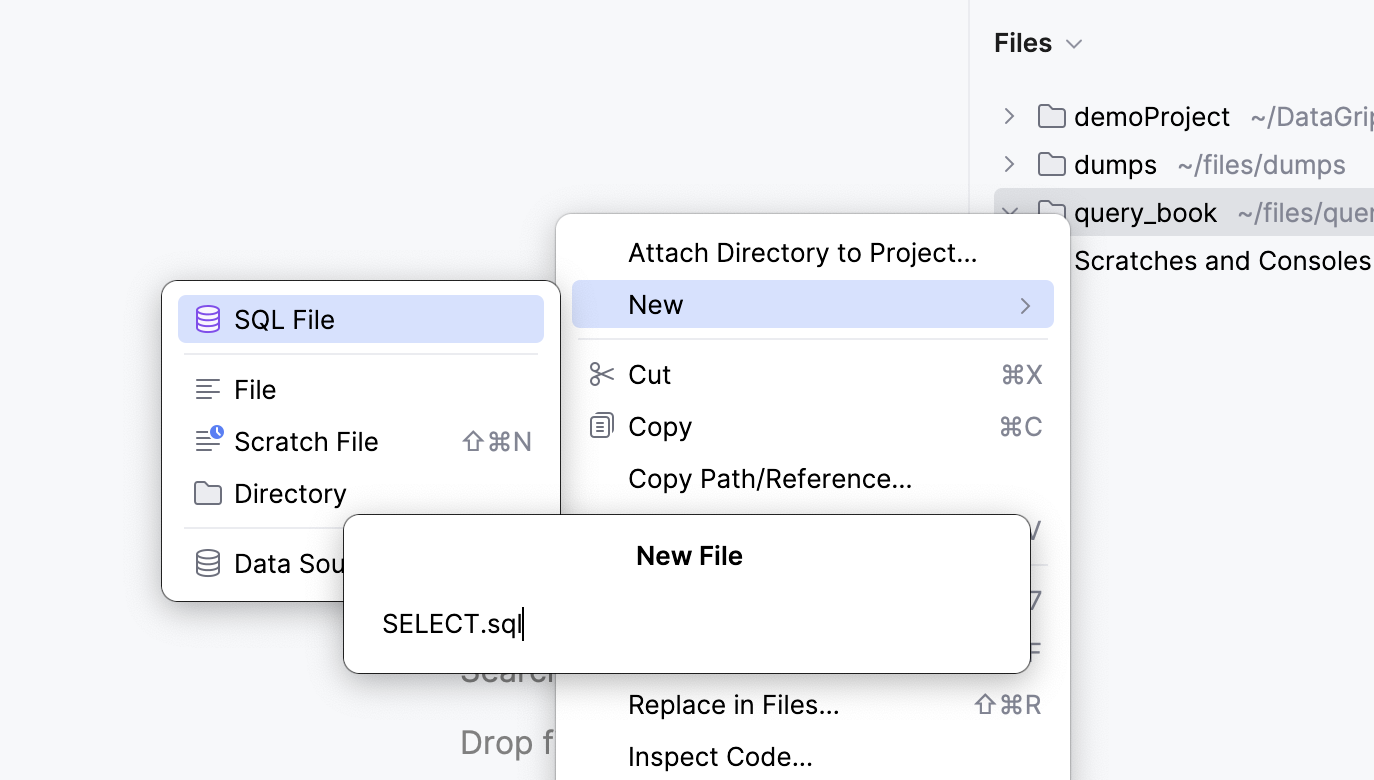
Right-click your attached directory and select .
In the New File popup window that appears, enter the file name. For example, SELECT.sql.
Your new SQL file will appear under the attached directory node in the Files tool window file tree. DataGrip will also open it in a code editor tab.
In the editor, paste your
SELECTqueries set into the file.Create a new other_queries.sql file and paste your other queries into it.
Copy existing files
In your OS file browser, copy the SQL file with your query set that you want to use in DataGrip.
In DataGrip, open the Files tool window ( ) .
In the Files tool window ( ) , select your attached directory and press Ctrl+V.
In the Copy dialog that opens, make sure the file name and target directory are correct and click OK to copy the file.
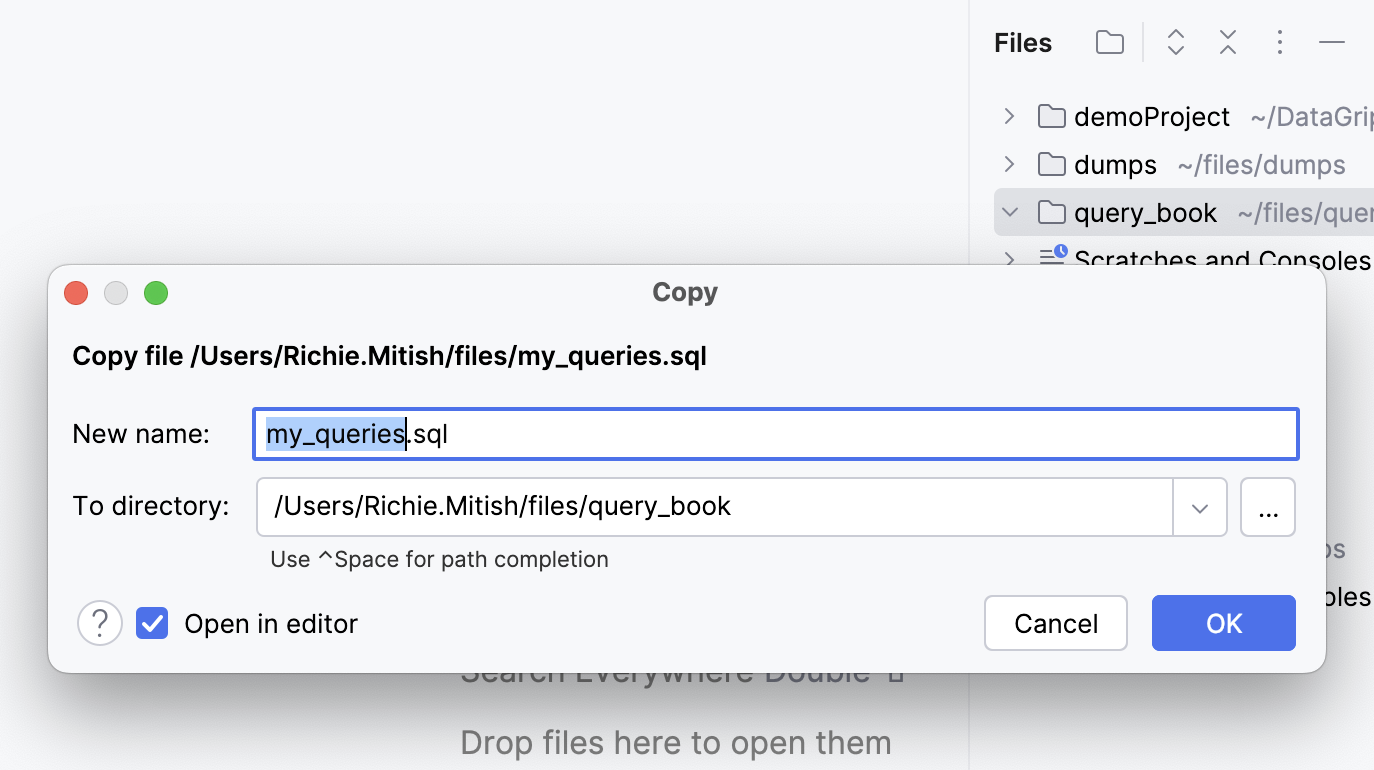
DataGrip copies your SQL file into the attached directory. To open your file, double-click it in the Files tool window .

In your OS file browser, copy the SQL files with your query sets that you want to use in DataGrip.
In DataGrip, open the Files tool window ( ) .
In the Files tool window ( ) , select your attached directory and press Ctrl+V.
In the Copy dialog that opens, make sure the target directory is correct and click OK to copy the files.
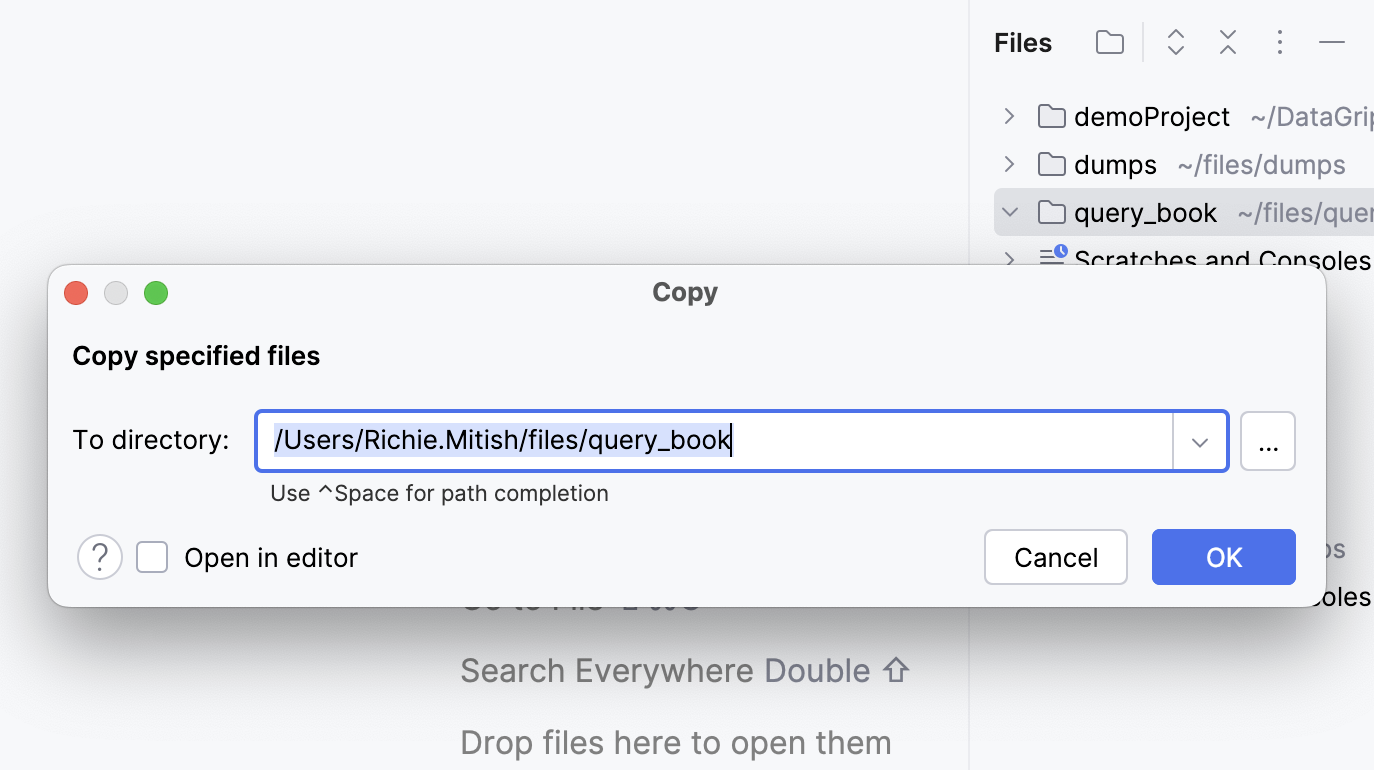
DataGrip copies your SQL files into the attached directory. To open your file, double-click it in the Files tool window .

Import data from files to database tables
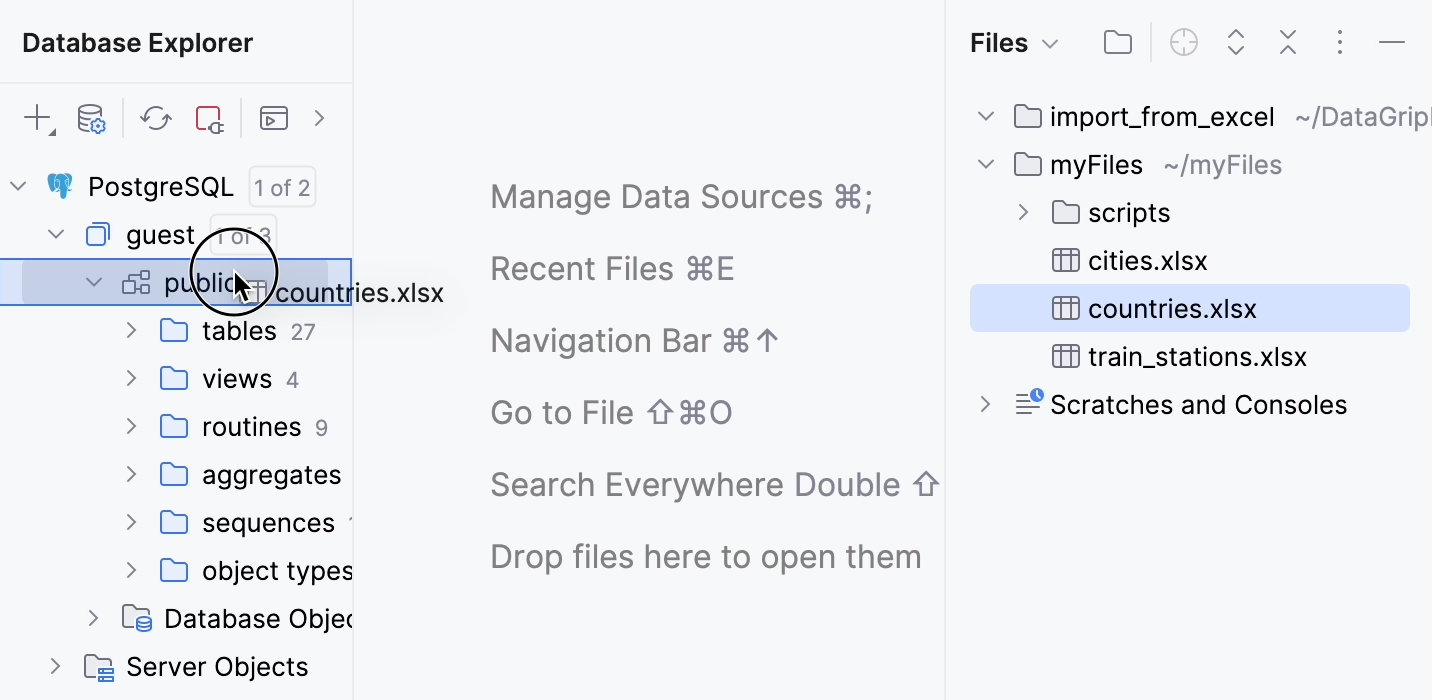
You can import data from your files to database tables by dragging the files to the Database Explorer and configuring the import settings. For example, there is the myFiles directory with countries.xlsx file. You need to import the file's data to the guest.public schema of PostgreSQL data source.
Attach the directory to your IDE project. In our case, the myFiles directory.

In the myFiles tree node, navigate to the countries.xlsx file.
Drag the countries.xlsx file to the database in Database Explorer that you want to import the data to. In our case, it is the guest.public schema of PostgreSQL data source.
Share directories on GitHub
You can share your attached directories on GitHub by creating a local repository and linking it to a remote one. For example, there is the MyScripts directory that you need to link with the https://github.com/JetBrainsUser/MyScripts.git GitHub repository.
Attach the directory to your IDE project. In our case, the MyScripts directory.

Create a local Git repository in the attached directory by navigating to in the main menu and selecting the directory you want to share.

Link your local and remote repositories by navigating to and adding the link to your GitHub repository as a new remote.

Query consoles
Query or database consoles are SQL files that are attached to a data source. You can write and execute SQL statements in query consoles the same way as you do it in terminal. For more information about the consoles, refer to Query consoles.
When you create a data source in DataGrip, a default console is created automatically. In the Files tool window , consoles are located under Scratches and Consoles | Database Consoles .
For example, you have a PostgreSQL data source, and you have already created and used a console query console for it. You can open the console in the Files tool window . For more information about creating query consoles, refer to Create a query console.

Open existing console
In the Files tool window , navigate to Scratches and Consoles | Database Consoles .
Expand the PostgreSQL data source node.
Double-click the console [PostgreSQL] console.
DataGrip will open the console [PostgreSQL] query console in the editor.

Create a new console
In the Files tool window , navigate to Scratches and Consoles | Database Consoles .
Right-click the PostgreSQL data source and select .
Alternatively, press Ctrl+Shift+Q.
DataGrip will create a new console_1 [PostgreSQL] query console and open it in the editor.

Rename your console
In the Files tool window , navigate to Scratches and Consoles | Database Consoles .
Expand the PostgreSQL data source node.
Right-click the console that you want to rename and select .
Alternatively, press Shift+F6.
In the Rename dialog, type the new name for the console. For example,
shiny_new_console.sql.
DataGrip will rename the console_1 [PostgreSQL] query console to shiny_new_console.

Data processing scripts
You can create custom data extractors, aggregators, and loaders by writing their code and placing the file in a corresponding directory.
For example, you have the following Groovy code of a data aggregator script that finds the longest common substring in the selected data:
Add your custom data aggregator
In the Files tool window , navigate to Scratches and Consoles | Extensions | Database Tools and SQL | data | aggregators.
Right-click the aggregators node and select .
In the New File popup, type the new file name. For example, longest_common_substring.groovy.
Paste your new data aggregator script into the file.
(Optional) If the Convert Pasted Code dialog appears, press Cancel. In this tutorial, we save the generated script itself.
New data aggregator appears on the aggregator list in status bar for data editor and can be used with your data.

Scratch files
In scratch files, you can store drafts of your code, temporary notes, and other content that should not be included in the project context and does not require it.
For example, you need to quickly store the following DELETE statements somewhere:
Create a new SQL scratch file
Right-click any element in the tool window and select .
Alternatively, press Ctrl+Alt+Shift+Insert.
In the New Scratch File popup, select Generic SQL.
The new SQL scratch file will appear in Scratches directory. IDE will automatically open it in the editor.
In the editor, paste your statements into the scratch file.
