Foreign keys
Foreign key relationships specify how tables relate to each other and indicate relationships between tables. DataGrip recognizes foreign key relationships in your database schema and uses them to construct JOIN clauses. You can see these relationships in the auto-completion list, data navigation, and diagrams.
In DataGrip, you can use explicit foreign keys or create virtual foreign keys.
Foreign keys ( ) can be found in the Database Explorer.
For the reference on other node and object icons, refer to the Data sources and their elements chapter of Database Explorer topic.
For the table column icons, refer to the Possible icon combinations for columns chapter.
Hide, sort, filter, and group tree objects using the tree objects view options in the View Options menu.

A foreign key is a field or a collection of fields in one table that refers to the primary key in another table. When you create or modify a table, you can clearly define those keys:
The table that contains a foreign key is a child table. The table that contains a candidate key is a referenced or target table. If your database contains explicit foreign key relationships, DataGrip automatically uses them in auto-completion, data navigation, and diagrams.
In the following example, activity.activity_id is a primary key, while visitor.activity_id is a foreign key.

Create a foreign key
In the Database Explorer () , expand the data source tree until the nodes of tables.
Right-click the table node and select .
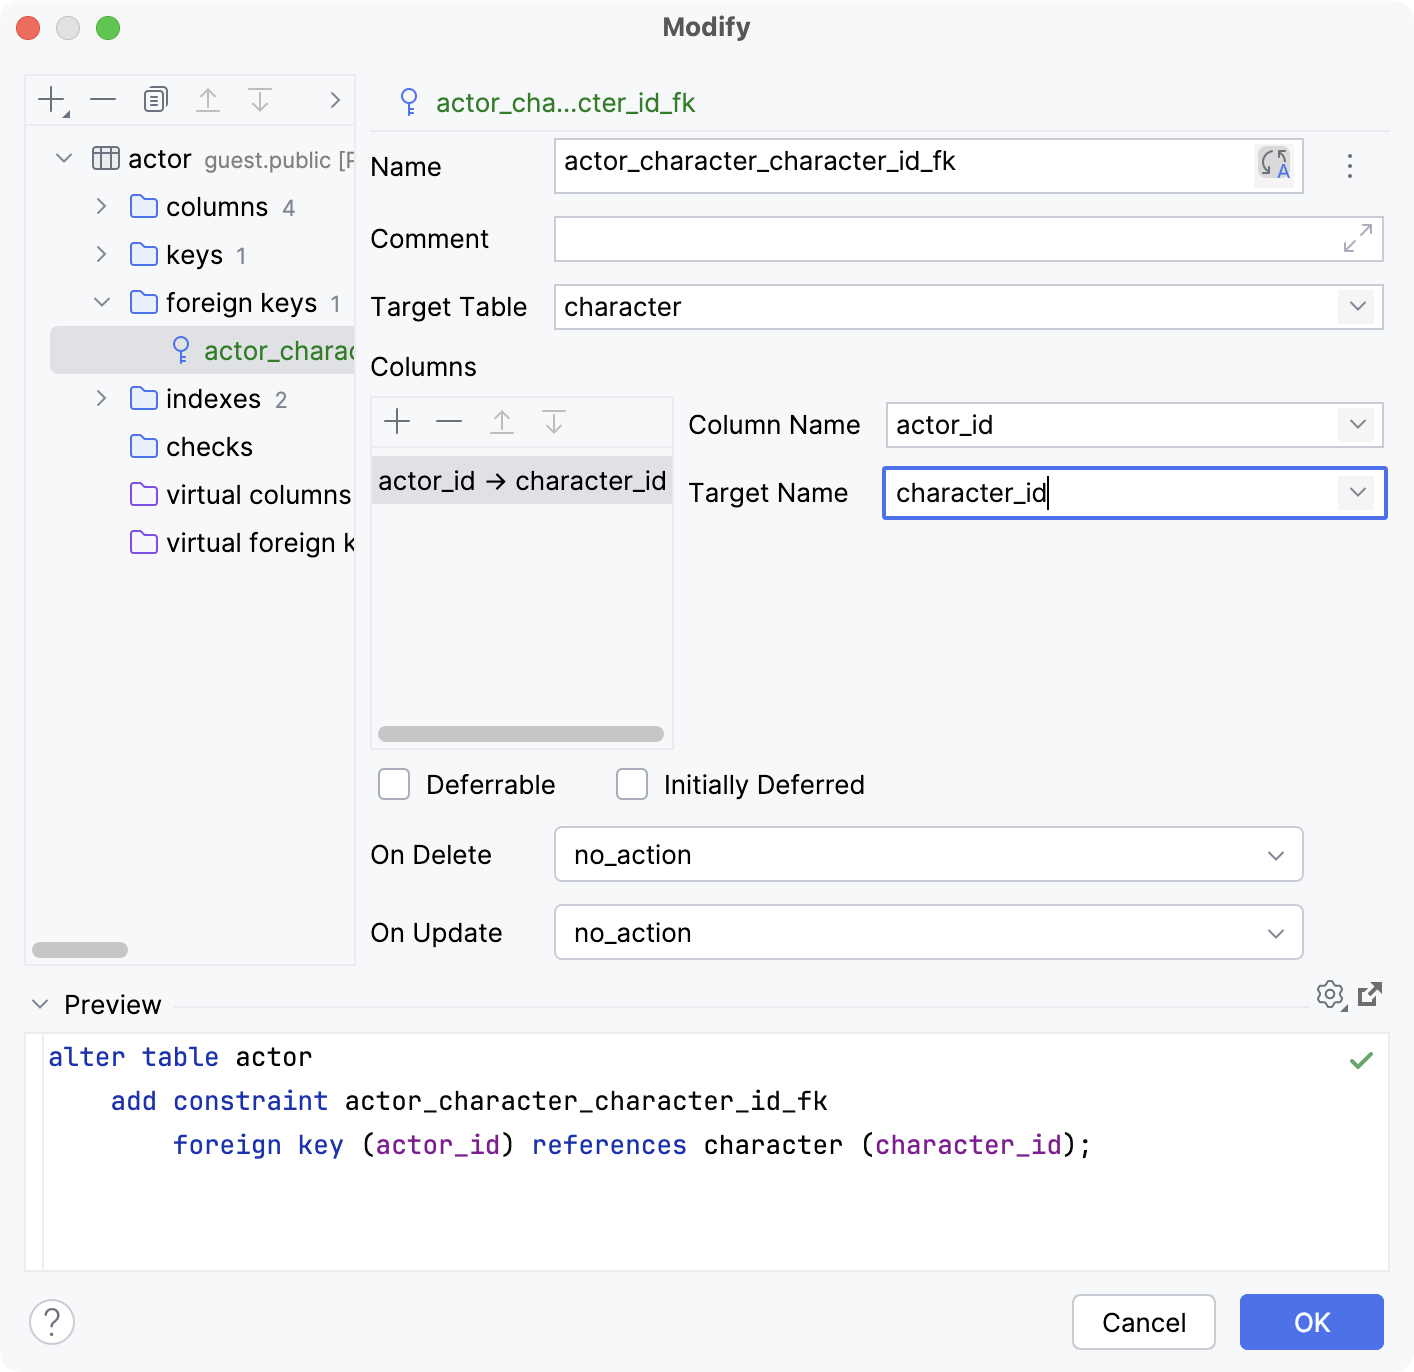
In the Modify dialog that opens, enter the name of your foreign key in the Name field.
In the Target Table pane, specify the name of the target table.
In the Columns pane, click the Add button (
).
In the Column Name field, specify the name of the column in the child table.
In the Target Name field, specify the name of the column in the target table.
In the Preview pane, you can view and change the generated SQL code.
Click OK to add your foreign key.

Productivity tips
Modify templates for generated index and key names
When you create indexes, and primary and foreign key constraints, their default names are generated according to corresponding templates. For a primary key, for example, the template is {table}_{columns}_pk.
To view and modify these templates, open the settings Ctrl+Alt+S and navigate to . Click the Code Generation tab.
The templates can contain variables and text. When you generate a name, the specified text is reproduced literally. For example, when you apply the
{table}_pktemplate in theactortable, the generated name of the primary key will beactor_pk.To see information about variables and their usage, click a field and press Ctrl+Q.
{unique?u:}checks if the index is unique and inserts the corresponding sequence of characters. If the index is unique, the template generates a name with the sequence of characters specified between?and:. For the{unique?u:}template, it isu. If the index is not unique, the sequence between:and}is inserted. For the{unique?u:}template, it is nothing.Example
You have the
personstable with columnsFirstNameandLastName. The{table}_{columns}_{unique?u:}indextemplate generates the following name for the not unique index:persons_FirstName_LastName_index.
Navigate between related rows
Right-click a row or cell in a table and select .
Alternatively, select a cell and click
Related Rows on the quick actions popup toolbar that appears.

In the data editor, you can select several values and navigate to the related data.
For more information about the action behavior options, refer to Advanced Settings.