Scratch files
Sometimes you may need to create temporary notes or draft up some code outside the project context. Instead of switching to a different application, you can use scratch files and scratch buffers.
Scratch files are fully functional, runnable, and debuggable files that support syntax highlighting, code completion, and all other features for the corresponding file type. For example, while working on one project, you may come up with an idea for a method that you could later use in another project. You can create a scratch file with a draft of the method, which is not stored in your project directory but can be opened when you're working on any other project. You can use scratch files to draft code constructs, HTTP requests, JSON documents, and so on.
Scratch buffers are simple text files without any coding assistance features. Scratch buffers can be used for simple task lists and notes to yourself. They are also not stored in the project directory and can be opened from any other project. You can create up to five scratch buffers with default names, which are rotated and reused by clearing the content.

By default, existing scratch files and buffers are shown in the Scratches and Consoles node in the Files tool window . If you don't use scratches, you can hide this node: click the Options button () on the header and then clear the checkbox next to Scratches and Consoles
Create a scratch file
Go to or press Ctrl+Alt+Shift+Insert. Alternatively, in the Files tool window , right-click any area and navigate to .
Select the dialect or language of the scratch file.
Scratch files of the same type are automatically numbered and added to the Scratches and Consoles directory of the Project view.

Alternatively, you can create a new scratch file with the contents of the current selection in the editor. Select some text or code, press Alt+Enter and then select Create new scratch file from selection. DataGrip will attempt to detect the language of the selected fragment and use the appropriate type and extension. If it can't detect the language of the selection, DataGrip will create the file with the same type and extension as the original file.
Create a scratch buffer
There is no dedicated menu item for the action to create a new scratch buffer, but you can use the Find Action popup Ctrl+Shift+A and run the New Scratch Buffer action.

You can also add a shortcut for the New Scratch Buffer action as described in Configure keyboard shortcuts.
DataGrip creates a text file named buffer1.txt.
The next scratch buffer you create is named buffer2.txt, and so on up to buffer5.txt. When DataGrip reaches that limit, it will recreate buffer1.txt and suggest clearing the content for it. If you want to make sure DataGrip does not clear the scratch buffer after you have five, you can rename it.
View all scratch files and buffers
Open the Project view and expand .

Use the Find Action popup Ctrl+Shift+A to invoke the Show Scratch Files action and view all available scratch files in a popup:

Location of scratch files and buffers
By default, DataGrip stores scratch files and buffers in the IDE configuration directory under scratches. They are available from any IDE and project that uses this configuration directory.
- Syntax
%APPDATA%\JetBrains\<product><version>
- Example
C:\Users\JohnS\AppData\Roaming\JetBrains\DataGrip2024.3
- Syntax
~/Library/Application Support/JetBrains/<product><version>
- Example
~/Library/Application Support/JetBrains/DataGrip2024.3
- Syntax
~/.config/JetBrains/<product><version>
- Example
~/.config/JetBrains/DataGrip2024.3
To change the location of the Scratches and Consoles directory, use the idea.scratch.path platform property. To change the location of just the Scratches directory, use the idea.scratch.path/scratches platform property. For more information, refer to Advanced configuration.
Include a scratch file into your project
If a scratch file grows into something that you want to use in your project, move it into the desired directory of your project structure.
Open a scratch file in the editor or select it under the directory in the Project view, press F6, and select the target directory in your project.
Drag a scratch file from the directory in the Project view to the target directory in your project.
Select a scratch file in the directory in the Project view and press Ctrl+X, then select the target directory in your project and press Ctrl+V.
Change the language of a scratch file or buffer
In the Files tool window, open the .
Right-click a scratch file or buffer and then click Change Language.
Select the desired language. You can start typing the name of the language to narrow down the list.
View documentation for scratches
Select any scratch file or buffer in the Project tool window and press Ctrl+Q to view quick documentation with the location, type, size, creation and modification date of the file.
Run scratch files and queries
Run an SQL scratch file
You can run scratch files the same way that you run regular files. For more information about running SQL files, refer to Run files.
Run queries in scratch files
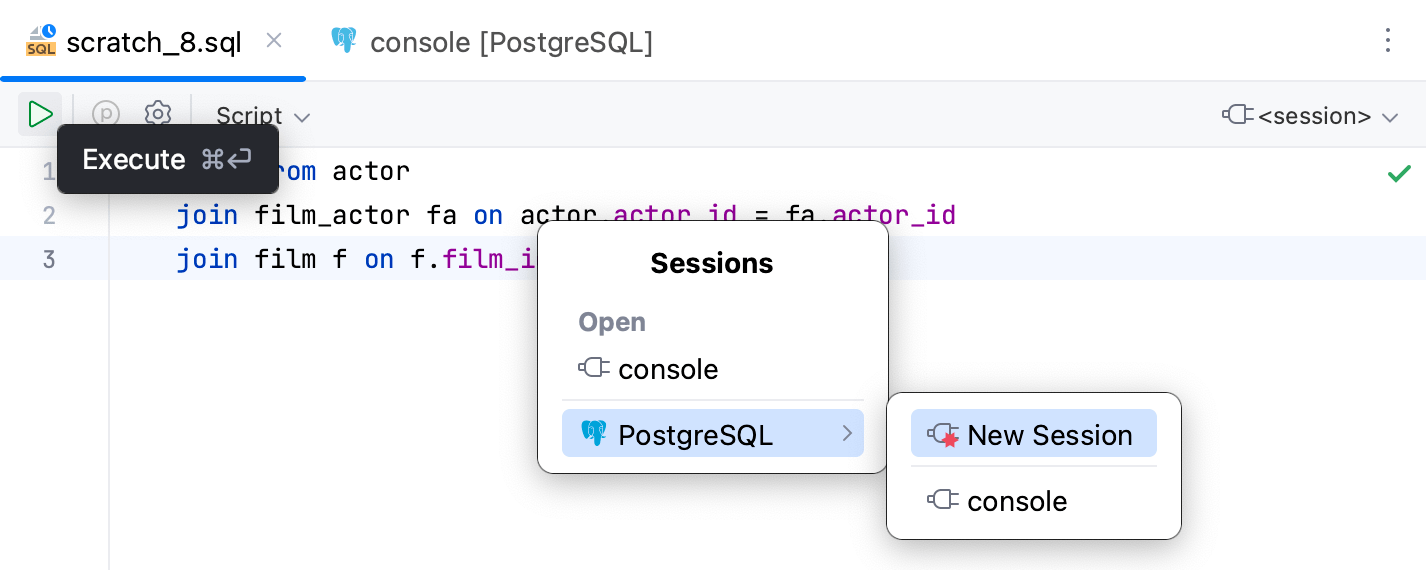
To run queries in an SQL scratch file, you need to have a connection to a data source. For this, attach a scratch file to a session.
When you attach your scratch file to a session, DataGrip resolves the objects in your SQL code. As a result, you can navigate from the SQL code to the database objects.
Press Ctrl+Enter or click
on the toolbar. In the Sessions window, select a session.
Click the <session switcher in the upper right corner of the window and select a session. The switcher menu includes sessions that are associated with the same language as your scratch file.
If you want to attach a session of another DBMS, change the scratch file language. To change a language, right-click any area in the open scratch file and click Change Language.
Right-click any area in the open scratch file and click Execute. In the Sessions window, select a session.
