Store your queries
This tutorial describes several ways to store your queries in DataGrip. You can use the one that is more suitable for your daily tasks.
The examples are shown for the guest.public schema of the Sakila PostgreSQL database. To learn how to create and run the Sakila PostgreSQL database in DataGrip, refer to the Run the PostgreSQL Sakila database in a Docker container topic.
Virtual views for SELECT statements
Virtual view is an IDE virtual object that lets you have the result set available in the Database Explorer. For more information about virtual views, refer to the Virtual views topic.
For example, the following SELECT statement has to be run daily against the public schema of the Sakila PostgreSQL database to get a list of currently active customers:
Create a virtual view for your SELECT statement
Right-click the public schema node and select .
In the Create dialog that opens, enter
customers_activein the Name field.In the Source text field, paste your
SELECTstatement.
Click OK to create your virtual view.
DataGrip creates a new virtual view and displays it in Database Explorer. To open your new virtual view, double-click it.

Live templates
Another way of storing statements is by using live templates which allow you to insert code blocks into your code editor.
For more information about live templates, refer to the corresponding topic.
For example, if you use the following statement regularly to delete records with an actor_id greater than 200:
Store a statement in a live template
Press Ctrl+Alt+S to open settings and then select .
From the template groups, expand the SQL one.
Click
and select Live Template.
Specify the context in which the template will be available.
Click Define below the message and select the SQL checkbox.
In the Abbreviation field, specify the characters that will be used to expand the template. For example:
del200.(Optional) In the Description field, describe the template for reference in the future.
For example:
Delete all records in the actor table that have an actor_id greater than 200.In the Template text field, specify the body of your template. For example:

Click OK to apply all your changes and close the dialog.
In the editor, type
del200and press Tab.
With live templates, you can also store statements with user parameters.
Consider the following example: to add a new record to the actor table, an INSERT statement is used. First and last names of the actor have to be entered manually each time.
Create a live template for an INSERT statement
Press Ctrl+Alt+S to open settings and then select .
From the template groups, expand the SQL one.
Click
and select Live Template.
Specify the context in which the template will be available.
Click Define below the message and select the SQL checkbox.
In the Abbreviation field, specify the characters that will be used to expand the template. For example:
newact.(Optional) In the Description field, describe the template for reference in the future.
For example:
Insert a new actor record with the current date.In the Template text field, specify the body of your template. For example:
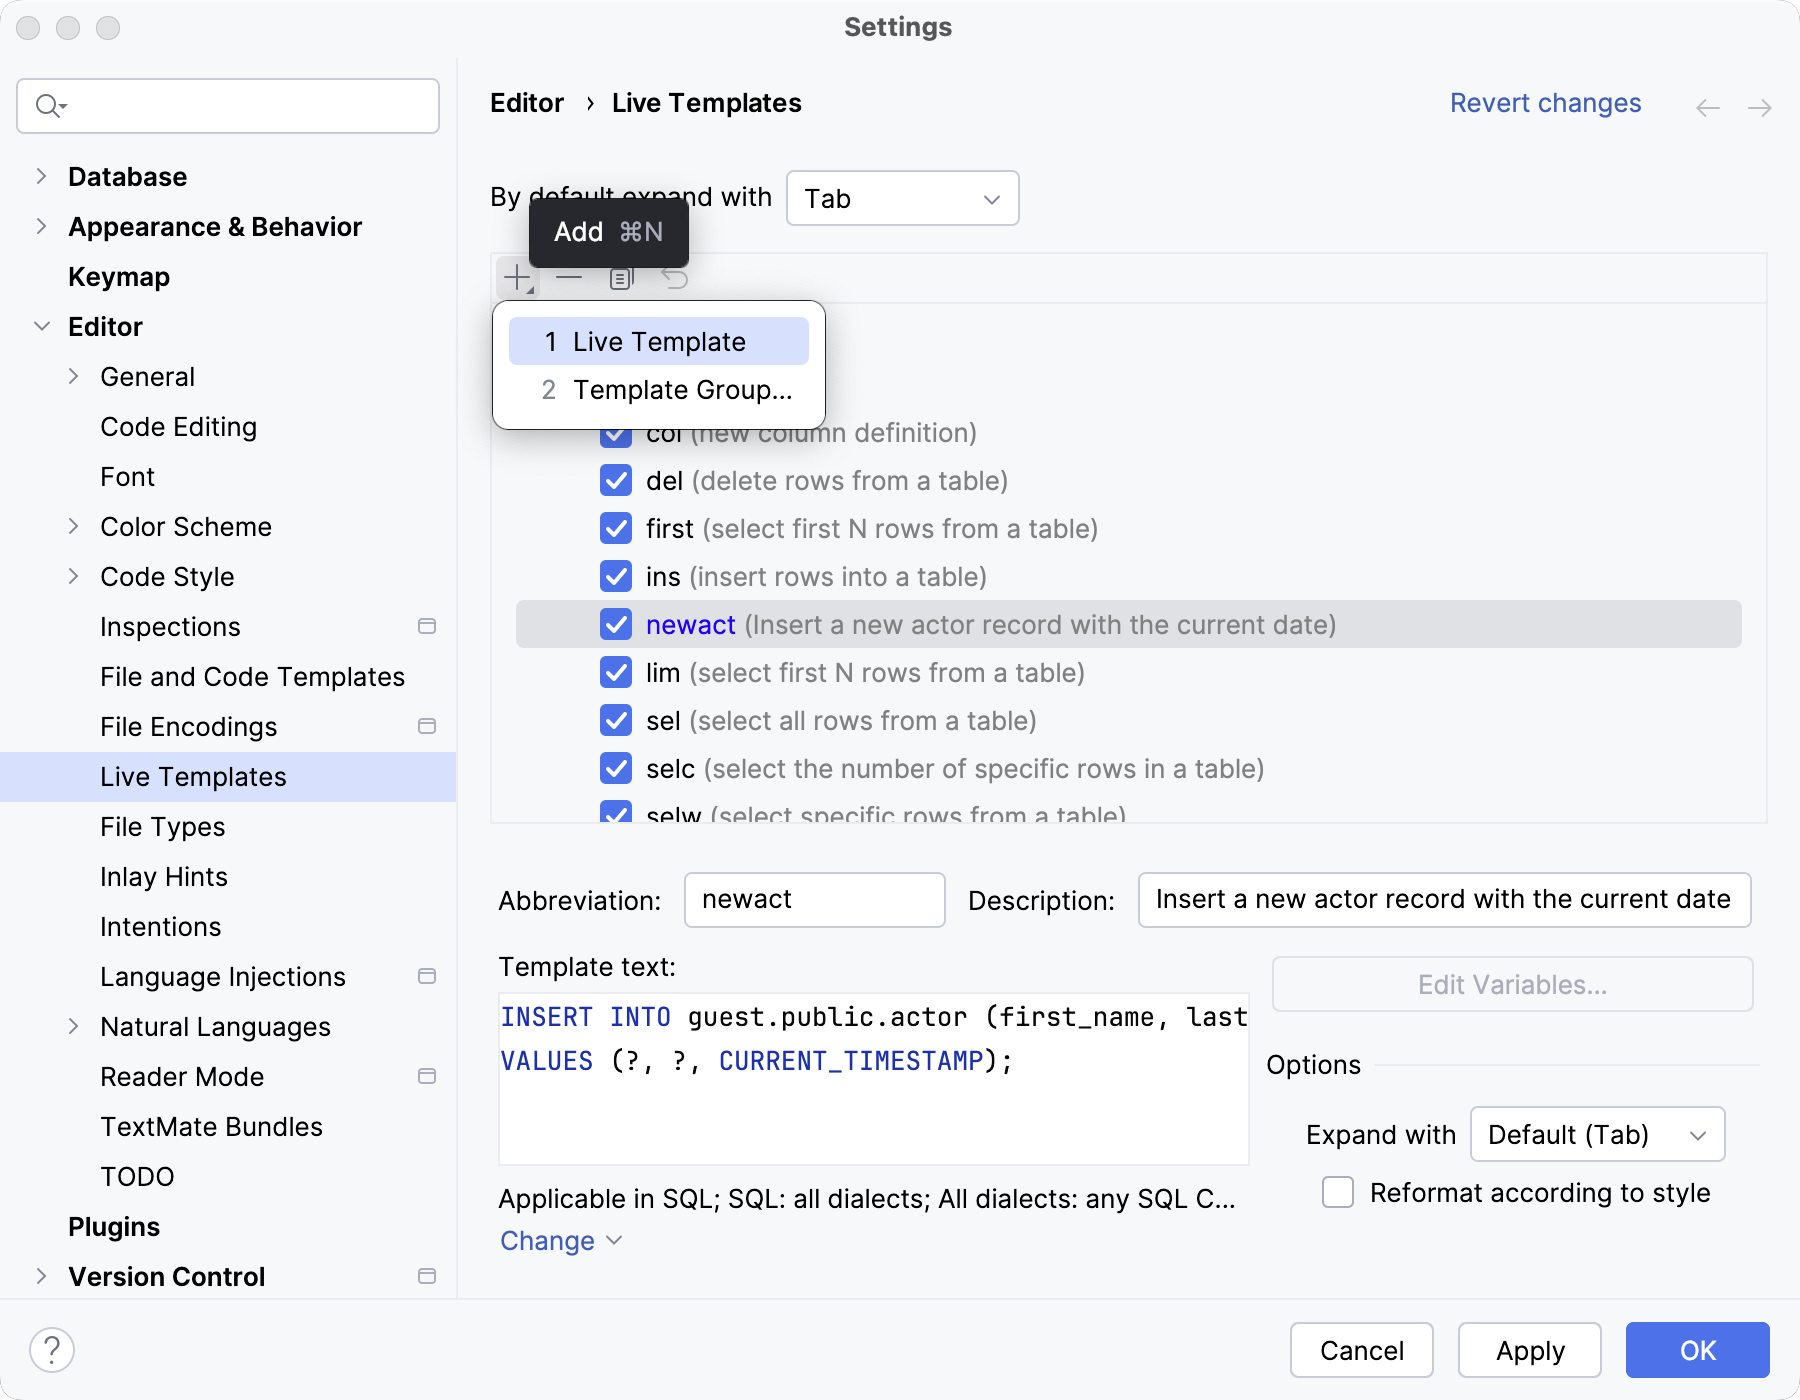
Click OK to apply all your changes and close the dialog.
In the editor, type
newactand press Tab.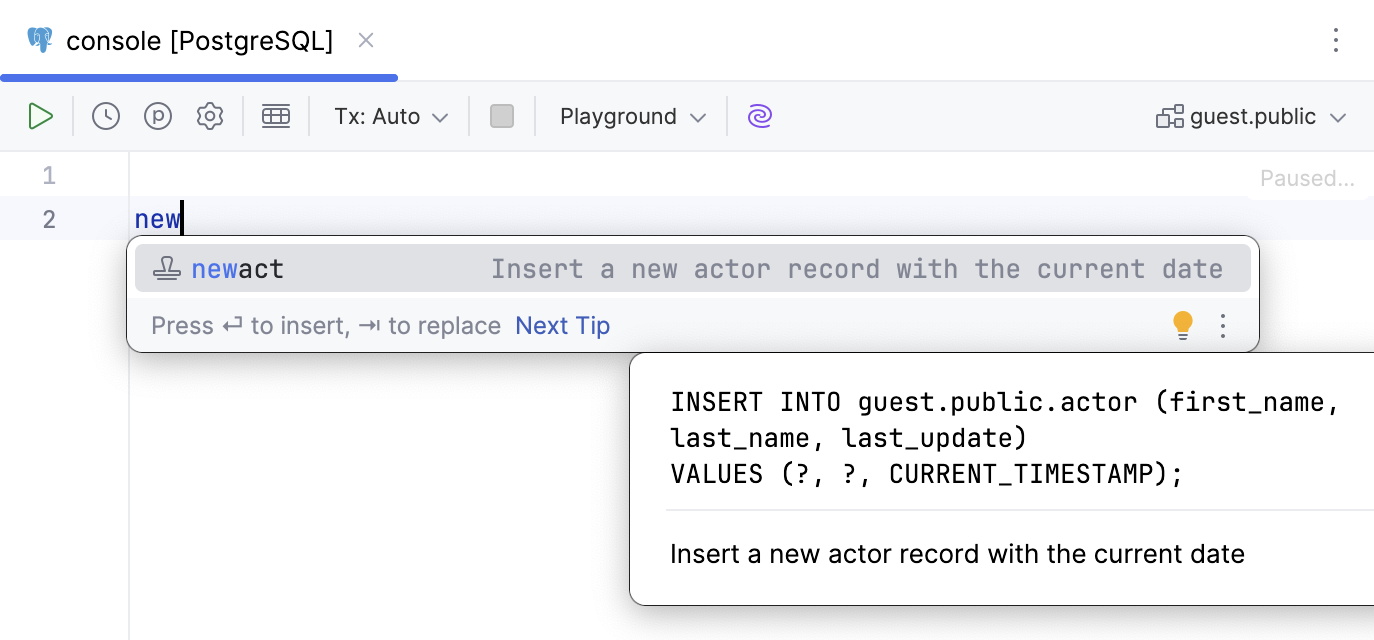
Press to run the statement.
In the Parameters dialog that appears, enter the values and click Execute to run the statement.
For example, enter
'Jay'as the first parameter and'Doe'as the second one.
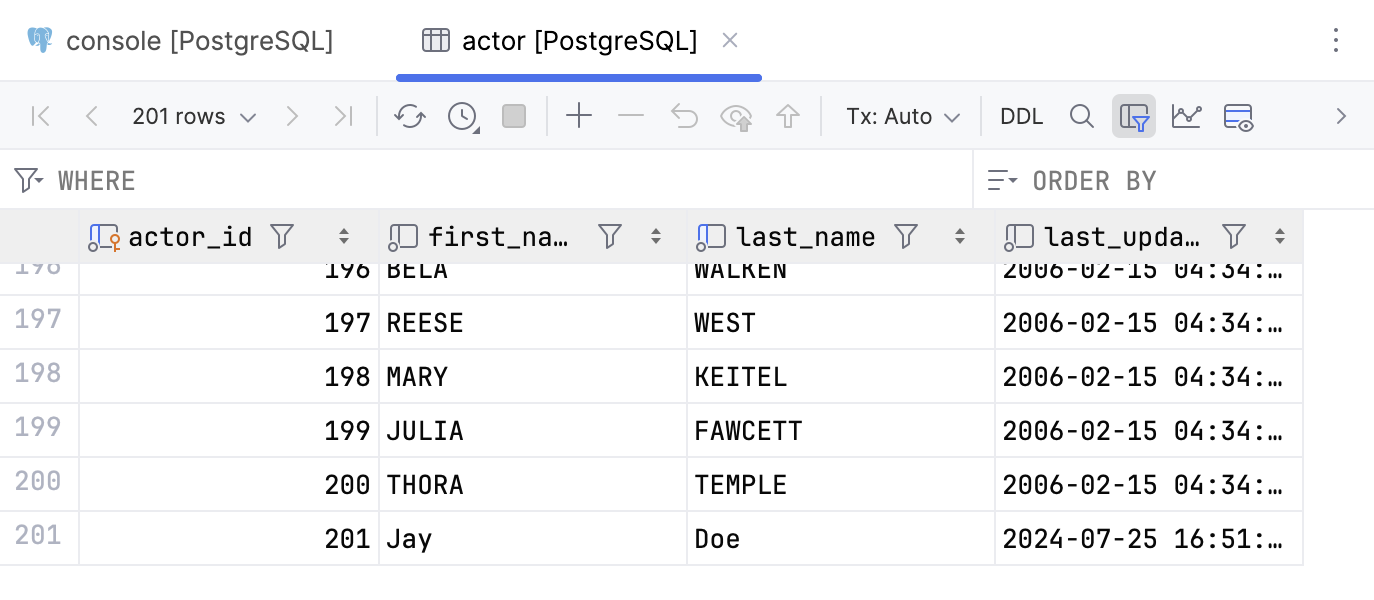
After the statement is executed, the new record appears in the actor table.
SQL files
You can attach any directory to your DataGrip project and have access to it and its files in the Files tool window . In the attached directory, you can open existing SQL files and also create new ones. DataGrip will index the files, providing the option to search for both those files and their content using the IDE's search functionality.
Depending on your needs and workflow, you can either store all your queries in a single SQL file or create and use multiple SQL files for it.
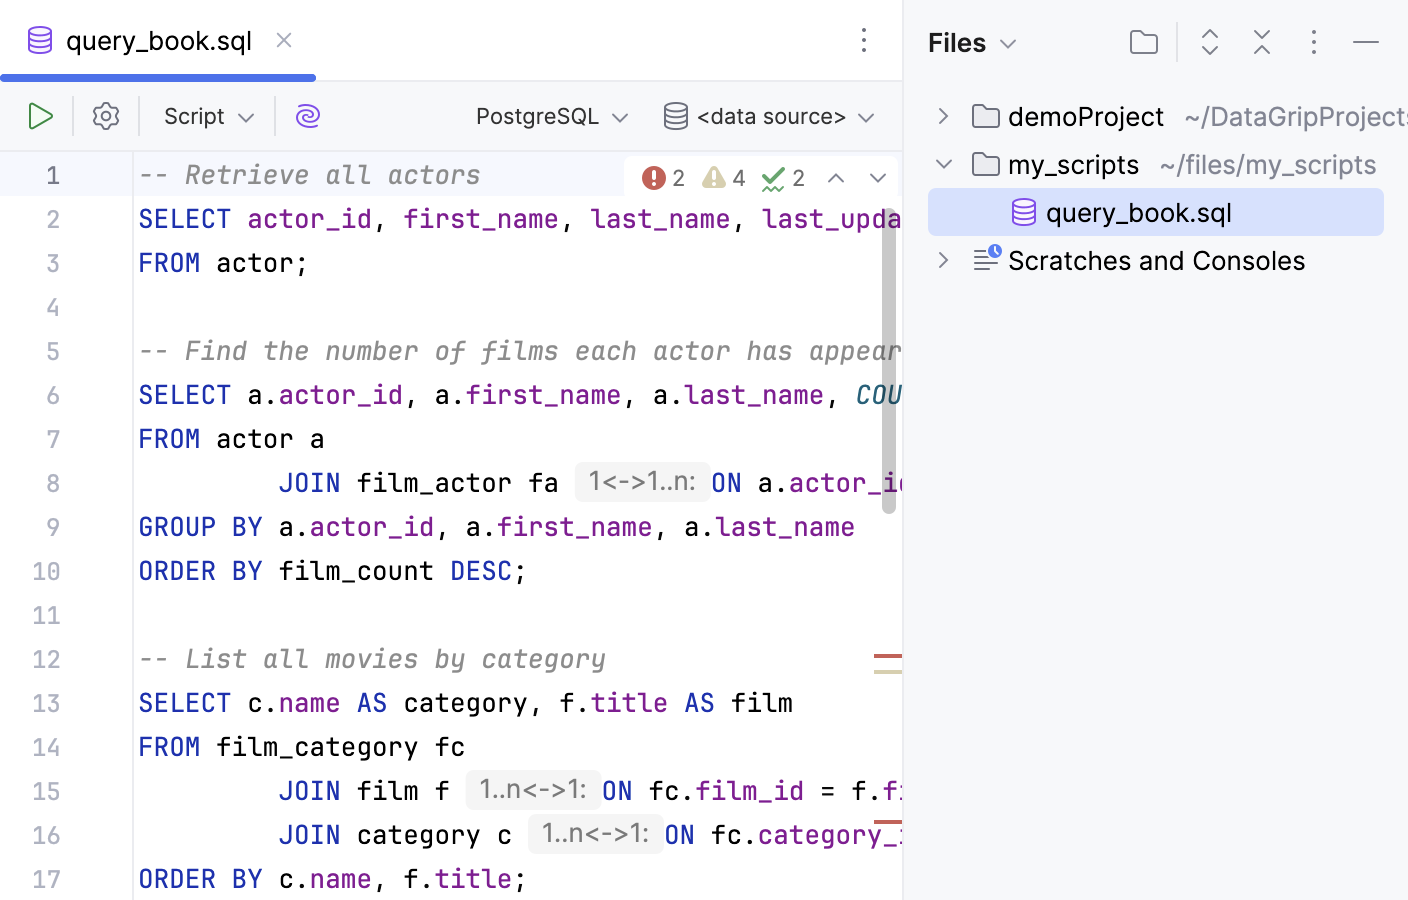
In this tutorial, we will take a look at attaching directories to your DataGrip projects and also at searching files from those directories and navigating the structure of those files. For illustration purposes, we will use the following sets of queries as file contents:
Single SQL file: query_book.sql
-- Retrieve all actors SELECT actor_id, first_name, last_name, last_update FROM actor; -- Find the number of films each actor has appeared in SELECT a.actor_id, a.first_name, a.last_name, COUNT(fa.film_id) AS film_count FROM actor a JOIN film_actor fa ON a.actor_id = fa.actor_id GROUP BY a.actor_id, a.first_name, a.last_name ORDER BY film_count DESC; -- List all movies by category SELECT c.name AS category, f.title AS film FROM film_category fc JOIN film f ON fc.film_id = f.film_id JOIN category c ON fc.category_id = c.category_id ORDER BY c.name, f.title; -- PostgreSQL -- Delete actors with ID greater than 200 DELETE FROM guest.public.actor WHERE actor_id > 200; -- MySQL -- Delete actors with ID greater than 200 DELETE FROM sakila.actor WHERE actor_id > 200; -- PostgreSQL -- Insert a new actor with the current timestamp INSERT INTO guest.public.actor (first_name, last_name, last_update) VALUES (?, ?, CURRENT_TIMESTAMP); -- MySQL -- Insert a new actor with the current timestamp INSERT INTO sakila.actor (first_name, last_name, last_update) VALUES (?, ?, CURRENT_TIMESTAMP);Several SQL files: ActiveConnections_postgres.sql and other
SELECT datname AS database, usename AS username, pid AS process_id, client_addr AS client_address, client_hostname AS client_hostname, client_port AS client_port, application_name, state, backend_start, xact_start, query_start, state_change, wait_event, query FROM pg_catalog.pg_stat_activity WHERE datname = 'guest';
For example, you have a query_book directory where you already store the SQL files, and you want to have access to that directory and its files in the IDE. To do that, you need to attach the directory to the DataGrip project.
Attach your directory and open SQL files
In the Files tool window , click the Attach Directory to Project button (
) in the toolbar.
Alternatively, right-click in the area of the Files tool window and select Attach Directory to Project.
In the file browser, navigate to the directory that you want to attach. In our case, it is the my_scripts directory.
Click Open.
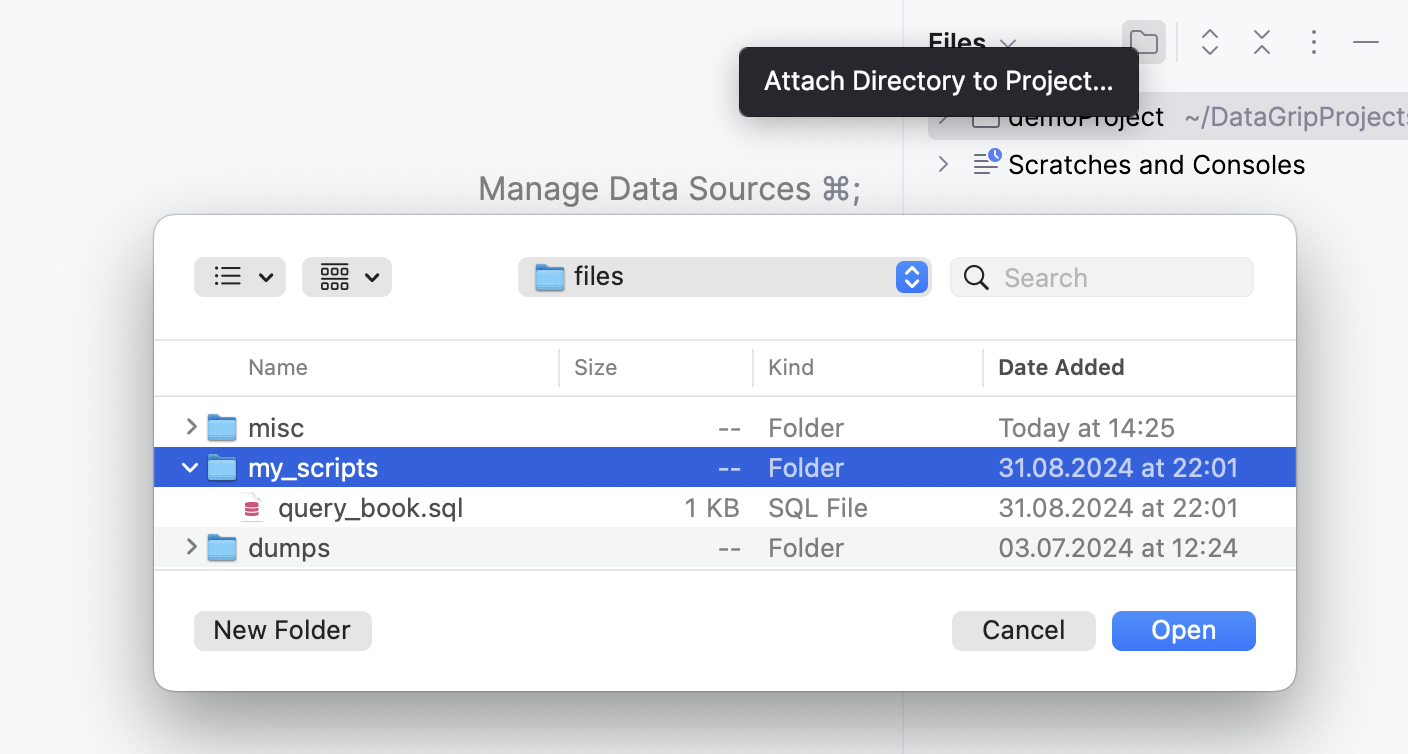
The directory will become available in the Files tool window . To open your SQL file in the editor, expand the attached directory node and double-click the file name.
Navigate to files and queries
You can store your queries in a single SQL file (a file per SQL dialect) or in several SQL files. Each time when you need a certain query, you can find the file and navigate its structure by using the IDE search functionality.
All queries of a certain SQL dialect in a single SQL file: Each time you need a certain query, you can navigate to the query inside this file.
You will have to switch the data source for that SQL file to the required one each time you run a query.
Queries in separate SQL files: Each file contains one query and is also attached to one certain data source.
In this tutorial, we will consider the query_book.sql file in my_scripts directory as an example of all queries in a single file. For the several SQL files case, the examples are ActiveConnections_postgres.sql and other files in query_book directory, each file contains a single query.
Invoke the Find in Files popup window by pressing Ctrl+Shift+F.
In the dialog, enter
qubo.Select the query_book.sql file and press Enter to open it in the editor.
In the Change SQL Dialect and <data source> selectors on the editor toolbar, select the data source and database or schema that you want to run the query against.
Invoke the Structure popup by pressing Ctrl+F12.
In the popup, make sure that the DDL Statements, DML Statements, and Select Statements checkboxes are selected.
Navigate to the query that you want to run and click it. Alternatively, press Ctrl+F12.
In the editor, select the query and click
Execute on the toolbar to run it. Alternatively, select it and press Enter.
Invoke the Go to File popup window by pressing Ctrl+Shift+N.
In the popup window, enter
connin the search fild.Select the ActiveConnections_postgres.sql file and click it to open in the editor. Alternatively, press Enter.
In the editor, click
Execute on the toolbar to run the query. Alternatively, press Enter.
Run configurations
You can store and run your queries using the Database Script type of run configurations.
When a SELECT query is run from a run configuration, the result set is displayed in the Services tool window.
For example, to fetch the customers who have made more payments than others, the following query can be used:
Store a query in a run configuration
Open the Run/Debug Configuration dialog in one of the following ways:
Select from the main menu.
With the Navigation bar visible (), choose from the run/debug configuration selector.
Press Alt+Shift+F10 and then press 0.
In the Run/Debug Configurations dialog, click the Add New Configuration icon (
) and select Database Script to create a new run configuration.
For more information about settings of the configuration type, refer to Database script.
In Name, enter your new run configuration name. For example,
most frequent payers.In Target data source / schema, select the schema that you want to run your query against.
In this tutorial, it is the guest.public schema of the PostgreSQL data source.
In Execute, select Script text.
In the text field, enter your query.
Click OK to save the run configuration.

To run your new run configuration, click Run '<run_configuration_name>' in the run widget on the title bar.

For more information about run configuration, refer to Run/debug configurations.