CPU and GPU machine options
Because different Datalore users have different needs, we offer a range of CPU and GPU machines to ensure a flexible choice of paid computation options. Below is the full list of machines you can use for computations in Datalore.
Machine name | Type | RAM | nCPUs | nGPUs | Spot machine price | On-demand machine price |
|---|---|---|---|---|---|---|
CPU S | CPU | 4 | 2 | - | $0.0459 | $0.0646 |
CPU L | CPU | 16 | 2 | - | $0.0895 | $0.1604 |
CPU XL | CPU | 32 | 16 | - | $0.6143 | $0.8007 |
CPU XXL | CPU | 96 | 48 | - | $1.9299 | $2.3951 |
GPU S | GPU | 16 | 4 | 1 | $0.2125 | $0.7056 |
GPU M | GPU | 32 | 8 | 1 | $0.4245 | $1.0068 |
GPU L | GPU | 64 | 16 | 1 | $0.7104 | $1.6116 |
GPU XL | GPU | 128 | 32 | 1 | $1.3702 | $2.9124 |
GPU XXL | GPU | 256 | 64 | 1 | $3.9024 | $5.8248 |
Multi-GPU S | Multi-GPU | 192 | 48 | 4 | $$1.8259 | $5.2356 |
Multi-GPU L | Multi-GPU | 384 | 96 | 8 | $3.1418 | $10.4700 |
The sections below explain the following:
Datalore credits as a currency unit for paid machine options
Difference between spot and on-demand machines
Professional plan advantages over Community plan regarding machine options
Datalore credits
Datalore credits is the special currency unit for the use of our paid CPU and GPU machines. There are 3 ways you can get Datalore credits:
Professional plan subscription: Professional plan users get 12 free Datalore credits every month, the unused part of which expires at the end of the month.
Purchase: You can add Datalore credits via JetStore.
Gifts: Datalore credits can be issued to a user as gift codes.
You can view the details of your balance in .
Spot and on-demand machines
Default behaviour
For each new notebook computation, Datalore launches a new AWS EC2 machine. By default, this is a spot machine, a cheaper option, which ensures lower expenses on your side. This machine type costs lower because such machines are not always available and theoretically can be interrupted at any time of computation.
The icon next to the machine type in the status bar shows whether you're using a spot or on-demand machine.

On-demand machine alternative
On rare occasions, there is no spot machine available due to higher load on the AWS side. Users receive the On-demand machine alternative notification as shown below:

You can choose whether to use such an option (and pay extra Datalore credits) or wait for an available spot machine.
Advanced scheduling settings
When setting up scheduled runs for your notebooks, you can choose how to resolve situations when no spot machine is available. For more details, see the Choose a machine option for your scheduling procedure. You can also read more about scheduling in this chapter.
Procedures
In this chapter, you will learn how to switch machine options, manage your credit balance, and select an option for situations when there is no spot machine available for your scheduled runs.
Upgrade to Professional
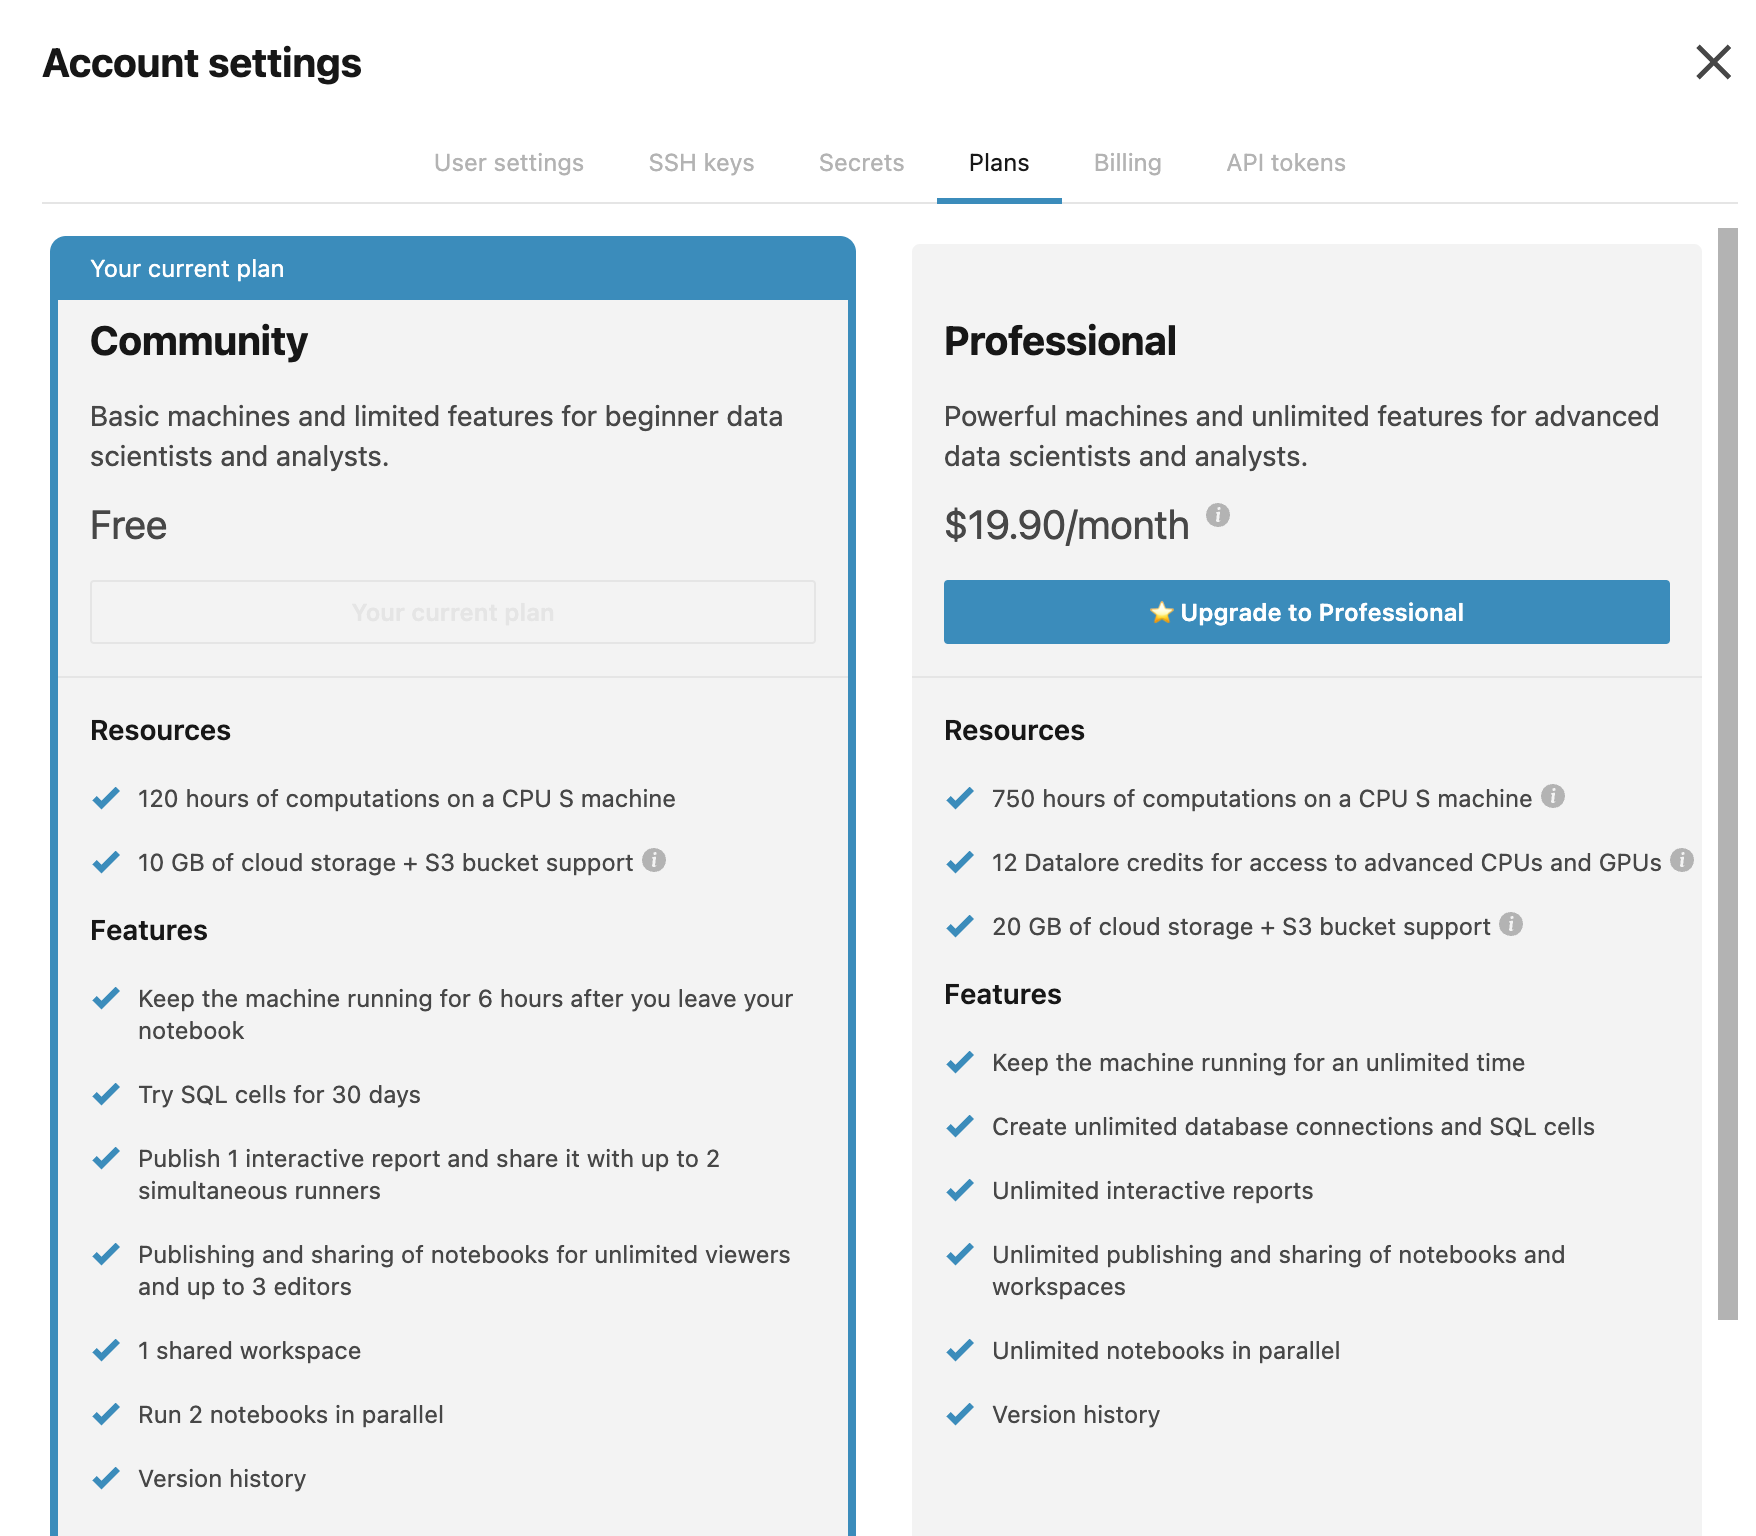
Professional plan subscription guarantees 12 free Datalore credits every month. This is a big advantage over Community plan if you want to fully use the feature of powerful machines in Datalore. If you're on Community plan, here are two ways to upgrade:
Click the avatar icon in the upper-right corner of the Home page or editor.
Select Plans from the list.
Now, you're on the Plans tab of the Account settings menu.

Click Upgrade to Professional. This will forward you to the JetBrains eStore.
Fill in the fields to provide your contact information and payment details and complete the order placement.
Change a machine option
You can see the type of the currently used machine either in the bottom sidebar of the editor or on the Computation tab.
To change the machine, use one of the two interfaces.
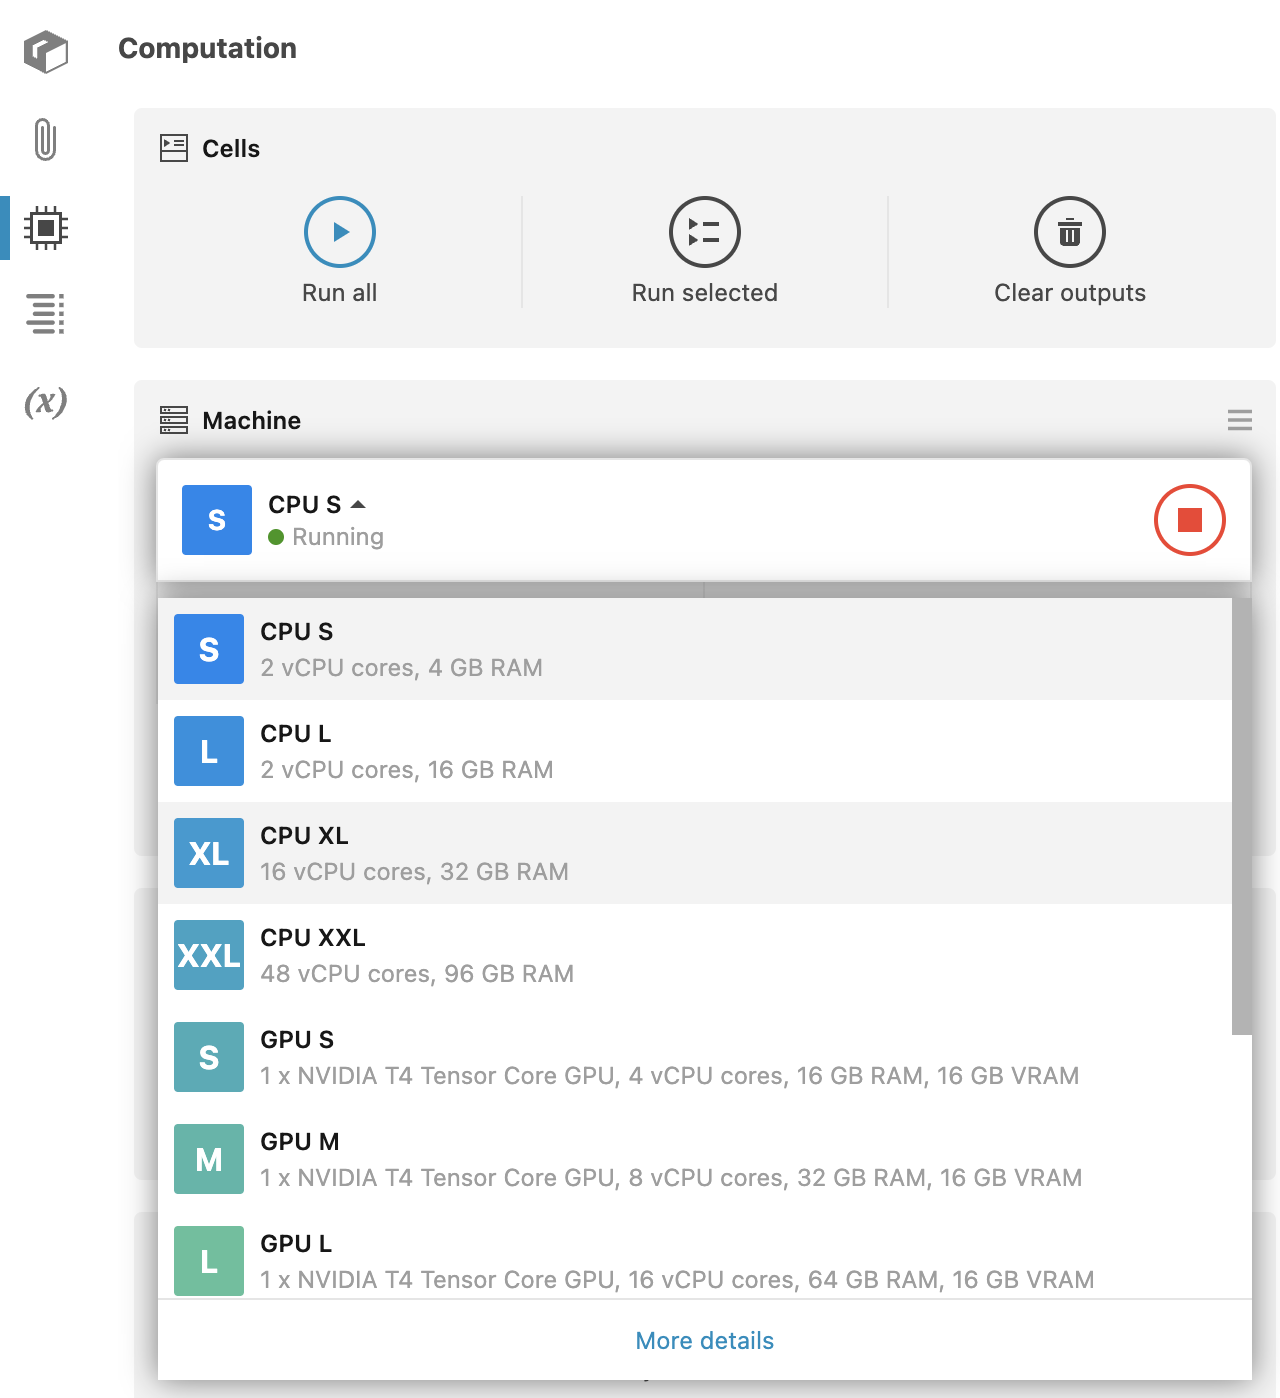
Computation tab:
Click the Computation icon on the left-hand sidebar of the editor.
In the Computation tool, expand the list under Machine.
Select the machine type you want to use from the list.

In the popup confirmation box, click OK to confirm your action and restart the machine.
(Optional) To open the Machines menu with the detailed machine list and your current balance, click the More details button at the bottom of the list. The Machines menu allows you to change machine options too.
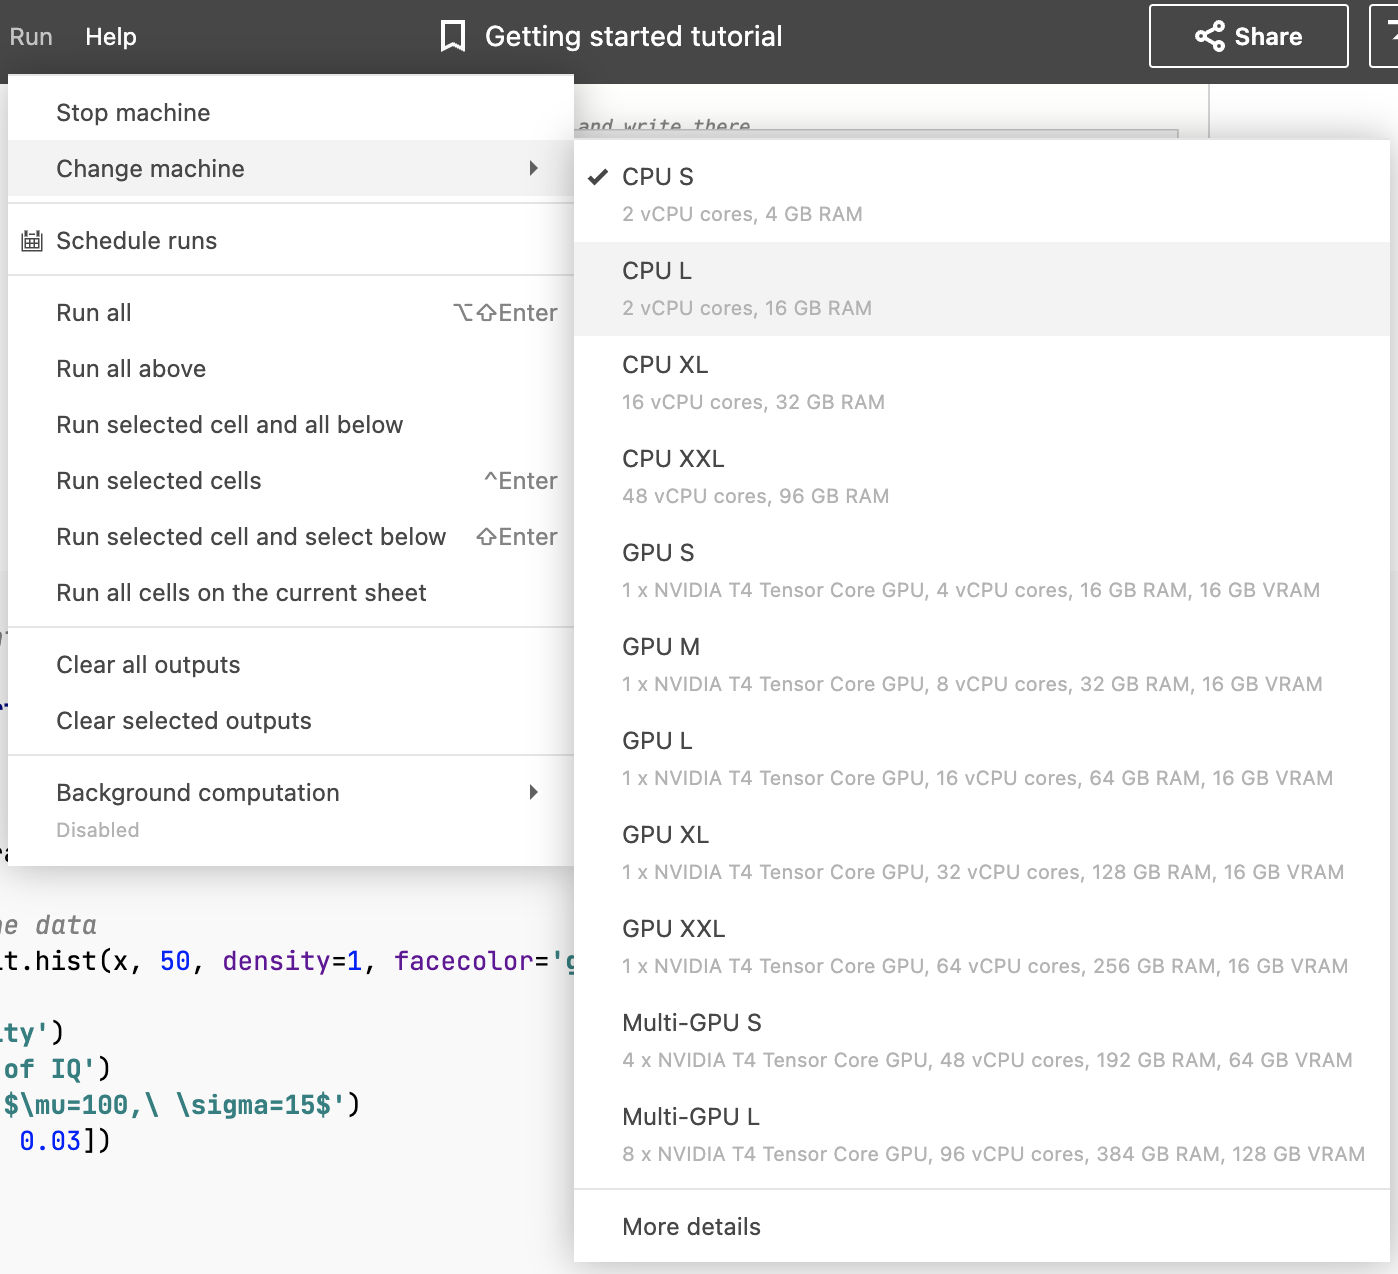
Main menu:
Go to to open the list of available machine options.
Select the machine type you want to use from the list.

In the pop-up confirmation box, click OK to confirm your action and restart the machine.
(Optional) To open the Machines menu with the detailed machine list and your current balance, select More details from the bottom of the list. The Machines menu allows you to change machine options too.
View your credit balance
In the current feature iteration, you can only view your current balance, the amount of available Datalore credits. In the next iteration, you will also be able to add (purchase) Datalore credits.
Open the Machines menu in one of the following ways:
Go to and select More details from the list.
In the Computation tool, expand the list under Machine and click the More details button.
To view the breakdown on your Datalore credits, hover over the details icon next to the amount of credits (Cr). You will see how many paid Datalore credits and how many free Datalore credits you currently have.

To view the details of your balance, click Billing. This will forward you to the Billing tab of your Account settings.

Work with the Billing tab
You can do the following on the Billing tab.
To view the breakdown on your Datalore credits, hover over the details icon next to Current balance. This will show you how many free and paid Datalore credits you have.
To view the remaining hours for a different machine, click the arrow icon and select an option from the expanded machine list.

Under Balance report, select the view of transactions:
Operations in the period: chronologically sorts transactions in the set period.
Most expensive notebooks: lists all notebooks that you have spent Datalore credits on.
To change the reporting period, do one of the following:
Click the date to enter new values manually.
Click the calendar icon to use the date picker.
Use the arrows below the transactions list to jump to another page. Each page contains up to 10 rows.
To open a notebook associated with a specific transactions, click the respective name in the Notebook column.
To download a detailed report, scroll the Billing tab down to the bottom and click the download icon for one of the following reports:
Balance report (.csv format)
Machine usage sessions (.csv and .xlsx formats)
Storage usage (all time) (.csv and .xlsx formats)
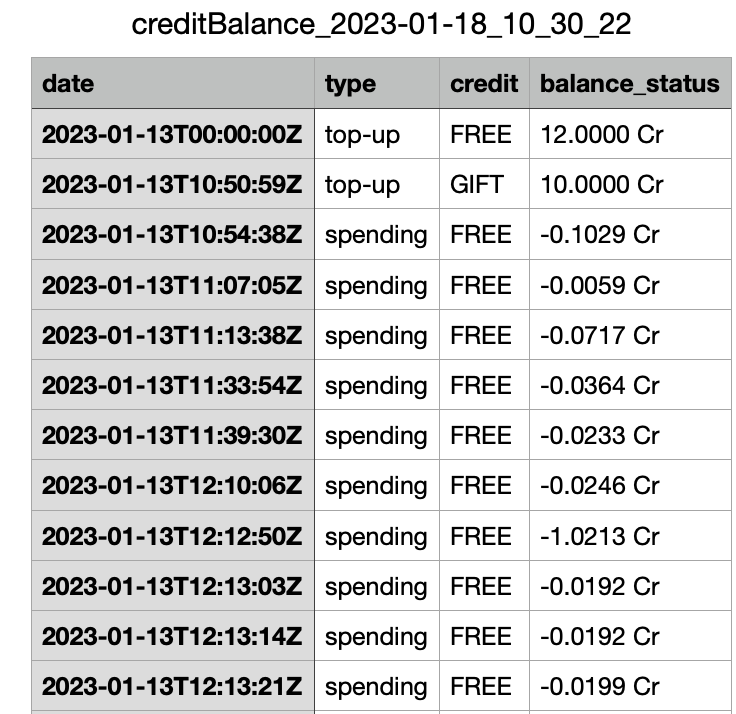
A downloaded balance report looks like this: 
Choose a machine option for your scheduling
When setting up a schedule, you can choose a behavior for situations when no spot machine is available. The default option is to skip the run. You can select a different option in the advanced settings of your schedule.
Select to open the schedule dialog.
Click Add new schedule.
Under Advanced settings, expand the Machine optionslist and select an option:
Skip if no spot machine available (default): does not run the notebook if there is no spot machine available at the moment.
Wait for spot machine (with timeout): waits for an available spot machine within a specified timeout to execute scheduled runs. If no such machine is available by the end of the specified time period, the notebooks is not run.
On-demand machine: uses an on-demand machine if no spot option is available within the specified timeout.
