Database connections on notebook level
This article explains how to manage database connections on notebook level.
You can attach to a notebook any database connection from the resources of the respective workspace.
Your other alternative is to create a database connection directly in a notebook. This will automatically attach the database connection to the notebook and add it to the resources of the respective workspace. As part of the workspace, this newly created database connection is available for attachment to any other notebook residing in that workspace.
Attach a database connection to a notebook
There are two options:
Attach a database connection stored in the respective workspace
Create a new database connection in a notebook
Use database connections from workspace resources
You can attach to a notebook a database connection you previously created for the respective workspace.
Attach a database connection from the workspace
Go to or click the Attached data icon on the left-hand sidebar.
Click Select data to attach to expand the list.
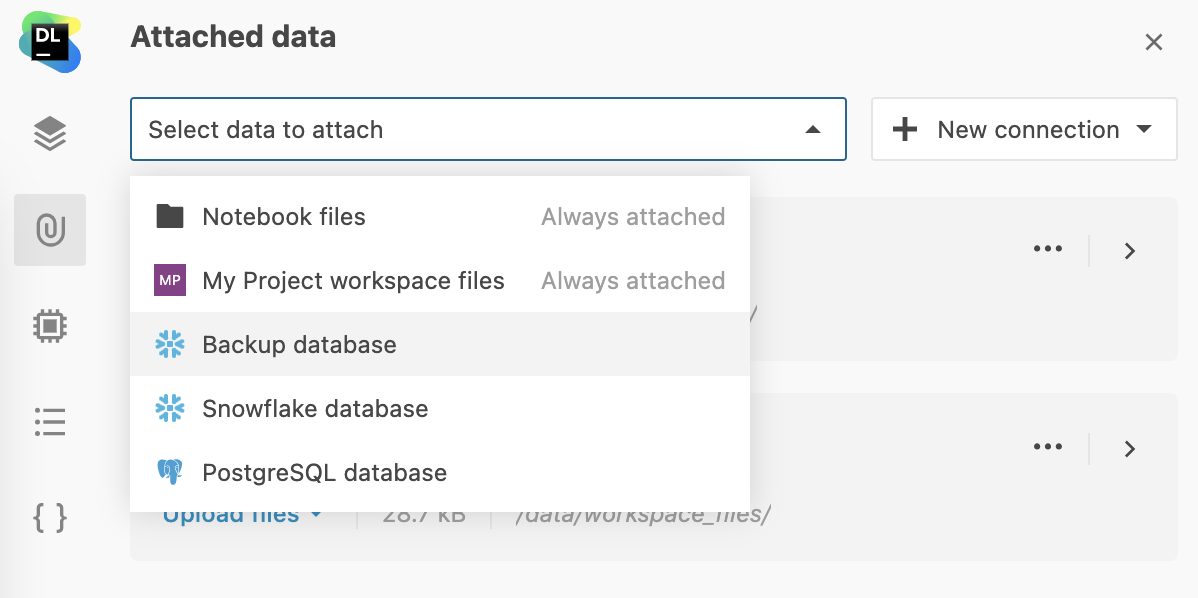
From the list, select the database connection you want to attach to the notebook.
Create and attach a database connection in a notebook
Use the New database connection dialog to create a new database connection. When created in a notebook, the new database is attached to that notebook and also added to the respective workspace.
Attach a database connection created in a notebook
Use the New database connection dialog to create a database connection in a notebook.
Open the New database connection dialog
Go to or click the Attached data icon on the left-hand sidebar.
Click New connection and select New database connection.
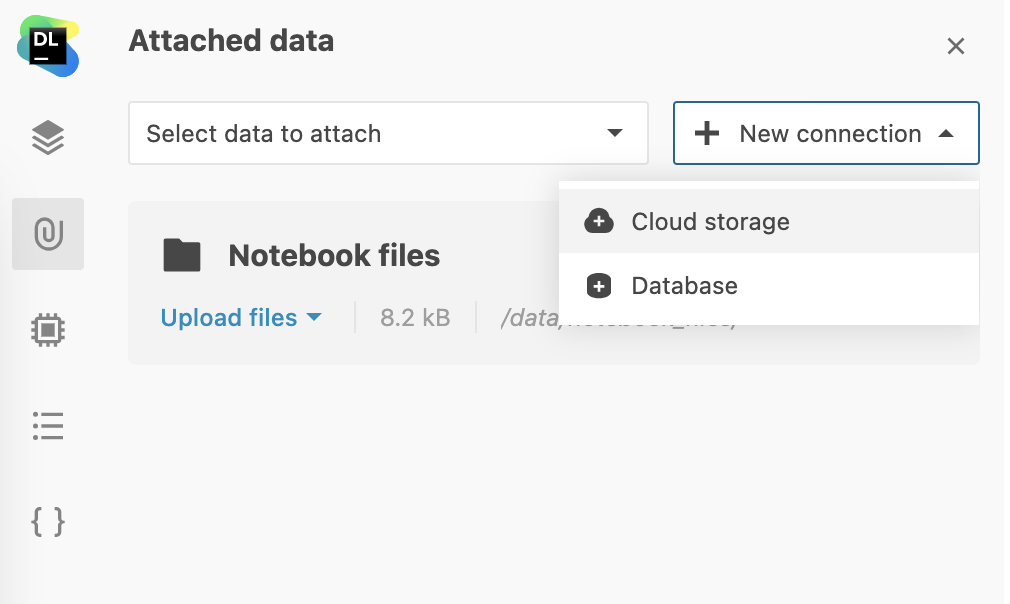
The New database connection dialog offers three options:
- Use database-specific interface
You select a database type and manually set up the parameters required for this particular type. This procedure is described here.
- Use a pre-built connection URL
Create a connection based on a pre-built connection URL. Switch to the Enter URL tab, provide the URL in the text field, and click Next. This will open the connection dialog for the respective database type with all the fields pre-filled.
- Import XML
Create a connection using data provided in XML format.
Copy the database parameters you want to use to the clipboard.
Switch to the Import XML.
Click the Import from clipboard button. This will process the provided data and open the connection dialog for the respective database type with all the fields pre-filled.

Configure a connection using database-specific interface
This procedure describes the general workflow for all supported database types. For specific procedures, refer to the topics under this article.
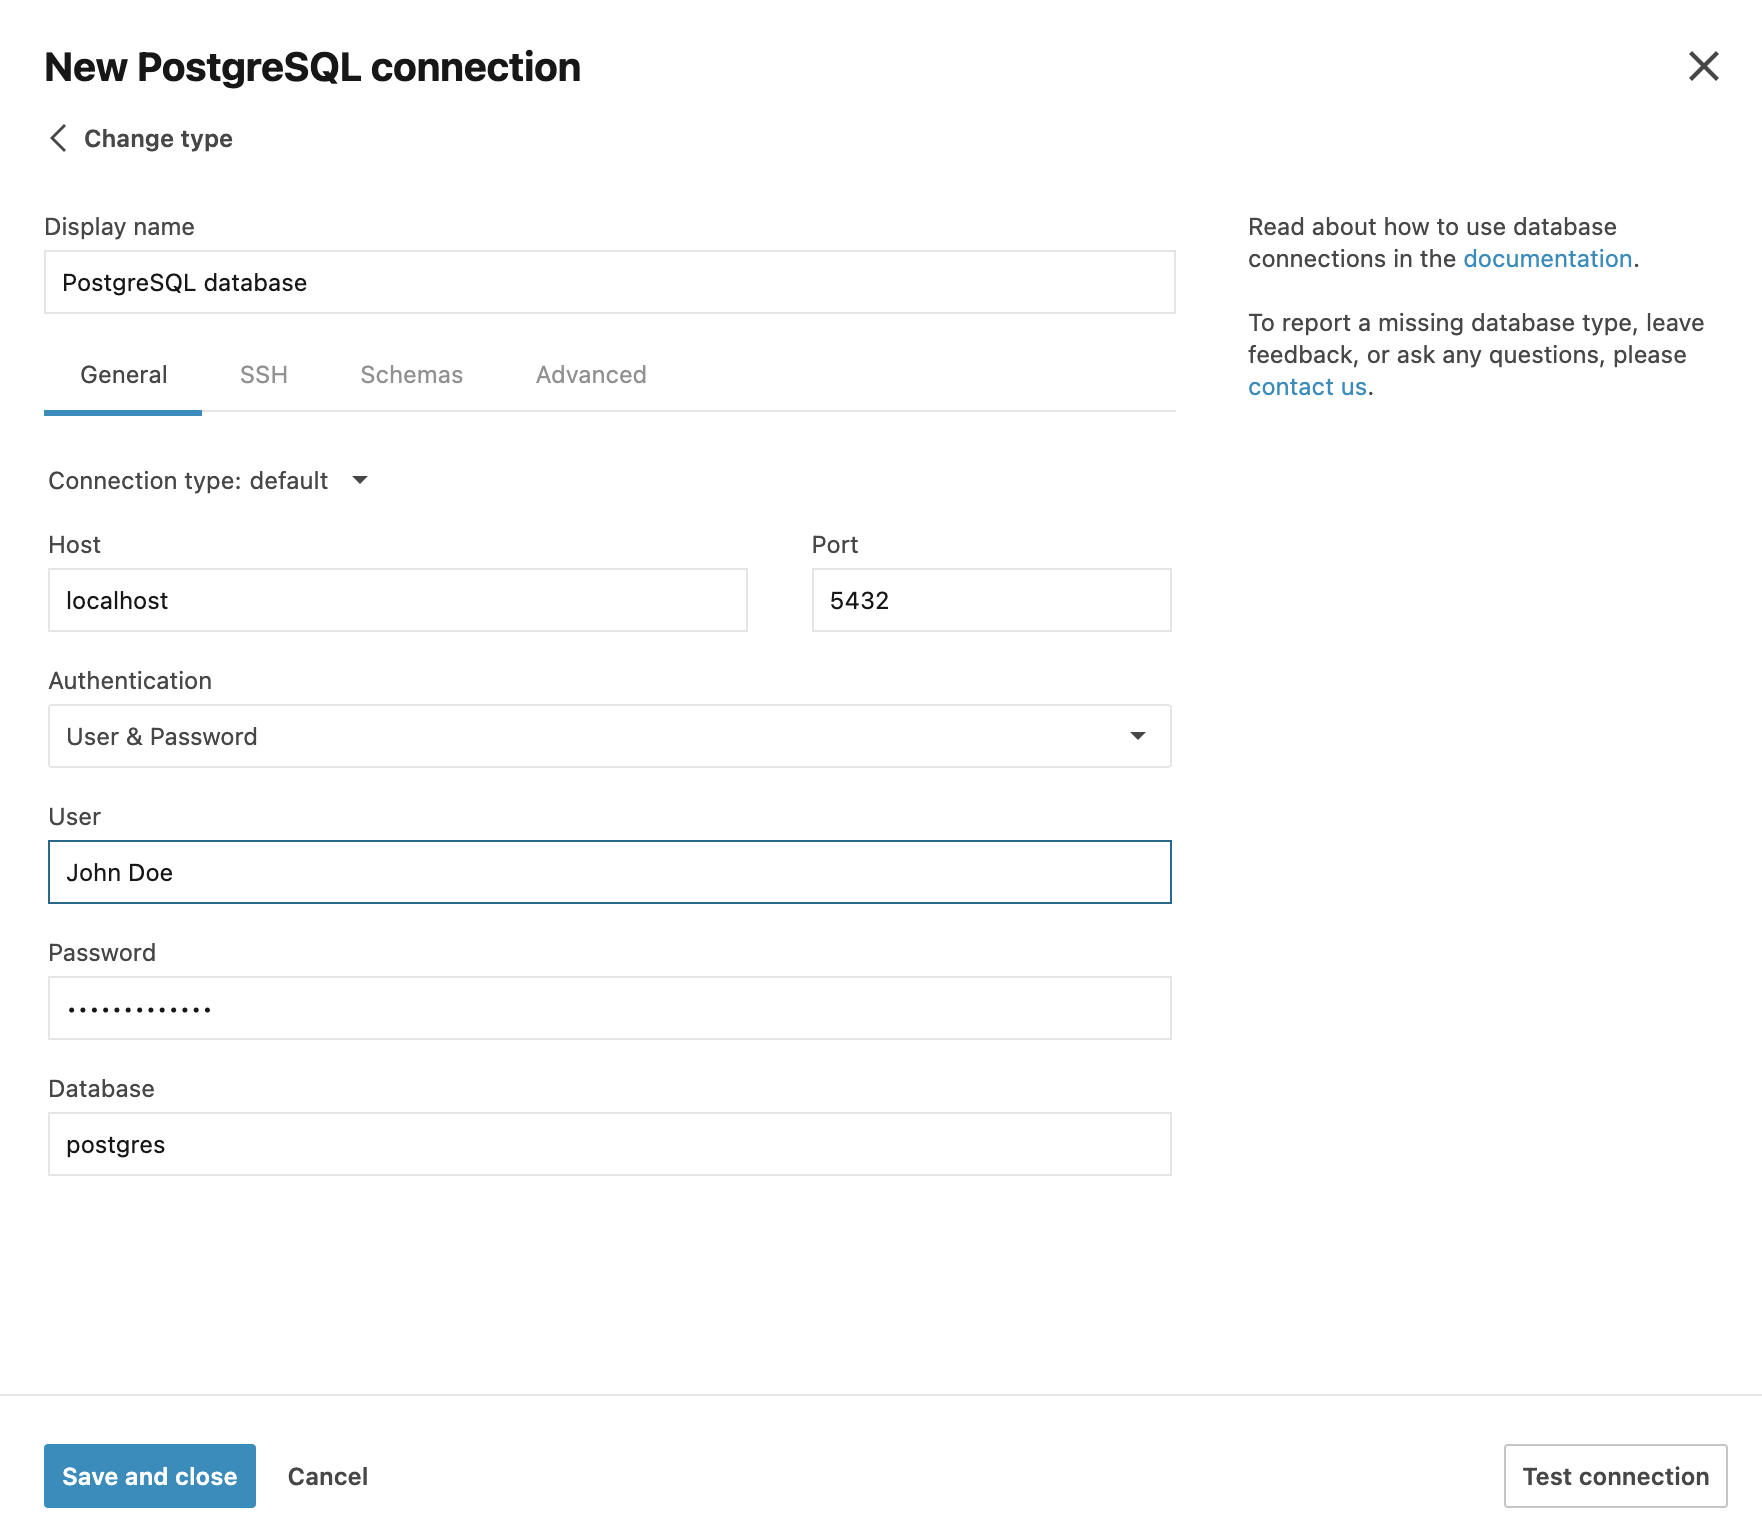
In the New database connection dialog, select a database type.
In the New [database_type_name] connection dialog, fill in the following fields:
On the General tab:
Select the connection type.
Default: to connect by specifying the Host, Port, and Database.
IAM cluster/region: to connect by using Database, Region, and Cluster.
URL only: to connect by providing the URL of a pre-built connection.
SID: to connect by using a unique name of an Oracle instance.
Service name: to connect by using an alias to an Oracle instance.
Select whether to use authentication.
Provide your user credentials if required by the connection type.
Specify the database if required by the connection type.
Select whether to use the IAM database authorization (where applicable).
On the SSH tab, enable SSH and configure an SSH connection. See more details in this procedure.
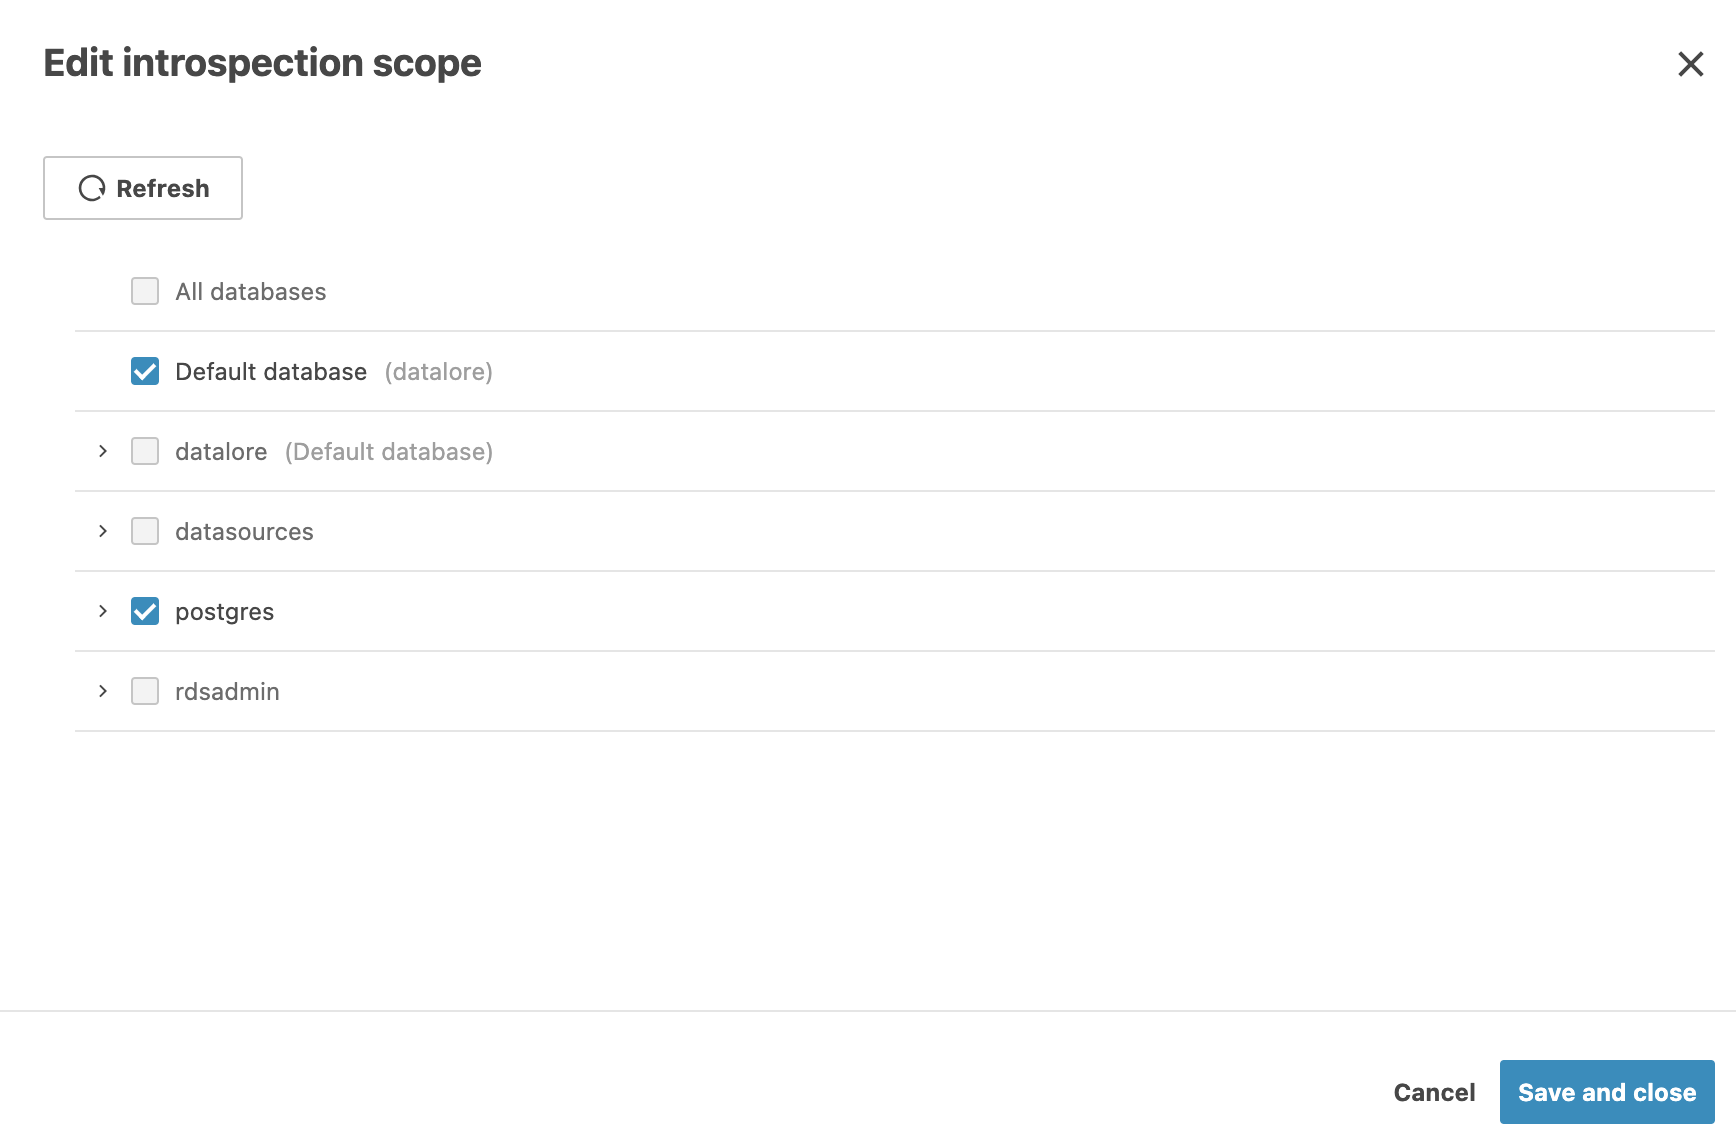
(Optional) Configure the database introspection scope on the Schemas tab:
Click Refresh to get the list of the database schemas.
Select or deselect schemas for introspection.
Click the Test connection button at the bottom of the dialog.
Once successfully tested, click the Create connection button.
Enable SSH tunneling
Datalore can create an SSH tunnel based on the parameters you configure in the New [database_type] connection dialog.
Switch to the SSH tab of the New [database_type] connection dialog.
Select the SSH checkbox.
Provide your connection details in the Host, Port, and User fields.
Use one of the two authentication types:
To use password-based authentication, fill in the Password field.
To use a key pair:
Expand the Authentication type list and select Key pair.
Under Key pair, expand the list and select one of the key pairs saved in your account settings.
Actions after attaching a database connection
Once the database connection is attached to the notebook, you can do the following in Attached data:
Click Connect SQL cell to query the database
Click the database to expand the detail view and browse the schema.
Click the vertical ellipsis to refresh the schema, edit the connection, or detach it from the notebook
The new database connection is attached to the notebook and added to the Databases list on the home page of the respective workspace.
Manage additional parameters for your connection
Use the Advanced tab of the database connection dialog to manage additional parameters. For example, you can manage your JDBC driver custom options here.
Switch to the Advanced tab of the dialog.
Click Add key-value pair to add a parameter and its value.
Repeat the previous step for each parameter required for your connection.
Click Save and close to finish your work in the dialog or switch to another tab to continue creating the connection.
Actions after attaching a database connection
The procedures below explain further actions on database connections attached to a notebook.
Start querying a database
Use SQL cells to retrieve and update data from connected databases.
Open the Attached data tool.
Click the Connect SQL cell button for the required database connection. This will add an SQL cell to the notebook tied to the selected database.
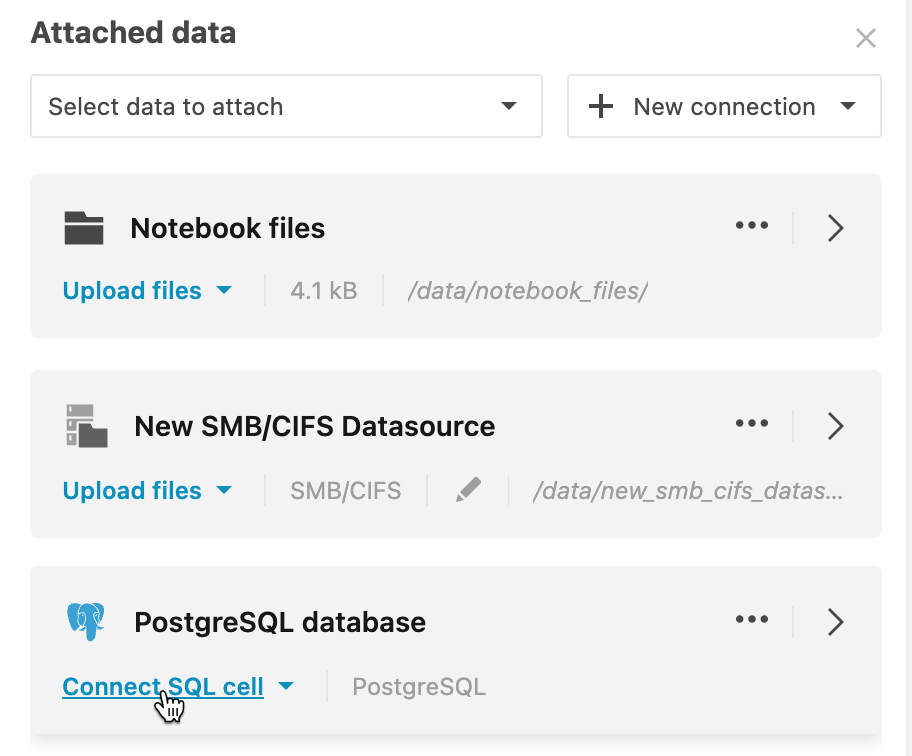
Use the newly added SQL cell to work on the attached database tables as described in SQL cells.
Append data to an attached database table
Follow this procedure to keep your tables regularly updated with fresh data.
Go to Attached data.
Clic the arrow next to the Connect SQL cell button for the required database and select Export to database cell from the expanded list.
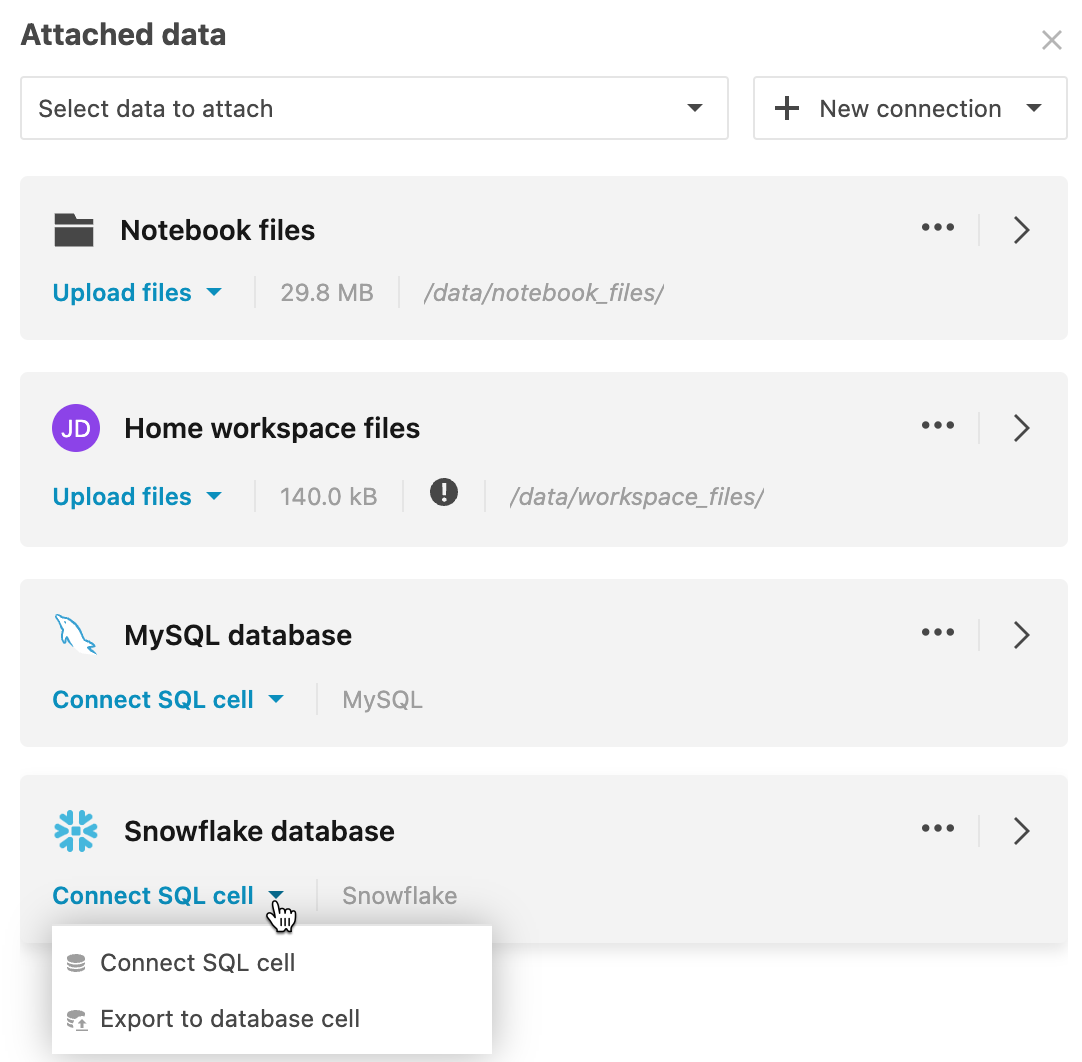
Use the newly added Export to datbase cell as described in Export to database.
Manage attached database connections
Open the Attached data tool.
Right-click the database connection you want to edit. This will open a popup menu.
Use the following options:
To view the details of the database connection, select Open detail view.
To refresh the database schema, select .
To edit the connection:
Select Edit database connection. This will open the Edit database connection dialog.
In the Edit database connection dialog, edit the connection parameters. Find more details about database-specific parameters in the respective articles in this section.
To detach the database connection from the notebook, select Detach database connection.
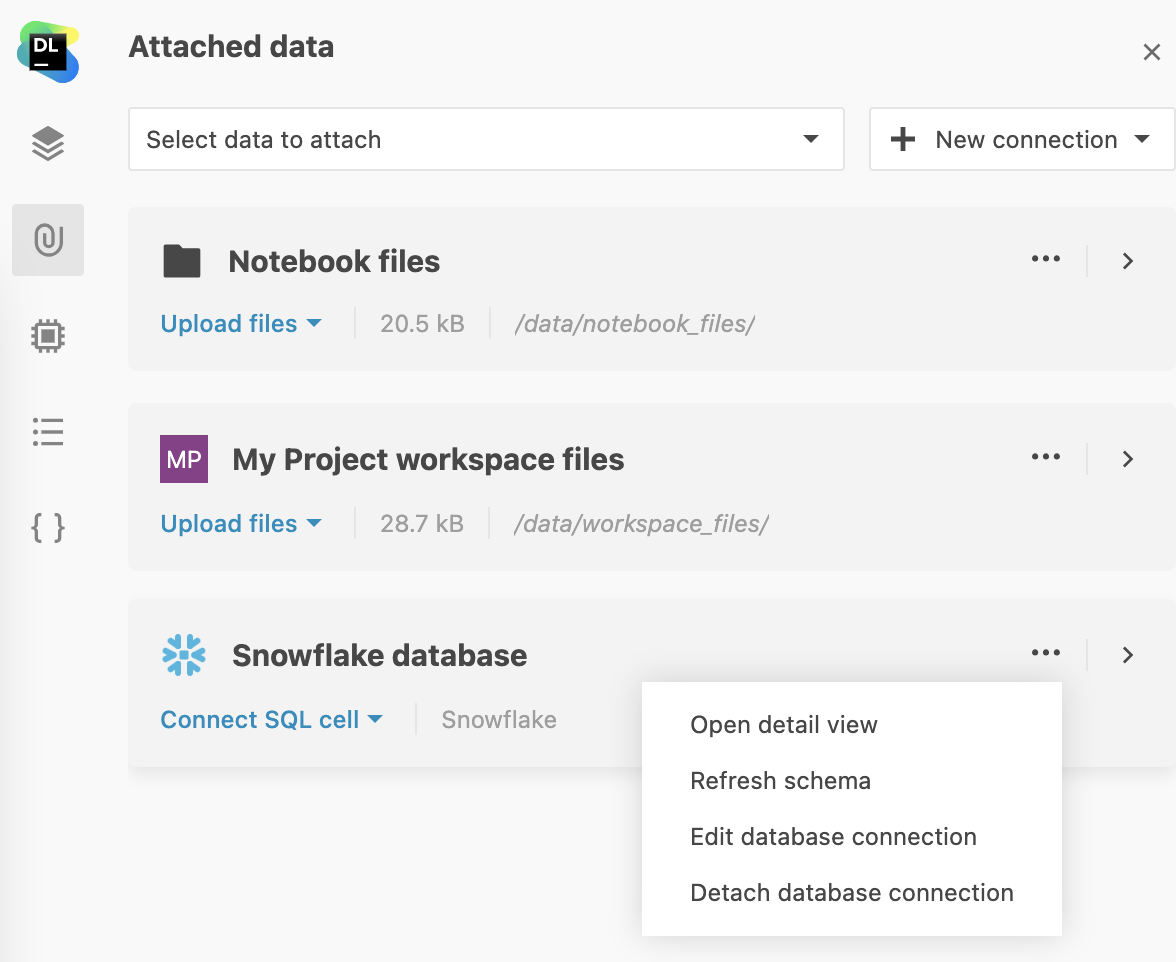
Edit database introspection scope
You can always edit the list of introspected schemas for an established connection in Attached data:
Click the connection to open the detail view.
Hover over the introspected schema indicator next to the database name and click Edit introspection scope.
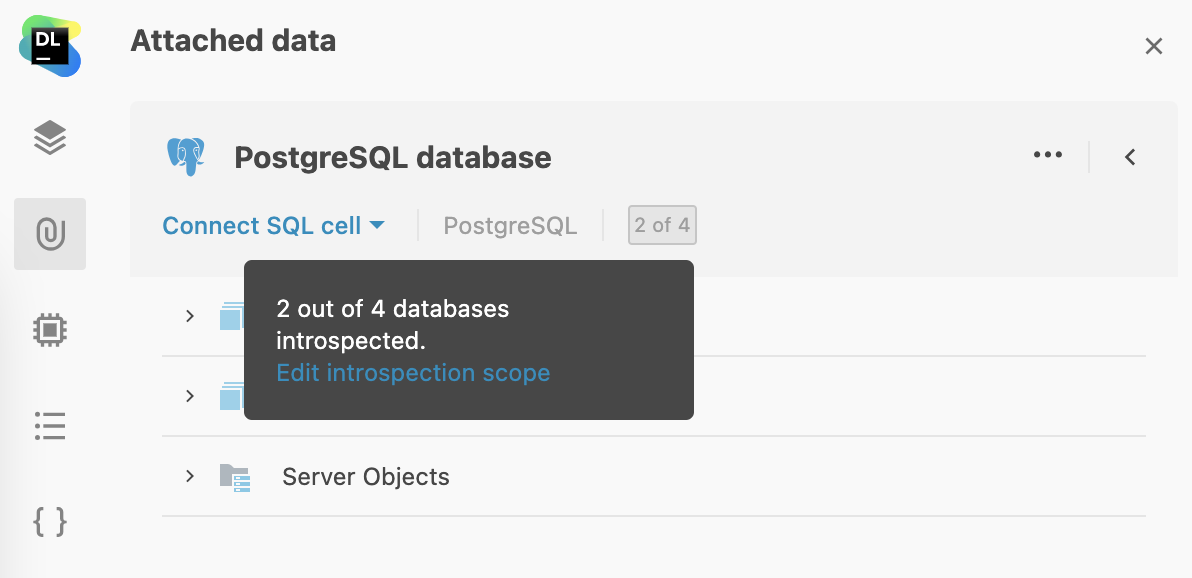
Select or deselect the list items in the Edit introspection scope dialog and click Save and close to finish the procedure.
