Manage files attached to a notebook
The article explains how to manage files attached to a notebook. These are the two categories of files that can be found in the Attached data tool:
Notebook files: they are stored in the notebook attachments (/data/notebook_files directory).
Workspace files: they are stored in the respective workspace attachments (/data/workspace_files directory)
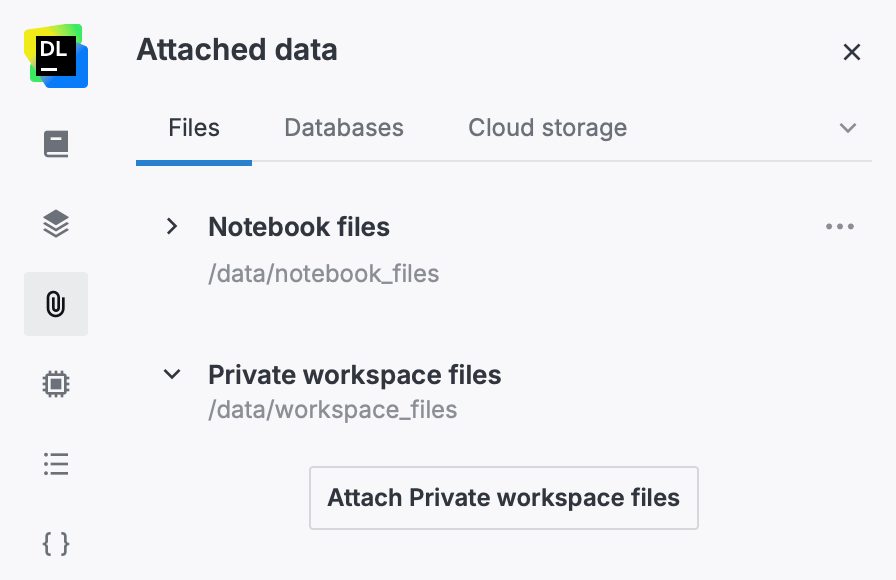
Attach Private workspace files
Files uploaded to the default Private workspace are not automatically attached to its notebooks, unlike files from other workspaces. Perform the following steps to attach them.
Click Private workspaces files to expand the section.
Click Attach Private workspace files.
Create a folder
Create folders to group attached files.
Select where you want to create a folder:
For the notebook attached files, stay on the Files tab.
For the respective workspace, expand the list of workspace files on the Files tab.
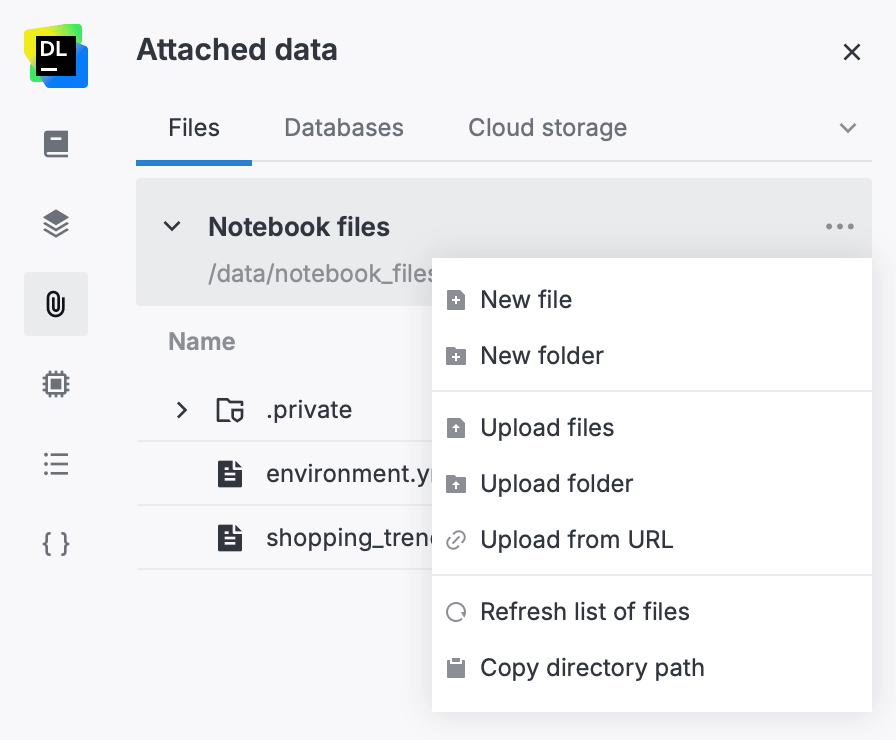
Open the menu of file adding options:
On the Files tab: Click the plus icon on the toolbar.
On the Cloud storage tab, click the ellipsis for the cloud storage you opened in detail view.
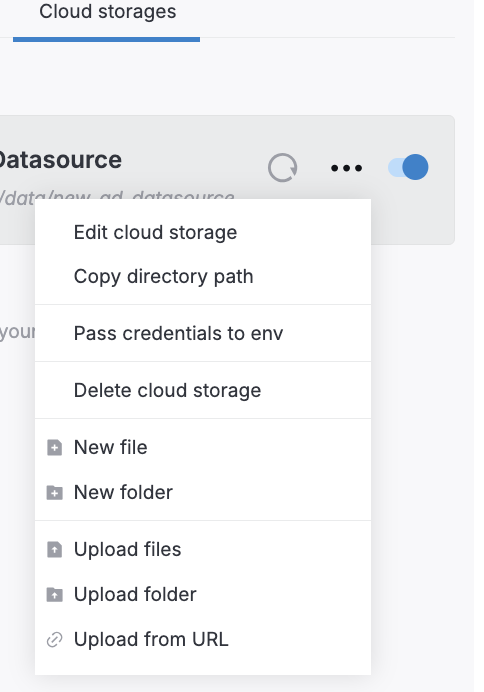
Select New folder from the menu. This will add a folder called New folder.
Provide a name for the new folder.
Drag items to move them to and from the folder.
Manage attached files
Click
(More) next to the file you want to manage.
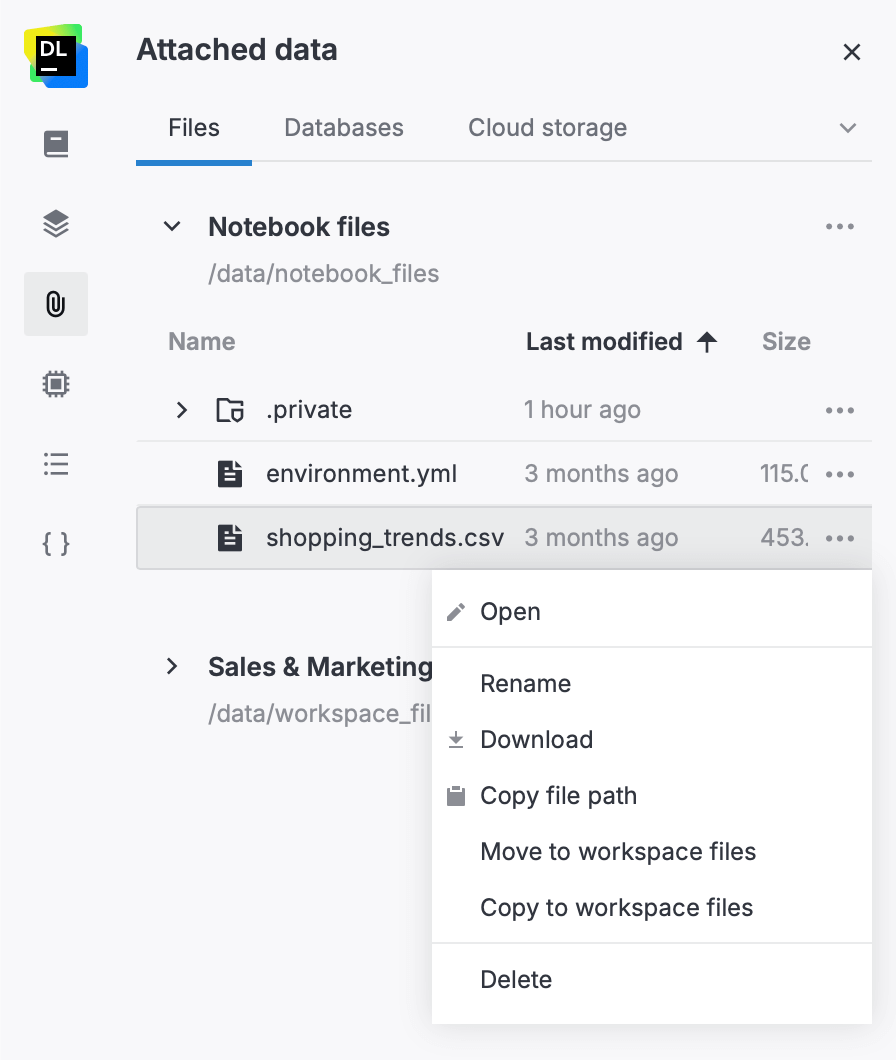
Select an action from the menu.
Download: The selected file is downloaded to your file system.
Unpack: The selected archived file is unpacked and added to the list.
Open: The selected file is opened in the file editor. For files with the .py extension, the preview pane provides full code-editing support.
Delete: The selected item is permanently deleted from the list.
Rename: You can provide a new name for the selected item.
Copy file path: The copied path can be used to refer to the selected file in the code.
Preview (for .ipynb): The selected .ipynb file is opened in a new browser tab for preview. You can also open the file by double-clicking it.
Move to workspace files: The selected item is moved to the respective workspace files. You can use it in any notebook from this workspace.
Move to notebook files: The selected item is moved to the notebook files. It can only be used in this notebook now.
Copy to workspace files: The selected item is copied to the respective workspace files. You can use it in any notebook from this workspace.
Copy to notebook files: The selected item is copied to the notebook files.
To refresh the list of files, click the refresh icon on the toolbar.
Manage notebook files on the Home page
This procedure explains how to manage notebook files (not workspace files or cloud storage files) on your Home page. Use this option when you want to quickly manage the files of a specific notebook without opening it in the editor and using the Attached data tool.
Procedure
On the Home page, select the workspace where you want to manage files of a specific notebook.
In the
Notebooks menu of the selected workspace, locate the notebook and click the down arrow next to its title. This will expand the list of all folders and files attached to this notebook.
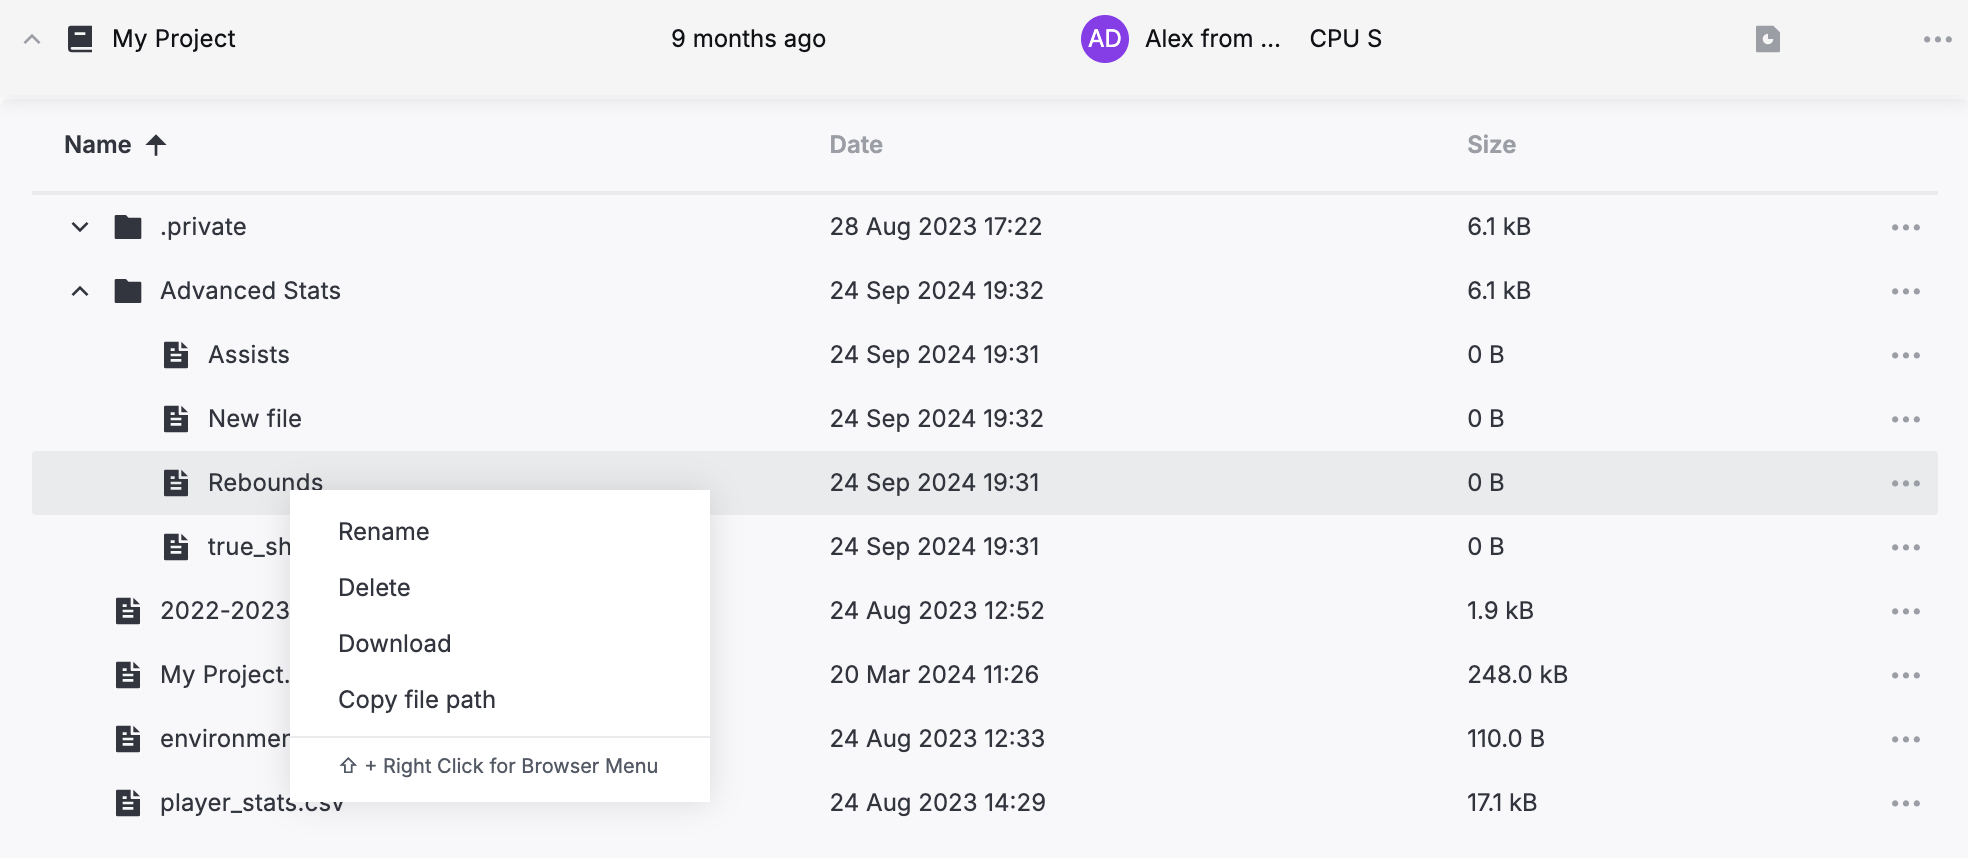
To manage a file or a folder, right-click the required item and use the following options:
Rename
Delete
Download
Copy file path
Keywords
upload files, attach files, add files, data sources, data, data files, notebook attachments, notebook files, attached files, manage files