ZIP Installation
The Hub ZIP distribution is available for download on the JetBrains website.
The Hub ZIP is a cross-platform distribution. You can use this distribution to install and run Hub on Linux, OS X, and Windows.
The procedure for installing Hub with this distribution is similar for all operating systems. All you need to do is select the appropriate application and run the script that is supported by your operating system.
| Operating System | Application | Script |
|---|---|---|
| Linux | Command Line Interface | hub.sh |
| OS X | Terminal | hub.sh |
| Windows | Command Prompt | hub.bat |
To install Hub with a ZIP distribution:
- Download the ZIP distribution from the JetBrains website.
- Create a directory on your server to use as the home directory for Hub. Extract the files from the ZIP archive and select this directory as the destination folder.
- In a command-line interface, change the directory to
<Hub home directory>/bin. - Enter the command
./hub.sh run.If you do not have a web browser installed on the host machine, enter
./hub.sh run --no-browser.- The web-based
Configuration Wizard
opens in your default browser. The wizard helps you set up and start your new Hub server.
If you do not have a web browser installed on the host machine, open the URL of the wizard in a web browser on another workstation. The wizard URL is printed in the console output:
JetBrains Hub 2.0 will be available on [<Hub Base URL>/bundle/starting] after start
- The web-based
Configuration Wizard
opens in your default browser. The wizard helps you set up and start your new Hub server.
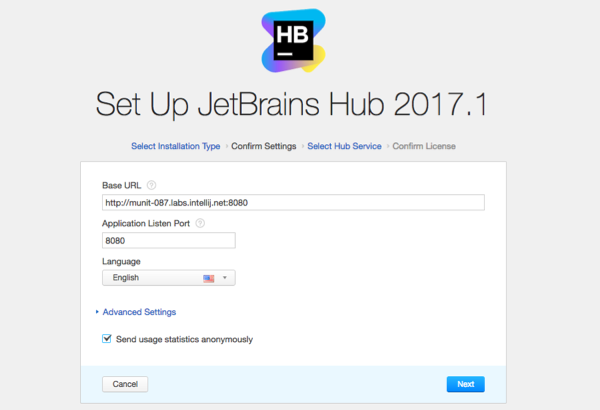
- In the Configuration Wizard, click Set up.
- On the Confirm Settings page, confirm or change the basic system settings.

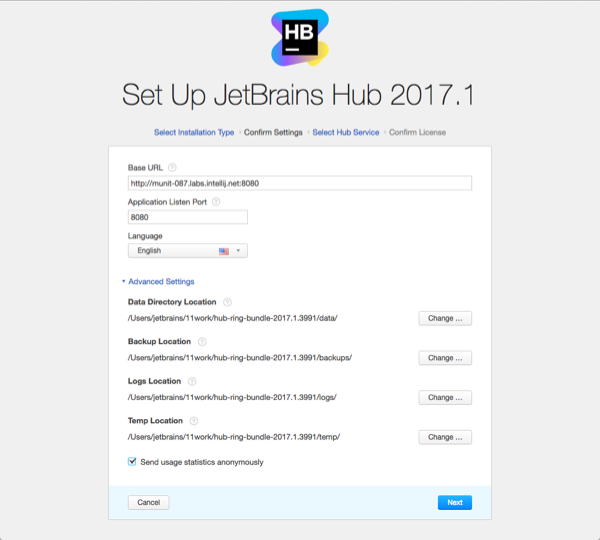
- Expand the Advanced Settings section to confirm or change the locations where Hub stores product data.

To change the location for any of these file types, click the Change button and select a new location.
- To share usage statistics with Jetbrains, keep the Send usage statistics anonymously option enabled. This feature helps JetBrains track usage statistics to make Hub better. We never share collected data with any third party.
- When done, click Next.
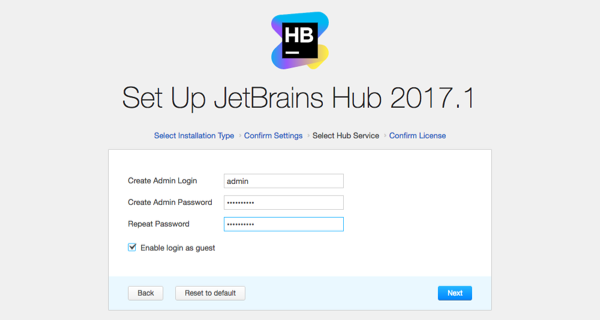
- On the Select Hub Service page, enter and confirm the password for the system
administrator account. The default username is
admin.
To assign a different username to the administrator account, edit the Create Admin Login setting.
Deselect the Enable login as guest option to ban the guest user account.
- When done, click Next.
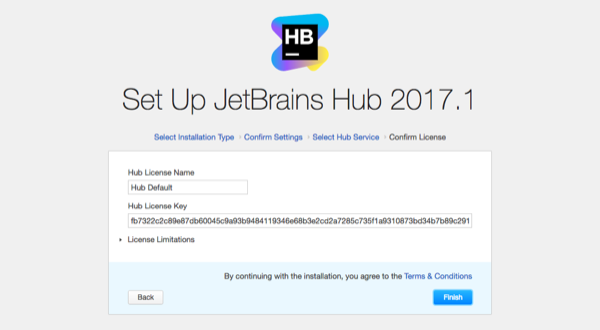
- On the Confirm License page, verify the license name and key.

- When done, click Finish.
Do not close the page in the browser until the setup is complete. When the Hub server is ready, you are redirected to the login page.
- Enter the credentials for the administrator account that you created during the configuration and click the Log in button.
That's it. Your Hub instance is installed and ready for use.