OAuth 2.0 Auth Module
An OAuth 2.0 authentication module lets users log in to Hub and any connected services with credentials that are stored in an external authorization service. Hub provides pre-configured authentication modules for Amazon, Azure AD 2.0, Bitbucket Cloud, Facebook, GitLab, Keycloak, Microsoft Live, Okta, PayPal, and Yandex Passport.
Use the generic OAuth 2.0 authentication module to let users log in to Hub with accounts from other third-party services that support OAuth 2.0, like Basecamp, Stack Exchange, and Zendesk.
When you enable an OAuth 2.0 authentication module in Hub:
Your users log in to Hub with the credentials they use in an external service.
Your Hub users have fewer accounts and passwords to remember.
New users with accounts in the connected service can create their own accounts in Hub.
Enable OAuth 2.0 Authentication
To allow users with existing accounts in an external authorization service to log in to Hub, enable an OAuth 2.0 authentication module.
This procedure takes place in three steps:
Generate a Redirect URI in Hub. When you create an authentication module, Hub generates a redirect URI to use with the authorization service. This URI identifies the source of each login request.
Generate a Client ID and Secret in the authorization service. Every login request sent from Hub includes a unique identifier. The ID and secret you store in the authentication module tell the authorization service that each login request is authorized.
Enable the Auth Module in Hub. When you have generated the information Hub uses to authenticate with the authorization service, copy the values into Hub and enable the module.
Generate a Redirect URI in Hub
First, create the OAuth 2.0 authentication module. When you perform this action, Hub generates a redirect URI to use with the authorization service.
To generate a redirect URI in Hub:
In the Access Management section of the Administration menu, select .
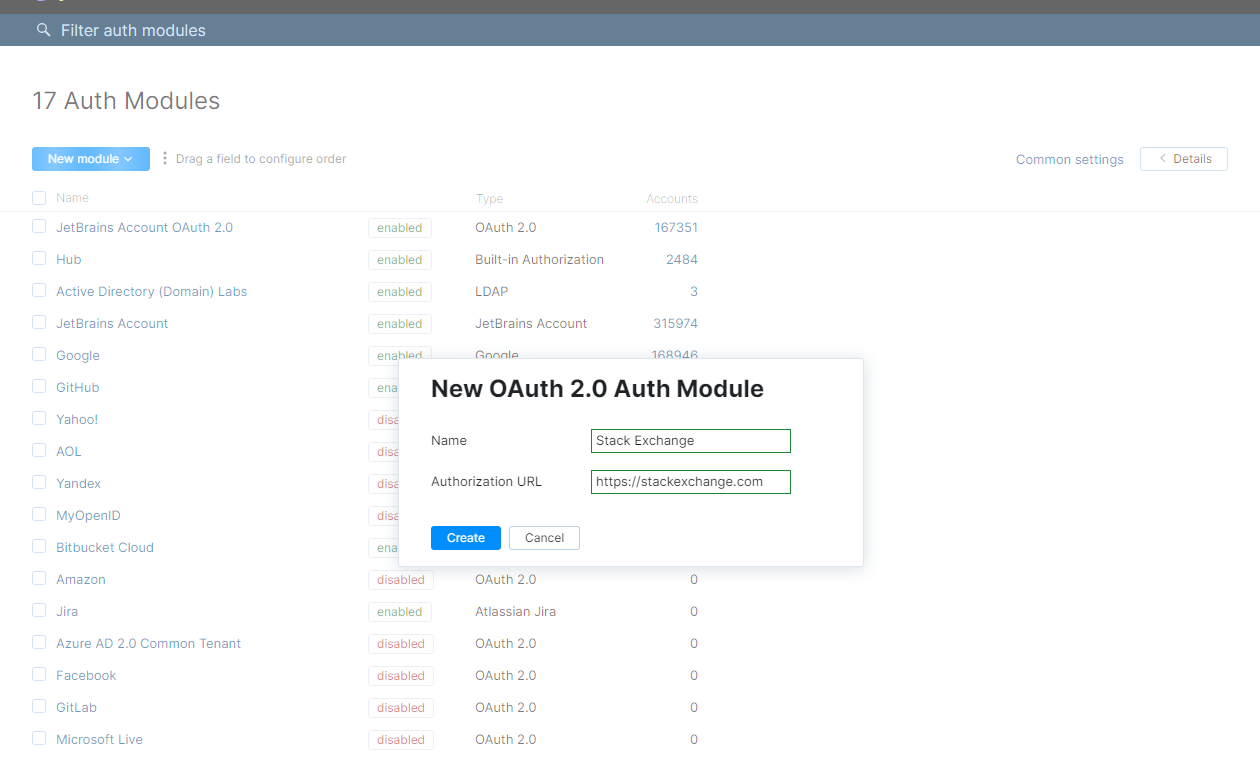
From the New Module drop-down list, select OAuth 2.0.
The New OAuth 2.0 Module dialog opens.

Enter the Name and Authorization URL, then click the Create button.
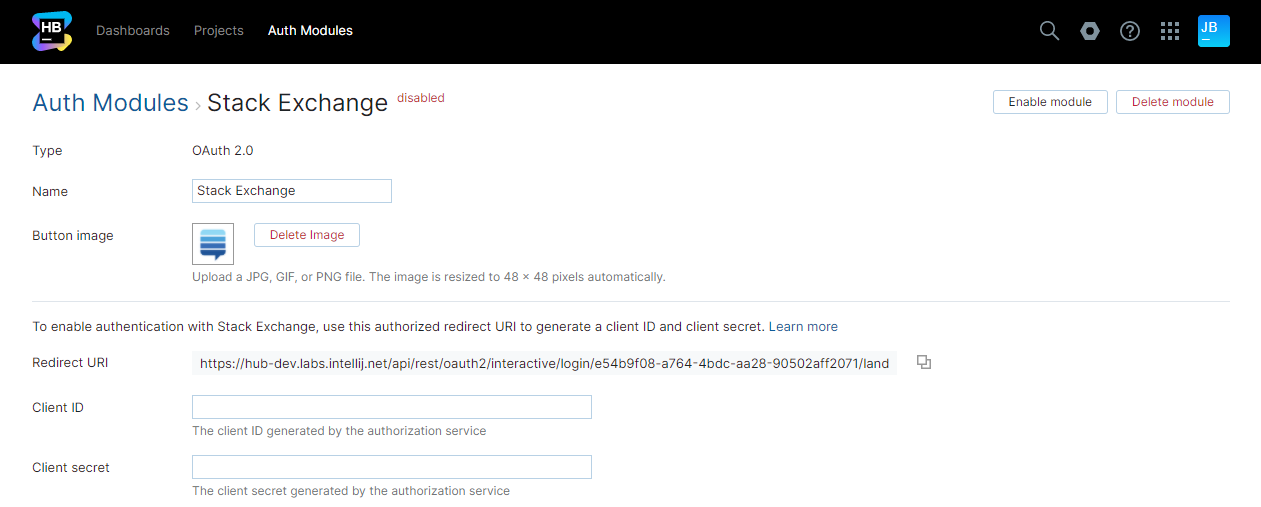
The Auth Modules page displays the settings for a new OAuth 2.0 authentication module.
Hub generates a redirect URI for you to use in the authorization service.

If the feature is supported by your browser, use the Copy button to copy the redirect URI to your clipboard.
Make sure to update the Redirect URI in the authorization service when you change the base URL of your Hub instance. For example, after migrating data to another Hub service or changing proxy settings.
Generate a Client ID and Secret in the Authorization Service
The next step is to register the authorized redirect URI for Hub in the authorization service. This process varies by service. You can refer to the setup instructions for any of the pre-configured authentication modules, like Amazon, Azure AD 2.0, Bitbucket Cloud, Facebook, GitLab, Microsoft Live, PayPal, and Yandex Passport. The procedures for other third-party authorization services are similar.
Enable the Auth Module in Hub
To complete the setup, store the client ID and secret from the authorization service in the OAuth 2.0 auth module.
Copy the client ID from the authorization service and paste it into the Client ID input field in Hub.
Copy the client secret from the authorization service and paste it into the Client secret input field in Hub.
Configure the optional settings for the authentication module. For more information, see Additional Settings.
Click the Enable module button.
The OAuth 2.0 authentication module is enabled.
The icon stored in the Button image setting is added to the login dialog window. Users can click this icon to log in to Hub with an account from the connected authorization service.
Settings
The first section of the settings page displays the general settings for the authentication module. Here, you also find the redirect URI that you use to register Hub in the authorization service and the input fields that store the Client ID and Client Secret that are generated in the authorization service.
Setting | Description |
|---|---|
Type | Displays the type of authorization service that is enabled for third-party authentication in Hub. |
Name | Stores the name of the authentication module. Use this setting to distinguish this module from other authentication modules in the Auth Modules list. The name is also shown in the tooltip for the third-party service icon on the login form. |
Button image | Displays the image used for the button that a user clicks to log in to Hub with a their account in the connected authorization service. You can upload a JPG, GIF or PNG file. The image is resized to 48 x 48 pixels automatically. |
Redirect URI | Displays the authorized redirect URI that is used to register the connection to Hub in the authorization service. |
Client ID | Stores the identifier that the authorization service uses to validate a login request. You generate this value in the authorization service when you configure the authorization settings for a web application and enter an authorized redirect URI. |
Client Secret | Stores the secret or password used to validate the client ID. You generate this value in the authorization service together with the client ID. |
Extension grant | Saves the value that is used to identify the authentication module when used for extension grants. If a value is provided, Hub will process requests to exchange access tokens that are issued by the authorization service for tokens that grant access to Hub. To exchange access tokens successfully, the authentication module must be authorized in the third-party authentication service and enabled in Hub. To learn how to exchange access tokens using the Hub REST API, see Extension Grants. |
Authorization Service Endpoints
The settings in this section of the page store the OAuth 2.0 endpoints used by the authorization service. Additional settings let you define the request scope, and choose how to authenticate with the service.
For pre-configured OAuth 2.0 modules, the values that are used by the selected authorization service are set automatically.
Setting | Description |
|---|---|
Authorization | Stores the endpoint that Hub uses to obtain authorization from the resource owner via user-agent redirection. |
Token | Stores the endpoint that Hub uses to exchange an authorization grant for an access token. |
User data | Stores the endpoint used to locate profile data for the authenticated user. |
The endpoint used to locate the email address of the authenticated user. Use only when the email address is not stored in the user profile. | |
Avatar | The endpoint used to locate the binary file that is used as the avatar for the authenticated user. Use only when the avatar isn’t stored directly in the user profile. |
Field Mapping
When a user profile response object is returned by the authorization service, values from the specified field paths are copied to the user profile in Hub. Use the following settings to define the endpoint that locates profile data for the authenticated user and map fields that are stored in the authorization service to user accounts in Hub.
For pre-configured OAuth 2.0 modules, the values that are used by the selected authorization service are set automatically.
To specify paths to fields inside nested objects, enter a sequence of segments separated by the slash character (
/).To reference values that may be stored in more than one location, use the "Elvis operator" (
?:) as a delimiter for multiple paths. With this option, Hub uses the first non-empty value it encounters in the specified field.
Field | Description |
|---|---|
User ID | Maps to the field that stores the value to copy to the User ID property in Hub. |
Username | Maps to the field that stores the value to copy to the Username field in the Hub profile. This option is available in Hub versions 2023.1.15453 and later. |
Full name | Maps to the field that stores the value to copy to the Full name field in the Hub profile. |
Maps to the field that stores the value to copy to the Email field in the Hub profile. | |
Email verification state | Maps to the field that stores the value to copy to the verified email property in Hub. |
Avatar | Maps to the field that stores the image to use as the Avatar in the Hub profile. |
Image URL pattern | Generates an image URL for avatars that are referenced by an ID. Use the <picture-id> placeholder to reference the field that stores the avatar. |
Groups | Maps to the attribute that stores group membership assignments in the connected authorization service. When this value is specified, you can map and sync group memberships in the authorization service with corresponding groups in Hub. For details, see Group Mappings. |
Additional Settings
The following options are located at the bottom of the page. These settings let you define the request scope and choose how to authenticate with the service.
Other options in this section let you manage Hub account creation and group membership and reduce the loss of processing resources consumed by idle connections.
Option | Description |
|---|---|
Scope | Sets the scope for the access request. Enter a list of scopes, separated by spaces. |
Authentication | Determines how credentials are passed to the authorization service. |
User creation | Enables creation of Hub accounts for unregistered users who log in with an account that is stored in the connected authorization service. Hub uses the email address to determine whether the user has an existing account. |
Email auto-verification | Determines how Hub sets the verification status of an email address when the authentication service does not return a value for this attribute. |
Auto-join groups | Adds users to a group when they log in with an account that is stored in the connected authorization service. You can select one or more groups. New users that auto-join a group inherit all the permissions assigned to this group. We recommend that you add users to at least one group. Otherwise, a new user is only granted the permissions that are currently assigned to the All Users group. |
Connection timeout | Sets the period of time to wait to establish a connection to the authorization service. The default setting is 5000 milliseconds (5 seconds). |
Read timeout | Sets the period of time to wait to read and retrieve user profile data from the authorization service. The default setting is 5000 milliseconds (5 seconds). |
Audit | Links to the Audit Events page in Hub. There, you can view a list of changes that were applied to this authentication module. |
Group Mappings
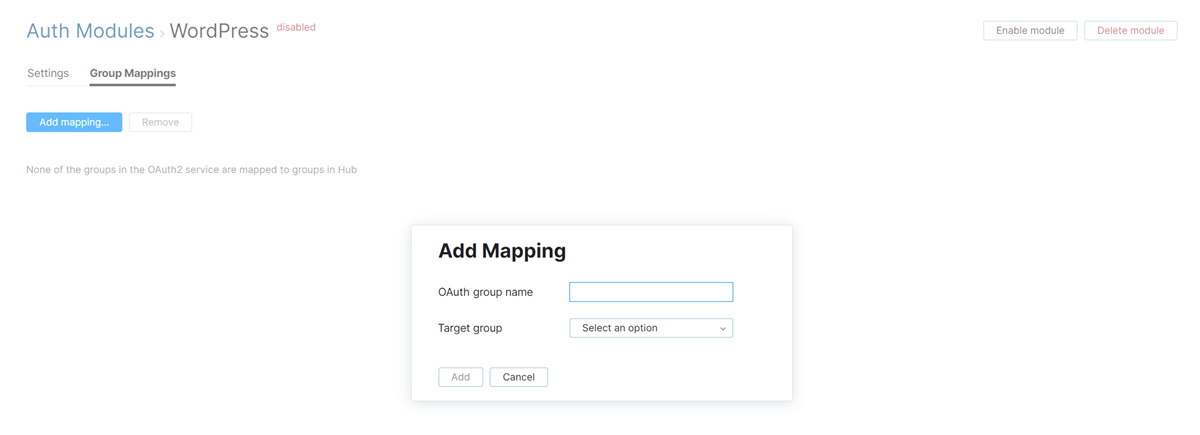
On the Group Mappings tab, you can map existing groups in the authorization service to the groups in Hub.

If you want to map groups in the OAuth 2.0 service to groups in Hub, you need to specify the Groups attribute that stores group memberships from the the OAuth 2.0 service in the Attribute Mapping section of the settings for this auth module.
When group mappings are configured, Hub checks for group memberships when users log in with accounts that are managed in the directory service. Hub performs the following operations for each group from the the OAuth 2.0 service that is mapped to a Hub group:
Users who are members of a mapped OAuth 2.0 group and are not members of the mapped Hub group are added to the group in Hub.
Users who are not members of a mapped OAuth 2.0 group and are members of the mapped Hub group are removed from the group in Hub.
Changes to group memberships in the authorization service are only applied in Hub when users log in using their accounts from the OAuth 2.0 service.
You can map multiple OAuth 2.0 groups to a single target group in Hub. You can't map OAuth 2.0 groups to more than one Hub group.
