Upgrade with Docker
This page describes various ways you can upgrade a Hub installation using a Docker image.
Prerequisites
Before you upgrade, perform the following prerequisite tasks:
Create a backup of your current database. Hub does not provide forward database compatibility. Your database is migrated to the format that is compatible with the latest version during the upgrade procedure. This means that you cannot revert to a previous version and continue to use the database that was processed during the upgrade.
Copy the backup of your current database to a secure location just in case you encounter problems with the upgrade and need to roll back to the previous version.
Recommended Upgrade Path
Installation Version | Target Version |
|---|---|
1.0 | 2.0 |
2.x | 2017.1 |
2017.x | 2018.x |
2018.x | 2019.x |
2019.x | 2020.x |
2020.x | 2021.x |
2021.x | 2022.x |
2022.x | 2023.1* --> 2023.2 or 2023.3 |
2023.2 or 2023.3 | 2024.x |
Upgrade Docker Installations
If all you want to do is upgrade your Hub installation from one version to another without changing any environmental variables, you can simply apply the update and skip the web-based Configuration Wizard.
This is done by adding the following parameter to the configuration file the application reads on each new start. the following configuration parameter to the command that runs the updated Hub installation:
This upgrade procedure is described below.
To upgrade an existing Docker installation
Create a backup of the Hub database while your existing Hub installation is running.
Use the following command to stop the Docker container:
docker exec <CONTAINER_ID> stopIf you don't know the ID of the YouTrack container, use the following command to get a list of the Docker containers for your server:
docker ps -aUse the following command to remove the container with the previous version.
docker rm <CONTAINER_ID>If you try to run the updated container without removing the previous version, the command will fail due to conflicts with duplicate container names.
Add the following parameter to your
hub.jvmoptionsfile:-Ddisable.configuration.wizard.on.upgrade=trueFor specific instructions, see Update Parameters on a Persistent Basis.
Run the following command to pull an image that contains the latest Hub version and run the application. All other attributes of the command (volumes and port mappings) must be the same as those that you used with the previous version of the Hub image:
docker run -it --name <hub-server-instance> \ -v <path to data directory>:/opt/hub/data \ -v <path to conf directory>:/opt/hub/conf \ -v <path to logs directory>:/opt/hub/logs \ -v <path to backups directory>:/opt/hub/backups \ -p <port on host>:8080 \ jetbrains/hub:<new version>docker run -it --name <hub-server-instance> ^ -v <path to data directory>:/opt/hub/data ^ -v <path to conf directory>:/opt/hub/conf ^ -v <path to logs directory>:/opt/hub/logs ^ -v <path to backups directory>:/opt/hub/backups ^ -p <port on host>:8080 ^ jetbrains/hub:<new version>Use the following information to customize this command as needed:
-itis a command-line flag that attaches both the input and output of the container to your terminal. This lets you see the output produced by the container as if it were running directly in your terminal.When the container starts, you will see the log messages generated during the initialization process as well.
Pressing Ctrl+ C while the terminal is attached to a container's output sends an interrupt signal to the container's running process. This is similar to how you would stop a regular process in your terminal. This command causes the container to shut down, so be cautious when using Ctrl+ C in this context.
If you want to detach the terminal from the container output without interrupting the processes running in it, press Ctrl+ P followed by Ctrl+ Q.
For more details, please refer to the official docker documentation.
--name hub-server-instanceis an arbitrary name for the container.By default, Docker generates random and sometimes cryptic names for containers. Use the
--nameoption to give your container a more meaningful and human-readable name that makes it easier to identify and manage.-v <path to <name> directory>:/opt/hub/<name>specifies the location of the storage provisioned on the host machine and maps them to the corresponding/opt/hub/<name>directories inside the container.-p <port on host>:8080is a parameter that defines the port mapping. This tells the host machine to listen for traffic on the<port on host>port and propagate all traffic to port8080inside the container.The listen port must be accessible to end users or to the reverse proxy server, if one is in use. This may require explicitly opening access to this port through the firewall.
jetbrains/hub:<new version>is a reference to the latest Hub version hosted in the Docker Hub Repository.
There are several configuration parameters that can be updated during an upgrade installation. This includes:
Switching from HTTP to HTTPS and vice versa.
Changing the base URL or application listen port for your Hub installation.
If you want to apply one or more of these changes to the Hub environment, remove the configuration parameter that suppresses the Configuration Wizard, then modify the parameters that you want to update in the web-based Configuration Wizard.
Upgrade an Existing Installation from a Database Backup using a Docker Image
You also have the ability to upgrade any installation using a Docker image by downloading a backup copy of your Hub database and using the backup as the upgrade source in the Configuration Wizard during installation of the latest version.
This procedure can be used to upgrade an MSI or ZIP installation. It can also be used to migrate an installation from one Docker container to another during the upgrade process.
Create a backup of the Hub database while your existing Hub installation is running.
Pull an image of the latest Hub version from the Docker Hub Repository:
docker pull jetbrains/hub:<version>Where <version> is a full version number of an Hub build.
Create and configure Hub-specific directories on the host machine.
Copy the backup file of the Hub database into the
backupsdirectory that you created in the previous step.Run the following command to launch Hub in a container, mapping its data volumes and port:
docker run -it --name <hub-server-instance> \ -v <path to data directory>:/opt/hub/data \ -v <path to conf directory>:/opt/hub/conf \ -v <path to logs directory>:/opt/hub/logs \ -v <path to backups directory>:/opt/hub/backups \ -p <port on host>:8080 \ jetbrains/hub:<version>docker run -it --name <hub-server-instance> ^ -v <path to data directory>:/opt/hub/data ^ -v <path to conf directory>:/opt/hub/conf ^ -v <path to logs directory>:/opt/hub/logs ^ -v <path to backups directory>:/opt/hub/backups ^ -p <port on host>:8080 ^ jetbrains/hub:<version>Use the following information to customize this command as needed:
-itis a command-line flag that attaches both the input and output of the container to your terminal. This lets you see the output produced by the container as if it were running directly in your terminal.When the container starts, you will see the log messages generated during the initialization process as well.
Pressing Ctrl+ C while the terminal is attached to a container's output sends an interrupt signal to the container's running process. This is similar to how you would stop a regular process in your terminal. This command causes the container to shut down, so be cautious when using Ctrl+ C in this context.
If you want to detach the terminal from the container output without interrupting the processes running in it, press Ctrl+ P followed by Ctrl+ Q.
For more details, please refer to the official docker documentation.
--name hub-server-instanceis an arbitrary name for the container.By default, Docker generates random and sometimes cryptic names for containers. Use the
--nameoption to give your container a more meaningful and human-readable name that makes it easier to identify and manage.-v <path to <name> directory>:/opt/hub/<name>specifies the location of the storage provisioned on the host machine and maps them to the corresponding/opt/hub/<name>directories inside the container.-p <port on host>:8080is a parameter that defines the port mapping. This tells the host machine to listen for traffic on the<port on host>port and propagate all traffic to port8080inside the container.
The Hub service starts on
{0.0.0.0:8080}inside the Docker container, and port 8080 is mapped to the specified <port on host>. This way the service can be accessed from any machine that has network access to the <port on host> of your host machine. For instance, if the fully qualified domain name (FQDN) of the host machine is host.mydomain.com and the <port on host> is 7777, the service will be available athttp://host.mydomain.com:7777.The Hub service starts with a web-based Configuration Wizard. The wizard is accessible from the web address where the service is hosted.
The Configuration Wizard is secured with a one-time access token, which you need to copy from the log output from Docker. For example:
JetBrains Hub 2023.1 Configuration Wizard will listen inside container on {0.0.0.0:8080}/ after start and can be accessed by URL [http://<put-your-docker-HOST-name-here>:<put-host-port-mapped-to-container-port-8080-here>//?wizard_token=FOT8QIzHuktzvxtiT1Ax]Using the example from the previous section, the Configuration Wizard would be available from
http://host.mydomain.com:7777//?wizard_token=FOT8QIzHuktzvxtiT1AxOpen the URL for the Configuration Wizard in your web browser.
In the Configuration Wizard, click Upgrade.

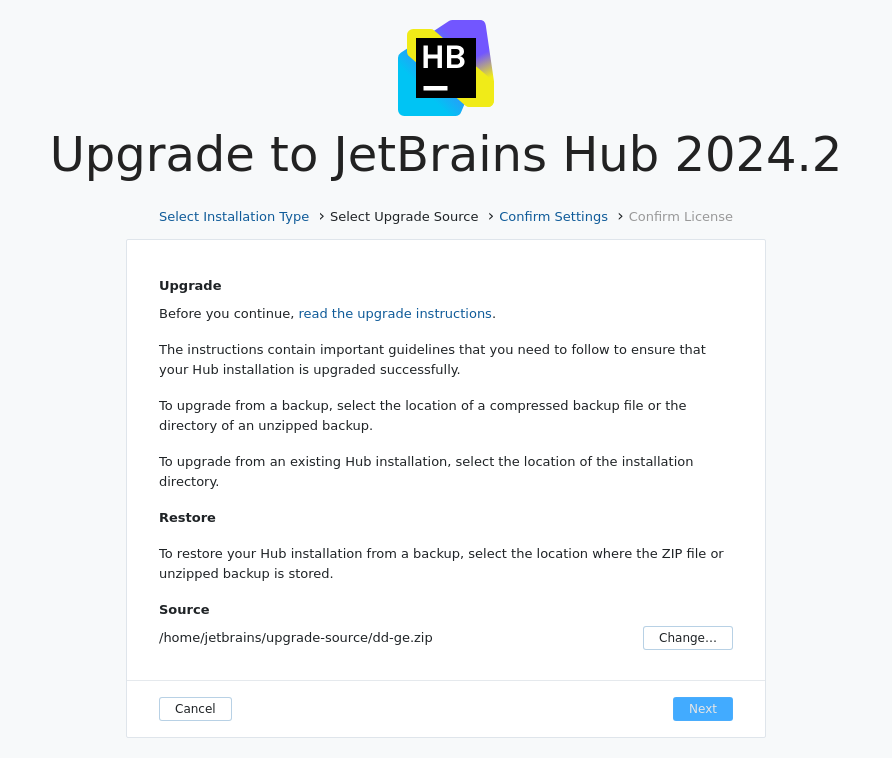
On the Select Upgrade Source page, click the Select button and select the backup file as an upgrade source.

Click Next.
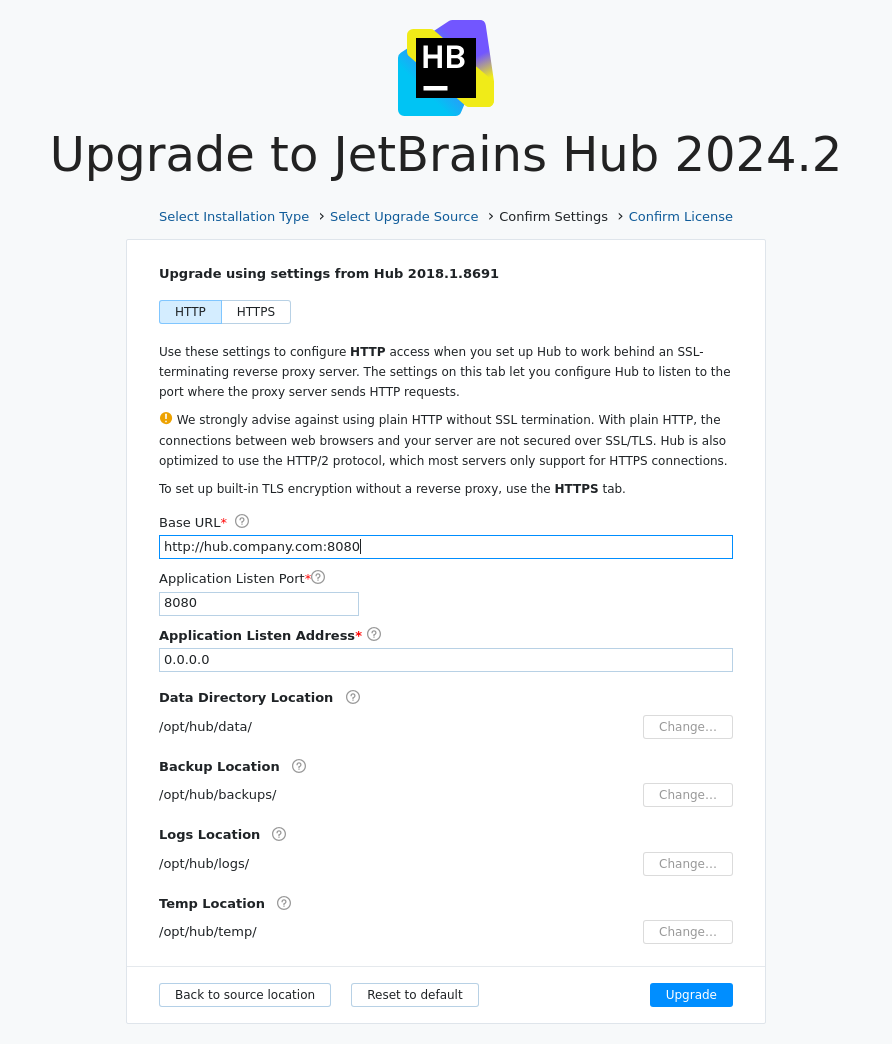
On the Confirm Settings page, review the system settings.

When done, click Upgrade.
Hub launches its components.
Do not close the page in the browser until the setup is complete. When the Hub server is ready, you are redirected to the login page.
Enter the credentials for the Hub administrator account and click the Log in button.
Hub opens to the Users page.
Your Hub installation is upgraded and ready to use.