Develop a basic JavaFX application
In this tutorial, we transform the sample application created by IntelliJ IDEA into a basic JavaFX Hello World application.
For more information on how to configure a sample application, refer to Create a new JavaFX project.
Rename the Controller class
To adjust the sample application to your needs, you may want to start with renaming the files. For example, let's rename the Controller class to SampleController.
In the editor, place the caret at the class name and from the main menu, select Refactor | Rename Shift+F6.
Controlleris now highlighted.Type
SamplebeforeControllerand Press Enter to indicate that you have completed the refactoring.Switch to sample.fxml in the editor and note that the value of the
GridPanel fx:controllerattribute has changed from"sample.Controller"to"sample.SampleController".
Add a button
In the interface of our application, let's define a button that is going to show Hello World! after you click it.
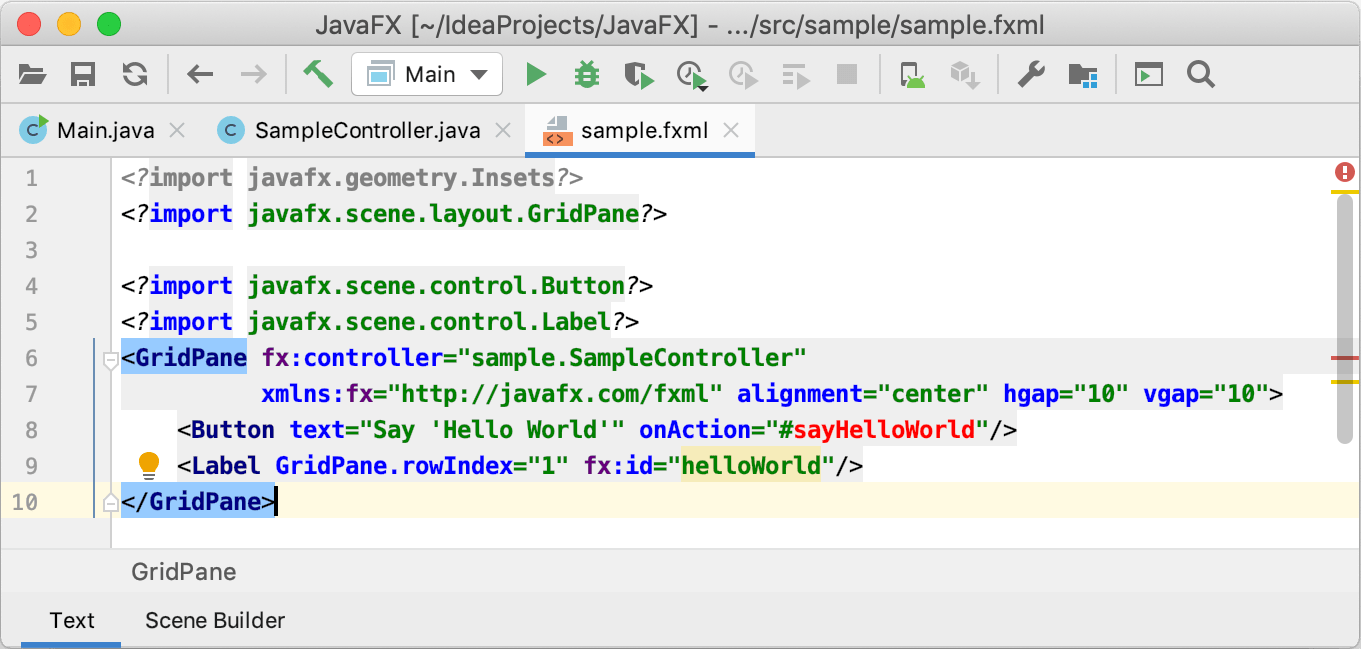
Add the following two elements between the opening and closing <GridPane> tags in the file sample.fxml:
sayHelloWorld is shown in red and helloWorld is highlighted. This means that IntelliJ IDEA cannot resolve the corresponding references. Let's fix this.

Complete the code for SampleController
Let's define the field helloWorld in the SampleController class. We will also add the corresponding event handler method sayHelloWorld that will set the text for the helloWorld label.
In sample.fxml, place the caret at
helloWorldand press Alt+Enter.Select Create Field 'helloWorld'.
IntelliJ IDEA switches to SampleController.java where the IDE has added the declaration of the field
helloWorld. Press Enter to quit the refactoring mode.Also note the import statement that has just been added
import javafx.scene.control.Label;and the iconto the left of the field declaration. This is a navigation icon; click it to go back to sample.fxml.

Place the caret at
sayHelloWorldand press Alt+Enter.Select Create Method 'void sayHelloWorld(ActionEvent)'.
IntelliJ IDEA adds the corresponding method declaration to SampleController.java.
Press Shift+Enter to quit the refactoring mode and start a new line.
Type the following code to set the text for the label:
helloWorld.setText("Hello World!");
Run the application
At this step, the code is ready. Let's run the application to see the result.
Click
on the toolbar or press Shift+F10.
The application window now shows the Say 'Hello World' button.
Click this button to display the Hello World! text.

Style the UI with CSS
Let's change the appearance of the UI by adding a style sheet and defining formatting styles.
In the file sample.fxml, add a reference to sample.css that we haven't created yet.
Add the
stylesheetsattribute within the opening<GridPane>tag:stylesheets="/sample/sample.css"Press Alt+Enter and select Create File sample.css

When the .css file is created, add the following style definitions.
The first of the styles makes the background in the application window "bisque" and the second one - sets the font size for the
Hello World!text to 20 pixels..root { -fx-background-color: bisque; } .label { -fx-font-size: 20; }Click
on the toolbar or press Shift+F10 to run the application.
