Export an IntelliJ IDEA project to Eclipse
Before you start exporting a project, make sure that the Eclipse Integration plugin is enabled.
Export a project to Eclipse
When you export an IntelliJ IDEA project to Eclipse, it results in creating Eclipse project files .project and .classpath for each module file .iml in the module directory that contains the content root.
Go to .
The Export to Eclipse dialog displays the list of modules that have not been converted and switched to use the Eclipse format yet (the modules that have the IntelliJ IDEA module format .iml).

Select the modules you want to export.
Select the suggested options if necessary:
Convert selected modules into Eclipse-compatible format: convert the modules selected in the Modules to export to the Eclipse-compatible format.
Export non-module libraries: IntelliJ IDEA creates a User Library configuration file for Eclipse *.userlibraries, containing definitions of all external libraries used in the project.
Path to resulting .userlibraries: the path to the generated *.userlibraries file. This field is available when the Export non-module libraries option is selected.
Click OK.
The project is exported to the same directory. The Project tool window displays the newly created Eclipse files.

Convert a module to the Eclipse-compatible format
Go to Control+Alt+Shift+S or click
on the toolbar.
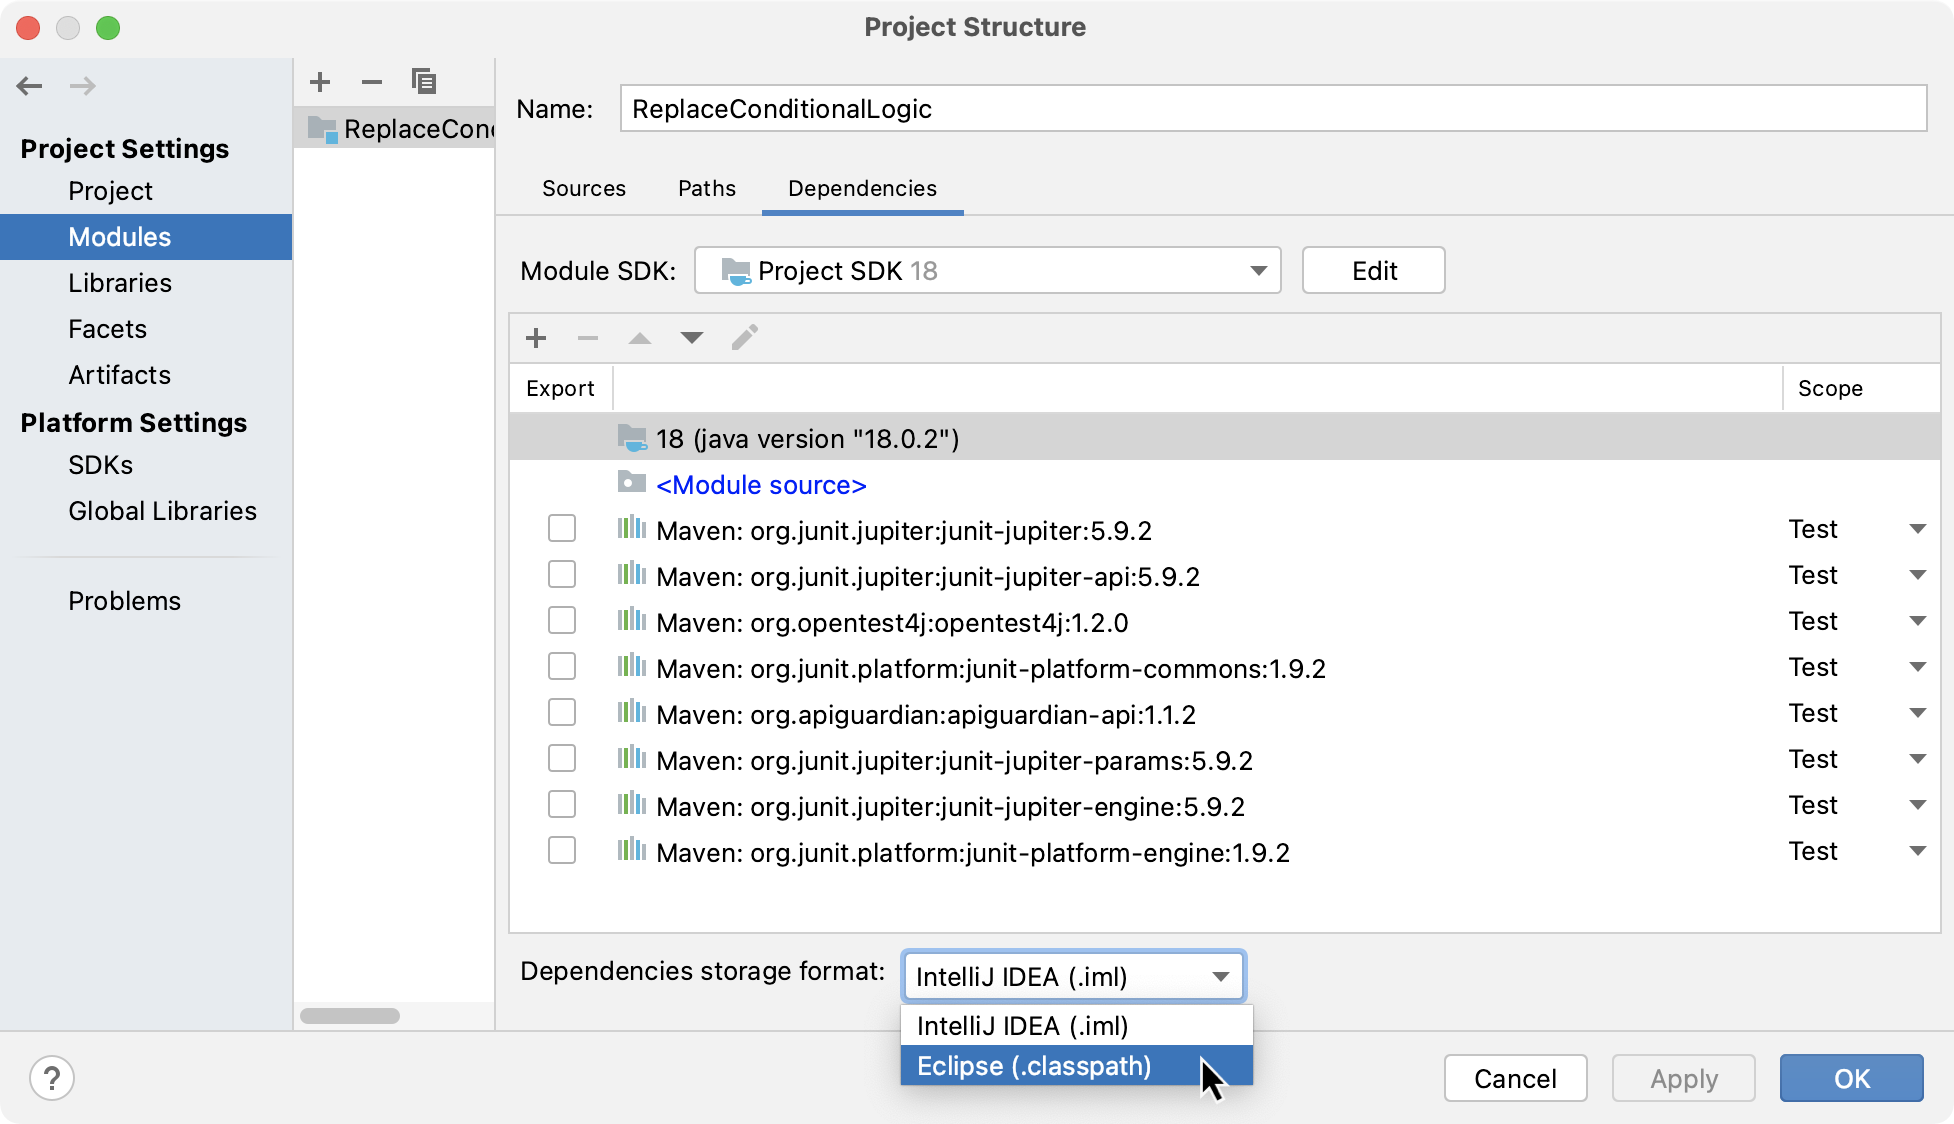
Select the module you want to convert and switch to the Dependencies tab.
From the Dependencies storage format list, select Eclipse (.classpath).
Click Apply to save the changes and close the dialog.
