Tutorial: Your first Jakarta EE application
This tutorial describes how to create a simple Jakarta Enterprise Edition (EE) web application in IntelliJ IDEA. The application will include a single JSP page that shows Hello, World! and a link to a Java servlet that also shows Hello, World!.
You will create a new Jakarta EE project using the web application template, tell IntelliJ IDEA where your application server is located, then use a run configuration to build the artifact, start the server, and deploy the artifact to it.
Here is what you will need:
IntelliJ IDEA Ultimate | Java Enterprise / Jakarta Enterprise development is not supported in the free IntelliJ IDEA Community Edition. For more information, refer to IntelliJ IDEA Ultimate vs IntelliJ IDEA Community Edition |
Relevant plugins | By default, the following necessary plugins are bundled and enabled in IntelliJ IDEA Ultimate. If something does not work, make sure that the following plugins are enabled:
Install and enable the GlassFish plugin as described in Install plugins. |
Java SE Development Kit (JDK) version 1.8 or later | You can get the JDK directly from IntelliJ IDEA as described in Java Development Kit (JDK) or download and install it manually, for example: Oracle JDK or OpenJDK. |
Tomcat | The Tomcat application server version 7 or later. |
GlassFish | The GlassFish application server version 4.0 or later. You can get the latest release from the official repository. The Web Profile subset should be enough for the purposes of this tutorial. |
Web browser | You will need a web browser to view your web application. |
Create a new Jakarta EE project
IntelliJ IDEA includes a dedicated wizard for creating Jakarta Enterprise projects based on various Jakarta EE implementations. In this tutorial, we will create a simple web application.
In the main menu, go to .
In the New Project dialog, select Jakarta EE.
Enter a name for your project:
JakartaEEHelloWorld.Select the Web application template, Maven as a build tool, and use Oracle OpenJDK 17 as the project SDK. Don't select or add an application server, we will do it later.
Click Next to continue.

In the Version field, select Jakarta EE 11 because that's what Tomcat 11 used in this tutorial is compatible with.
In the Version field, select Jakarta EE 9.1 because that's what GlassFish 6.2.5 used in this tutorial is compatible with.
In the Dependencies list, you can see that the web application template includes only the Servlet framework under Specifications.

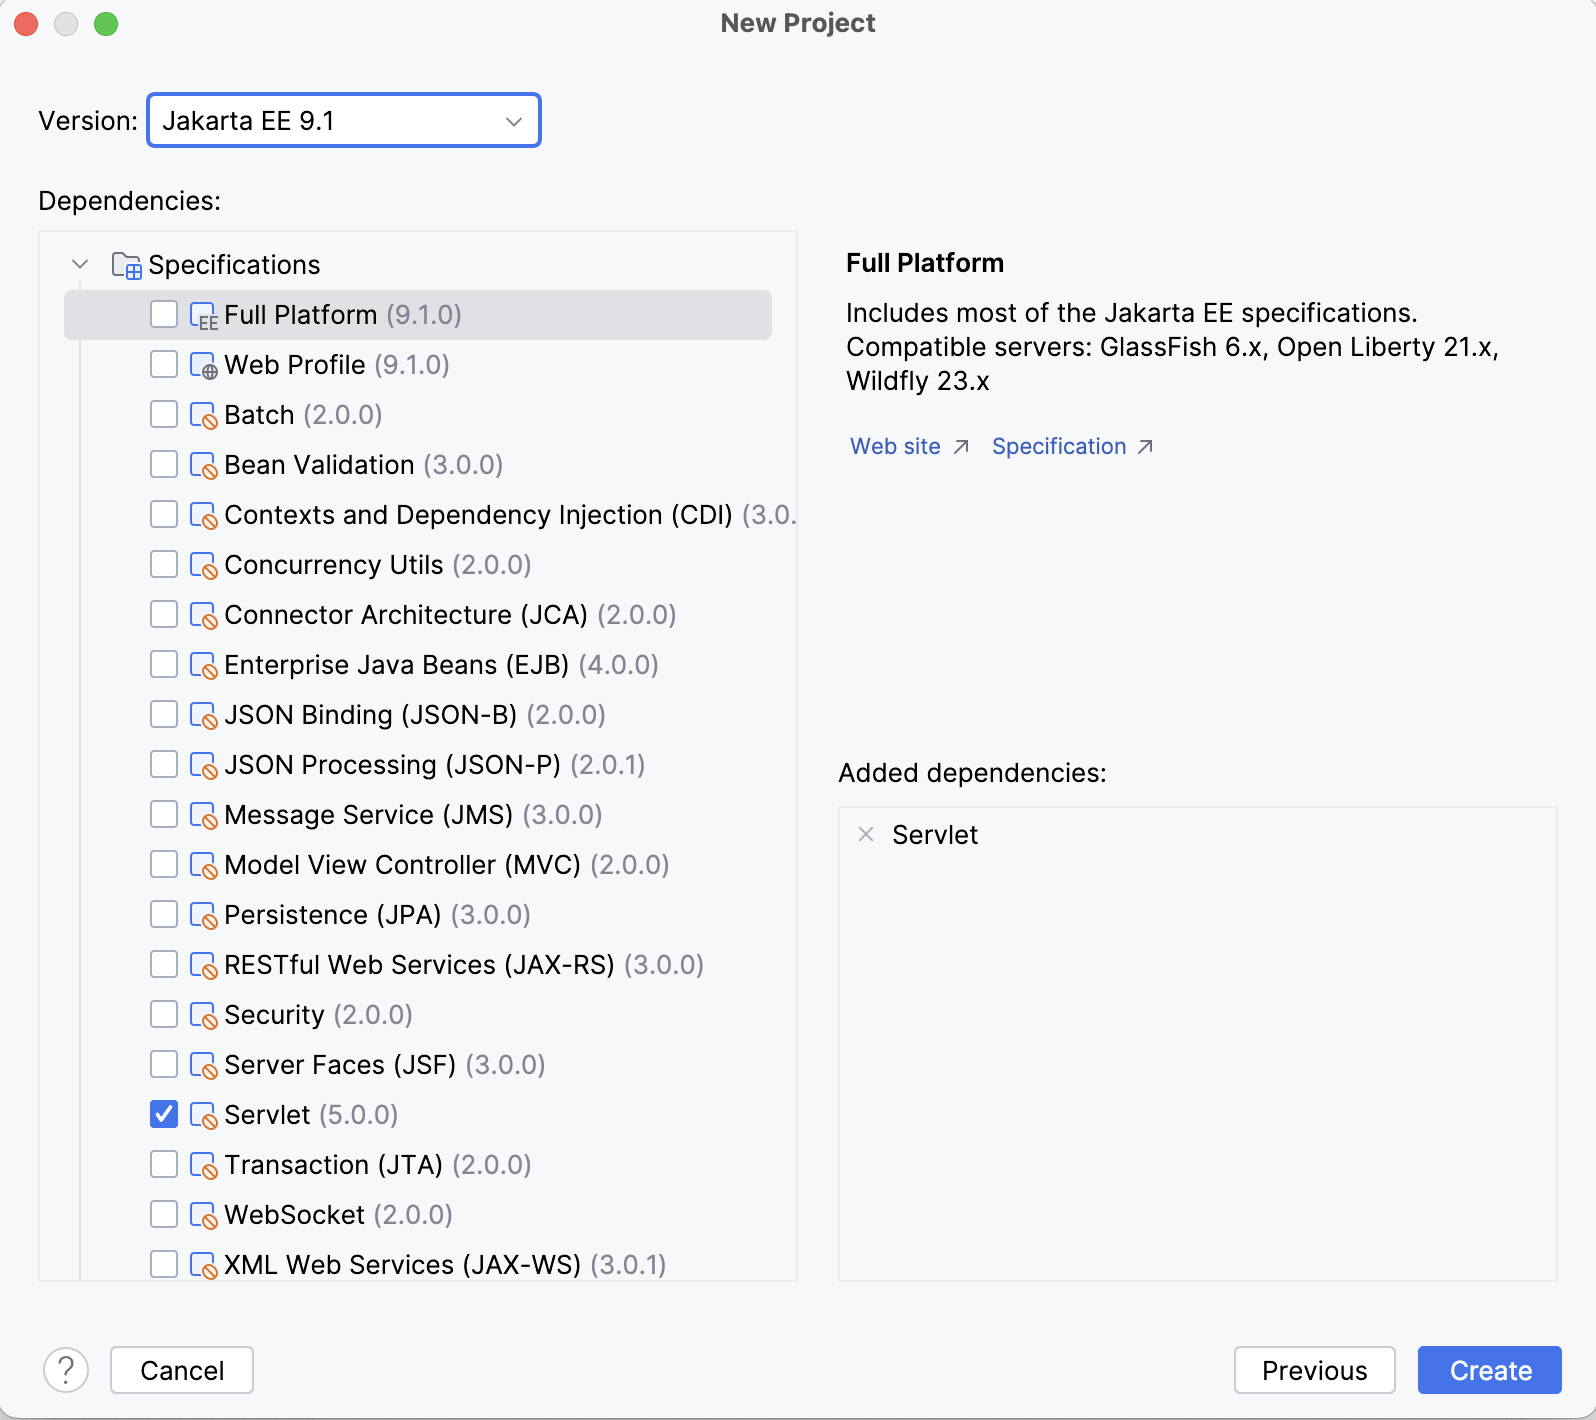
Click Create.
Explore the default project structure
IntelliJ IDEA creates a project with some boilerplate code that you can build and deploy successfully.
pom.xml is the Project Object Model with Maven configuration information, including dependencies and plugins necessary for building the project.
<?xml version="1.0" encoding="UTF-8"?> <project xmlns="http://maven.apache.org/POM/4.0.0" xmlns:xsi="http://www.w3.org/2001/XMLSchema-instance" xsi:schemaLocation="http://maven.apache.org/POM/4.0.0 https://maven.apache.org/xsd/maven-4.0.0.xsd"> <modelVersion>4.0.0</modelVersion> <groupId>org.example</groupId> <artifactId>JakartaEEHelloWorld</artifactId> <version>1.0-SNAPSHOT</version> <name>JakartaEEHelloWorld</name> <packaging>war</packaging> <properties> <project.build.sourceEncoding>UTF-8</project.build.sourceEncoding> <maven.compiler.target>21</maven.compiler.target> <maven.compiler.source>21</maven.compiler.source> <junit.version>5.11.0-M2</junit.version> </properties> <dependencies> <dependency> <groupId>jakarta.servlet</groupId> <artifactId>jakarta.servlet-api</artifactId> <version>6.1.0</version> <scope>provided</scope> </dependency> <dependency> <groupId>org.junit.jupiter</groupId> <artifactId>junit-jupiter-api</artifactId> <version>${junit.version}</version> <scope>test</scope> </dependency> <dependency> <groupId>org.junit.jupiter</groupId> <artifactId>junit-jupiter-engine</artifactId> <version>${junit.version}</version> <scope>test</scope> </dependency> </dependencies> <build> <plugins> <plugin> <groupId>org.apache.maven.plugins</groupId> <artifactId>maven-war-plugin</artifactId> <version>3.4.0</version> </plugin> </plugins> </build> </project><?xml version="1.0" encoding="UTF-8"?> <project xmlns="http://maven.apache.org/POM/4.0.0" xmlns:xsi="http://www.w3.org/2001/XMLSchema-instance" xsi:schemaLocation="http://maven.apache.org/POM/4.0.0 https://maven.apache.org/xsd/maven-4.0.0.xsd"> <modelVersion>4.0.0</modelVersion> <groupId>org.example</groupId> <artifactId>JakartaEEHelloWorld</artifactId> <version>1.0-SNAPSHOT</version> <name>JakartaEEHelloWorld</name> <packaging>war</packaging> <properties> <project.build.sourceEncoding>UTF-8</project.build.sourceEncoding> <maven.compiler.target>11</maven.compiler.target> <maven.compiler.source>11</maven.compiler.source> <junit.version>5.9.2</junit.version> </properties> <dependencies> <dependency> <groupId>jakarta.servlet</groupId> <artifactId>jakarta.servlet-api</artifactId> <version>5.0.0</version> <scope>provided</scope> </dependency> <dependency> <groupId>org.junit.jupiter</groupId> <artifactId>junit-jupiter-api</artifactId> <version>${junit.version}</version> <scope>test</scope> </dependency> <dependency> <groupId>org.junit.jupiter</groupId> <artifactId>junit-jupiter-engine</artifactId> <version>${junit.version}</version> <scope>test</scope> </dependency> </dependencies> <build> <plugins> <plugin> <groupId>org.apache.maven.plugins</groupId> <artifactId>maven-war-plugin</artifactId> <version>3.3.2</version> </plugin> </plugins> </build> </project>index.jsp is the starting page of your application that opens when you access the root directory URL. It renders
Hello World!and a link to/hello-servlet.<%@ page contentType="text/html; charset=UTF-8" pageEncoding="UTF-8" %> <!DOCTYPE html> <html> <head> <title>JSP - Hello World</title> </head> <body> <h1><%= "Hello World!" %> </h1> <p/> <a href="hello-servlet">Hello Servlet</a> </body> </html>The
HelloServletclass extendsHttpServletand is annotated with@WebServlet. It processes requests to/hello-servlet: a GET request returns HTML code that rendersHello World!.package com.example.demo; import java.io.*; import javax.servlet.http.*; import javax.servlet.annotation.*; @WebServlet(value = "/hello-servlet") public class HelloServlet extends HttpServlet { private String message; public void init() { message = "Hello World!"; } public void doGet(HttpServletRequest request, HttpServletResponse response) throws IOException { response.setContentType("text/html"); // Hello PrintWriter out = response.getWriter(); out.println("<html><body>"); out.println("<h1>" + message + "</h1>"); out.println("</body></html>"); } public void destroy() { } }
Use the Project tool window to browse and open files in your project or press Ctrl+Shift+N and type the name of the file.
Configure the application server
Let IntelliJ IDEA know where the GlassFish Tomcat application server is located.
Press Ctrl+Alt+S to open settings and then select .
Click
and select Glassfish Server Tomcat.
Specify the path to the GlassFish Tomcat server install location. IntelliJ IDEA detects and sets the name and version appropriately.
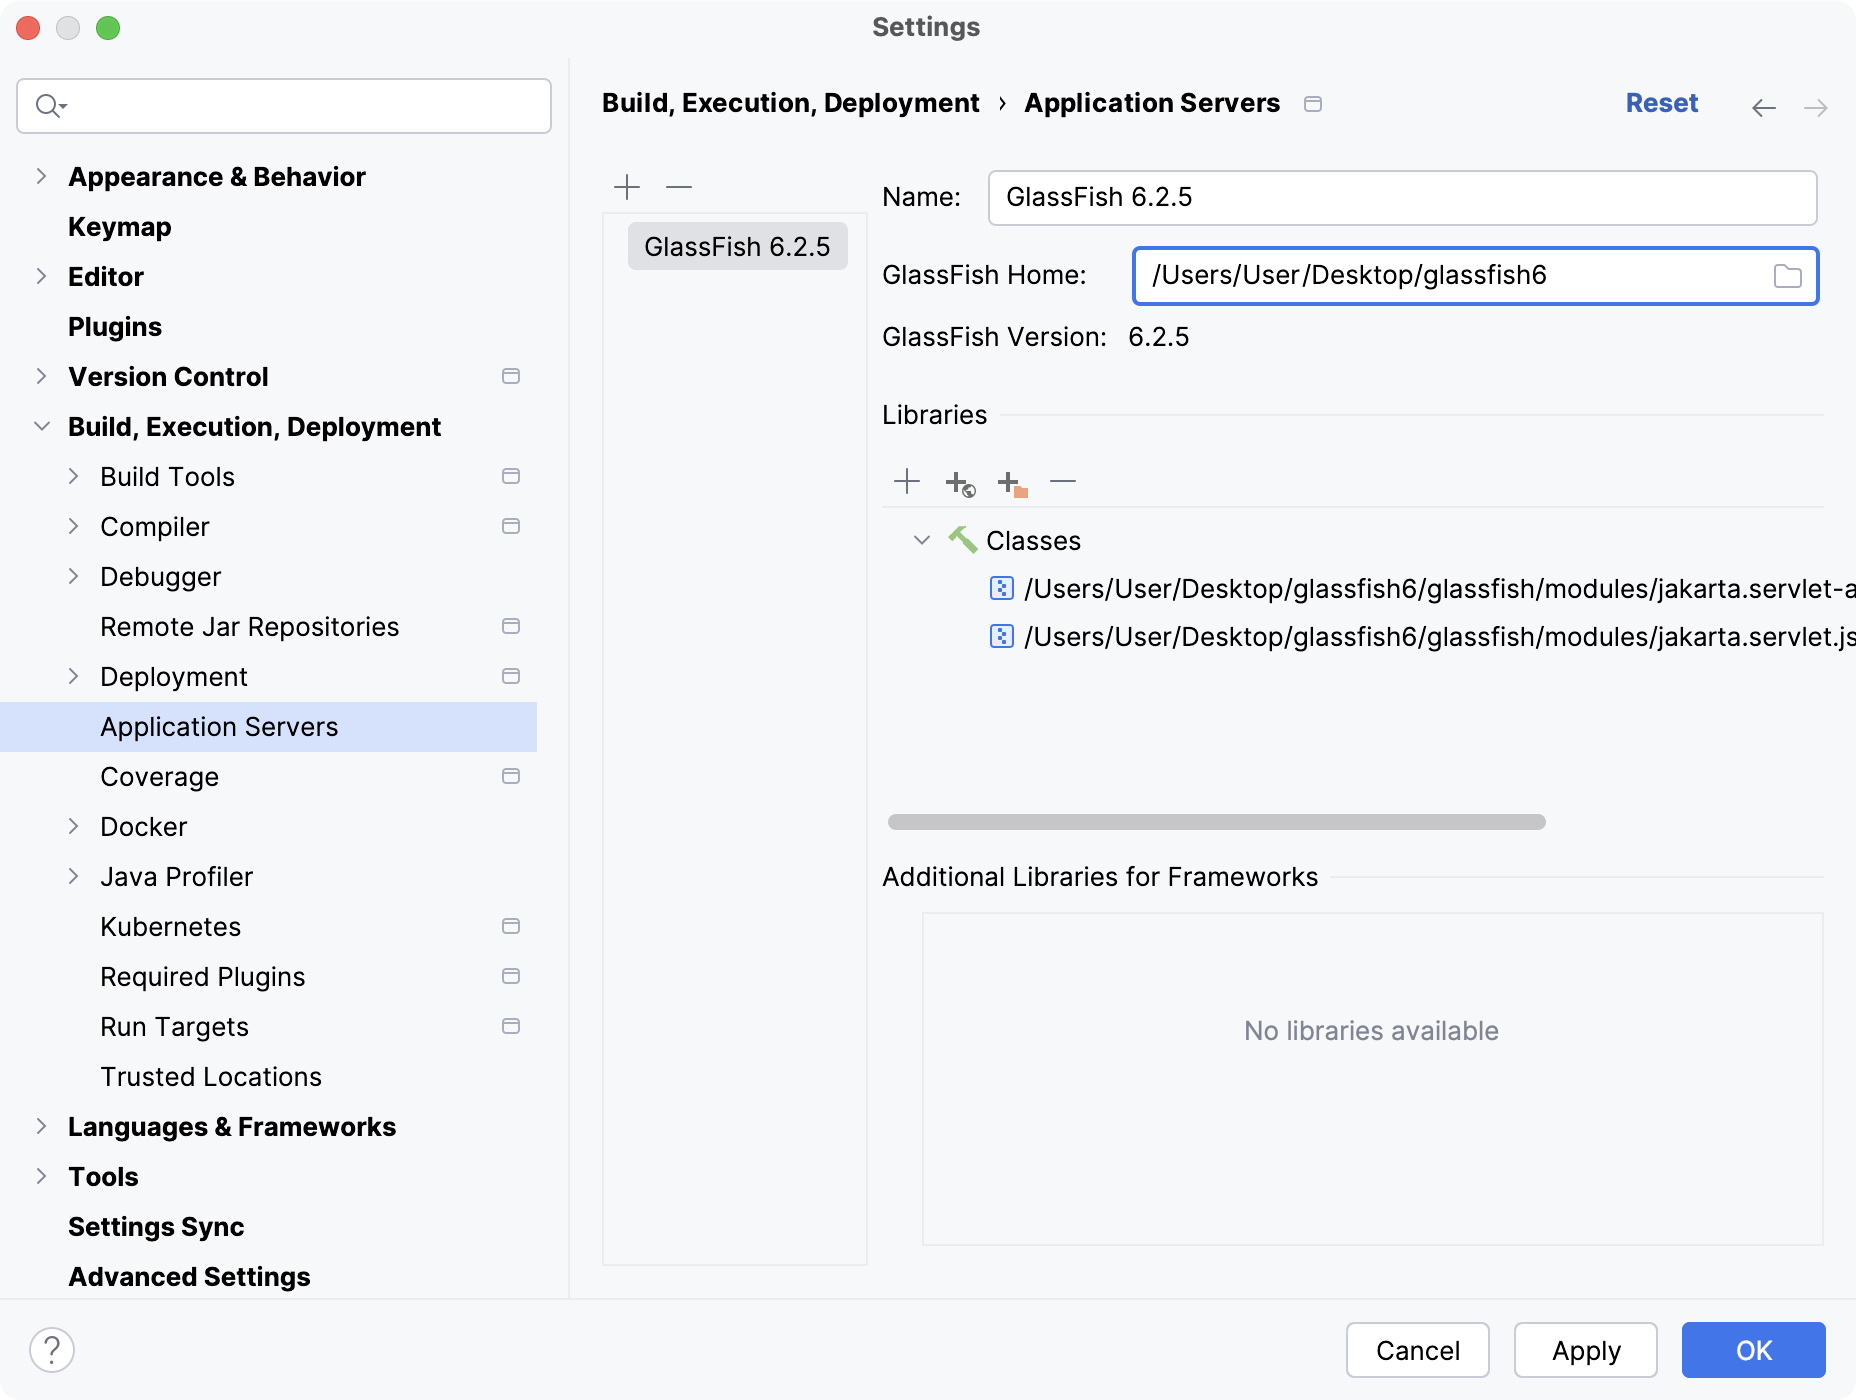

Create a run configuration
IntelliJ IDEA needs a run configuration to build the artifacts and deploy them to your application server.
In the main menu, go to .
In the Run/Debug Configurations dialog, click
, expand the Glassfish Server Tomcat Server node, and select Local.
Fix any warnings that appear at the bottom of the run configuration settings dialog.

Most likely, you will need to fix the following:
On the Server tab, set the Server Domain to
domain1.On the Deployment tab, add the artifact that you want to deploy:
JakartaEEHelloWorld:war exploded
On the Server tab, set the URL to point to the root resource:
http://localhost:8080/JakartaEEHelloWorld_war_exploded/http://localhost:8080/JakartaEEHelloWorld-1.0-SNAPSHOT/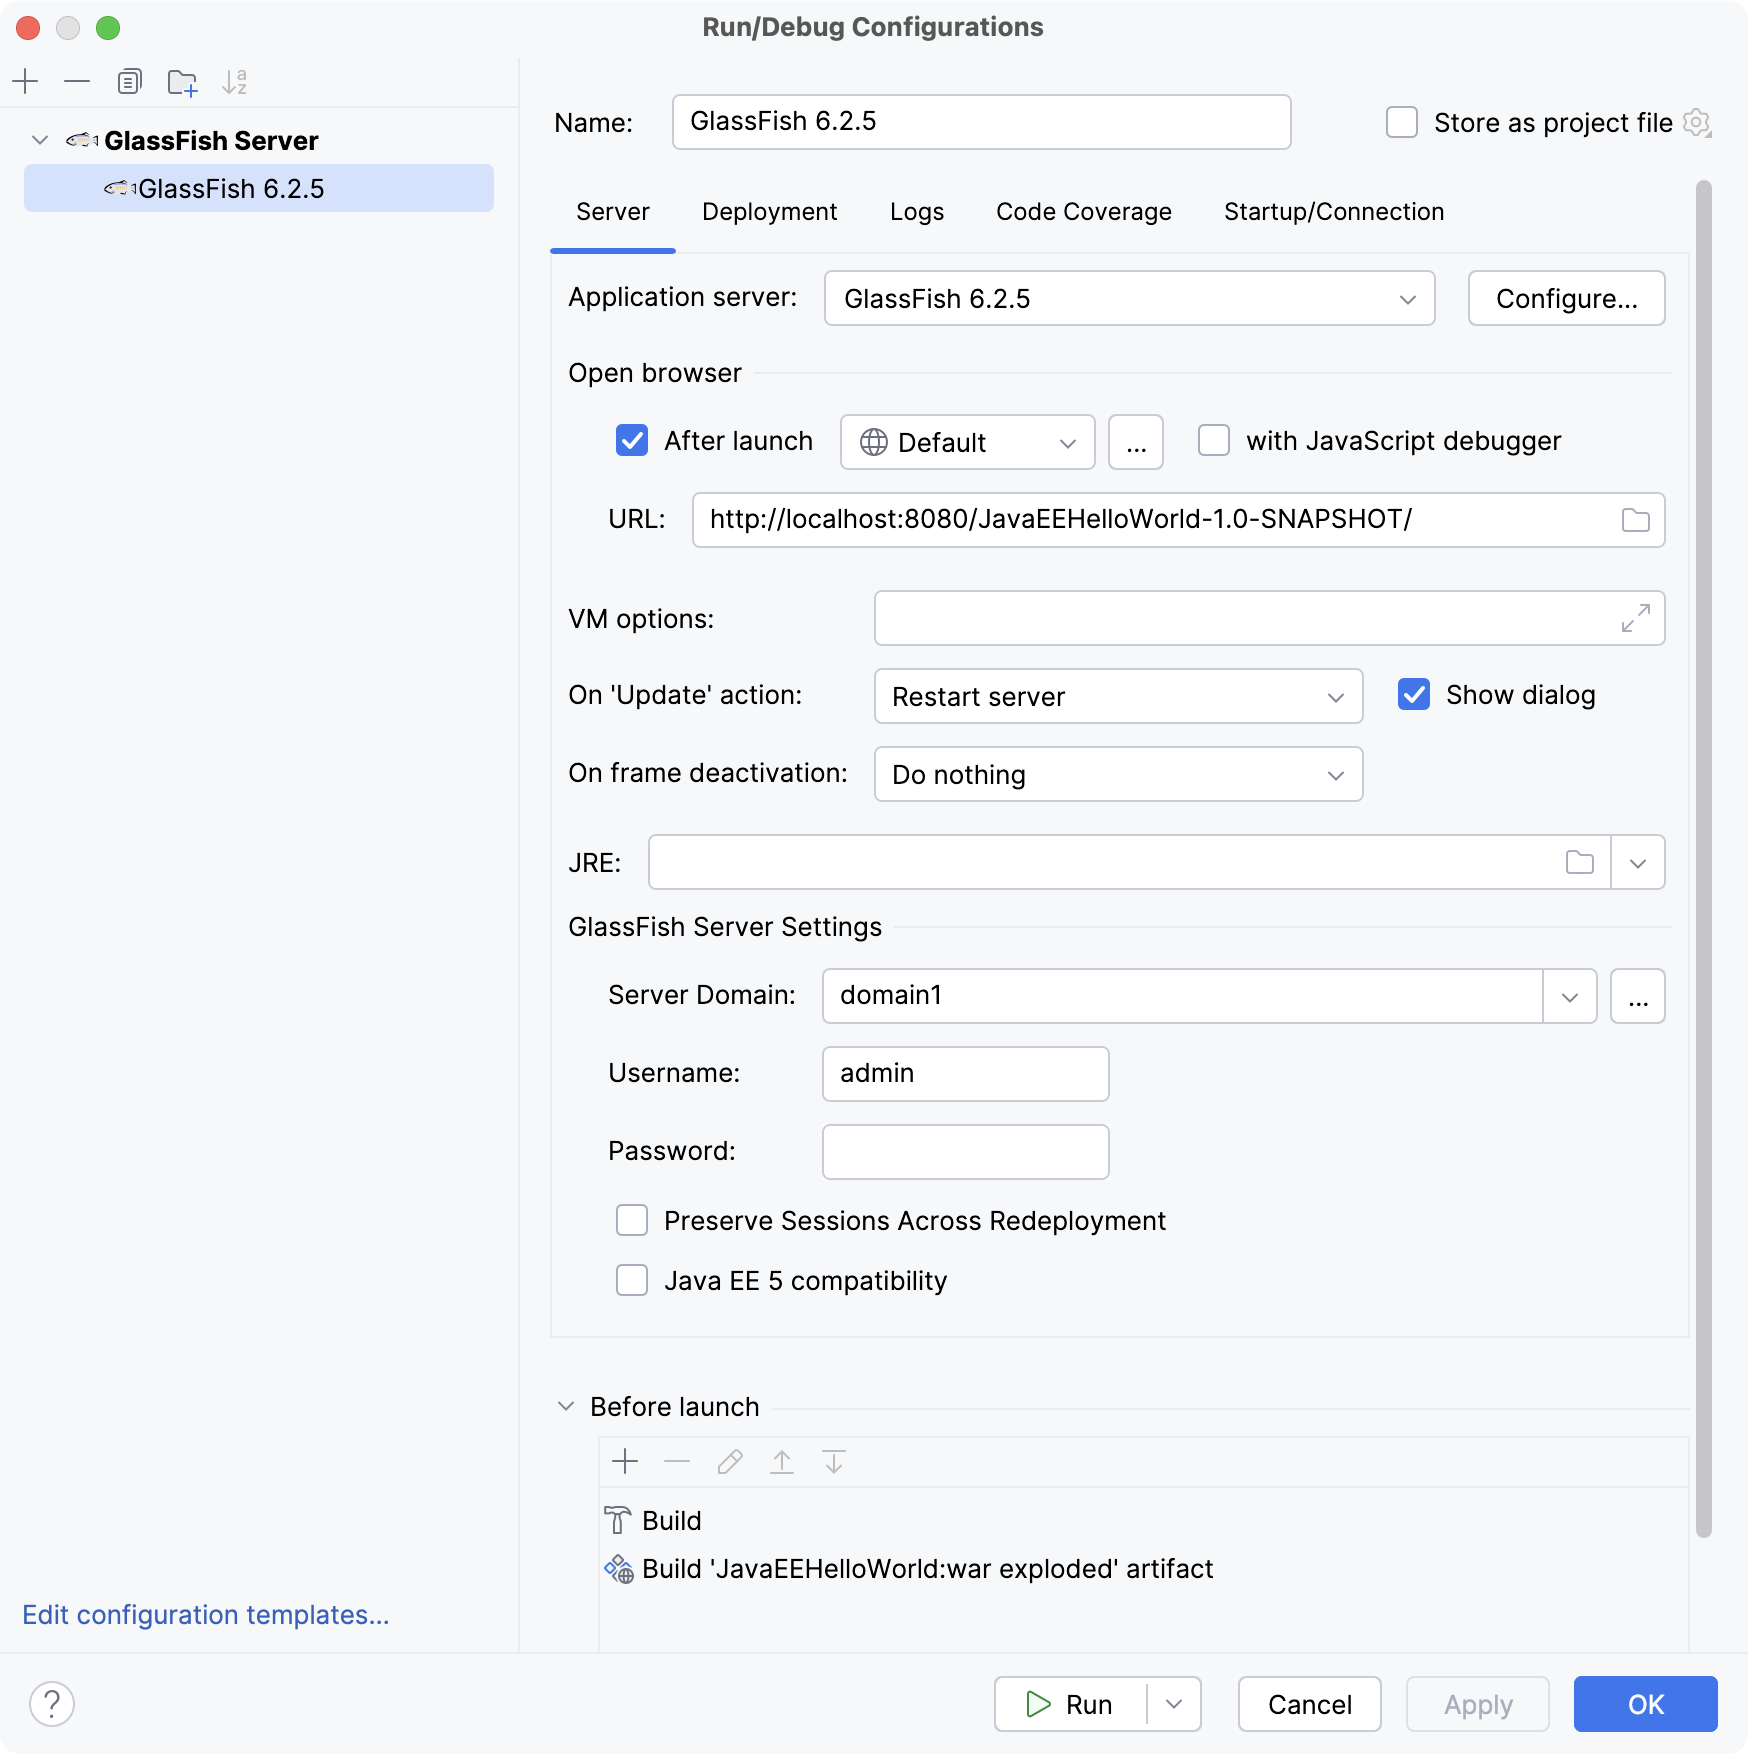

Click OK to save the run configuration.
To run the configuration, press Alt+Shift+F10 and select the created application server configuration.
Alternatively, if you have your run configuration selected in the main toolbar at the top, you can click
in the main toolbar or press Shift+F10 to run it.
This run configuration builds the artifacts, then starts the GlassFish Tomcat server, and deploys the artifacts to the server. You should see the corresponding output in the Services tool window.
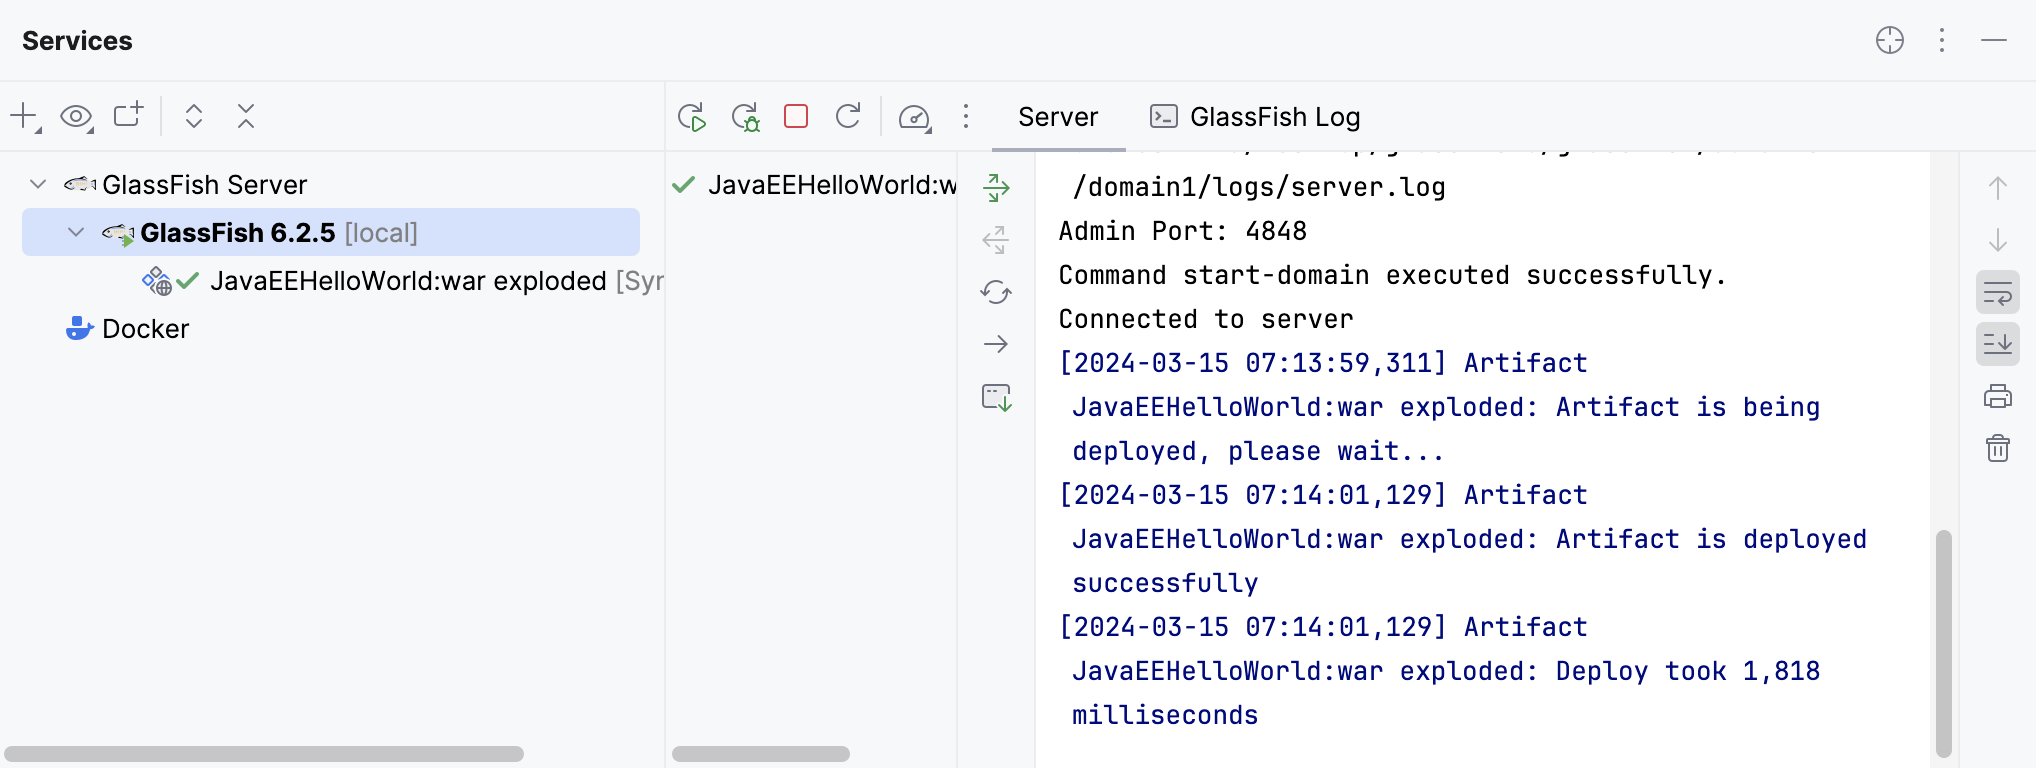

Once this is done, IntelliJ IDEA opens the specified URL in your web browser.

If not, try opening the URL yourself: http://localhost:8080/JakartaEEHelloWorld_war_exploded/ http://localhost:8080/JavaEEHelloWorld-1.0-SNAPSHOT/
Modify the application
Whenever you change the source code of the application, you can restart the run configuration to see the changes. But this is not always necessary, especially when you can't restart the server. Most of the changes are minor and don't require rebuilding the artifacts, restarting the server, and so on. Let's change the JSP page of the application.
Open index.jsp and change the greeting from
Hello WorldtoA better greeting.In the Services tool window, click
or press Ctrl+F10.
In the Update dialog, select Update resources because the JSP page is a static resource. Click OK.
Refresh the application URL in your web browser to see the new string:
A better greeting.
You can configure the default update action in the run configuration settings: go to in the main menu. Change the On 'Update' action option under the Server tab of the GlassFish Tomcat run configuration settings.
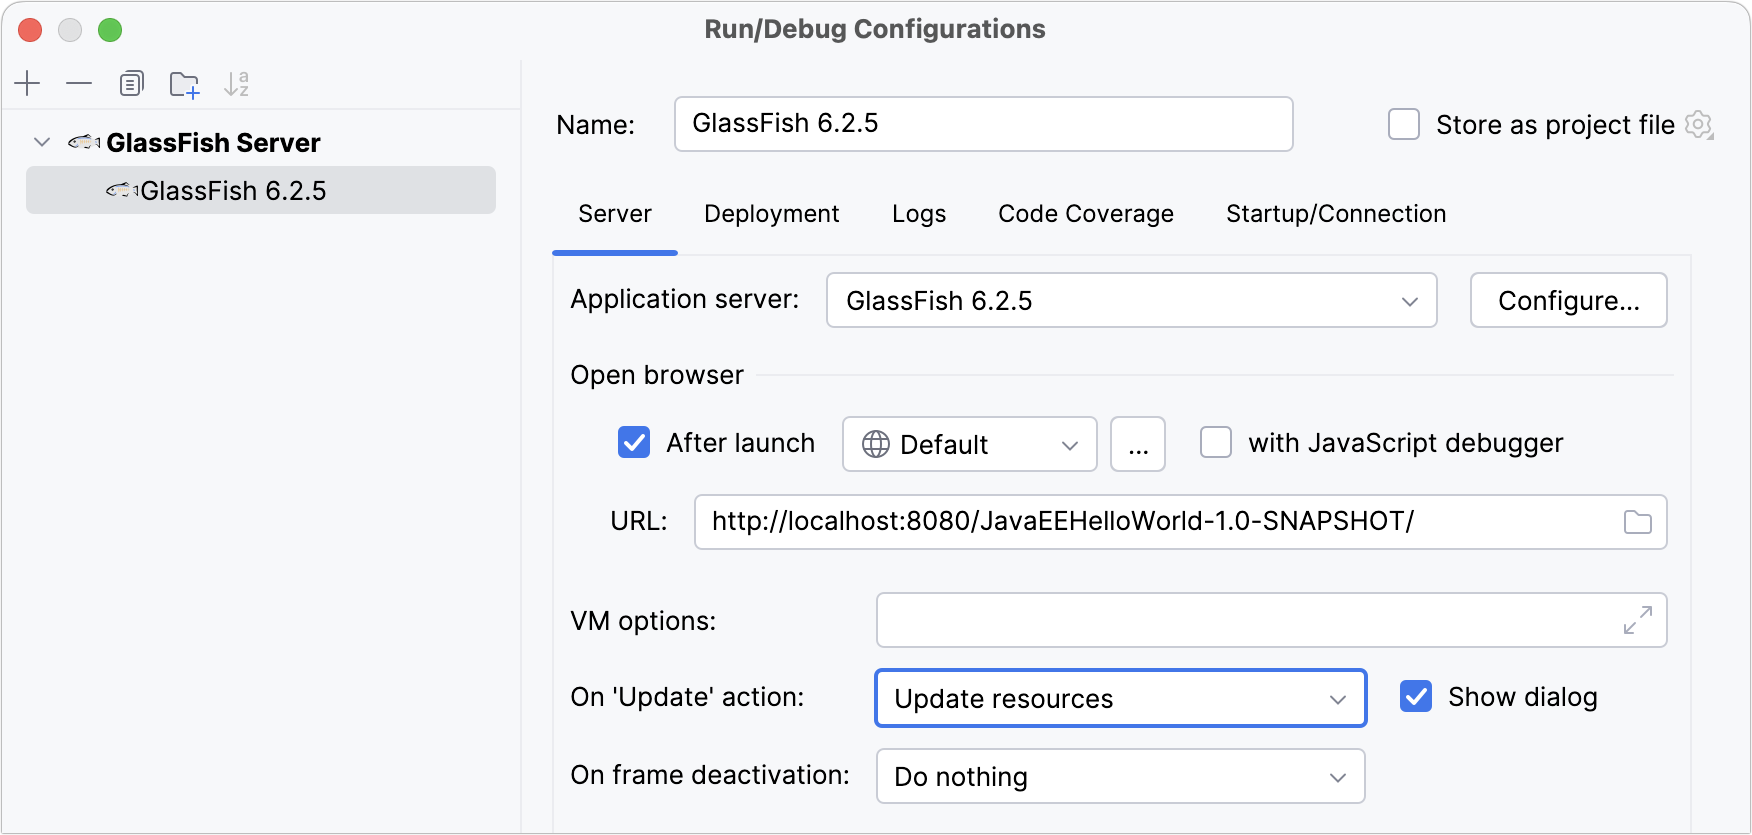

With the On frame deactivation option, you can configure to update your resources and classes without redeploying and restarting the server whenever you change focus from IntelliJ IDEA. In this case, you won't even have to use the Update Application action, just switch to your web browser and refresh the page.
Package the application into a WAR and deploy it on a running server
In the previous steps, we deployed the application using an exploded artifact, where all files are uncompressed. This is useful during the first stages of development because it allows you to update individual resources and classes without redeploying. When you are happy with your application and ready to share it with others by deploying to a remote server, it is better to use the compressed web archive (WAR) format.
Let's add a Remote GlassFish Remote Tomcat run configuration to deploy the WAR artifact to a running server. This assumes that you did not terminate the running server from the previous steps.
In the main menu, go to .
In the Run/Debug Configurations dialog, click
, expand the GlassFish Server Tomcat node, and select Remote.
Change the name of this run configuration to distinguish it, for example:
Remote GlassFish 6.2.5Remote Tomcat 10.1.5.Open the Deployment tab, click
above the table of artifacts to deploy, and select Artifact. Select the
JakartaEEHelloWorld:warartifact and click OK.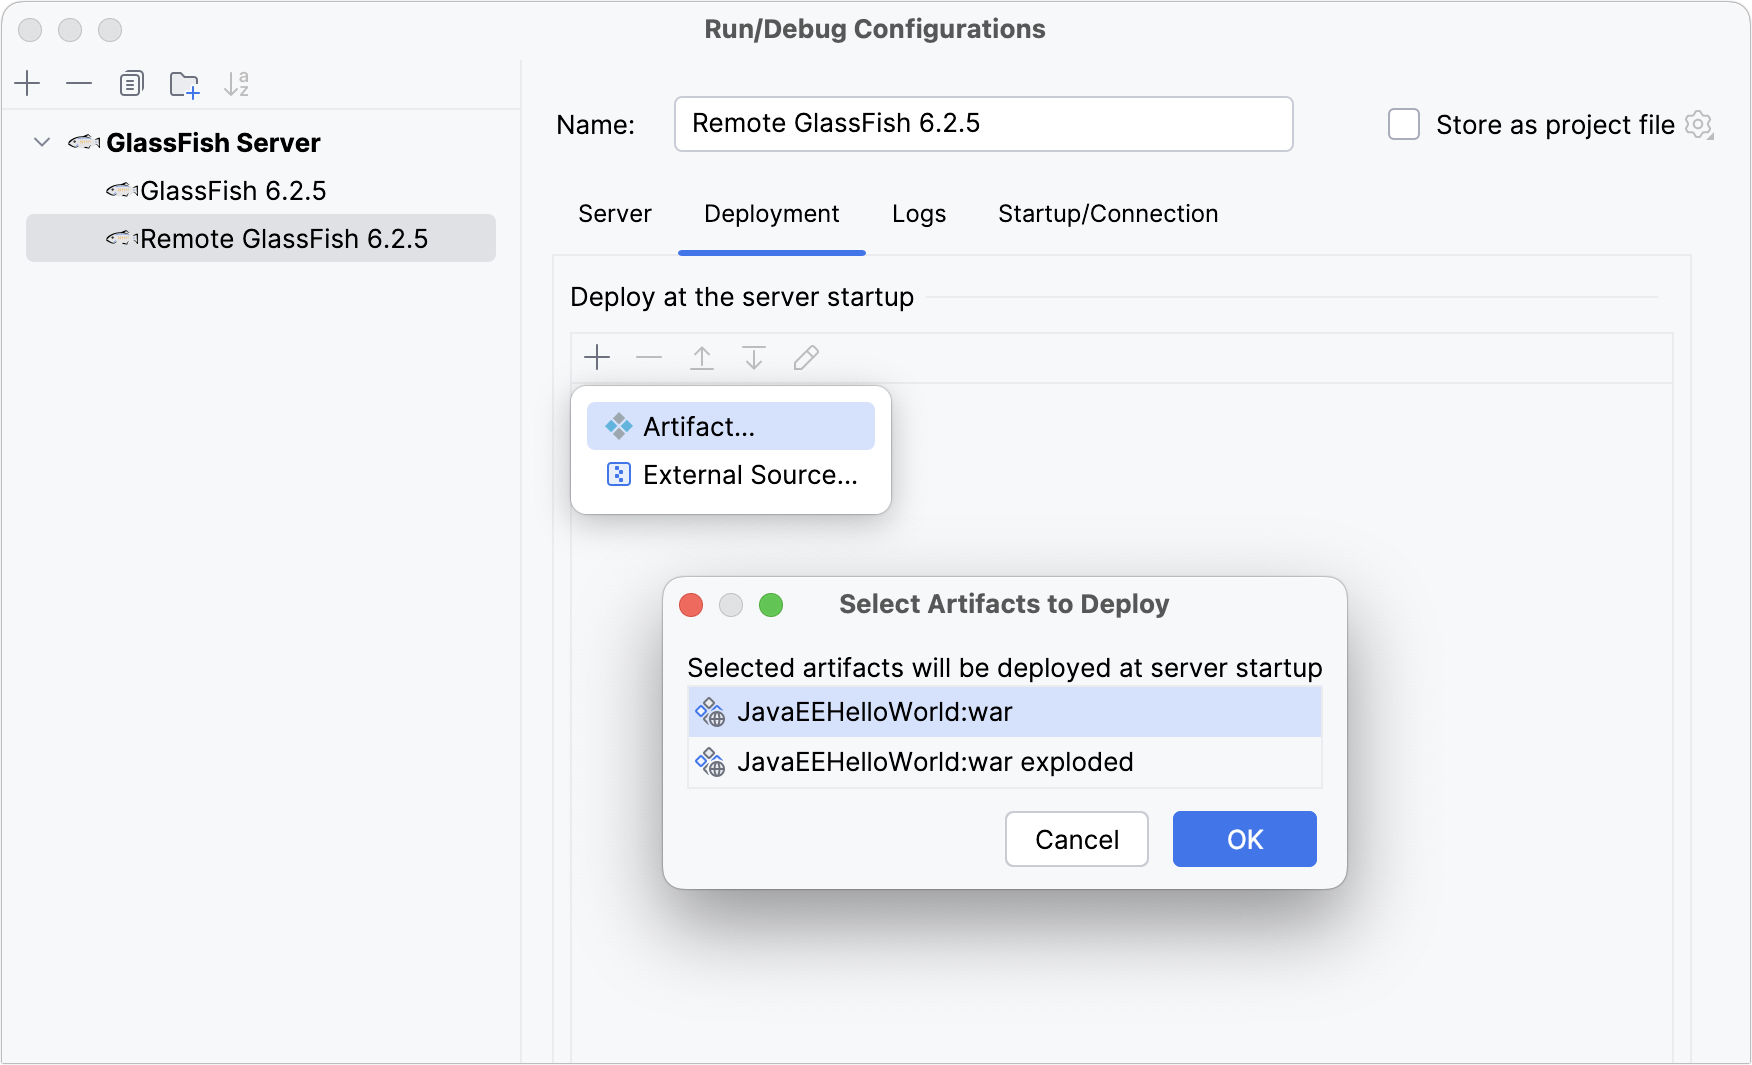

Click OK to save the remote run configuration.
Open index.jsp and change the greeting to
Hello from WAR!.Select the new run configuration in the main toolbar and click
or press Shift+F10.


The new configuration builds the WAR artifact and deploys it to the running server. Refresh the URL and see the new greeting: Hello from WAR!
Troubleshooting
Compatibility with Jakarta EE
If you get a 404 error, make sure you have selected the Jakarta EE specification version that is compatible with your version of GlassFish when creating the project.
For more information, refer to the GlassFish version compatibility.
Unable to connect to Tomcat
If you see an error message like Unable to connect to the localhost:1099 when trying to deploy the application on a remote Tomcat server, try these steps:
Make sure the Tomcat server is running. For example, launch the local Tomcat run configuration described above.
Configure JMX authentication or (if it's not a production environment), disable it by passing the
-Dcom.sun.management.jmxremote.authenticate=falseVM option before running the server on which you want to deploy the application.
Older IntelliJ IDEA versions
If you are using IntelliJ IDEA version 2020.2.2 or earlier, the New Project wizard will not add all of the necessary dependencies required for Tomcat. In this case, open pom.xml and add the following dependencies:
For example, in version 2020.2.3, the generated pom.xml looks like this:
What next?
In this tutorial, we created and deployed a simple Jakarta EE application. To extend this knowledge, you can create a RESTful web service as described in Tutorial: Your first RESTful web service.