Create SSH configurations
In IntelliJ IDEA, you can save the remote server SSH connection parameters as a dedicated SSH configuration. The created configuration can be then used for connecting to SFTP deployment servers, or launching SSH sessions.

Enable the FTP/SFTP/WebDAV Connectivity plugin
This functionality relies on the FTP/SFTP/WebDAV Connectivity plugin, which is bundled and enabled in IntelliJ IDEA by default. If the relevant features are not available, make sure that you did not disable the plugin.
Press Ctrl+Alt+S to open settings and then select .
Open the Installed tab, find the FTP/SFTP/WebDAV Connectivity plugin, and select the checkbox next to the plugin name.
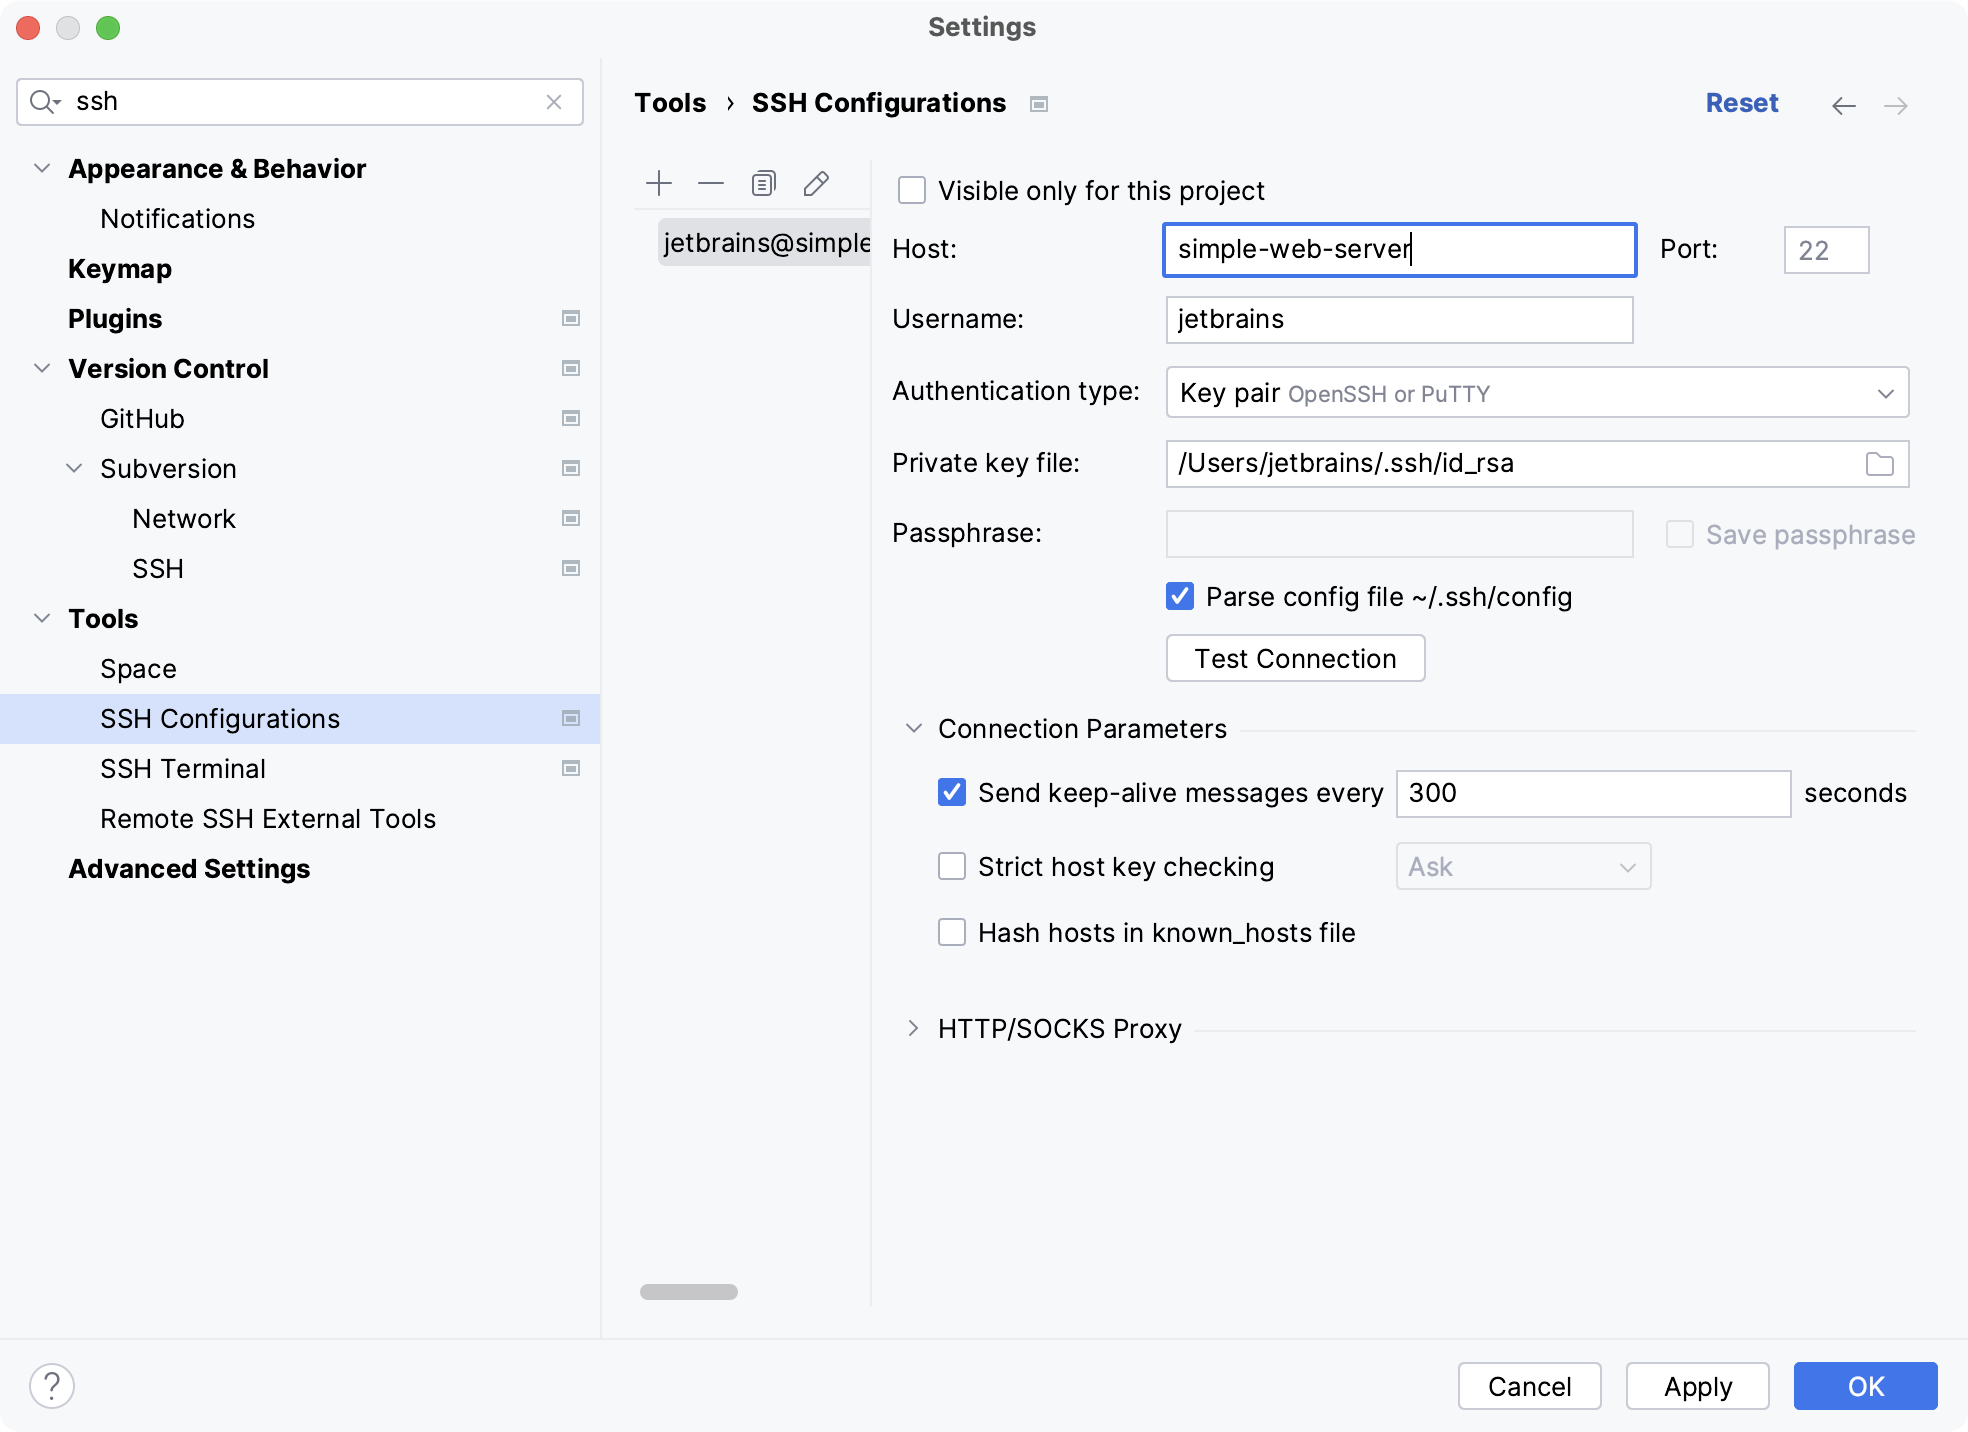
In the Settings dialog (Ctrl+Alt+S) , go to .
In the left-hand pane that lists all the existing SSH configurations, click
.
Use the Visible only for this project checkbox to enable reuse of this server access configuration in other projects.
Select the checkbox to restrict the use of the SSH configuration to the current project. Such SSH configuration cannot be reused outside the current project. It does not appear in the list of available configurations in other projects.
The SSH configurations are stored in the .idea directory together with the project, which allows sharing them between team members through a VCS.
When the checkbox is cleared, the SSH configuration is visible in all IntelliJ IDEA projects. Its settings can be reused across several projects.
In the Host, Username, and Port fields, specify the connection parameters.
Choose the way to authenticate to the server. Do one of the following:
Password: Access the host with a password. To save the password in IntelliJ IDEA, select the Save password checkbox.
Key pair (OpenSSH or PuTTY): Use SSH authentication with a key pair. To apply this authentication method, you must have a private key on the client machine and a public key on the remote server. IntelliJ IDEA supports private keys that are generated with the OpenSSH utility.
Specify the path to the file where your private key is stored and type the passphrase (if any) in the corresponding fields. To have IntelliJ IDEA remember the passphrase, select the Save passphrase checkbox.
OpenSSH config and authentication agent: Use a credentials helper application that manages your SSH keys, such as ssh-agent or Pageant (Windows only).
For more information about working with SSH keys, refer to the Generating a new SSH key and adding it to the ssh-agent tutorial.
Click the Test Connection button to make sure that the settings are correct and IntelliJ IDEA can connect to the target server.