Gradle tasks
A Gradle task is a small piece of work that is performed in the Gradle build cycle. For more information on the task concept, see the Gradle documentation.
IntelliJ IDEA lets you run, debug and manage Gradle tasks in your project.
Run Gradle tasks
You can use several ways to run Gradle tasks such as run them from the Run Anything window, with a run configuration, from a context menu, and even run several tasks with one run configuration.
Run a Gradle task in the Run Anything window
In the Gradle tool window, on the toolbar, click
. Alternatively, press Ctrl twice to open the Run Anything window.
In the Run Anything window, start typing a name of the task you want to execute. To execute several tasks, enter task names using space to separate each new task. Alternatively, scroll down to the Gradle tasks section and select the task you need. Press Enter.
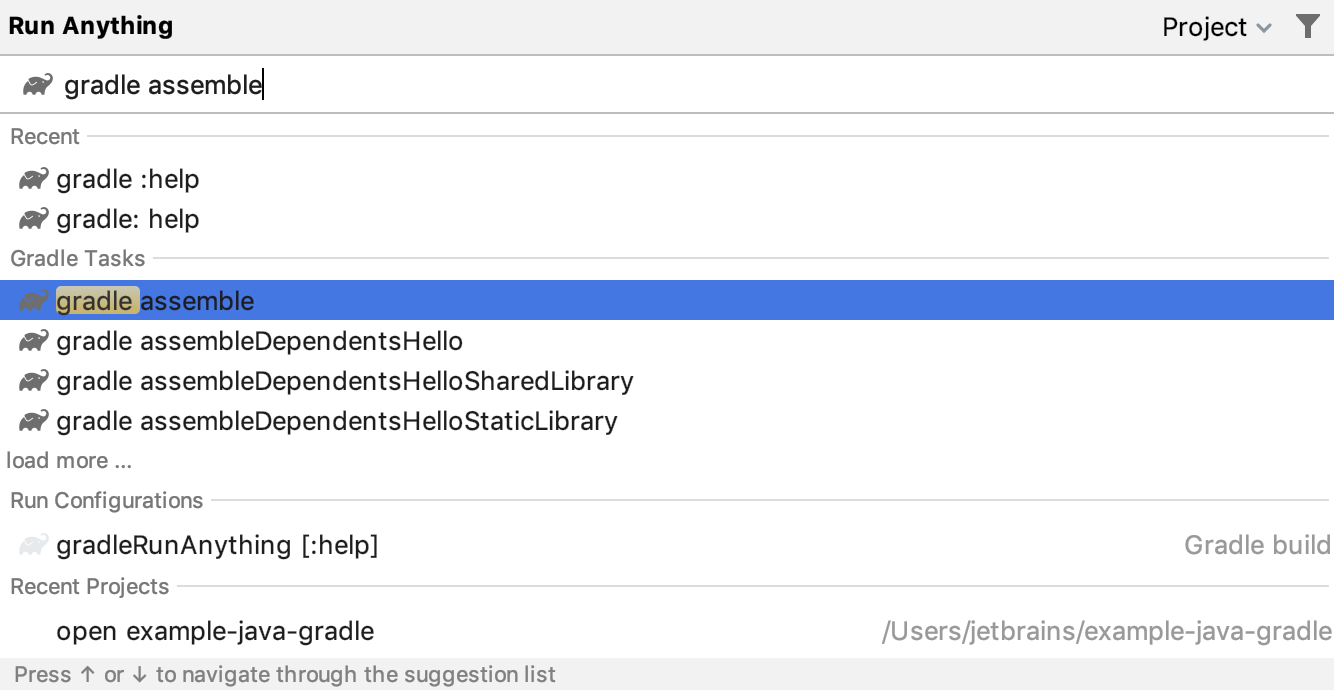
If you have linked projects and want to run a task for the specified project then in the Run Anything window, in the top-right corner, from the Project list, select the name of the project and in the search field enter the name of your task.
IntelliJ IDEA runs the specified task and displays the result in the Run tool window.
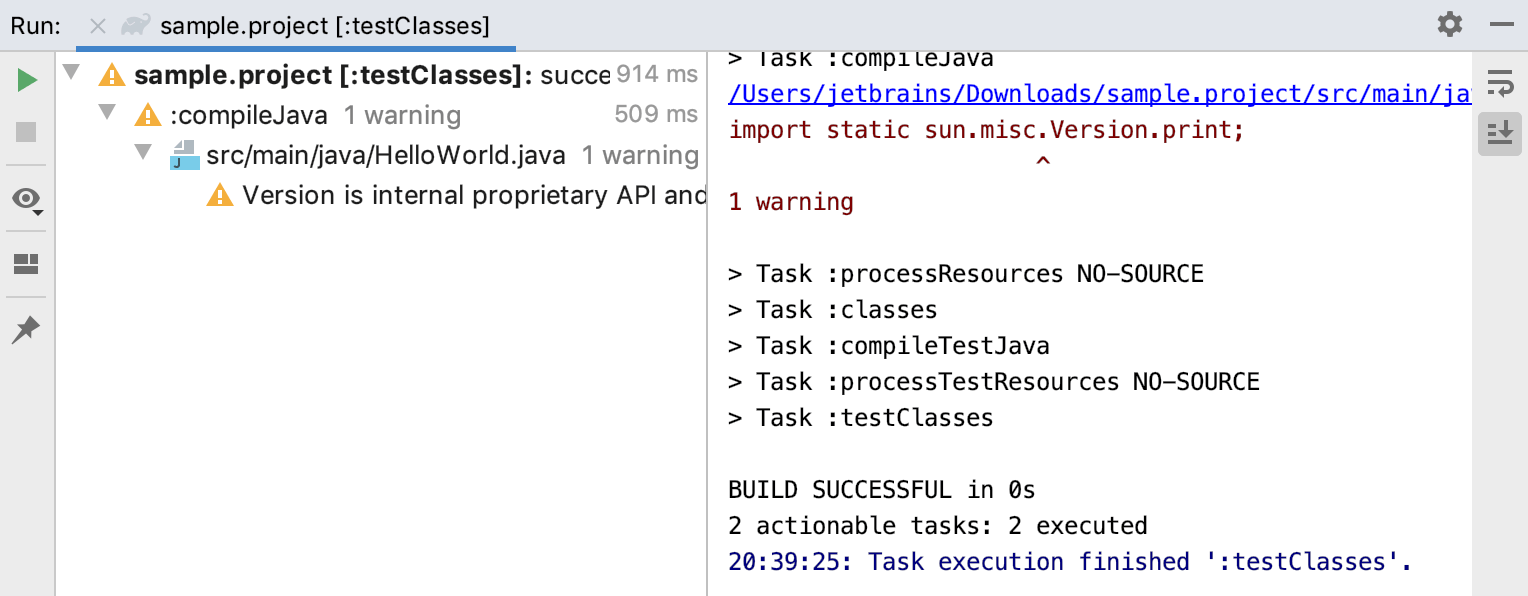
IntelliJ IDEA also saves the task in the Run Anything window under the Recent section as well as under the Run Configurations node in the Gradle tool window.

Run a Gradle task via Run Configurations
You can add some additional parameters to your task, configure it as a run configuration, save it and use that run configuration in your project whenever you need.
Open the Gradle tool window.
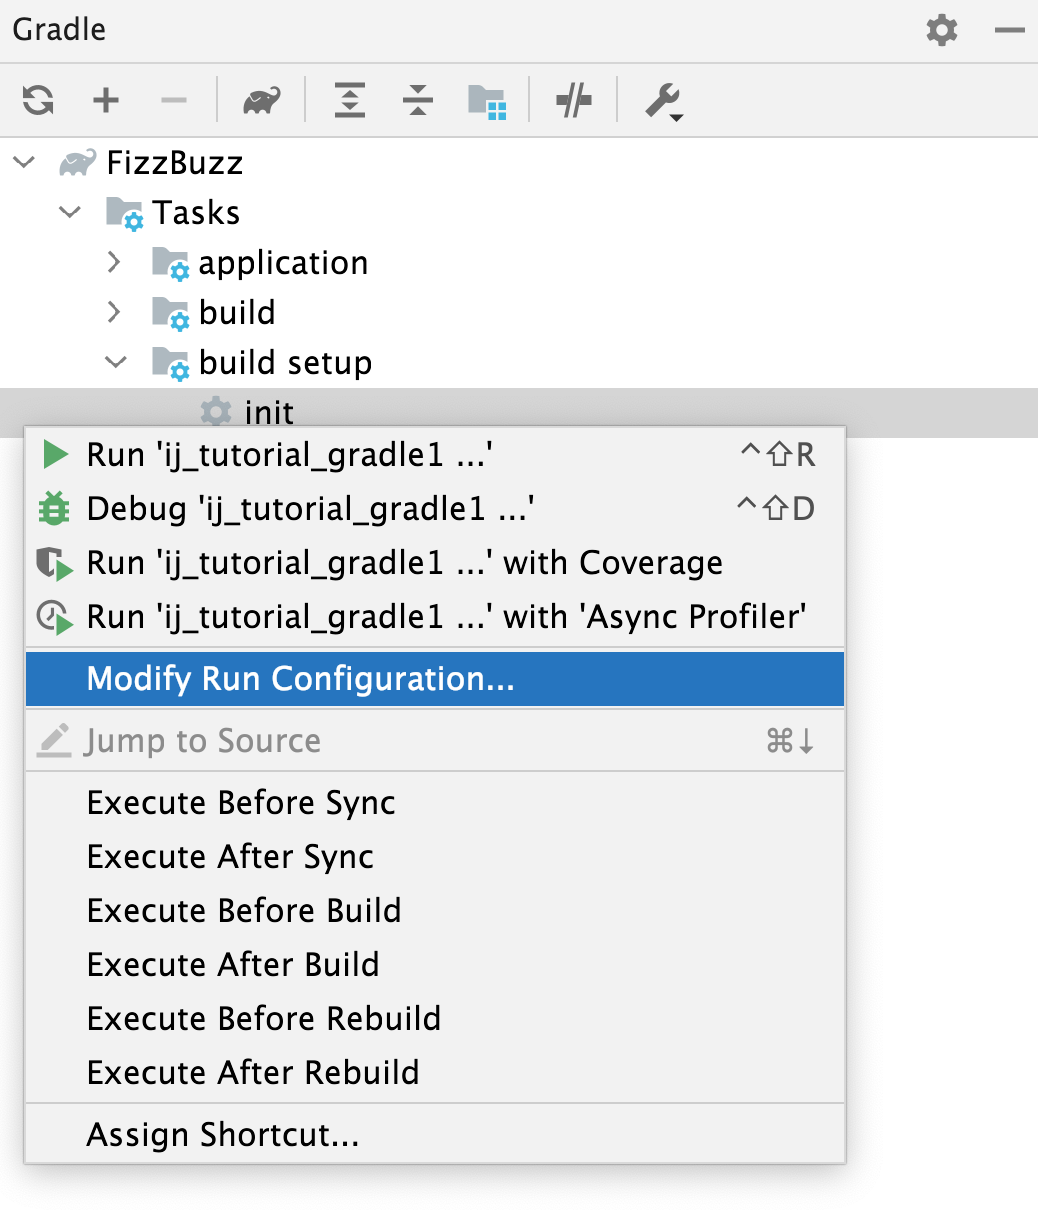
Right-click the task for which you want to create the Run configuration.
From the context menu select Modify Run Configuration.
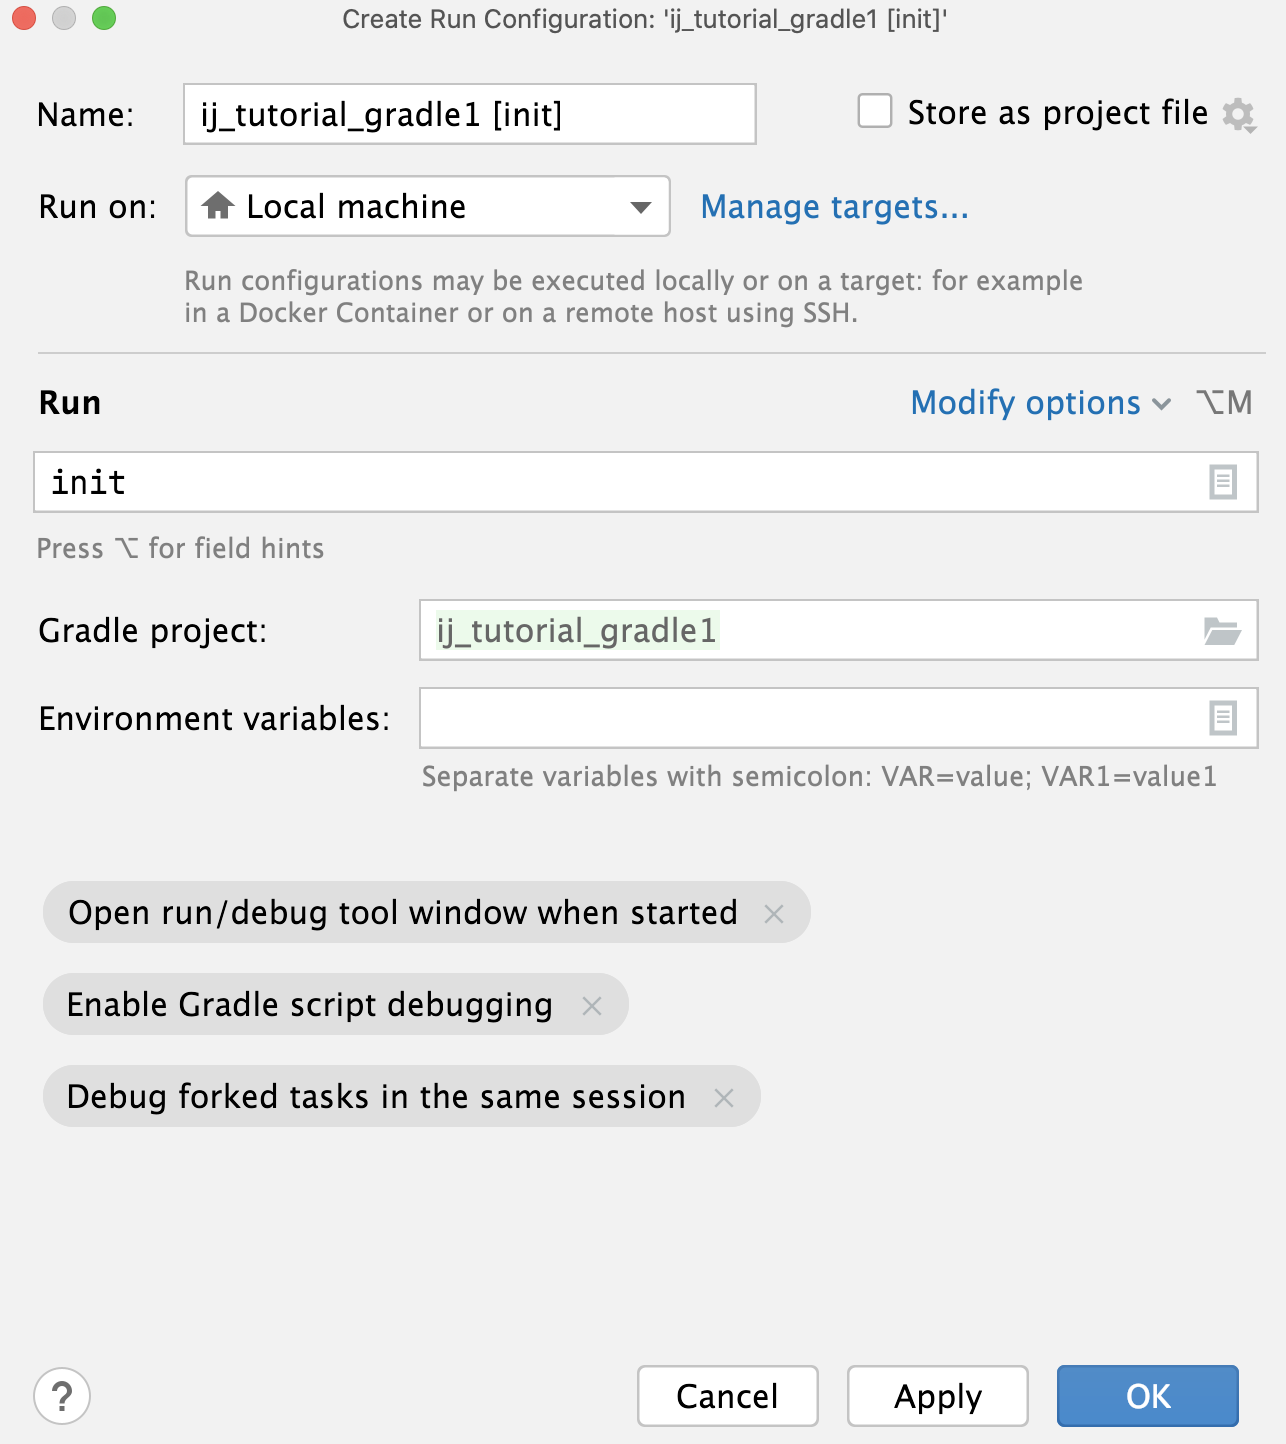
In Create Run Configuration: 'task name', you can use the default settings or configure the additional options and click OK.
IntelliJ IDEA displays the task under the Run Configurations node.
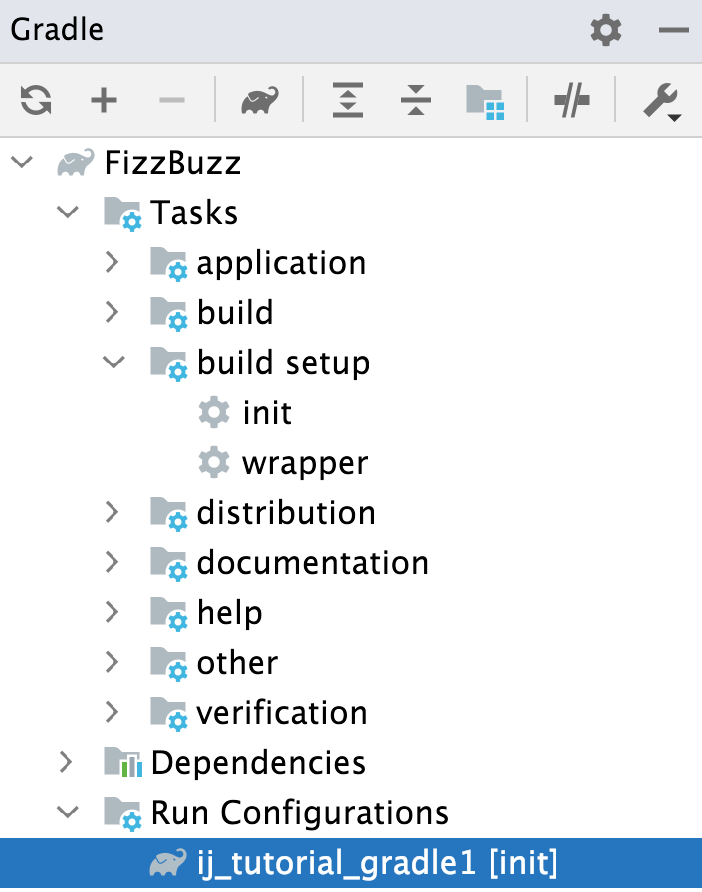
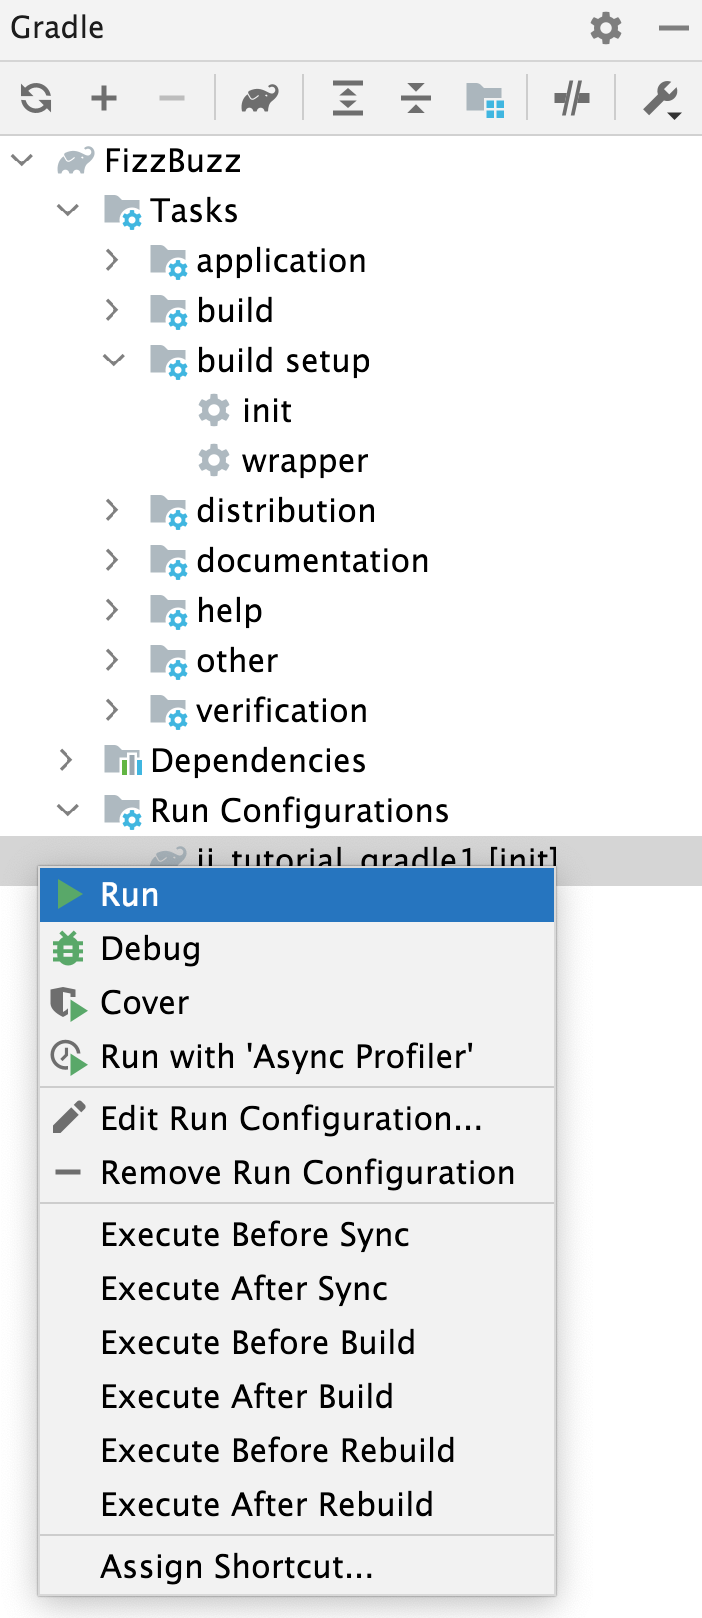
Double-click the task to run it or right-click the task and from the context menu select Run.
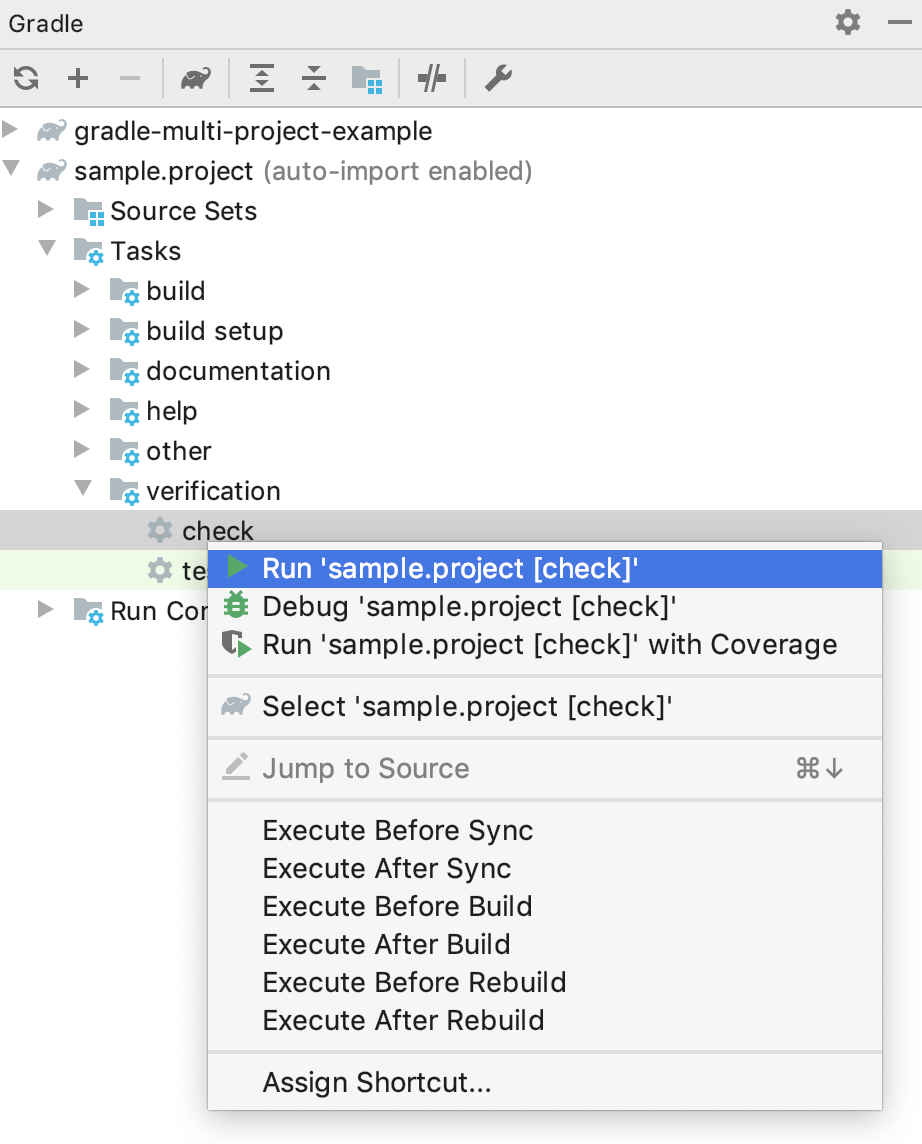
Run a Gradle task from the context menu
Open the Gradle tool window.
Right-click a task that you want to run.
From the context menu select Run 'task name'.
Run several Gradle tasks simultaneously
You can create a run configuration for several tasks.
Select Alt+Shift+F10.
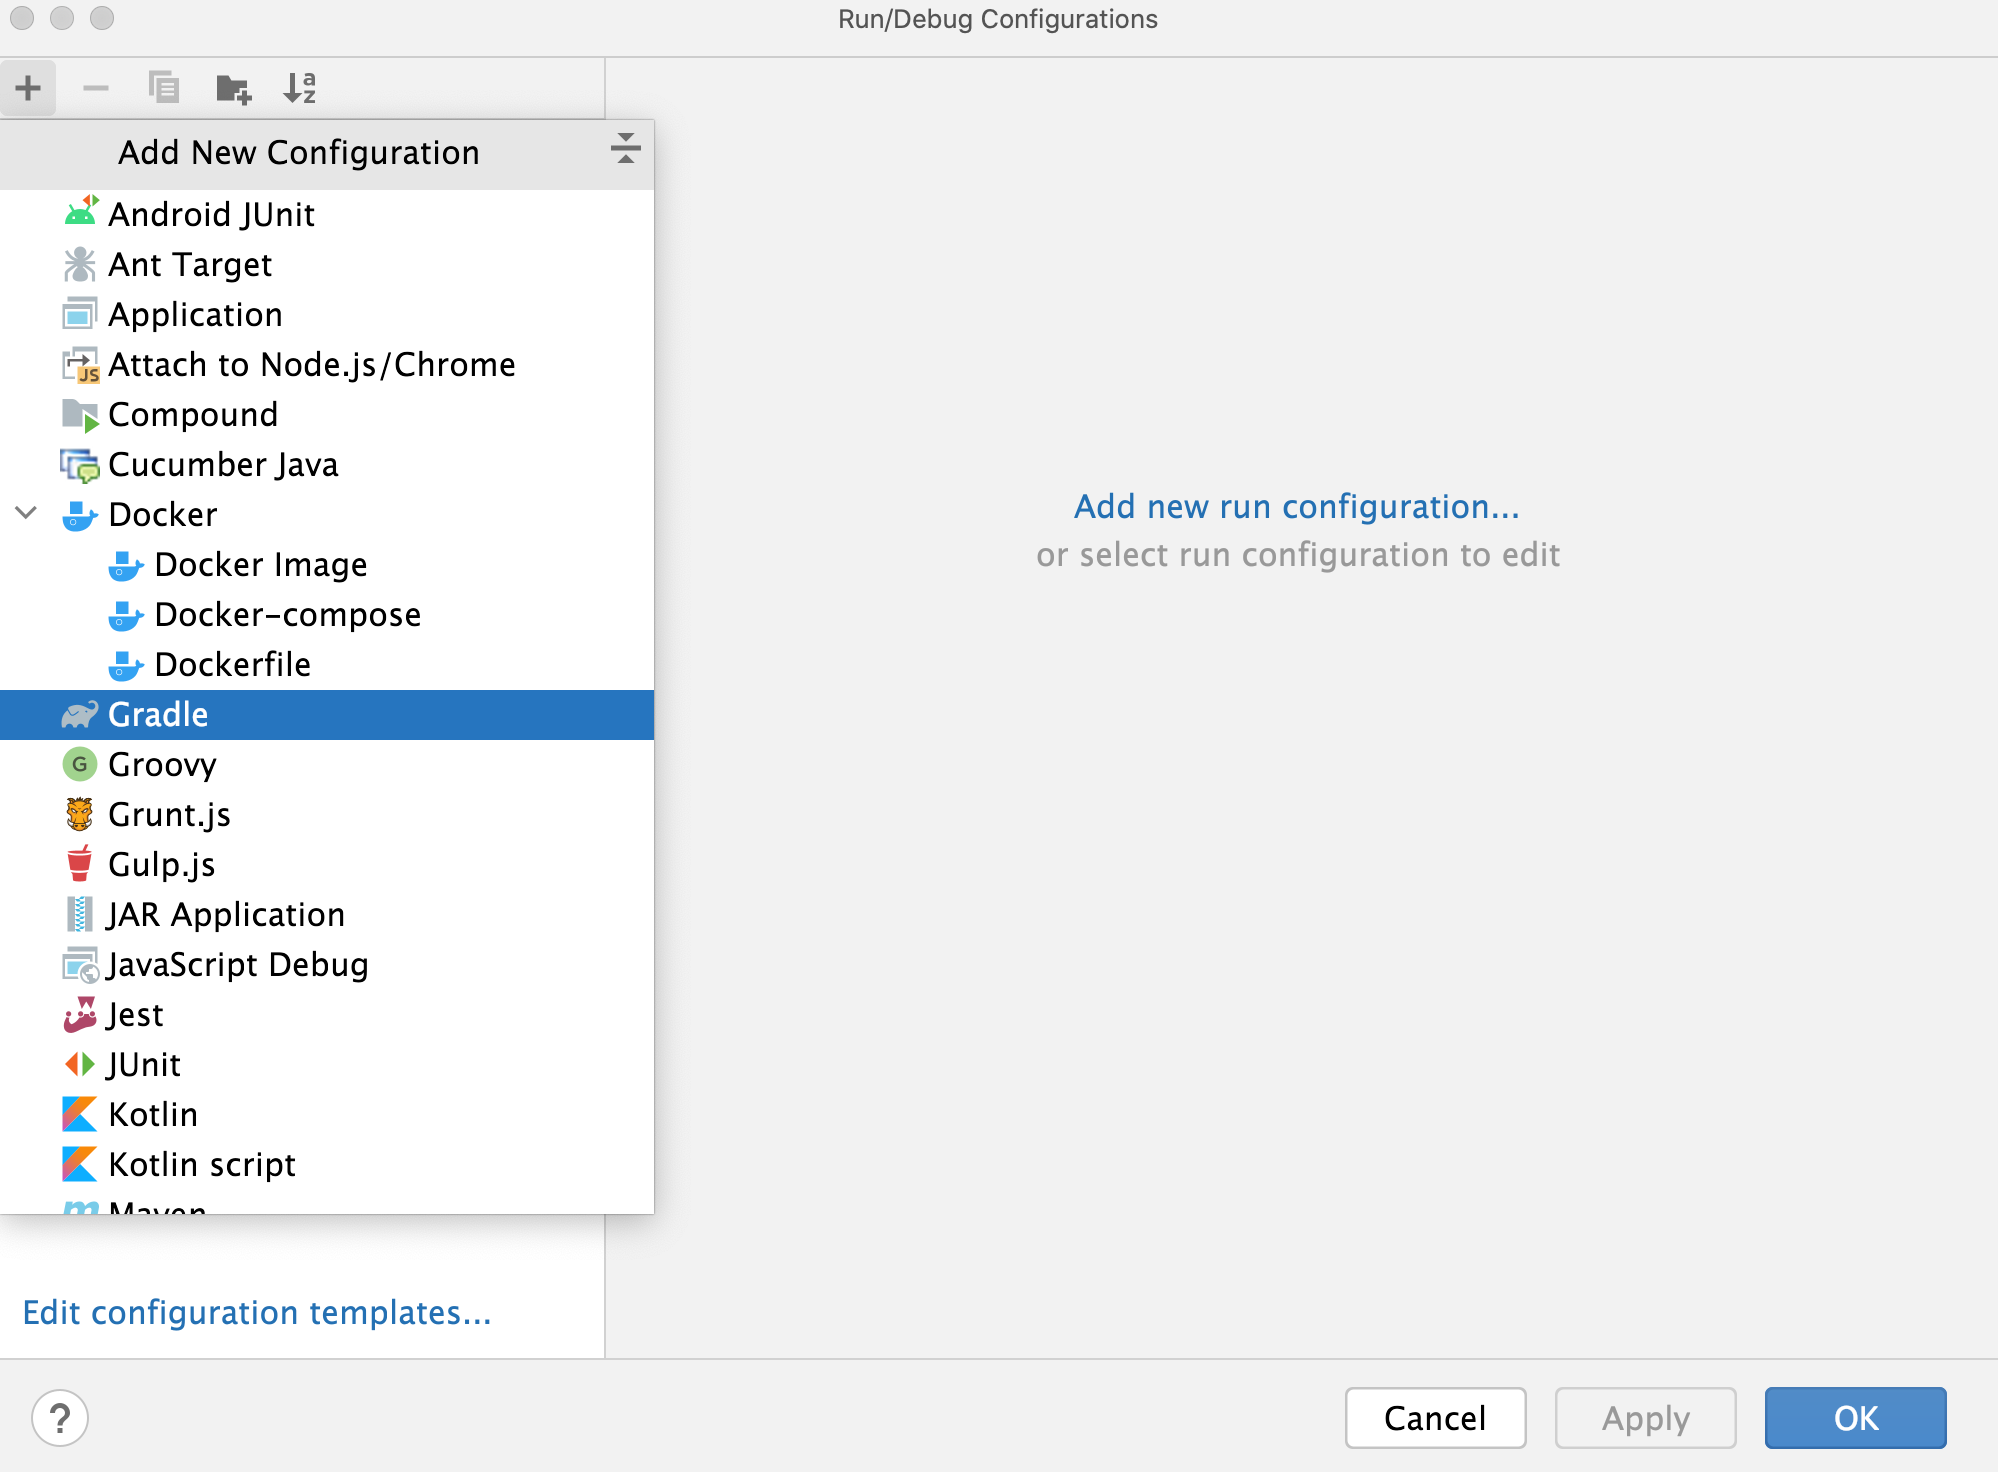
The Run/Debug Configurations dialog opens.
In the Run/Debug Configurations dialog, click
and select Gradle to add a new configuration.
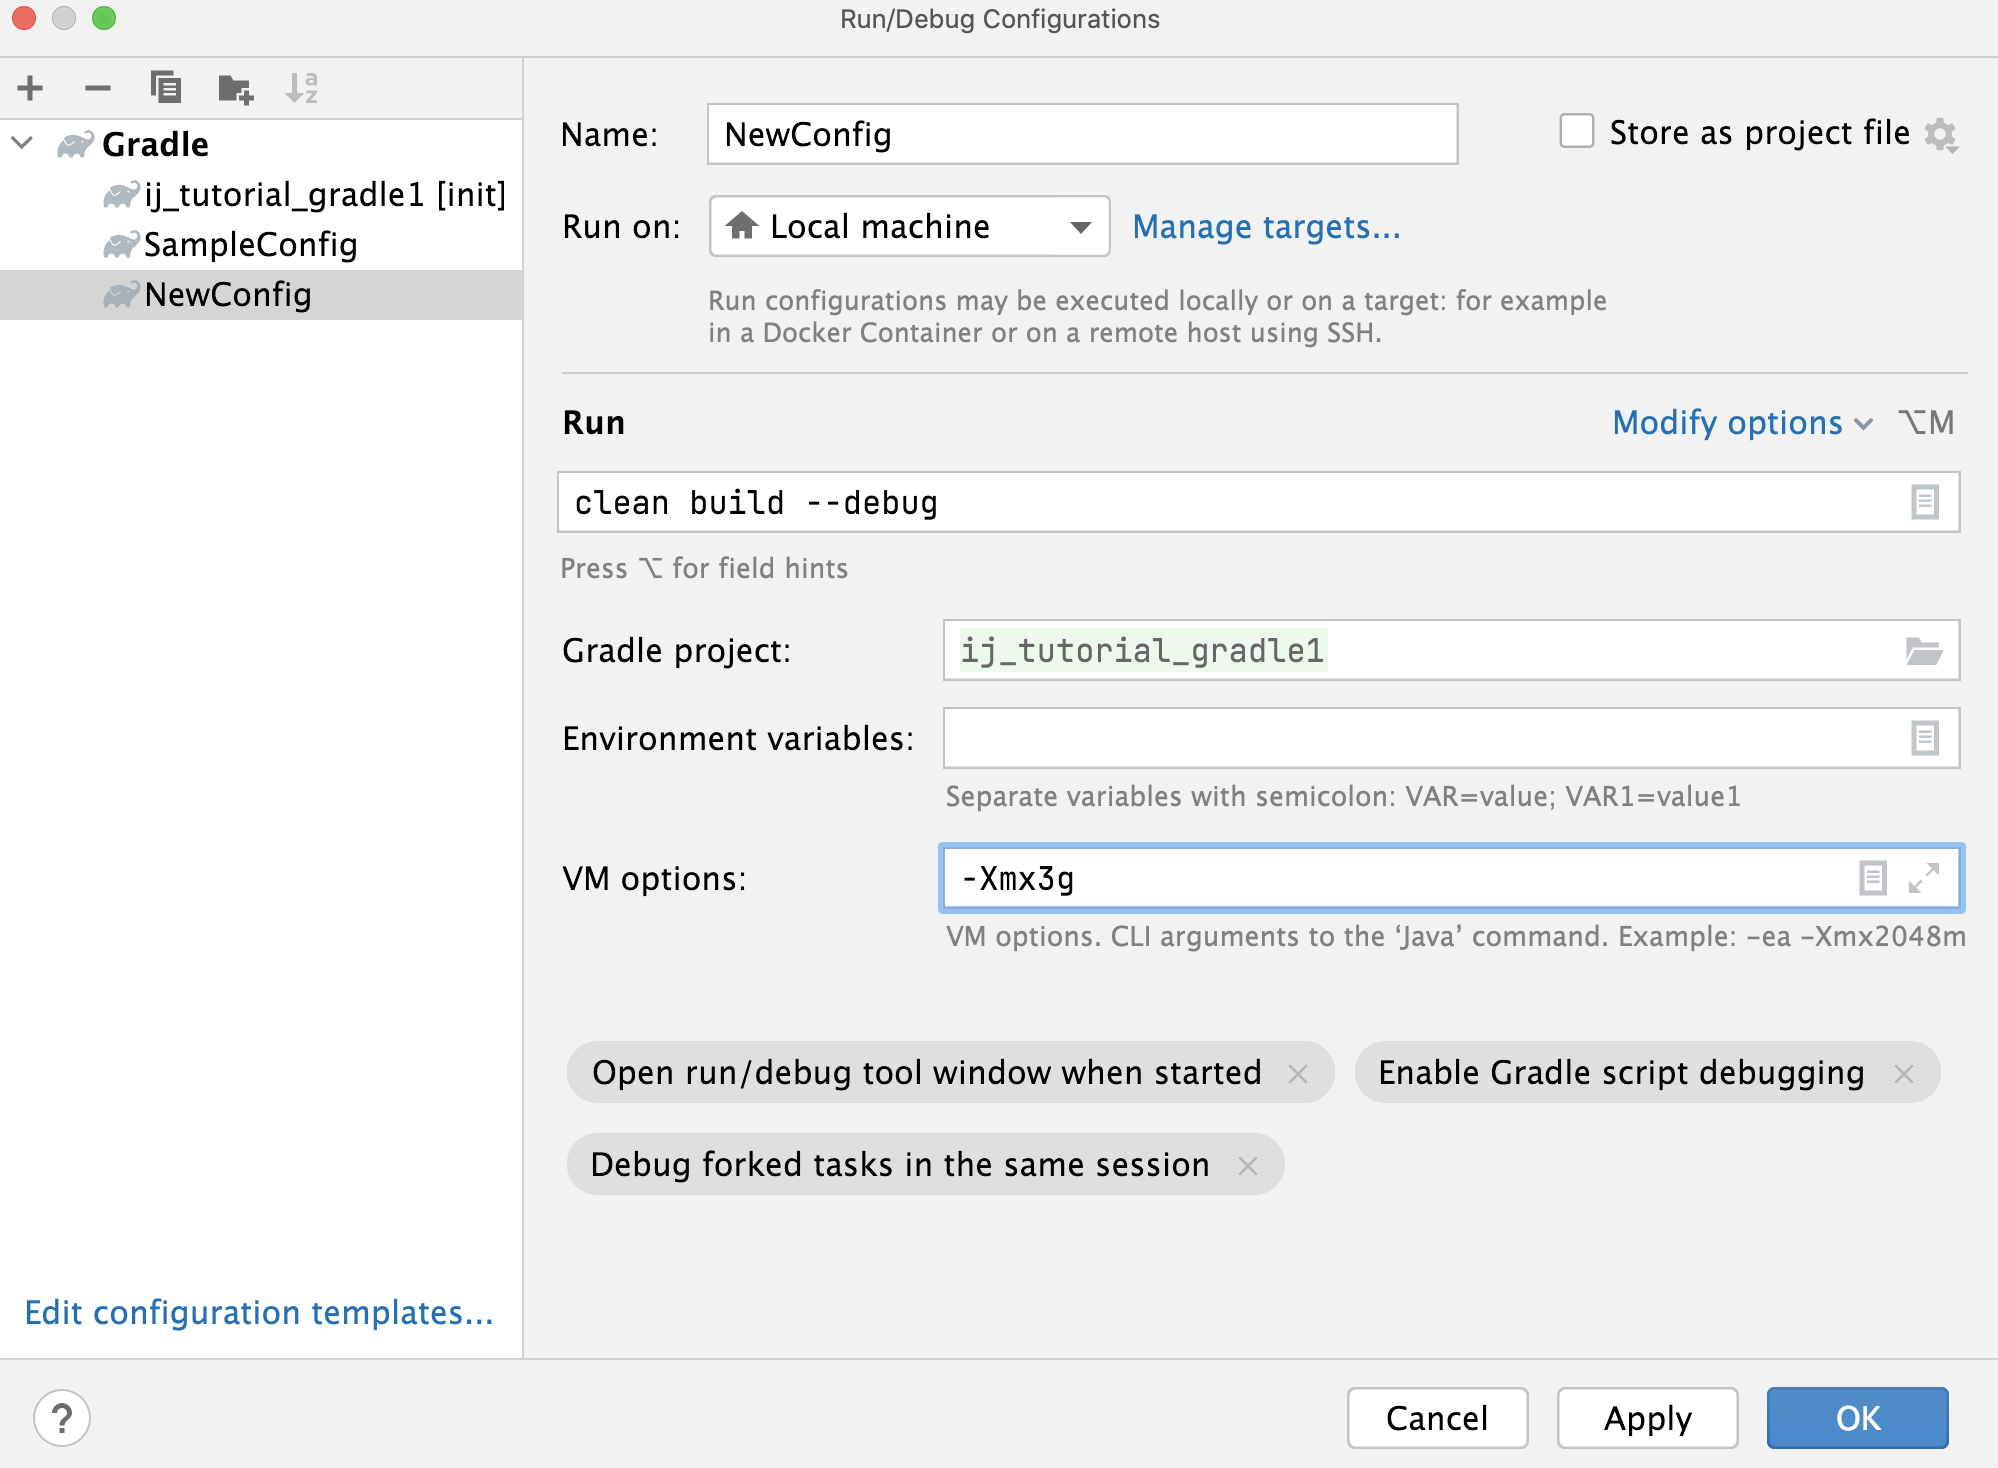
On the right side of the Run/Debug Configurations dialog, in the Name field, enter the name of your configuration. Also, you can specify where you want to run your configuration. Use the Run on drop-down list to specify the run target option.
Use the Run section to specify settings for the run configuration.
As an example, check the following settings:
Tasks and Arguments - specify tasks and arguments you want to execute with this configuration. You can run more than one task. Click
inside the field to open the Tasks and Arguments dialog to select the needed options.
For example, specify
cleanandbuild, and add the argument--debug.Gradle project - click
and select the registered Gradle project.
If you want to add VM options, click the Modify options link and in the dialog that opens, under Java section, select Add VM options. The VM options field is added to the run configuration, and you can specify the needed parameters. For example, specify
-Xmx3g.
For more information about run configurations, refer to Run/debug configurations.
Click OK.
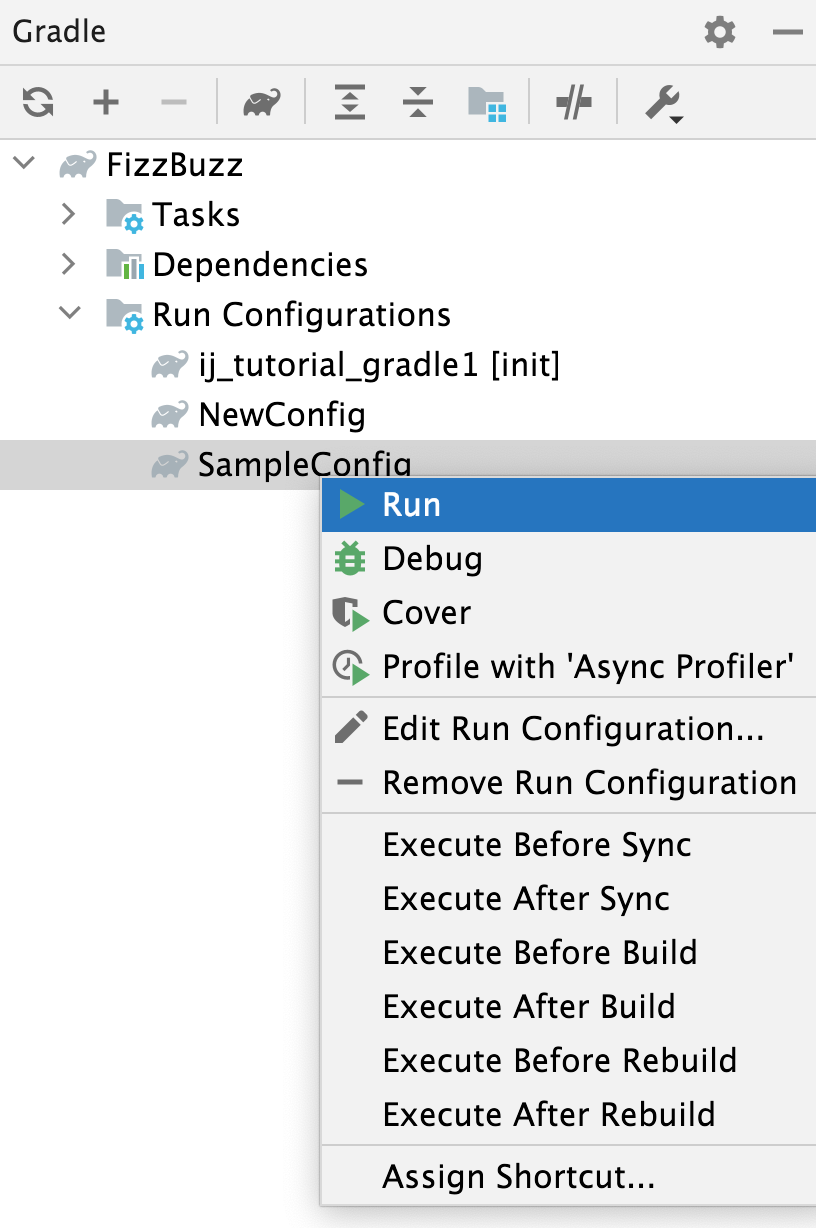
The created configuration is added to the Run Configurations node in the Gradle Projects tool window.
Double-click the configuration to run the task or right-click the configuration and select Run.
Debug Gradle tasks and scripts
You can debug Gradle tasks and scripts the same way you debug your regular applications.
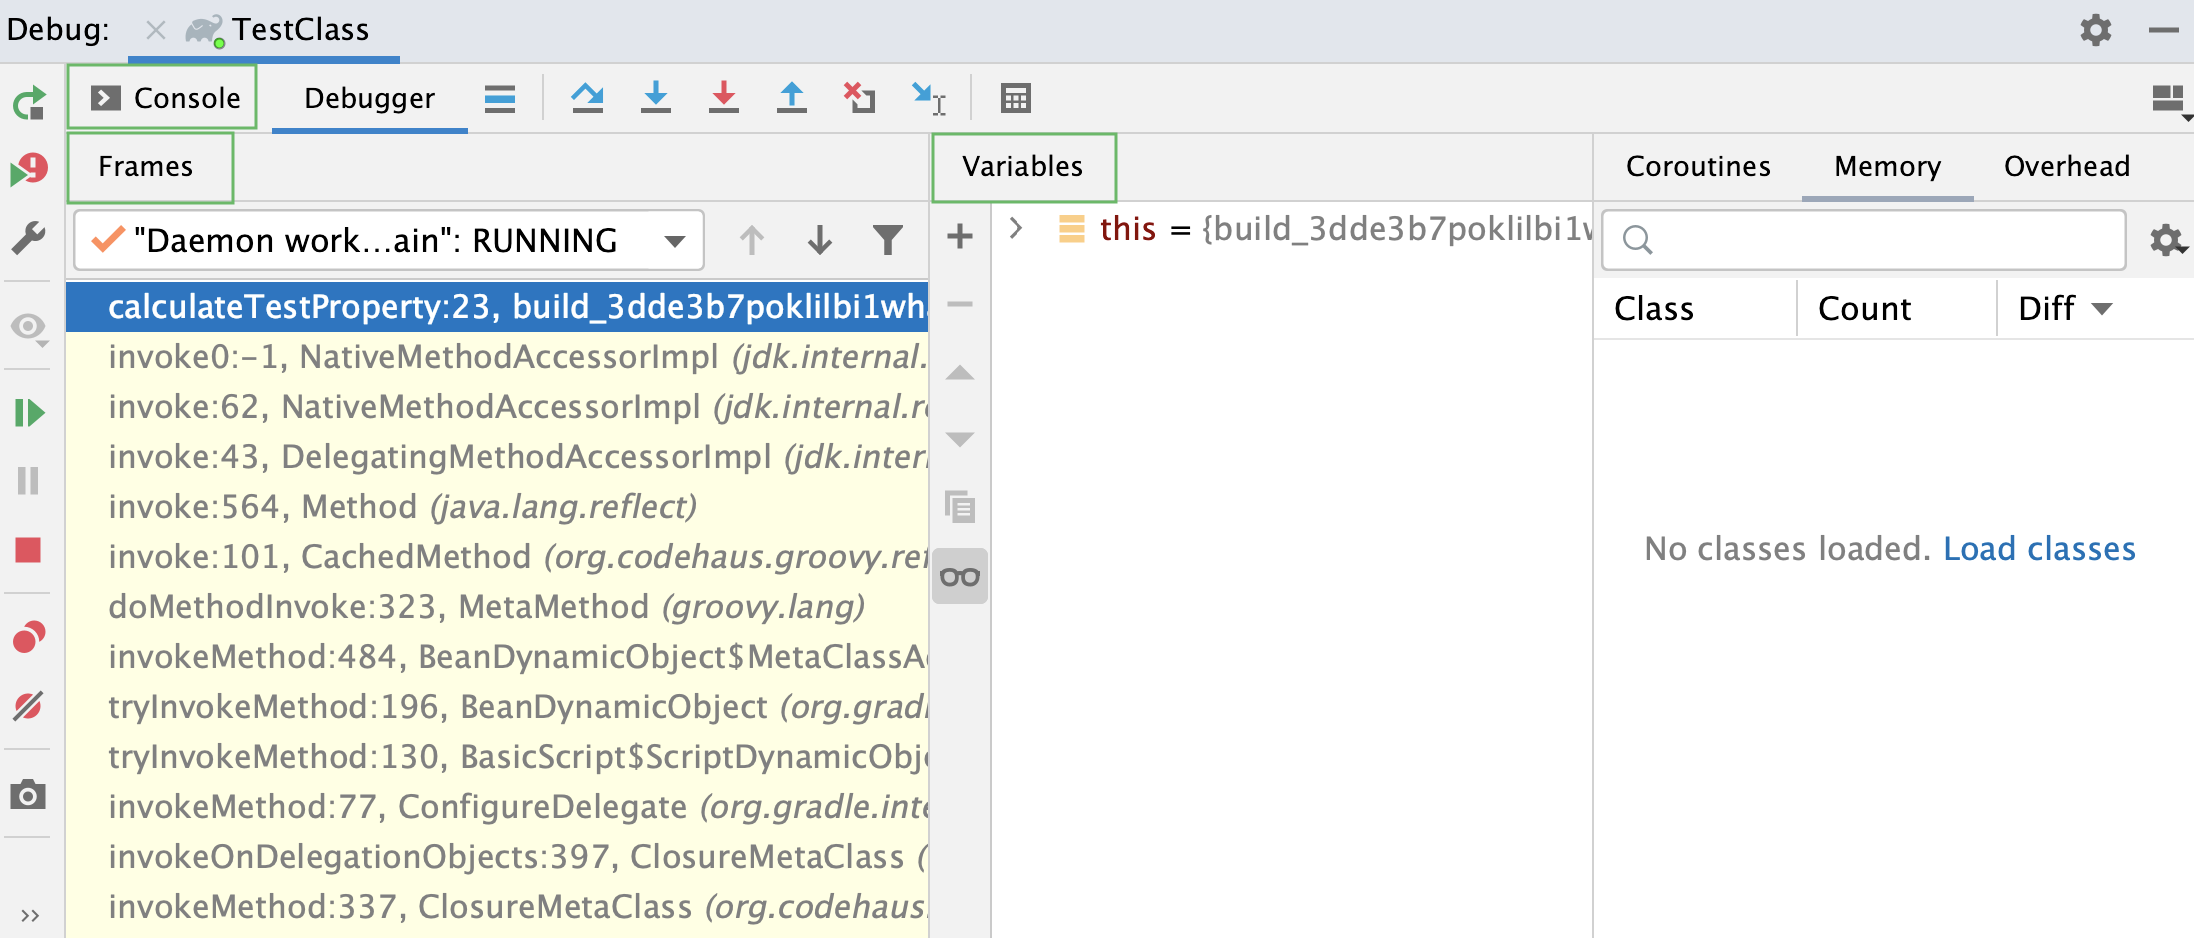
IntelliJ IDEA opens one tab per debugging session for Gradle scripts and for your regular tests. The Debug tool window contains Frames and Variables, as well as the Console output.
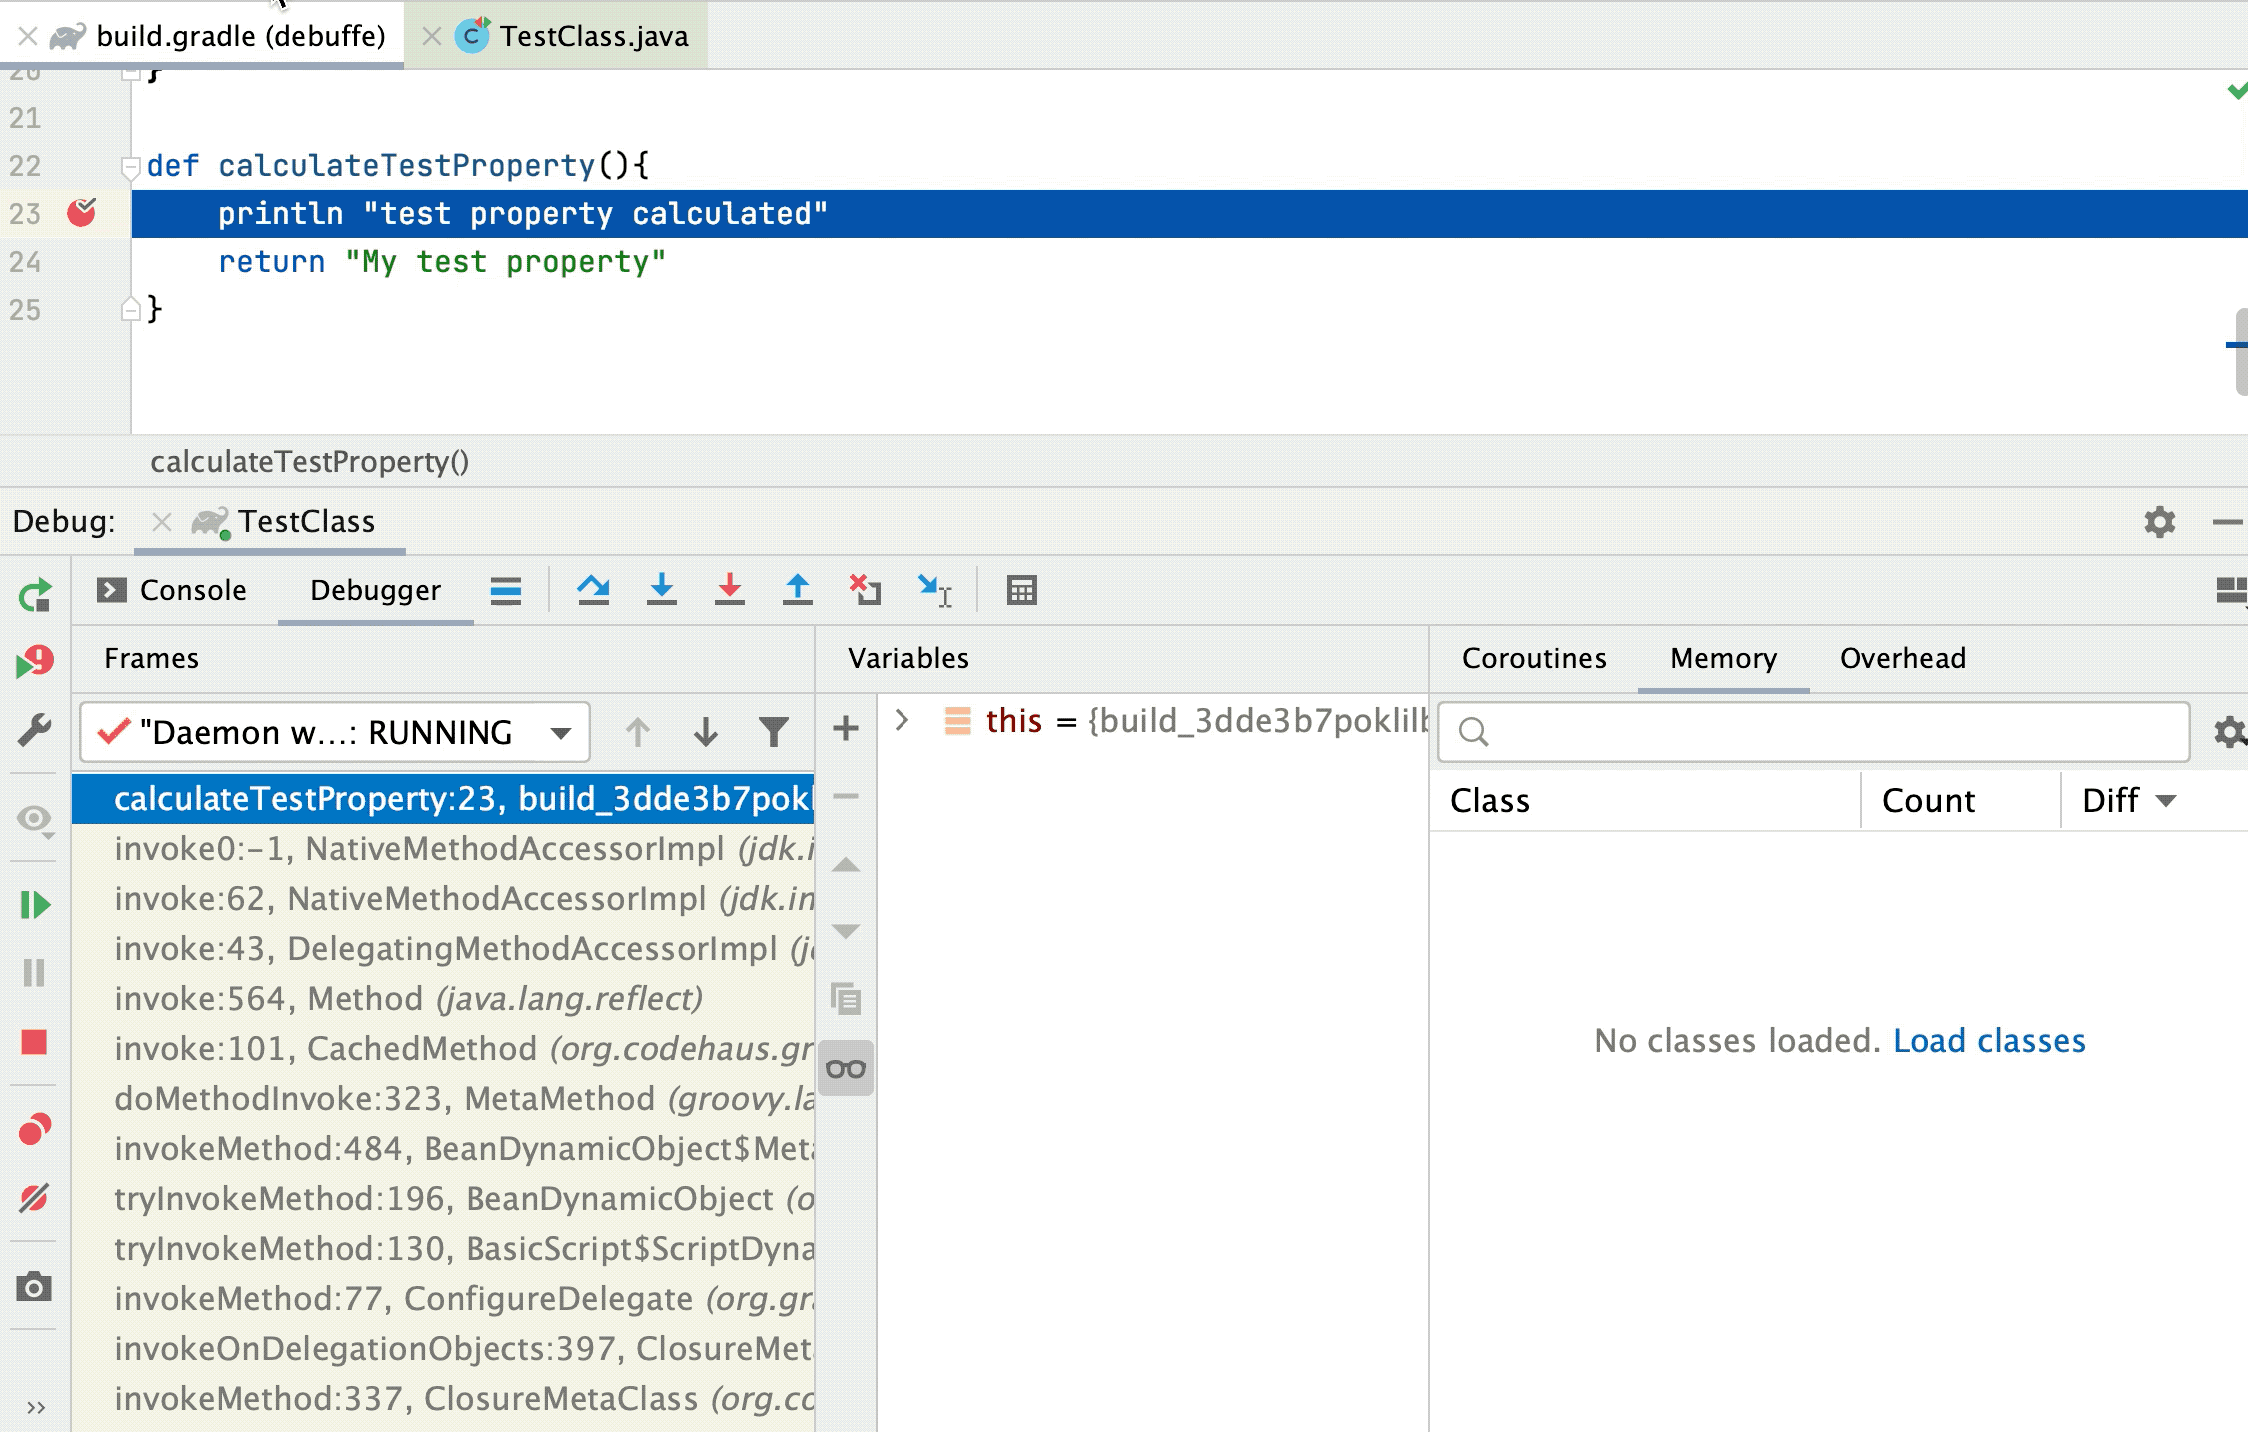
You can perform stepping actions and stop on breakpoints that you set in build.gradle and in the regular test classes under a single tab in the debugging session.
Configure Gradle debugging process
Create a run/debug configuration. If you have the existing run/debug configuration, select it from the main menu, and click Edit Configurations.
On the Run/Debug Configurations page, click the Gradle Debug tab.
Use the following options to configure the Gradle debugging process:
Debug Gradle scripts:
this option is disabled when you execute your test using left gutter in the editor or the context menu. This is done to speed up your debugging process.
Debug forked Gradle tasks in separate debug tabs: when this option is selected any new debugging process is run under the different tab in the Debug tool window. By default, this option is disabled and the debugging process is performed under the same tab.
Debug all tasks on the execution graph: when you select this option, every task in the execution graph will be debugged. For example, all the dependent tasks of the task you are trying to debug will be debugged as well.
Debug a Gradle script task
Open your build.gradle in the editor.
Set your breakpoints and in the gutter right-click the Run
icon. From the context menu, select Debug <name>.
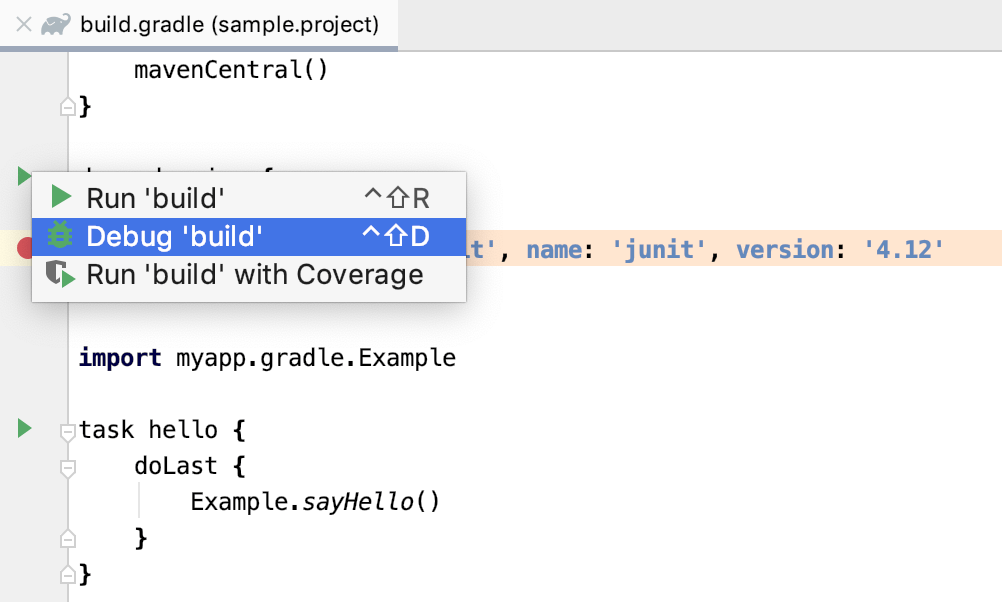
IntelliJ IDEA starts the debugging session, and you can check the results in the Debug tool window.
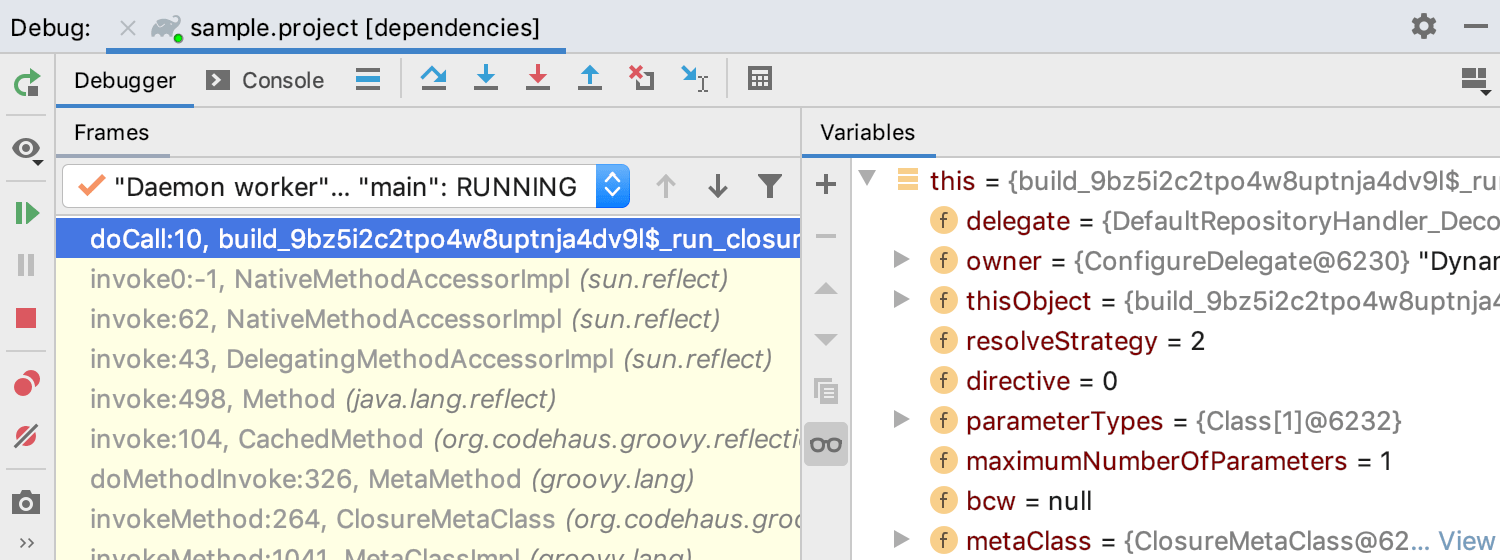
Debug a Gradle task
Use the Gradle tool window to debug Gradle tasks that implement the org.gradle.process.JavaForkOptions interface, for example, test or run.
In the Gradle tool window, click the project, open the Tasks node, and right-click a task you want to debug.
From the context menu, select Debug.
The debugging process is started and the task is added to the list of the recent tasks located under the Run Configurations node.
Assign a shortcut to a Gradle task
IntelliJ IDEA lets you assign shortcuts to Gradle tasks and execute those tasks with a single key. You can also assign a shortcut to the Gradle run/debug configuration that can contain more than one task.
In the Gradle tool window, right-click the desired task.
From the context menu, choose .
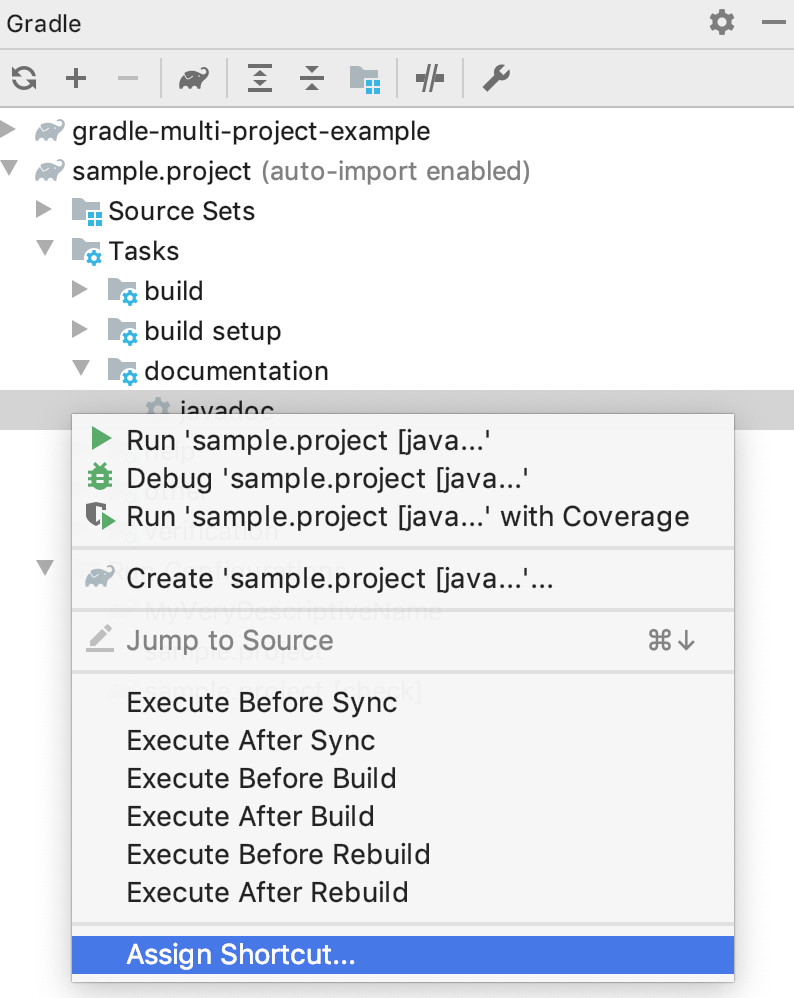
The Keymap dialog opens.
In the Keymap dialog, under the Gradle node navigate to your task.
Right-click the task and from the list that opens, select a type of the shortcut you want to assign.
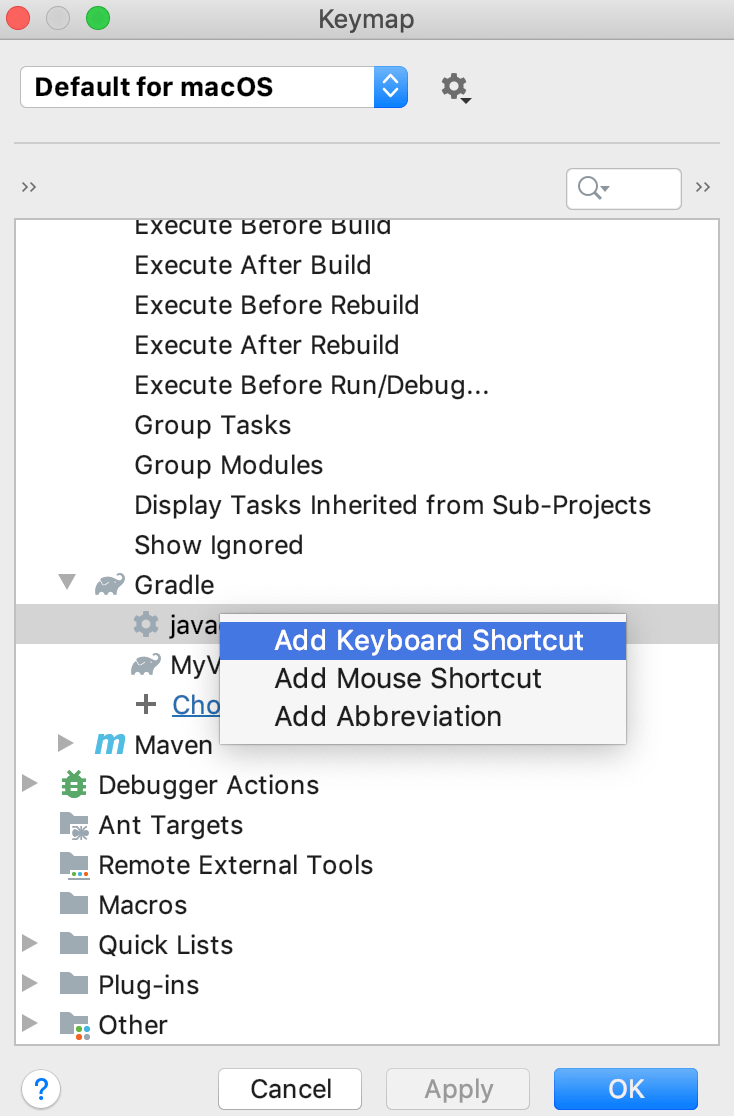
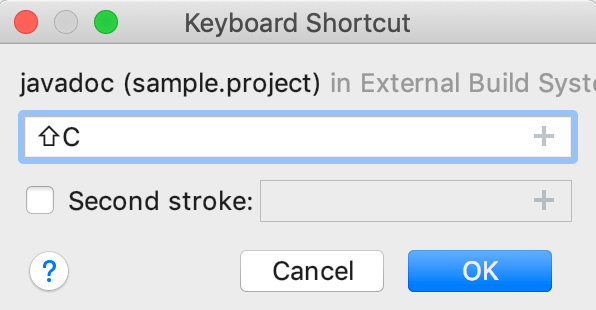
In the dialog that opens, depending on the shortcut's type, configure your shortcut and click OK.
In our case let's add a keyboard shortcut.
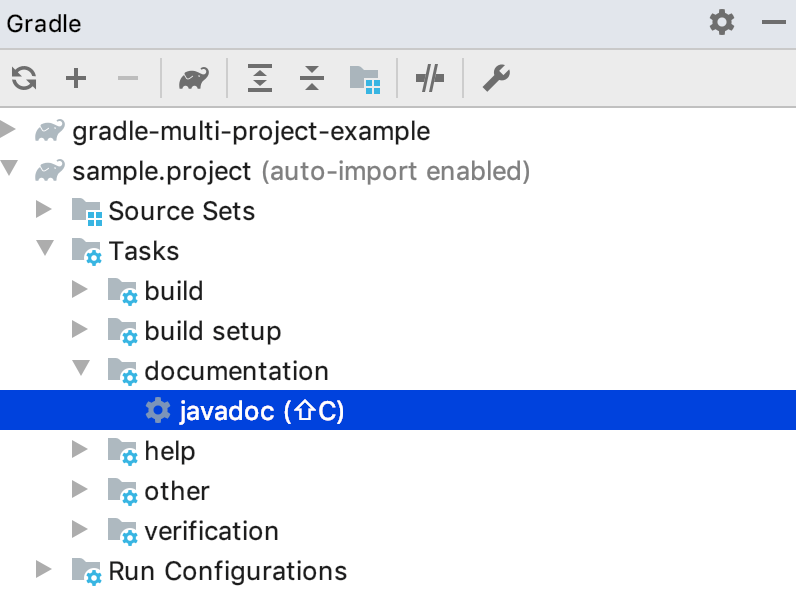
You can see that the shortcut is displayed against your task in the Gradle tool window.
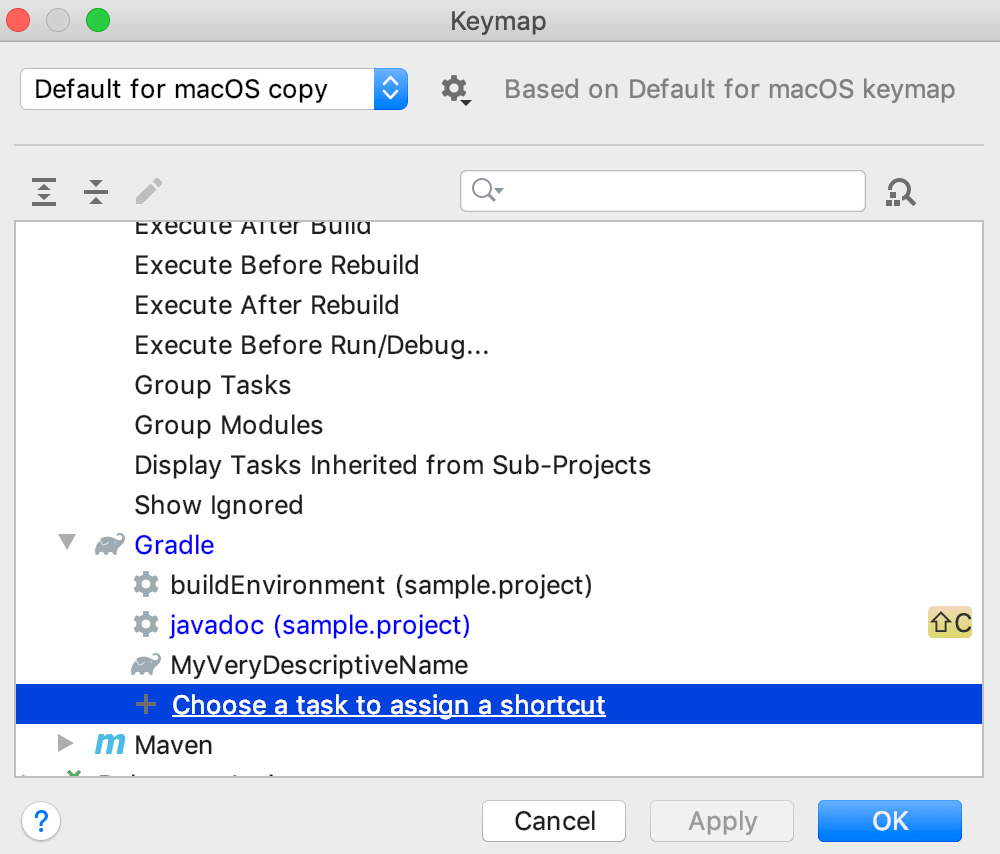
While in the Keymap dialog, you can add a new task to which you want to assign a shortcut.
In the Keymap dialog, under the Gradle node, click Choose a task to assign a shortcut.
In the dialog that opens, select a task you need and click OK.
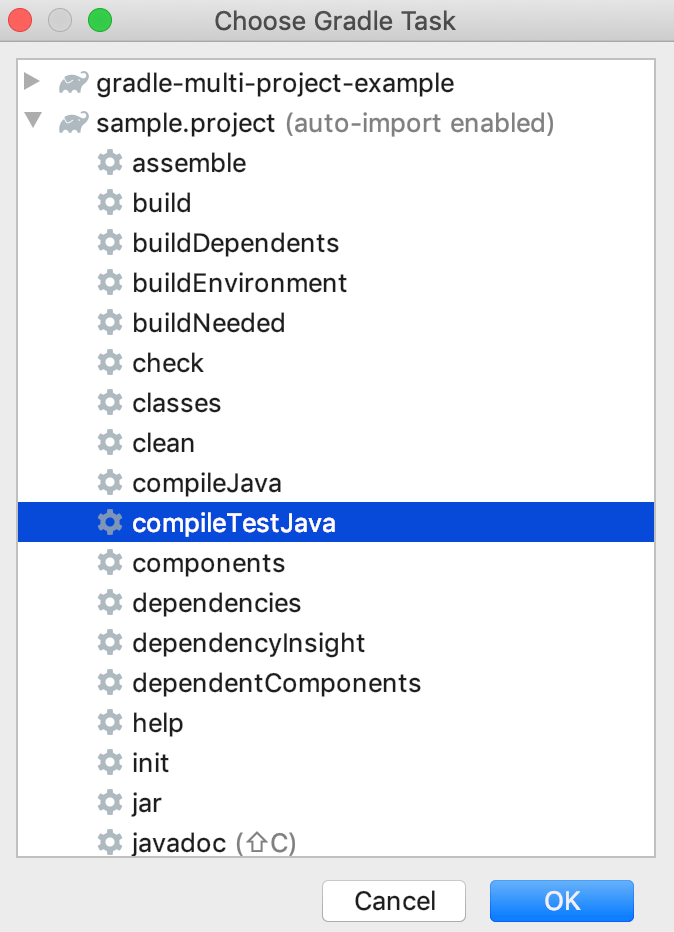
The task is added to the list under the Gradle node. Now you can configure the shortcut.
Configure running triggers for Gradle tasks
IntelliJ IDEA lets you run Gradle tasks before your project's execution or set other conditions using the task activation configuration.
In the Gradle tool window, right-click a Gradle project.
From the context menu, select Tasks Activation.
In the Tasks Activation dialog, click
.
On the Choose activation phase menu, choose when to run your task, for example, Before Build, After Sync, and so on.
On the Choose task menu, select the actual task.
The task and activation phase will be added to the list in the Task Activation dialog. You can also see the activation phase name against the selected task in the Gradle tool window.
Alternatively, you can select the activation phase name from the context menu when you right-click the task you want to execute in the Gradle tool window.
You can also create a run/debug configuration that would depend on a Gradle task.
In the main menu, go to to open the run/debug configuration for your project.
In the Run/Debug Configurations dialog, in the Before Launch section, click the
icon.
In the list that opens, select Run Gradle task.
In the Select Gradle Task dialog, specify the project and the task that you want to execute before launching the project. You can specify a Gradle linked project or any other Gradle project. Note that if your Gradle project is not linked then IntelliJ IDEA will use the default configurations (for example, a bundled Gradle version) to run the task.
Click OK.