Generator User Guide Demo2
Generator User Guide Demo 2
In this demo we will again generate a Java Swing application, but unlike in previous Demo 1, this time it is going to be a single Java application per input model (in Demo 1 we generated a separate Java application for each input XML Document). The single Java application that Demo 2 creates, will contain all components mentioned in all XML Documents of the input model.
New Language
We need to do some little technical setup first:
create a new language: 'generator_demo.demoLang2'
in the language properties dialog add an extends dependency on 'jetbrains.mps.sampleXML' and 'jetbrains.mps.baseLanguage'
create a new generator for this language, if it has not been created automatically (see Generator User Guide Demo1 for details).
As the code that we are going to generate is almost identical to that in Demo 1, we will copy the application class template from the demoLang1 generator:
go to model 'main@generator' in demoLang1
select the 'map_Document' template in project tree and copy it to clipboard
- return to model 'main@generator' in demoLang2 (select this model in tree) and paste from clipboard
in the same manner copy the template switch 'switch_JComponentByElementName' from demoLang1 to the demoLang2 generator model
Conditional Root Rule
The process of code generation in MPS can be viewed as a series of model-to-model transformations. An AST in one language is gradually transformed into an AST expressed in concepts from another language. In each step individual concepts from one language get translated (reduced) into concepts from another language. Conditional Root Rule is somewhat special in that it creates new nodes out of nothing. It generates a brand new root node in the output model using a template referred to in this rule without having any original node in the input model.
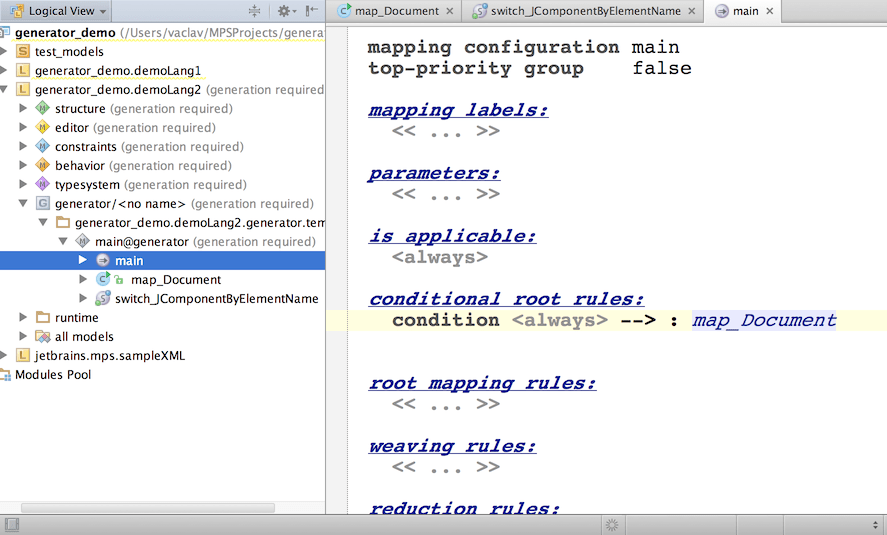
go to demoLang2 generator and open the mapping configuration 'main' in editor
add new Conditional Root Rule (press Insert or Enter while cursor is in conditional root rules section)
make reference to the 'map_Document' template so that this template is used to generate the resulting class

open the 'map_Document' template (Control + <left-click> or Cmd + <left-click> on the reference in the editor) so we can tweak it a bit for it to work in the changed context

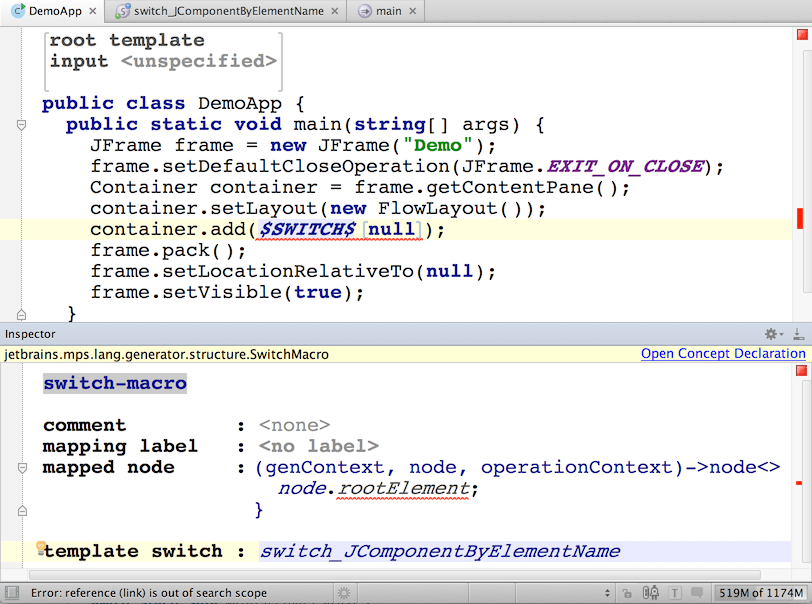
in the template's header remove the mention of Document- press Del while cursor is on the word 'Document' (we are using this template in Conditional Root Rule, which no longer passed a Document as the template's input)
remove the property-macro from the class name, as now we only get a single class, we can hard-code its name
rename the generated class to ' DemoApp'
open the Inspector for the SWITCH macro and resolve the reference to the template_switch by hitting Control + Space
LOOP-macro
The SWITCH-macro in 'DemoApp' template is expecting an XML Document on the input, since this is how we implemented it in Demo 1. It then extracts the Document's root element and applies a template switch to it. However, there may be multiple Documents in the input model (in fact in our demo app will have two - a button and a label), so we need to gradually process them all in sequence and generate an appropriate "container.add(null);" statement for each of these Documents.
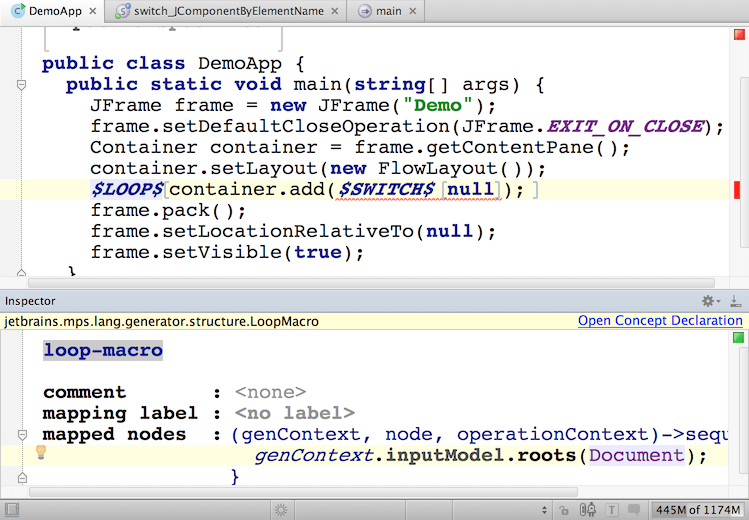
To provide the SWITCH-macro with a single Document node, we will wrap the ' container.add(..);' statement inside a LOOP-macro:
- in the template code select the statement 'container.add($SWITCH$[null]);' (with your cursor placed inside the statement, use Ctrl/Cmd+W to expand block selection)
press Ctrl-Shift+M to add node-macro
choose $LOOP$ from the auto-completion menu (Ctrl+Space)
enter code in the LOOP's mapped nodes function as below

The mapped nodes function will find all Documents in the input model and return a sequence of these Documents to the generator (the return statement can be omitted in BaseLanguage ).
Then, the generator will iterate through this sequence, create 'container.add(..);' statement for each Document and gradually pass each Document as an input node to the SWITCH-macro.
That's it. The last step, as usual, is hitting Shift-F9 to make the generator.
Running First Test
To test the demoLang2 generator we need the exactly same input as in Demo 1 except that we are going to 'engage' different language on its generation.
go to the 'test1' model in 'test_models' solution (select it in project tree)
choose Clone Model in the popup menu
enter the new model name: 'generator_demo.test2'
- in properties dialog of the 'test2' model, in the Languages Engaged on Generation section:
remove 'generator_demo.L1' language
add 'generator_demo.L2' language
Generate the 'test2' model and preview the generated sources.
Abandon Root Rule
Note that the generated output also contains two 'generated' XML files: Button.xml and Label.xml. MPS did not generate those XML files in previous Demo 1. Why does it do so in this demo?
Because in Demo 1 we have defined explicit mapping of input Documents to output Classes using Root Mapping Rule, the input was consumed and the xml files were not generated..
In Demo 2 we do not explicitly map input Documents to any output roots and so they remain in the model until the text-generation phase, which turns them into xml files.
To prevent copying Documents to the output model we will use the Abandon Root Rule.
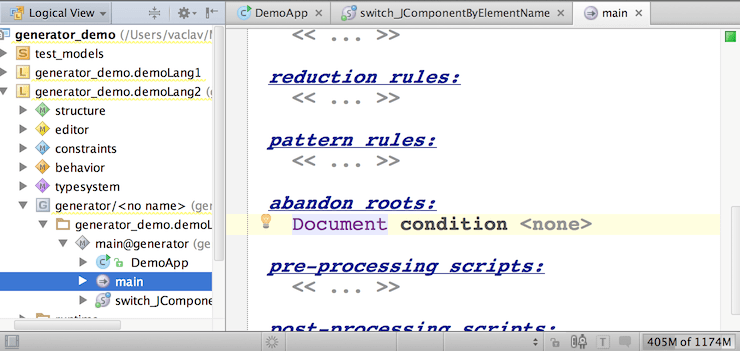
return to demoLang2 generator and open mapping configuration 'main' in editor
add a new Abandon Root Rule - press Insert while cursor is in the abandon roots section
choose ' Document' as the concept for application of the rule

After rebuilding the project you will no longer get xml files on the output.