Testing languages
Testing languages
Introduction
Testing is an essential part of language designer's work. To be of any good MPS has to provide testing facilities both for BaseLanguage code and for languages. While the jetbrains.mps.baselanguage.unitTest language enables JUnit-like unit tests to test BaseLanguage code, the Language test language jetbrains.mps.lang.test provides a useful interface for creating language tests.
Quick navigation table
Different aspects of language definitions are tested with different means:
Language definition aspects | The way to test |
|---|---|
Intentions Actions Side-transforms Editor ActionMaps KeyMaps | Use the jetbrains.mps.lang.test language to create EditorTestCases. You set the stage by providing an initial piece of code, define a set of editing actions to perform against the initial code and also provide an expected outcome as another piece of code. Any differences between the expected and real output of the test will be reported as errors. See the Editor Tests section for details. |
Constraints Scopes Type-system Dataflow | Use the jetbrains.mps.lang.test language to create NodesTestCases. In these test cases write snippets of "correct" code and ensure no error or warning is reported on them. Similarly, write "invalid" pieces of code and assert that an error or a warning is reported in the correct node. See the Nodes Tests section for details. |
Generator TextGen | Use the language to create GeneratorTests. These let you transform test models and check whether the generated code matches the expected outcome. See the Generator Tests section for details. There is currently no built-in testing facility for these aspects. There are a few practices that have worked for us over time:
|
Migrations | Use the jetbrains.mps.lang.test language to create MigrationTestCases. In these test cases write pieces of code to run migration on them. See the Migration Tests section for details. |
Tests creation
There are two options to add test models into your projects.
1. Create a Test aspect in your language
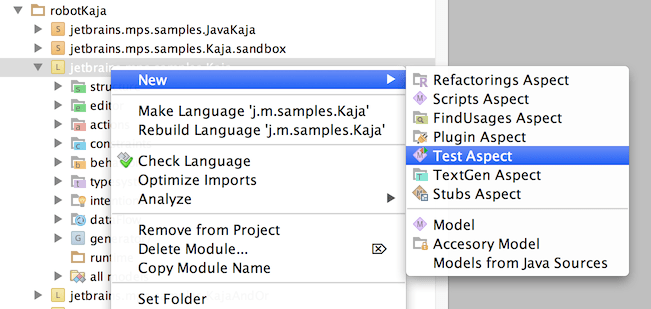
This is easier to setup, but can only contain tests that do not need to run in a newly started MPS instance. So typically can hold plain baselanguage unit tests. To create the Test aspect, right-click on the language node and choose chose New->Test Aspect.
Now you can start creating unit tests in the Test aspect.

Right-clicking on the Test aspect will give you the option to run all tests. The test report will then show up in a Run panel at the bottom of the screen.
2. Create a test model
This option gives you more flexibility. Create a test model, either in a new or an existing solution. Make sure the model's stereotype is set to tests.
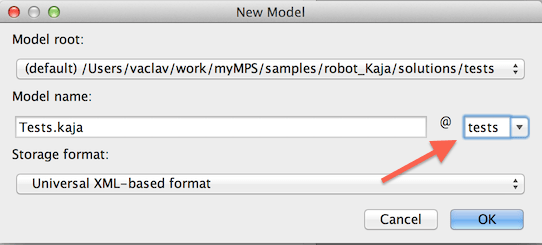
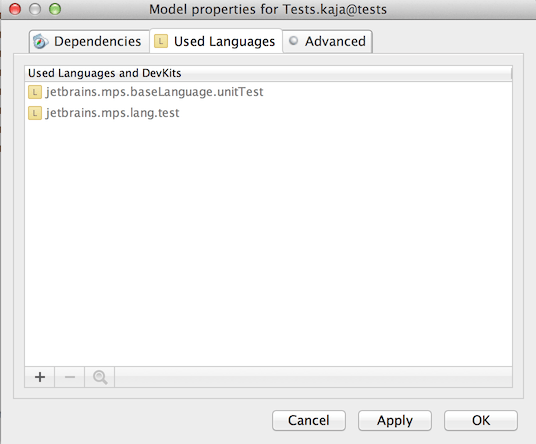
Open the model's properties and add the jetbrains.mps.baselanguage.unitTest language in order to be able to create unit tests. Add the jetbrains.mps.lang.test language in order to create language (node) tests.
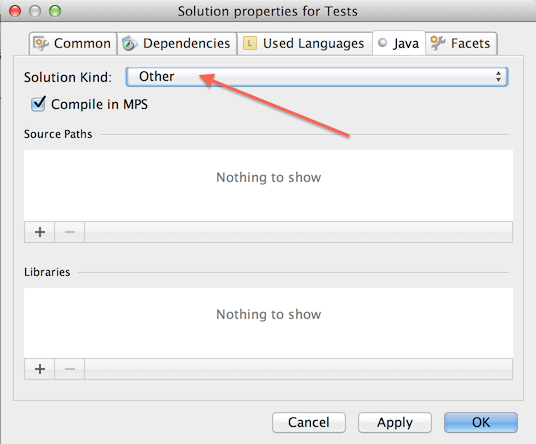
Additionally, you need to make sure the solution containing your test model has a kind set - typically choose Other, if you do not need either of the two other options (Core plugin or Editor plugin).
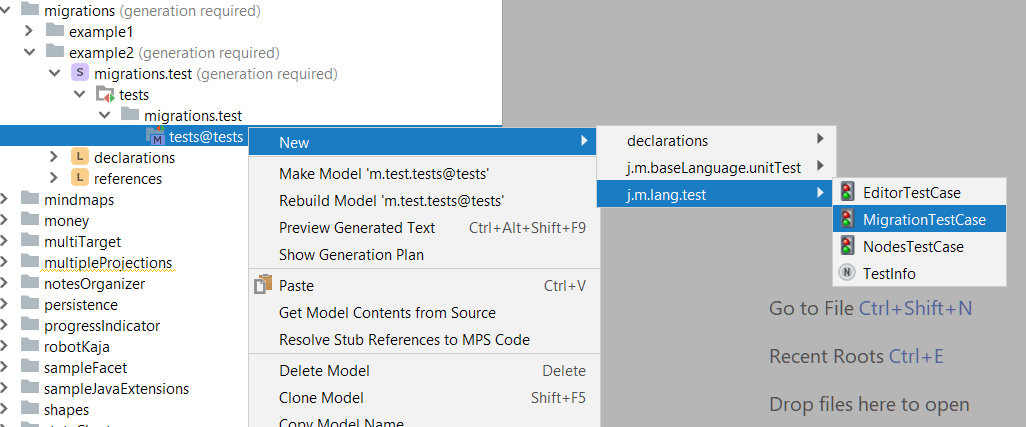
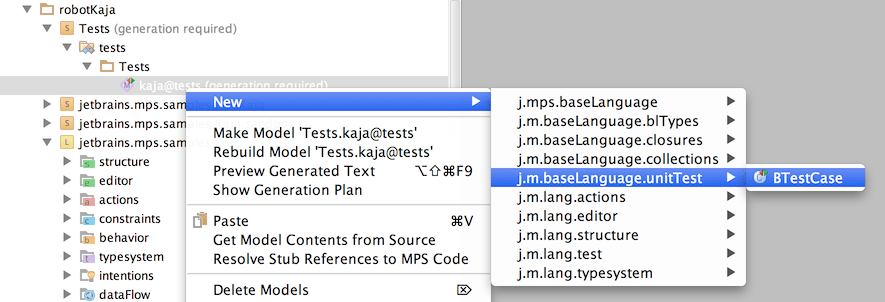
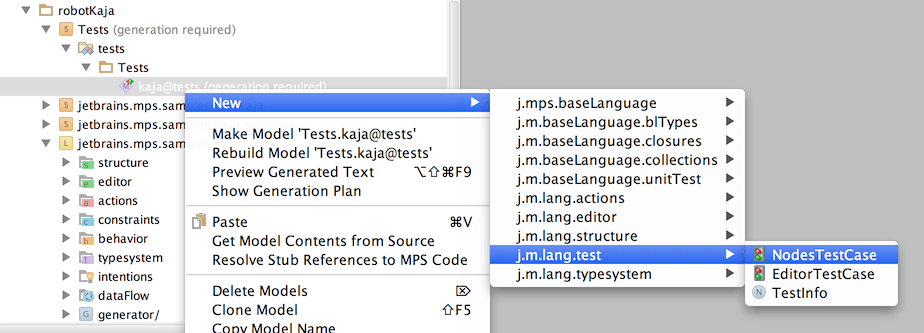
Right-clicking on the model allows you to create new unit or language tests. See all the root concepts that are available:
Unit testing with BTestCase
As for BaseLanguage Test Case, represents a unit test written in baseLanguage. Those are familiar with JUnit will be quickly at home.
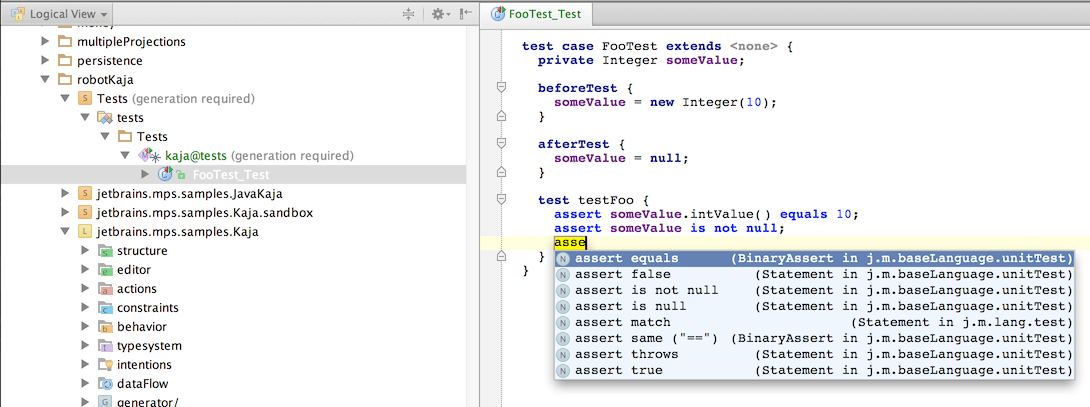
A BTestCase has four sections - one to specify test members (fields), which are reused by test methods, one to specify initialization code, one for clean up code and finally a section for the actual test methods. The language also provides a couple of handy assertion statements, which code completion reveals.
TestInfo
Some tests, like for example, Node tests or Editor tests need to access the MPS project they are part of. In order to be able to run such tests, you need to provide more information through a TestInfo node in the root of your test model. If the tests are plain BTestCases or other kind of tests that do not access the Project open API object, you do not need to have a TestInfo in the model.
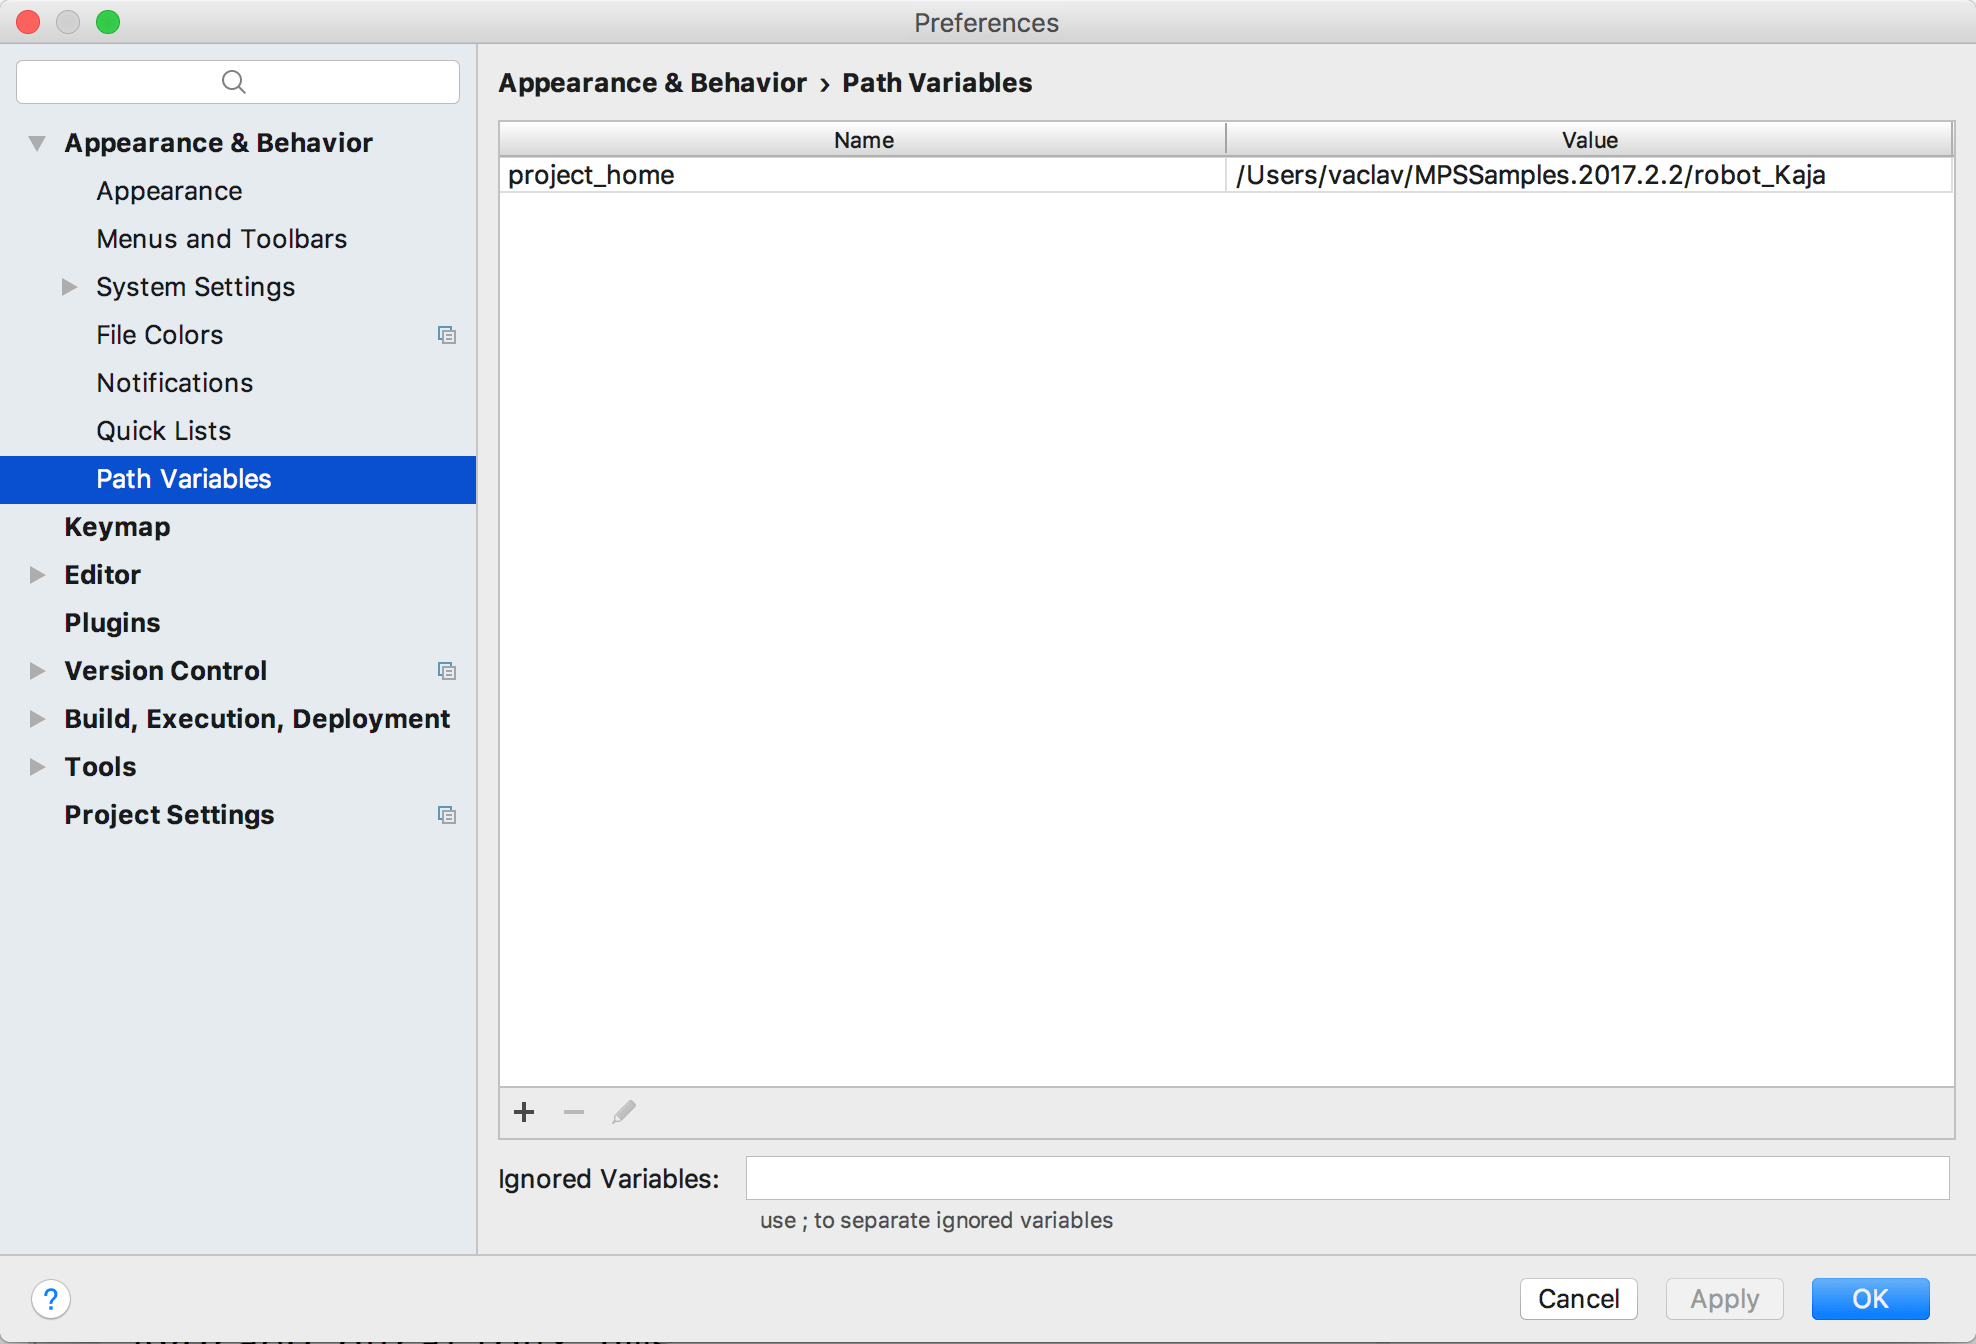
Especially the Project path attribute is worth your attention. This is where you need to provide a path to the project root, either as an absolute or relative path, or as a reference to a Path Variable defined in MPS (Project Settings -> Path Variables).
To make the path variable available in Ant scripts, define it in your build file with the mps.macro. prefix (see example below).
Testing aspects of language definitions
Node tests
A NodesTestCase contains three sections:
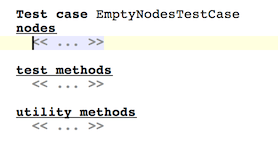
The first one contains code that should be verified. The section for test methods may contain baseLanguage code that further investigates nodes specified in the first section. The utility methods section may hold reusable baseLanguage code, typically invoked from the test methods.
Checking for correctness
To test that the type system correctly calculates types and that proper errors and warnings are reported, you write a piece of code in your desired language first. Then select the nodes, that you'd like to have tested for correctness and choose the Add Node Operations Test Annotation intention.
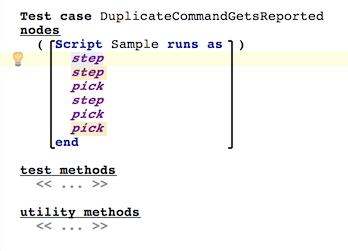
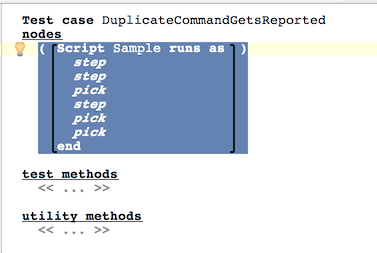
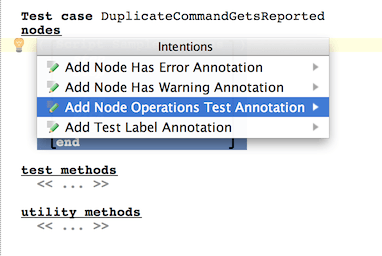
This will annotate the code with a check attribute, which then can be made more concrete by setting a type of the check:
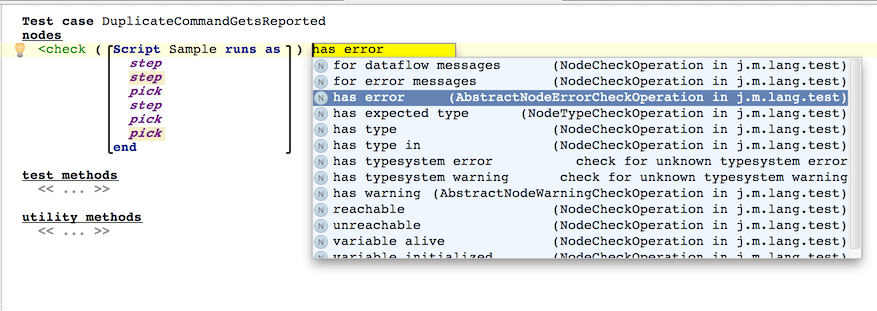
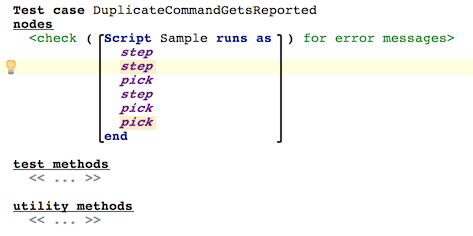
Note that many of the options have been deprecated and should no longer be used.
The for error messages option ensures that potential error messages inside the checked node get reported as test failures. So, in the given example, we are checking that there are no errors in the whole Script.
Checking for type system and data-flow errors and warnings
If, on the other hand, you want to test that a particular node is correctly reported by MPS as having an error or a warning, use the has error /has warning option.
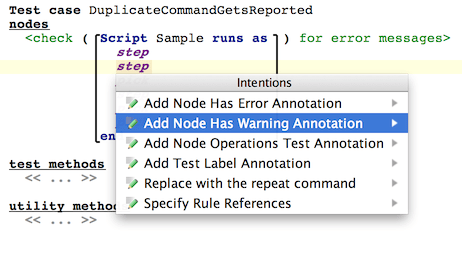
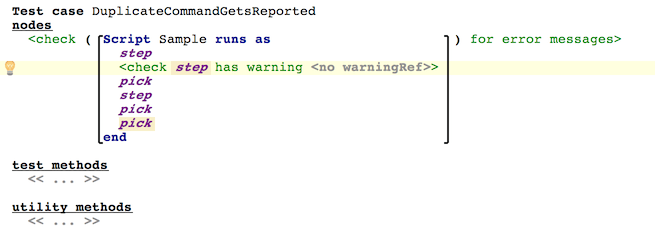
This works for both warnings and errors. Multiple warnings and errors can be declared with a single annotation.

You can even tie the check with the rule that you expect to report the error / warning. Hit Alt+Enter when with cursor over the node and pick the Specify Rule References option:
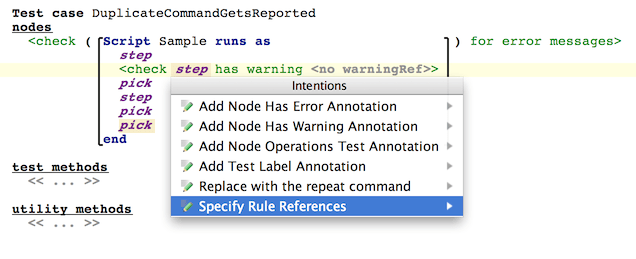
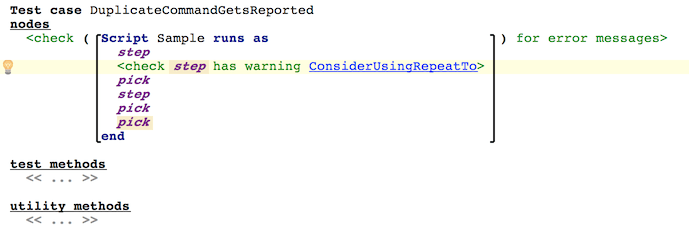
An identifier of the rule has been added. You can navigate by Ctrl+Space to the definition of the rule.

When run, the test will check that the specified rule is really the one that reports the error.
Type-system specific options
The check command offers several options to test the calculated type of a node.
Multiple expectations can be combined conveniently:

Testing scopes
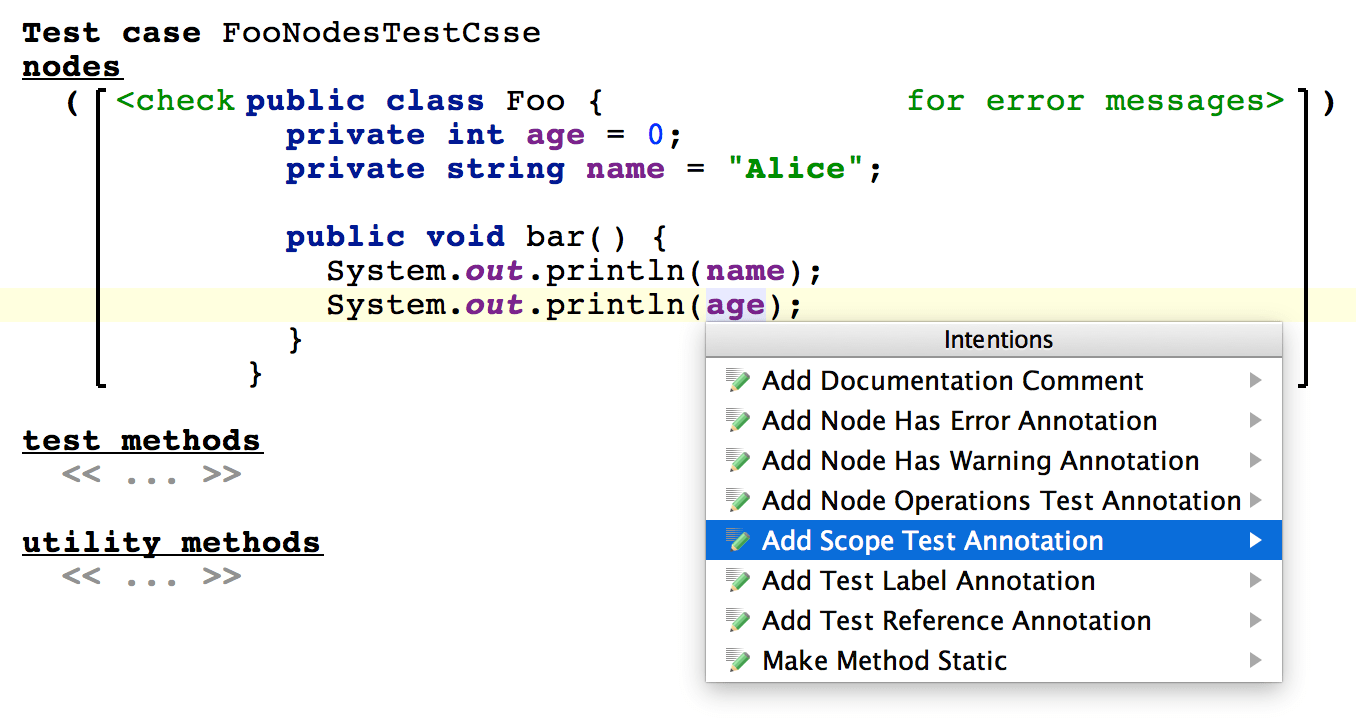
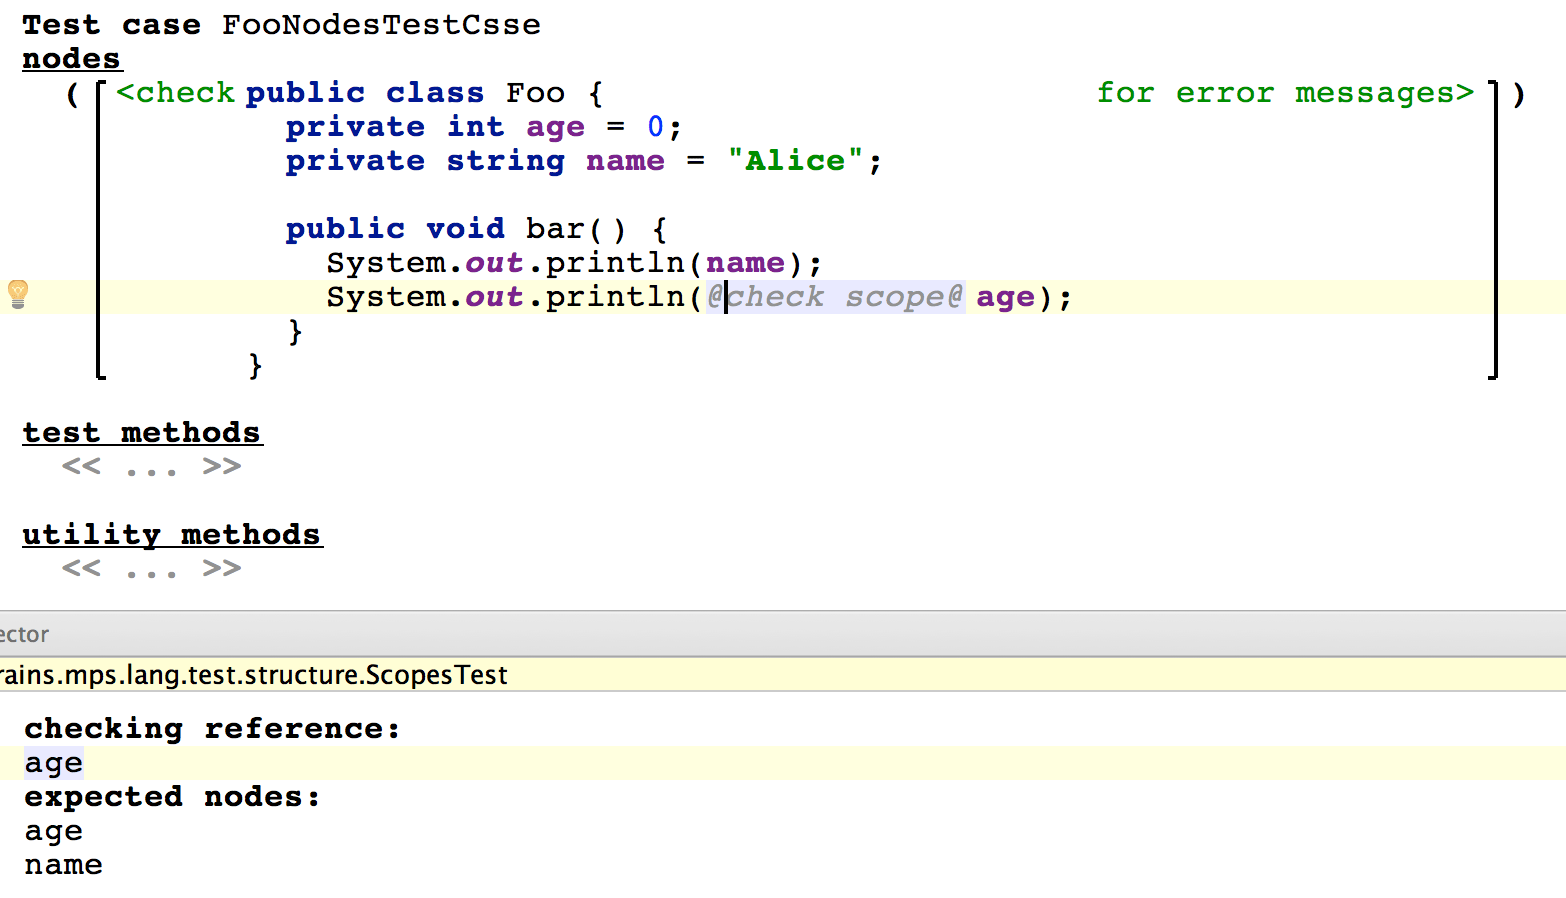
The Scope Test Annotation allows the test to verify that the scoping rules bring the correct items into the applicable scope:
The Inspector panel holds the list of expected items that must appear in the completion menu and that are valid targets for the annotated cell:
Test and utility methods
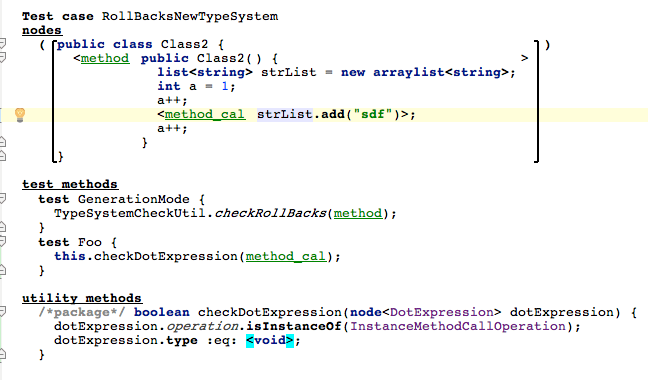
The test methods may refer to nodes in your tests through labels. You assign labels to nodes using intentions:
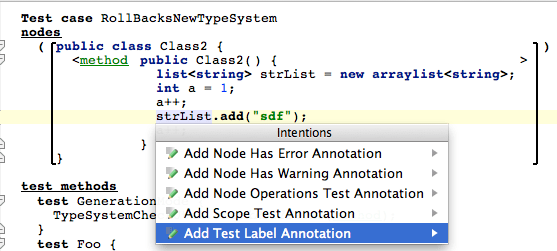
The labels then become available in the test methods.
Editor tests
Editor tests allow you to test the dynamism of the editor - actions, intentions and substitutions.

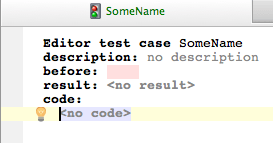
An empty editor test case needs a name, an optional description, setup the code as it should look before an editor transformation, the code after the transformation (result) and finally the actual trigger that transforms the code in the code section.
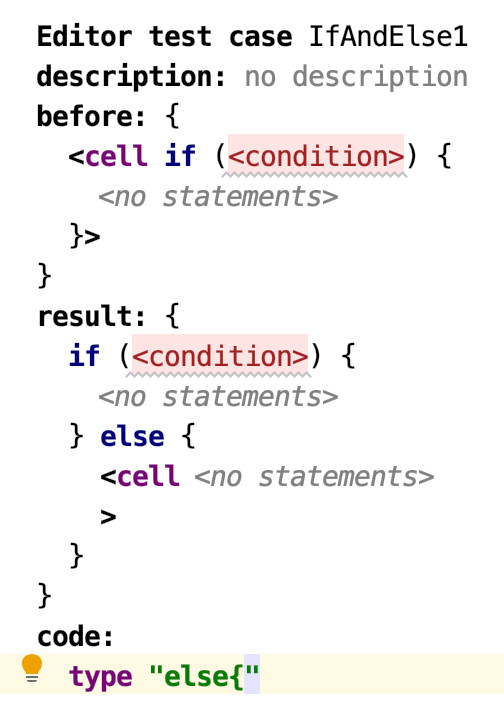
For example, a test that an IfStatement in BaseLanguage can have an "else" block added if the user types "else{" behind the closing brace would look as follows:
In the code section the jetbrains.mps.lang.test language gives you several options to invoke user-initiated actions:
type - insert some text at the current cursor position
press keys - simulate pressing a key combination
invoke action - trigger an action
invoke intention - trigger an intention
invoke quick-fix XXX from YYY to the selected node - invokes a specified quick-fix named XXX to an error YYY from the intentions menu, fails if the quick-fix is not available in the menu
invoke quick-fix <the only one available> to the selected node - invokes the only quick-fix that is available in the intentions menu, fails if 0 or more than 1 quick-fixes are available
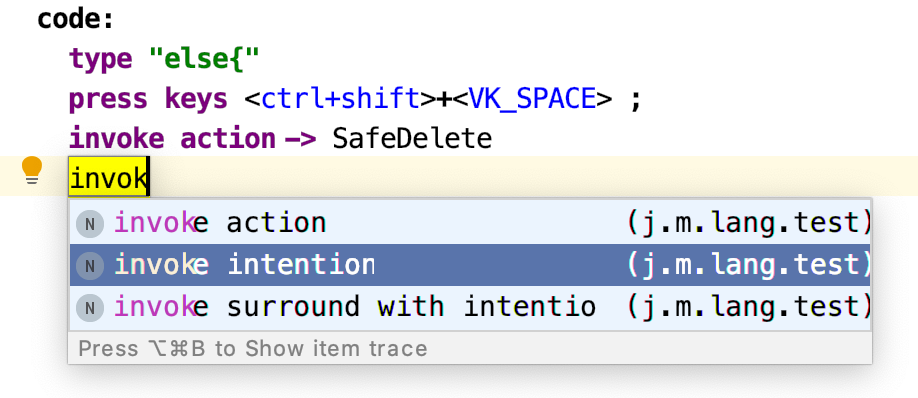
Obviously you can combine the special test commands with the plain BaseLanguage code.
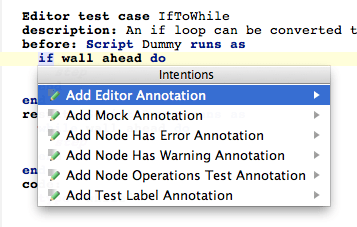
To mark the position of the caret in the code, use the appropriate intention with the cursor located at the desired position:
The cursor position can be specified in both the before and the after code:
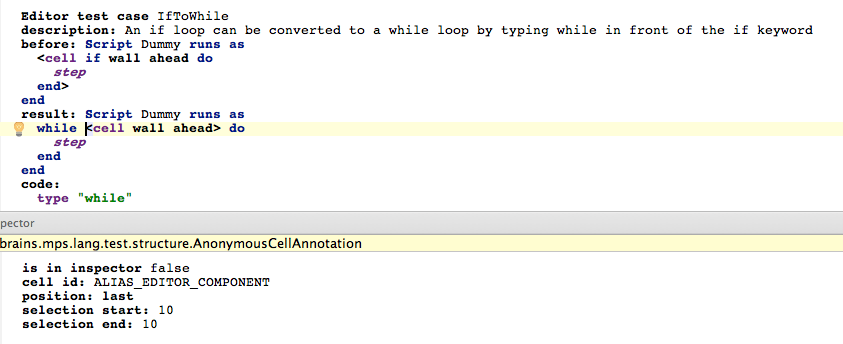
The cell editor annotation has extra properties to fine-tune the position of the caret in the annotated editor cell. These can be set in the Inspector panel.
Inspecting the editor state
Some editor tests may wish to inspect the state of the editor more thoroughly. The editor component expression gives you access to the editor component under cursor. You can inspect its state as well as modify it, like in these samples:
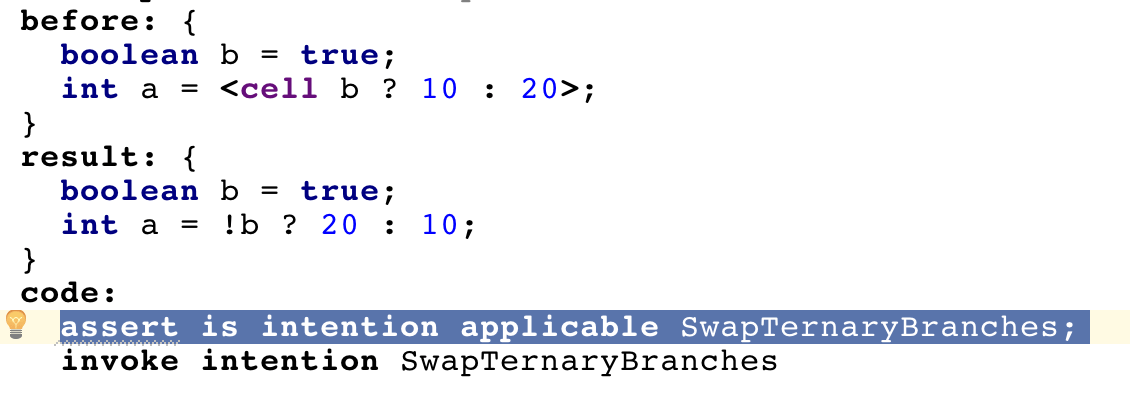
The is intention applicable expression let's you test, whether a particular intention can be invoked in the given editor context:
You can also get hold of the model and project using the model and project expressions, respectively.
Testing two-phase deletion
Two-phase deletion of nodes can be tested using the editor component expression as follows
EditorTestUtils.runWithTwoStepDeletion will create a local context with two-step deletion enabled. Remember that the user can turn two-phase deletion on and off at will, so this will ensure consistent environment for the tests. The second, boolean parameter to the method indicates whether two-phase deletion should be on or off.
DeletionApproverUtil.isApprovedForDeletion - retrieved the cell corresponding to the current node and tests is "approvedForDeletion" flag.
Alternatively use component.getDeletionApprover() to test the flag without the help of the utility class. You will have to find and provide the editor cell that should have the "approved for deletion" flag tested.
Migration tests
Migrations tests can be used to check that migration scripts produce expected results using specified input.
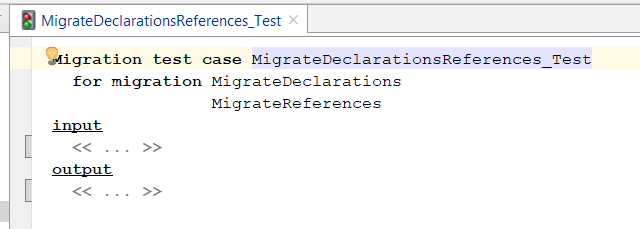
To create a migration test case you should specify its name and the migration scripts to test. In many cases it should be enough to test individual migration scripts separately, but you can safely specify more than one migration script in a single test case, if you need to test how migrations interact with one another.
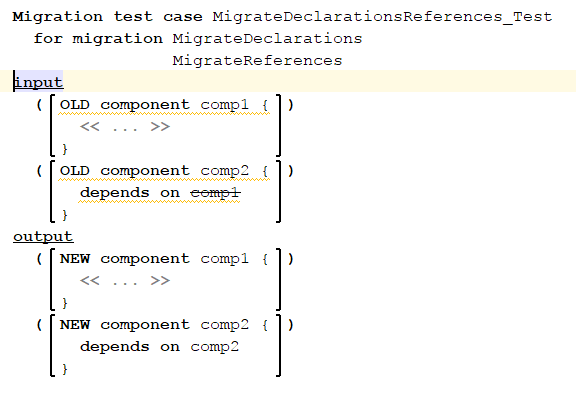
Additionally, migration test cases contain nodes to be passed into the migration process and those also nodes that are expected to come out as the ouptut of the migration.
When running, migration tests behave the following way:
Input nodes are copied as roots into an empty module with single model.
Migration scripts run on that module.
Roots contained in that module after migration are compared with the expected ouput
The check() method of the concerned migration(s) is invoked to ensure that it returns an empty list of problems
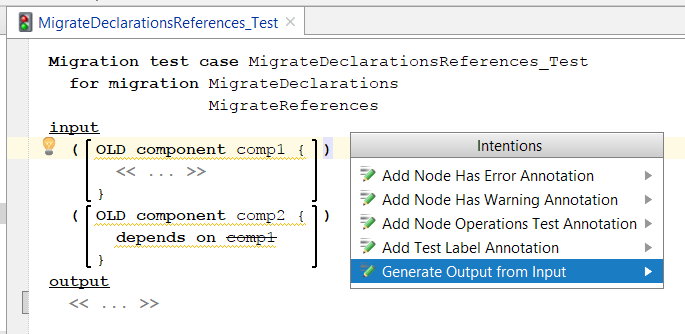
To simplify the process of writing migration tests, the expected output can be generated automatically from the input nodes using the currently deployed migration scripts. To do this, use the intention called 'Generate Output from Input'.
Generator tests
Generators can be tested with generator tests. Their goal is to ensure that a generator, or set of generators, do their transformations as expected. Both in-process and out-of-process execution modes are supported from the IDE, as well as execution from MPS Ant build scripts. As with all tests in MPS the user specifies:
the pre-conditions in form of input models
the expected output of the generator in form of output models
the set of generators to apply to the input models in form of an explicit generator plan or, if omitted, the implicit generator plan is used.
The jetbrains.mps.lang.test.generator allows you to create GeneratorTests. The jetbrains.mps.lang.modelapi language will let you create convenient model references using the model/name of the model/ syntax.

Notice that the structure of a generator test gives you a section called Arguments, where all the models need to be specified (input, expected output and optionally also models holding the generation plans), and a section called Assertions, where the desired transformations and matching are specified.
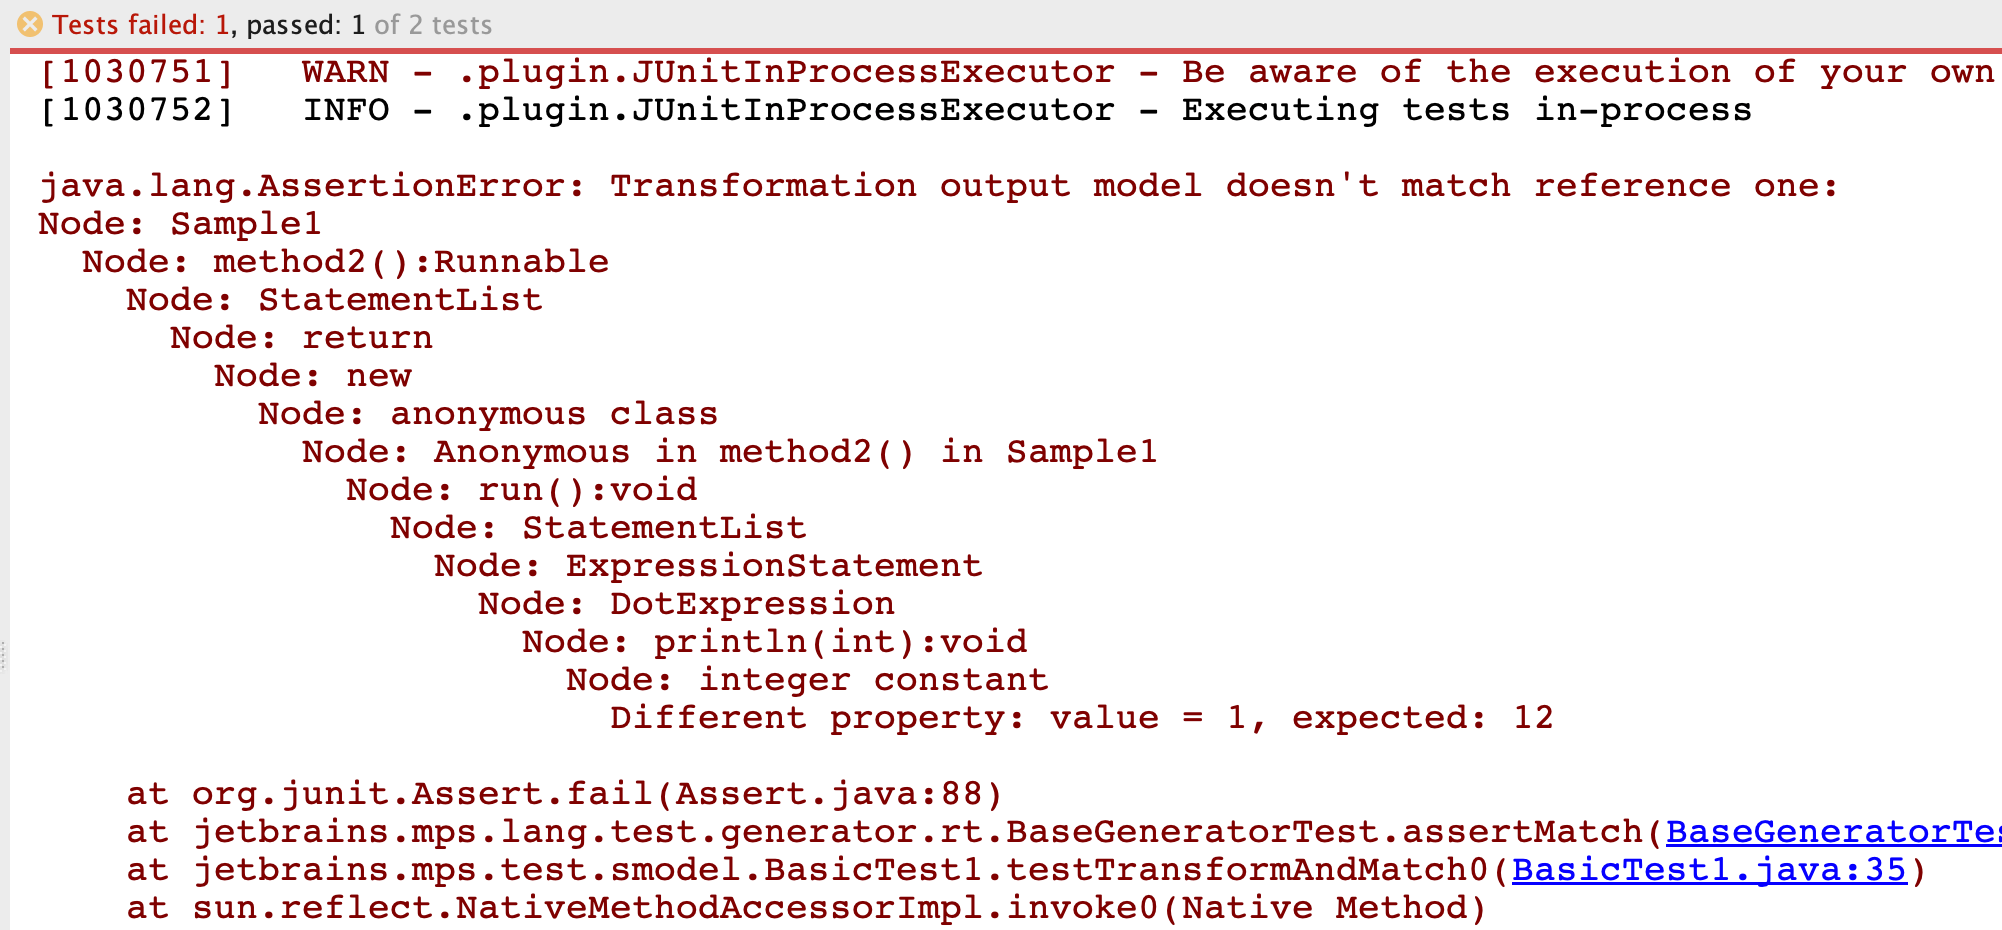
A failure to match the generator output with the expected output is presented to the user in the test report:
Running the tests
Inside MPS
To run tests in a model, just right-click the model in the Project View panel and choose Run tests:
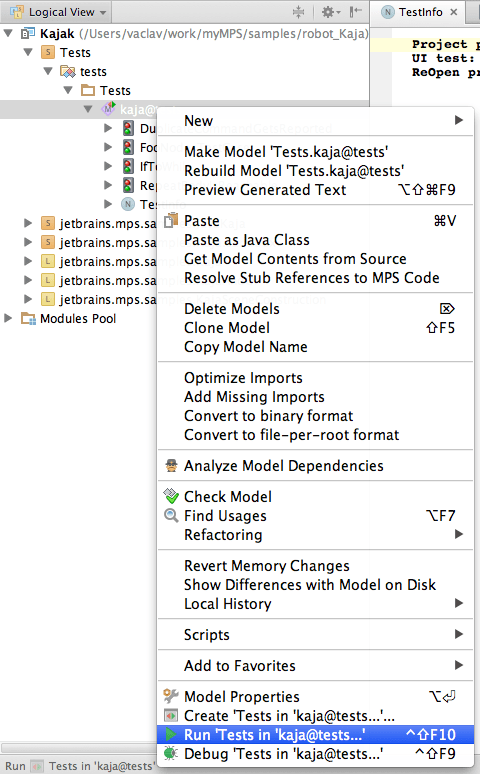
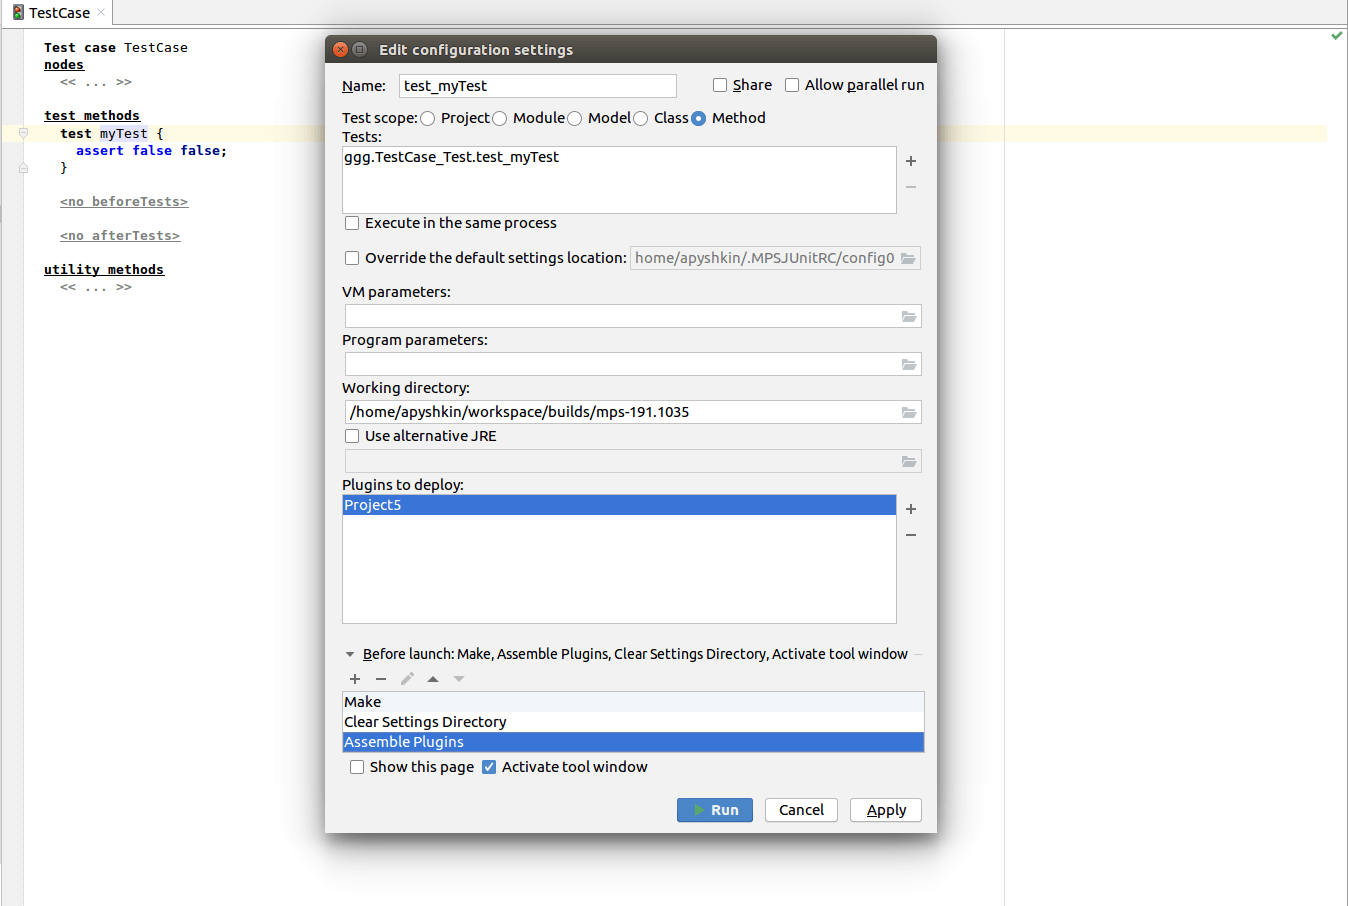
If the model contains any of the jetbrains.mps.lang.test tests, a new instance of MPS is silently started in the background (that's why it takes quite some time to run these compared to plain baseLanguage unit tests) and the tests are executed in that new MPS instance. A new run configuration is created, which you can then re-use or customize:
The Run configurations dialog gives you options to tune the performance of tests.
Override the default settings location - specify the directory to save the caches in. By default, MPS chooses the temp directory. The directory is cleared on every run.
Execute in the same process - to speed up testing tests can be run in a so-called in-process mode. It was designed specifically for tests, which need to have an MPS instance running. (For example, for the language type-system tests MPS should safely be able to check the types of nodes on the fly.)
One way to run tests is to have a new MPS instance started in the background and run the tests in this instance. The second way, enabled by this checkbox, runs all tests in the same original MPS process, so no new instance needs to be created.
When the option Execute in the same process is set, the test is executed in the current MPS environment. This is the default for:
Node tests
Editor tests
To run tests in the original way (in a separate process) you should uncheck this option. This is the default for:
Migration tests
Generation tests
Unit tests (BTestCases and JUnit test cases)
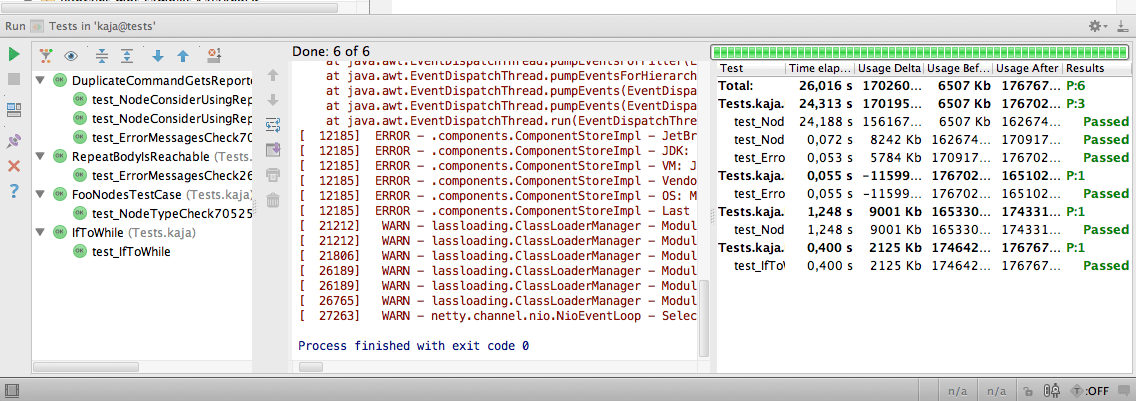
The test report is shown in the Run panel at the bottom of the screen:
The JUnit run configuration accepts plugins to deploy before running the tests. The user can provide a list of idea plugins to be deployed during the test execution. The before task 'Assemble Plugins' is available in the JUnit run configuration as well. It automatically builds the given plugins and copies the artifacts to the settings directory.
From a build script
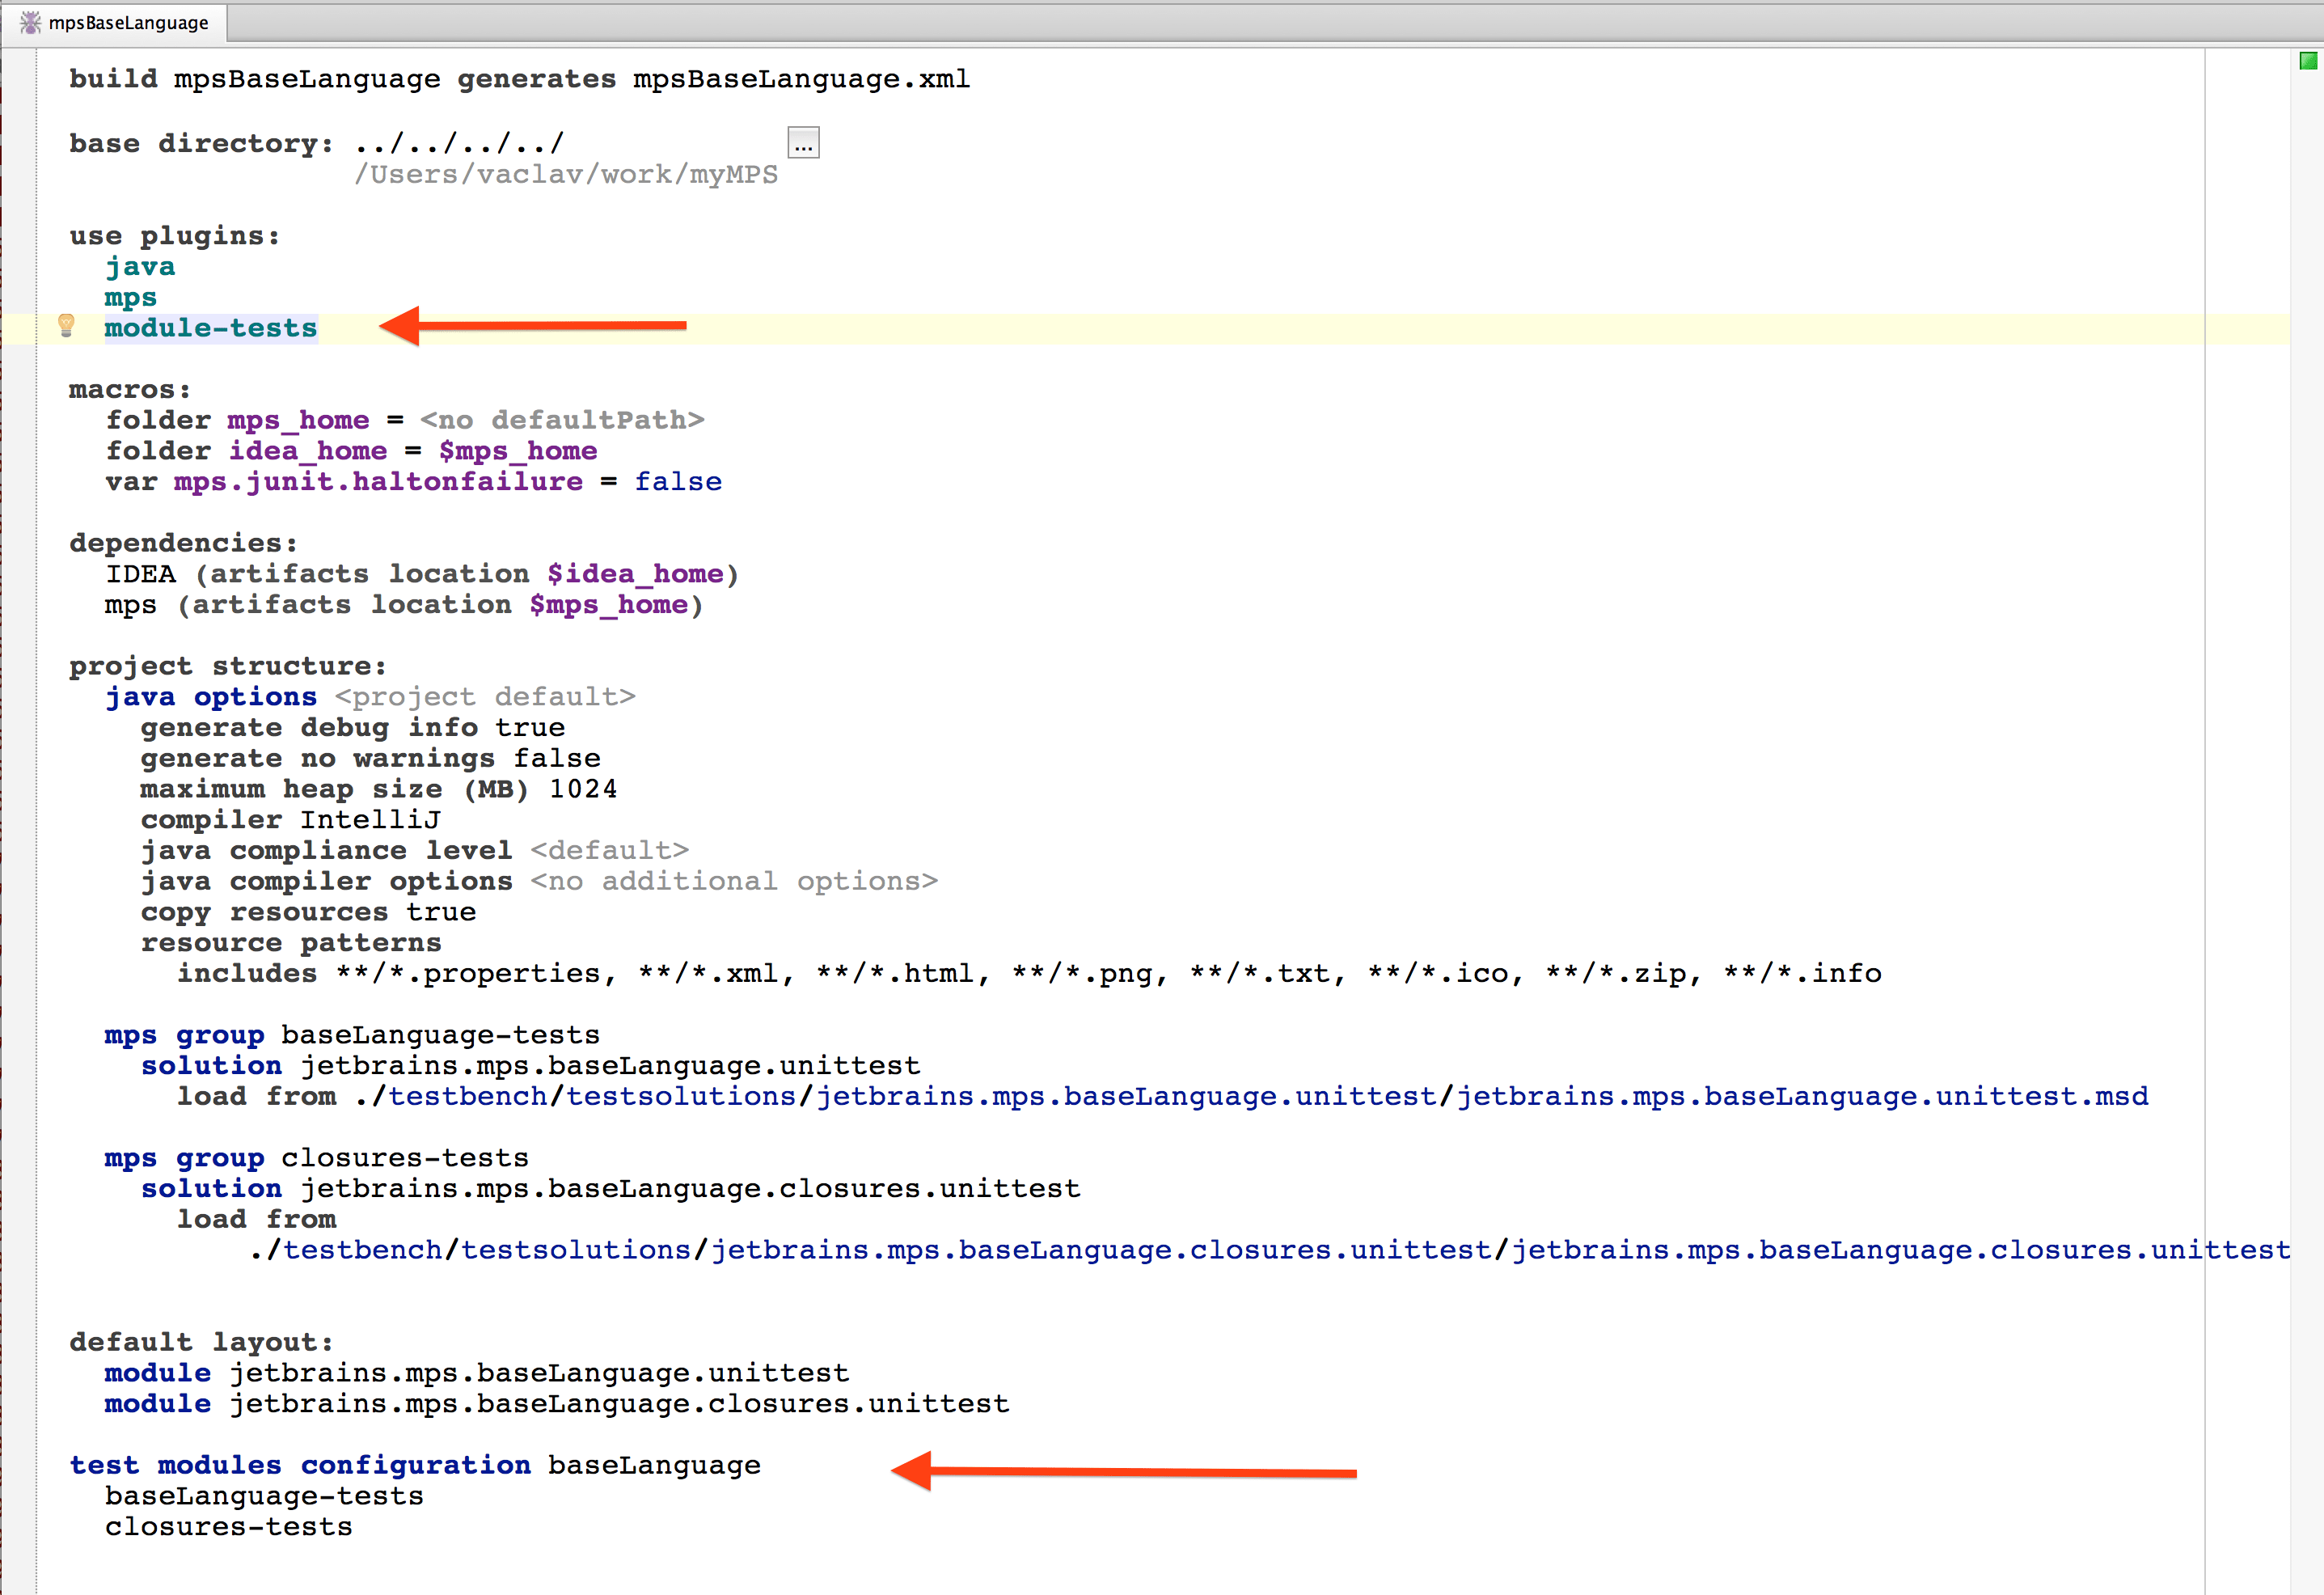
In order to have your generated build script offer the test target that you could use to run the tests using Ant, you need to import the jetbrains.mps.build.mps and jetbrains.mps.build.mps.tests languages into your build script, declare using the module-tests plugin and specify a test modules configuration.
To define a macro that Ant will pass to JUnit (e.g. for use in TestInfo roots in your tests), prefix it with mps.macro.:

Running Editor tests in IDEA Plugin
With the new JUnit test suite (jetbrains.mps.idea.core.tests.PluginsTestSuite) it is possible to execute editor tests for your languages in IntelliJ IDEA, when using the MPS plugin. To make use of this functionality you have to create a simple ANT script that will install all the necessary plugins into the IntelliJ platform and executing the tests by specifying test module name(s).

