Generator User Guide Demo1
Generator User Guide Demo 1
In this demo we will create a generator that will generate a java application for each input XML Document.
We'll re-use the 'generator_demo.test1' model in solution 'test_models' that we have created earlier. This model uses the 'jetbrains.mps.sampleXML' language and contains two XML Documents - a 'Button' and a 'Label'.
We will apply a root mapping rule to each of these documents in order to generate the output java application. In the application's main method the generated code will instantiate a swing frame and add a requested swing component to its content pane. The component is going to be either a JButton or a JLabel, depending on the name of the root element in the input document.
So, our 'Button' XML Document will be translated into a Java application that will show a button inside a frame.
New Language
The first thing to do is to create a language that will enhance simpleXML with a new generator. Instead of generating XML, we now need to generate Java code.
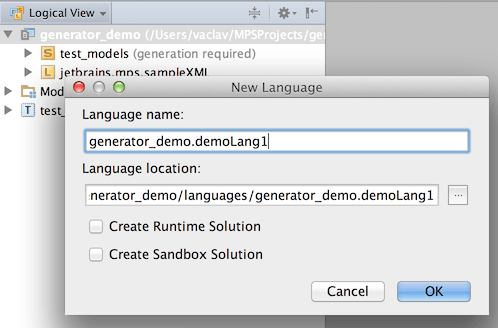
choose New -> Language in project's popup menu
enter language name: 'generator_demo.demoLang1'
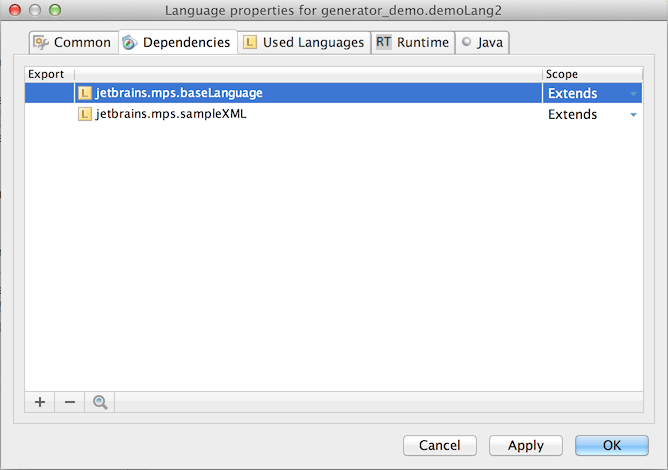
add the 'jetbrains.mps.sampleXML' as well as 'jetbrains.mps.baseLanguage' languages as extended languages into the Dependencies section in the demoLang1 language properties dialog
New Generator
MPS has created an empty generator module inside the 'generator_demo.demoLang1' language as well as a generator model 'main@generator' containing an empty mapping configuration node 'main'. If not, you can easily have them created through the context menu for the 'generator_demo.demoLang1' language.
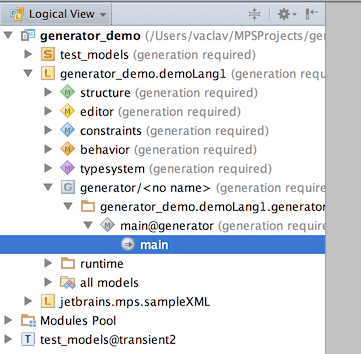
Mapping configurations serve as generator's 'entry points' where all generator rules are declared and from where templates can be referenced. Templates contain snippets of target code with declared placeholders for values to fill in from the input model. The templates are the core of MPS model-to-model transformation process.
The model stereotype 'generator' (shown after symbol '@' in the model name) allows MPS to tell a generator model from a regular model. Any node in generator model is interpreted as a template unless that node is a part of the generator language itself.
For instance, a mapping configuration node is a part of the generator language (the 'MappingConfiguration' concept is declared in language 'jetbrains.mps.lang.generator').
The class node, which we will create in the next step, is not a part of the generator language and so will be used as a template in our generator.
Root Mapping Rule
Let's create our first rule which will generate a Java application class for each input XML Document.
open the mapping configuration named 'main' in the editor
add a new rule in the root mapping rules section (press Insert or Enter with the caret at the section)
choose the rule's applicable concept: 'Document'
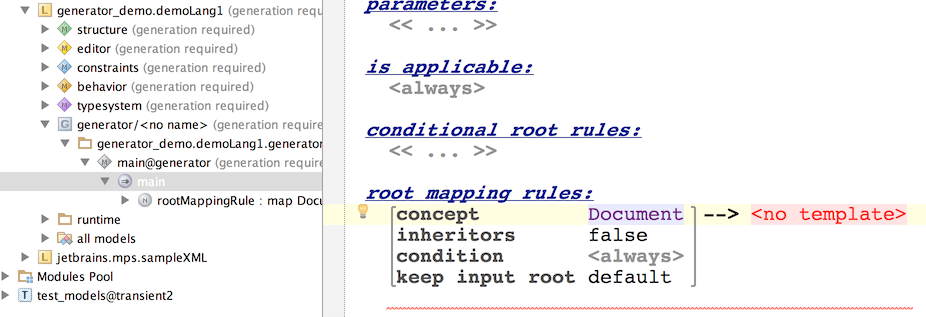
As we want to generate a class for each input Document, the template for this rule that we have to specify as part of the mapping rule is going to be a Class - i.e. an instance of the 'ClassConcept' concept defined in BaseLanguage.
The easiest way to create that template is to apply intention (see the on the left edge of the editor?):
press Alt-Enter while the caret is in the red field '<no template>'
choose New Root Template
choose class.
open the newly created class in the editor (use Ctrl+left-click or Ctrl+B on the reference)


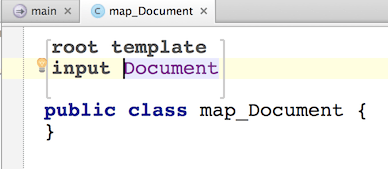
Property-macro
A template needs to be parametrized with values from the input model to be of any good. MPS gives you several types of macros to hook values from the input model into your templates. Property-macros, which we are going to start with, are used to compute values of output model nodes' properties at the time of generation.
Let's start with something very trivial - we want to generate an output class with the same name as was the name of the input Document.
Thus we will create a property-macro for the output class's name:
place the caret somewhere inside the name of the class
press Ctrl-Shift+M and choose property macro in menu
alternatively you could use Intentions through the Alt+Enter command
select the macro node in editor (rendered as '$' symbol) and open the inspector window for it (Alt-Shift+I)
enter the code for the value function that will calculate the actual name of the class when it is being generated
the function can refer to the original Document node through the node parameter
this value function will in our case return the name of original Document
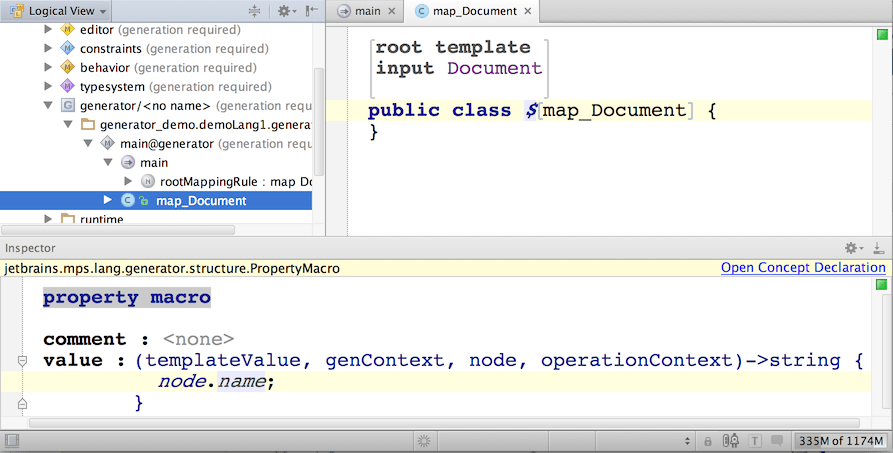
The main() method
Since we plan to use Java Swing components in the generated code, we need to import the MPS java_stub models for the 'java.awt' and 'javax.swing' packages into the generator model.
press Ctrl-M (import model)
choose 'java.awt@java_stub' model
press Ctrl-M again
choose 'javax.swing@java_stub' model
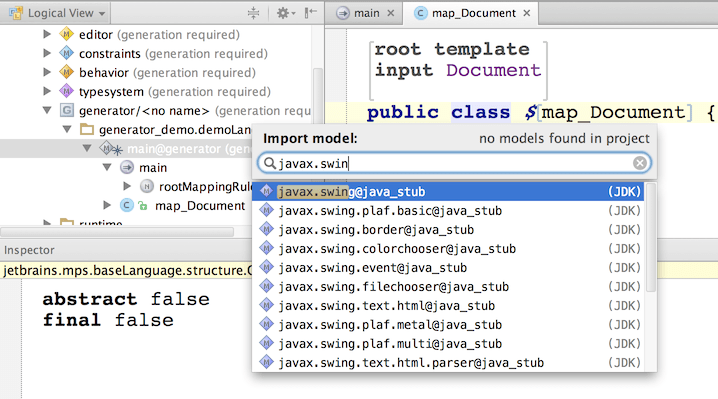
With the imports out of the way, we can now create the main() method. Typing 'psvm' will trigger an automated action that inserts an empty main method for you. Alternatively you can just type the method signature yourself.
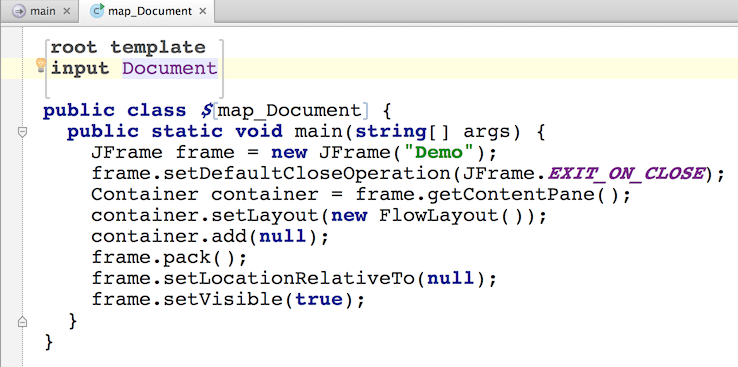
If you stumbled trying to enter 'String[]' - don't panic, you are not alone. Help is here
SWITCH-macro
You might have wondered why we pass null into the container.add() method, while instead we need to pass in either a new Button or a Label, depending on the actual value in the input XML Document . That is the last thing we have to do in this template - to replace the 'null' argument in the 'container.add(null)' expression with expression creating a swing component.
We will generate 'new JButton()' expression if the root element in the input document is named 'button', and 'new JLabel()' if the root element is named 'label'.
To perform this replacement we will 'wrap' the 'null' argument into a SWITCH-macro.
A SWITCH-macro replaces the 'wrapped' template node with a new node. The replacing node is created depending on, which case-condition is satisfied in the associated template switch.
To begin with, let's create new template switch named 'switch_JComponentByElementName'.

To start entering a condition code press Insert
The '<T...T>' things on next screenshot are called in-line template. See also the note below the screenshot.
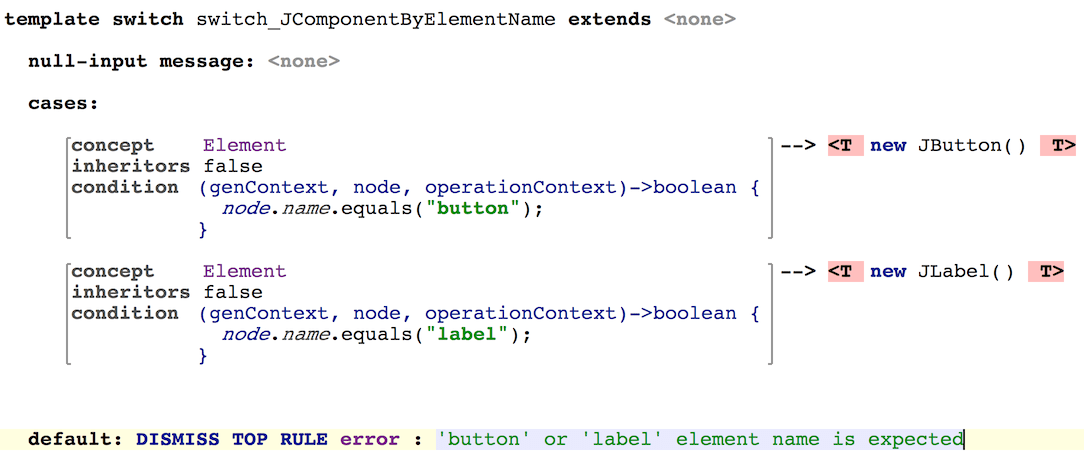
That's it. We are testing element's name. If it is 'button' we generate 'new JButton()'. Identically, if it is 'label' we generate 'new JLabel()'. If it is neither 'button' nor 'label' we are raising an error.
Now we are ready to attach the SWITCH-macro to the 'null' argument node in the in the 'container.add(null)' expression.
return to the 'main()' method in the 'Document' template
select the 'null' node in the 'container.add(null)' expression
press Ctrl-Shift-M to add an abstract node-macro
press Ctrl+Space to invoke completion menu and choose $SWITCH$
go to inspector of the $SWITCH$ macro
enter the code (see below) in the mapped node function (press Insert to start entering) to set the node on which to make a decision regarding the switch
make reference to the 'switch_JComponentByElementName' template switch node that we created earlier to refer the switching process to
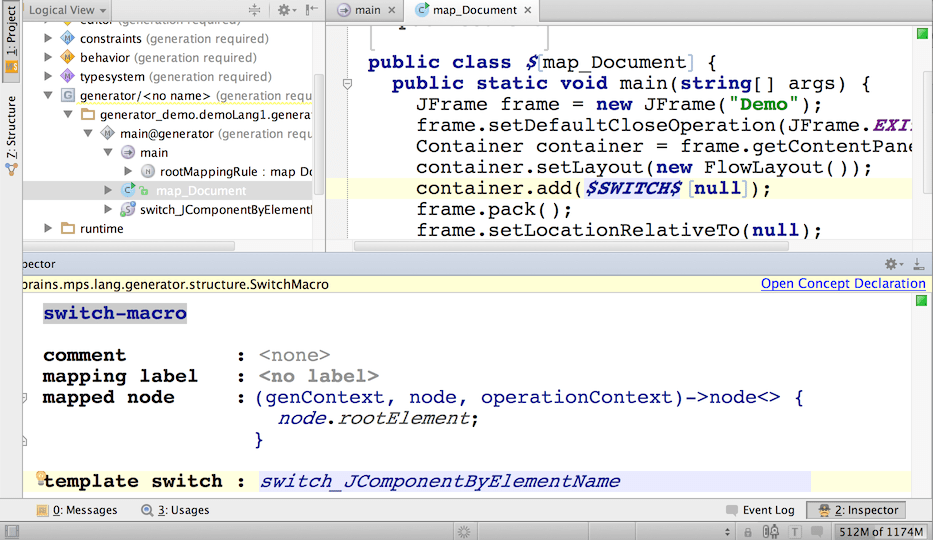
What does the mapped node function do and why do we need it?
Up to this point our input node inside the map_Document template has been a Document . But the template switch 'switch_JComponentByElementName' expects an Element as its input, not a Document . Thus we have to replace the input node - a Document, with a new input node - an Element . The expression 'node.rootElement' returns the root element of the current input document. The root element will become the new input node applicable inside the template switch.
Getting Ready for the First Test
It is very important to remember that whatever changes you made in generator models that only become visible to other modules after the generator has been made. Your last action after making changes should always be the same: Make the generator.
There is just one model in our generator so hit Shift + Control + F9 or Shift + Cmd + F9 (make model) when you finish editing the template.
Generating Test Model
Let's return to the 'test1' model in the 'test_models' solution. The solution contains several XML Documents and we have just defined the semantics for XML nodes in demoLang1. Unfortunately, MPS cannot combine these two pieces without us telling it first. MPS doesn't understand that model 'test1' is now written in two languages - sampleXML and demoLang1, because we're not using demoLang1 explicitly anywhere in 'test1'.
Since demoLang1 doesn't define any concepts of its own and so we cannot really use demoLang1 model 'test1', therefore we will explicitly tell MPS to include the demoLang1 generator in the generation process for model 'test1'.
open properties of model 'test1'
add language 'generator_demo.L1' to the Languages Engaged On Generation section
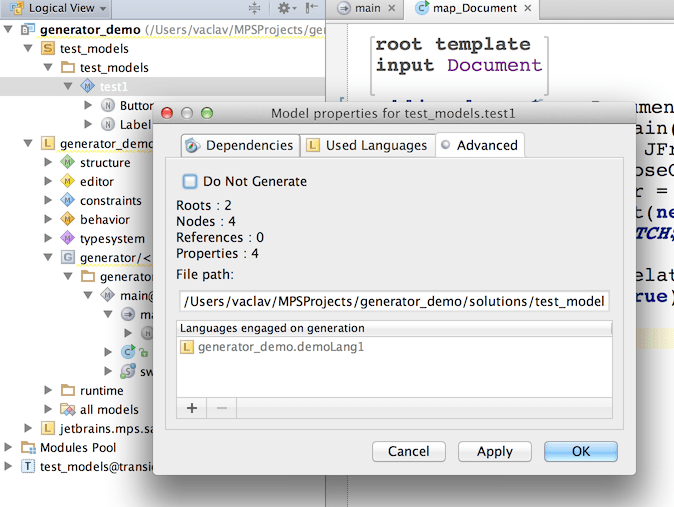
Run the Preview Generated Files command in the 'test1' model's popup menu. MPS will generate two java files and show them in the editor:
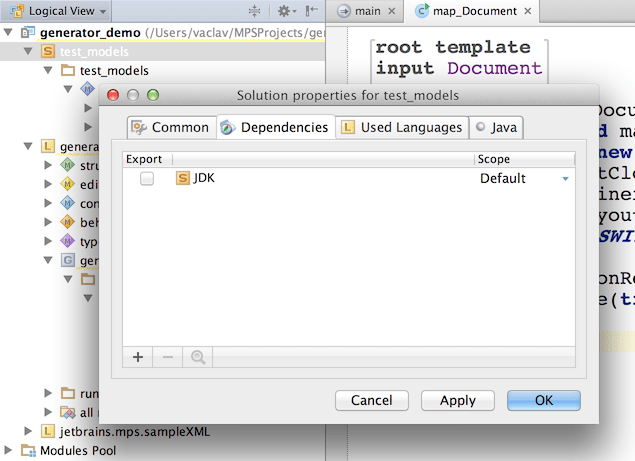
MPS can also compile your generated Java sources into Java byte code as part of make or rebuild of the 'test1' model. To enable Java compilation of generated sources you need to add a dependency on JDK to the 'test_models' solution:
