Simulate location
Last modified: 06 August 2021To test your application with different device locations, you can specify a default location for a run/debug configuration and change it when the application is running.
note
Location simulation is available for iOS and tvOS devices and simulators.
Allow location simulation
To enable location simulation for a run/debug configuration, do the following:
Select Run | Edit Configurations from the main menu or Edit Configurations from the run/debug configuration selector on the toolbar.
Choose your configuration from the list and go to the Options tab.
Select the Allow Location Simulation checkbox and click OK.
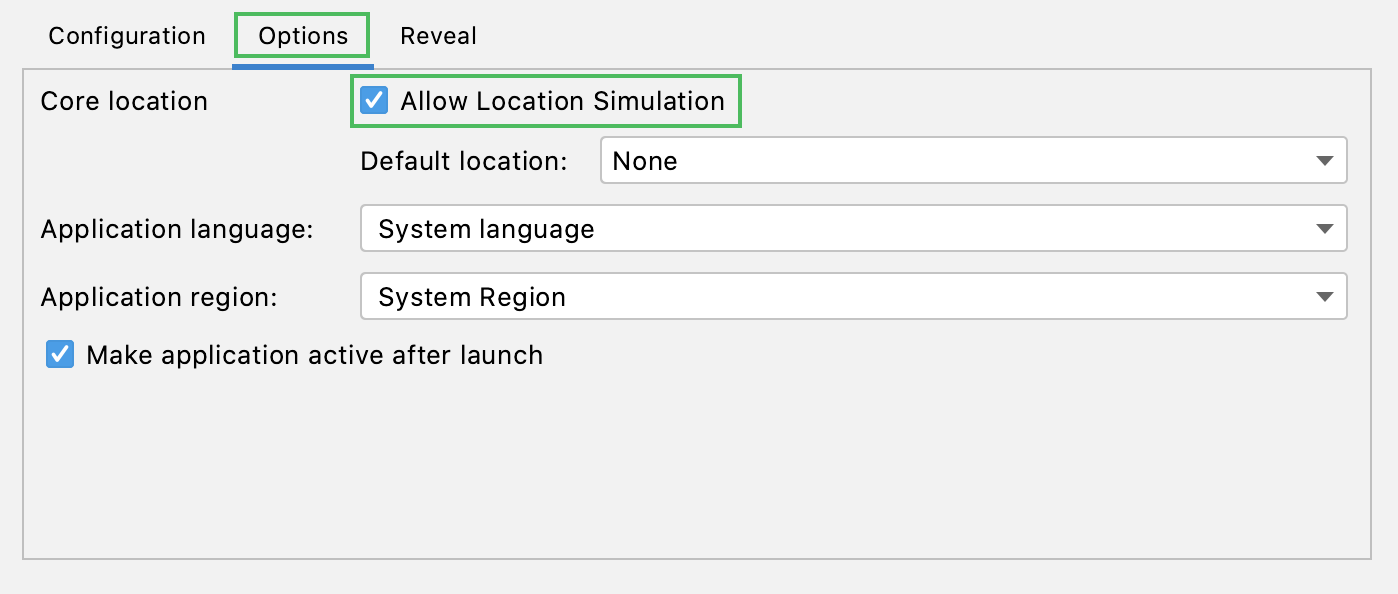
Specify location for run/debug configuration
You can specify a location both for application and test run/debug configurations.
Select Run | Edit Configurations from the main menu or Edit Configurations from the run/debug configuration selector on the toolbar.
Choose your configuration from the list and go to the Options tab.
Select the Allow Location Simulation checkbox.
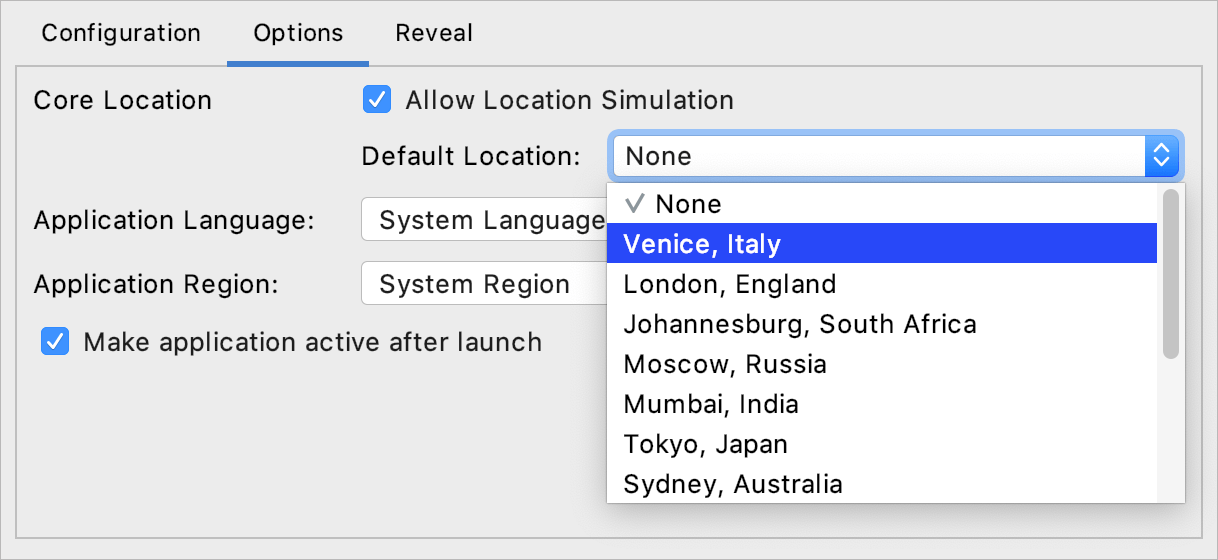
In the Default Location field, select a location from the list and click OK:
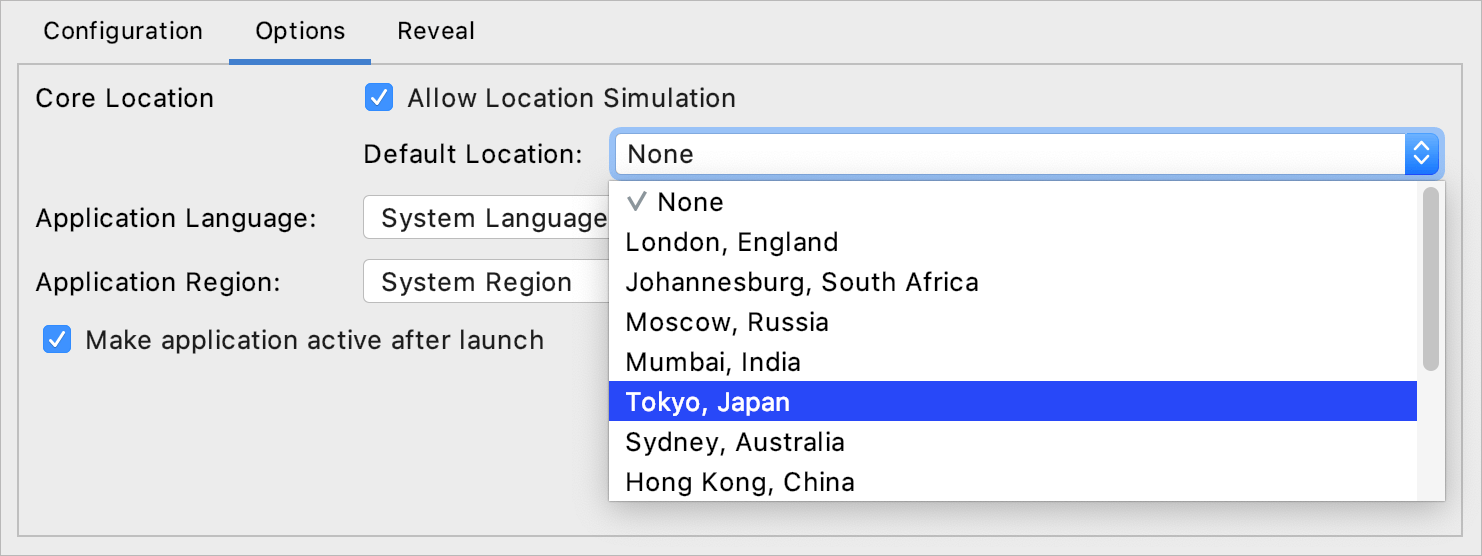
If the None value is selected, your current location will be used.
If you want to add new locations to the list, use GPX files.
Change location when the application is running
You can change the device location while running or debugging your application or application extension.
Verify that location simulation is allowed for your run/debug configuration.
Start running ⇧ F10 or debugging ⇧ F9 the application.
In the Run or Debug tool window, click
:
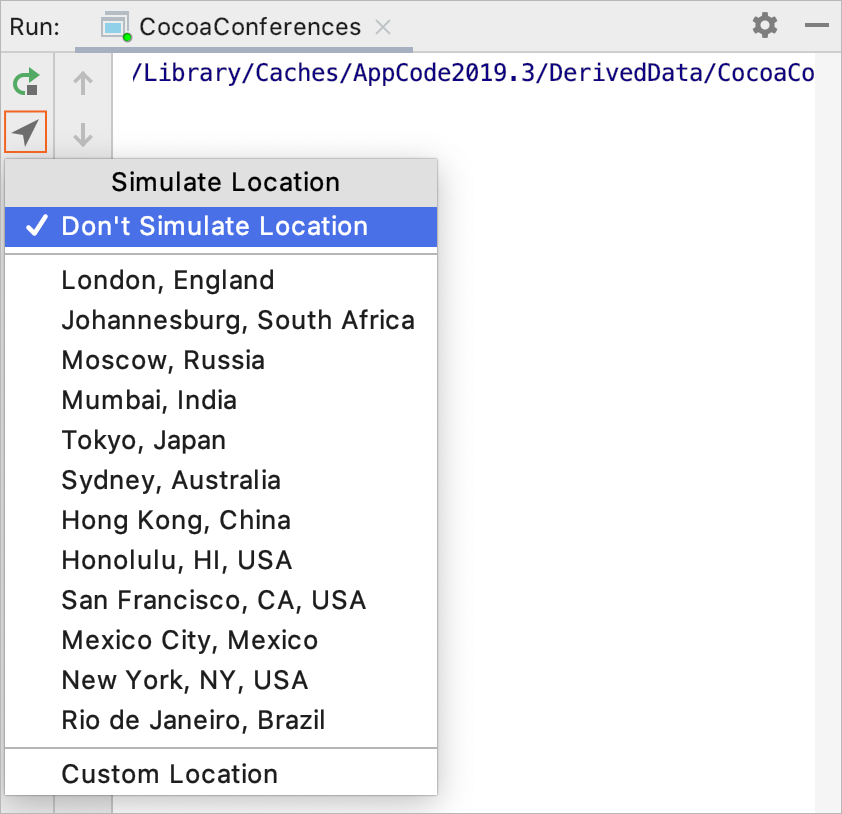
Select a desired location from the list that opens.
If you cannot find the location that you need, select Custom Location and enter the location coordinates:
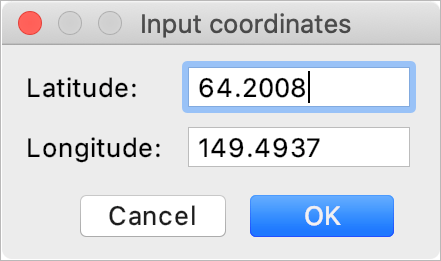
This location will be simulated on your device, but won't be saved in the list. If you want to add custom locations to the list, use GPX files.
Use GPX files
To simulate custom locations missing in the standard list, you can use the GPX files. With these files, you can also simulate movement.
GPX is an XML-based file format used for storing GPS data. The format describes waypoints <wpt>, tracks <trk>, and routes <rte>. AppCode supports only waypoints <wpt>.
You can add an already existing GPX file to your project, edit it in AppCode, or create a new file from the Xcode template.
Create a new GPX file
In the Project tool window ⌥ 1, right-click a directory you want to add the file to and select New | File from Xcode Template.
In the dialog that opens, select iOS | Resource | GPX File:
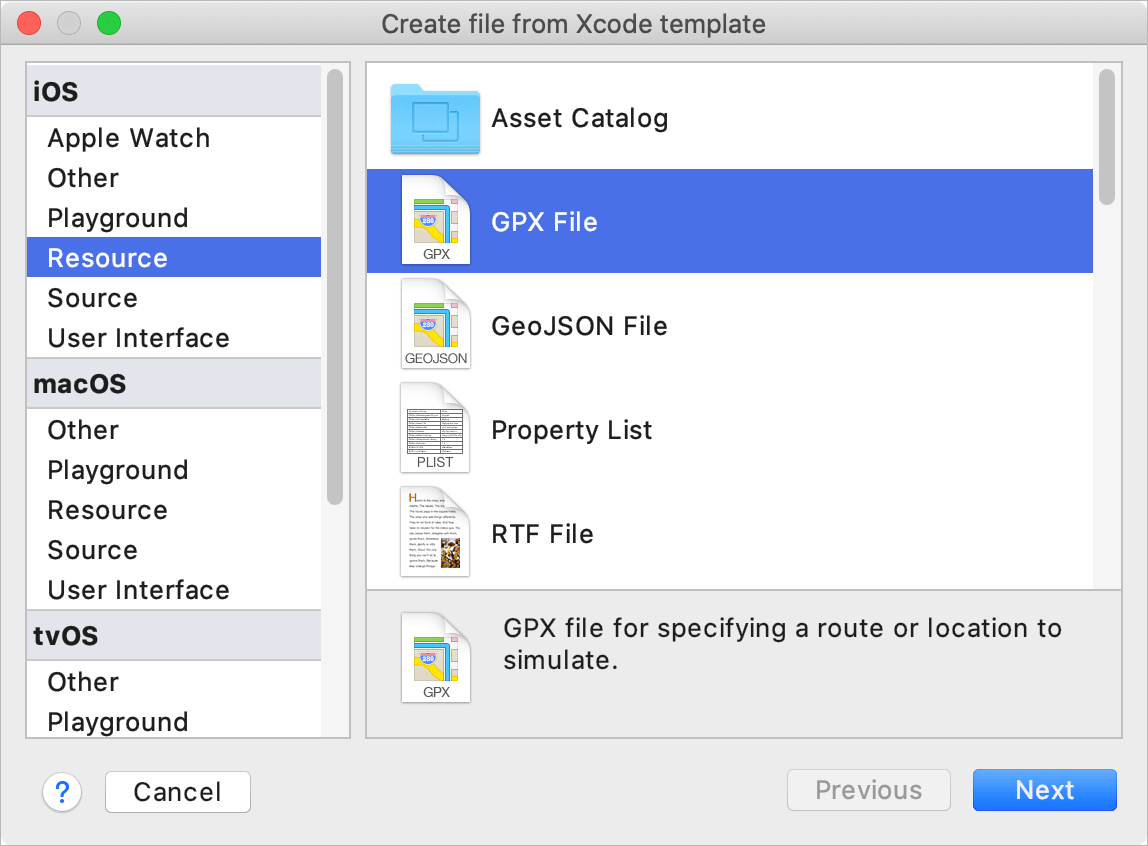
Click Next.
On the next page, specify the file name and location and define to which group and target the file will belong. Later, the file name will appear in the list of locations. Click Finish.
A GPX file with initial content will be created.
If you want to simulate location, create one
<wpt>element containing the place coordinates and (optionally) name. For example:<gpx> <wpt lat="45.4408" lon="12.3155"> <name>Venice, Italy</name> </wpt> </gpx>To simulate movement, add several waypoints containing time values.
warning
The waypoints must be sorted by time in ascending order. Otherwise, AppCode won't be able to read the file.
<gpx>
   <wpt lat="40.606641" lon="-74.044835">
     <time>2019-11-05T16:25:12Z</time>
   </wpt>
   <wpt lat="40.608693" lon="-74.038514">
     <time>2019-11-05T16:25:17Z</time>
   </wpt>
   <wpt lat="40.610769" lon="-74.032217">
     <time>2019-11-05T16:25:26Z</time>
   </wpt>
</gpx>
After the GPX file is added to your project, a new item will be available in the location list both in the Run/Debug tool window and Run/Debug Configurations dialog.
Thanks for your feedback!