Connect to Oracle Cloud by using wallets
Oracle Wallet is a set of files that stores all the user credentials such as certificates, certificate requests, and private keys. You can create a wallet by using the Oracle tooling or ask your Oracle server administrator to generate the wallet. For more information about wallets, see Creating and Managing Oracle Wallet and Download Client Credentials (Wallets) at docs.oracle.com.
Preparing wallets and environment
From the Oracle Instant Client Downloads page at oracle.com, download the following packages for your operating system:
Basic Package
SQL*Plus Package
JDBC Supplement Package
Also, download oraclepki.jar from Oracle Database 12.2.0.1 JDBC Driver & UCP Downloads page at oracle.com.
Prepare a ZIP archive with wallet files. For more details about downloading a wallet, see Download Client Credentials (Wallets) at docs.oracle.com.
Step 1. Unpack and move downloaded archives and files
Create a directory (for example, ~/Oracle/instantclient_19_8/).
Extract all packages to the created directory.
Move oraclepki.jar to the created directory.
Extract a ZIP archive with wallet files to the wallet directory inside the network directory. The path to wallet files might look as follows: ~/Oracle/instantclient_19_8/network/wallet.

Step 2. Add environment variables
This procedure is optional, but it might further simplify operations with OCI.
Add the following environment variables:
export ORACLE_HOME=~/Oracle/instantclient_19_8export TNS_ADMIN=$ORACLE_HOME/network/adminexport NLS_LANG=English_America.UTF8export PATH=$PATH:$ORACLE_HOMEset ORACLE_HOME=C:\Oracle\instantclient_19_8set TNS_ADMIN=%ORACLE_HOME%\network\adminset NLS_LANG=English_America.UTF8set PATH=%PATH%:%ORACLE_HOME%
Step 3. Configuring ORA files
An archive with wallet files includes tnsnames.ora and sqlnet.ora files.
In the directory that you created on Step 1, create the network directory. Inside the network directory, create the admin directory. The overall path should look as follows: ~/Oracle/instantclient_19_8/network/admin.
Copy tnsnames.ora and sqlnet.ora files to the admin directory.
Open the sqlnet.ora file from the admin directory in the text editor.
Change the value of the
DIRECTORYattribute to the path to your wallet. For example, the path for this tutorial looks as follows:WALLET_LOCATION = (SOURCE = (METHOD = file) (METHOD_DATA = (DIRECTORY="/Users/jetbrains/Oracle/instantclient_19_8/network/wallet"))) SSL_SERVER_DN_MATCH=yesConsider the following screenshot of the admin directory and configuration files.

Creating the Oracle Cloud connection
Step 1. Prepare a driver for the OCI Cloud connection
In the Database tool window (), click the Data Source Properties icon
.
In the Data Sources and Drivers dialog, click the Drivers tab.
In the list of drivers, right-click the Oracle driver and select Duplicate.
Change the name of the duplicated Oracle driver (for example, Oracle [Cloud]).
In the Driver Files pane, click the Add icon (
) and select Custom JARs.
In the file browser, navigate to the directory of the Instant Client that you created previously (for example, ~/Oracle/instantclient_19_8).
In the directory, select the following files: ojdbc8.jar, orai18n.jar, and oraclepki.jar.
Click Open.
In the Driver Files pane, click the Add icon (
) and select Native Library Path.
In the file browser, navigate to the directory of the Instant Client created previously (for example, ~/Oracle/instantclient_19_8) and click Open.

Step 2. Create the OCI connection
In the Database tool window (), click the Data Source Properties icon
.
In the Data Sources and Drivers dialog, click the Add icon (
) and select Oracle.
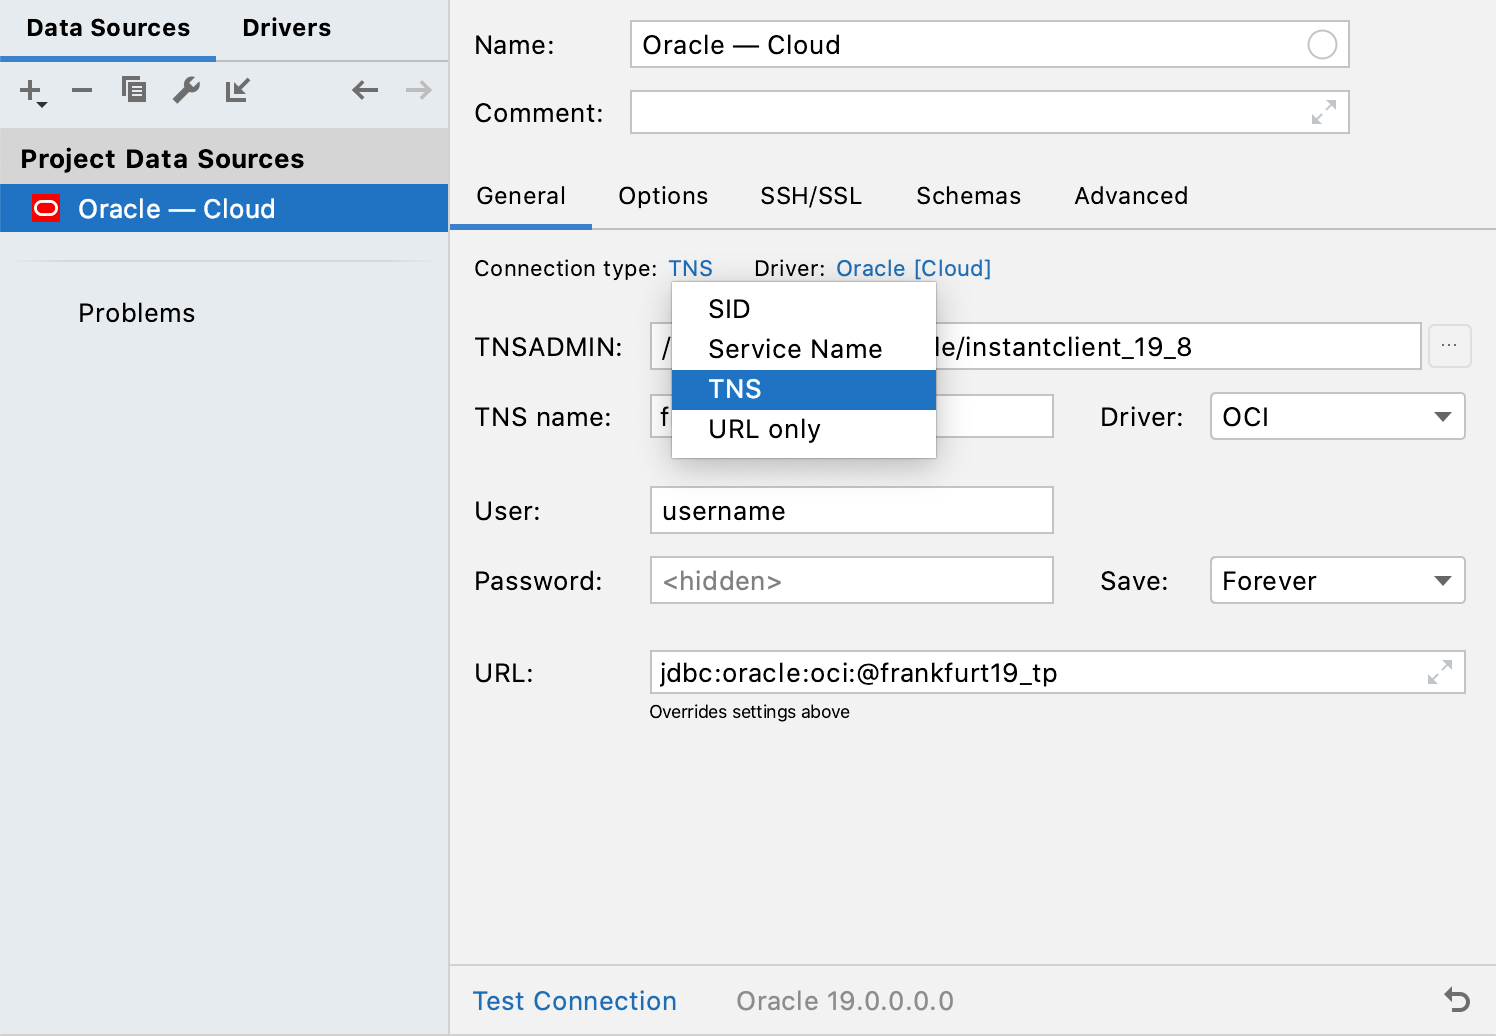
From the Connection type list, select TNS.

From the Driver list, select OCI.

Click the Driver link and select the driver entry that you created on Step 1.

In the TNSADMIN field, click the browse button and navigate to the directory with the Instant Client (in our case, ~/Oracle/instantclient_19_8/).
In the TNS name field, specify what service name to use (see a value of an alias in tnsnames.ora).
Specify credentials for the Oracle user.
To ensure that the connection to the data source is successful, click the Test Connection link.
