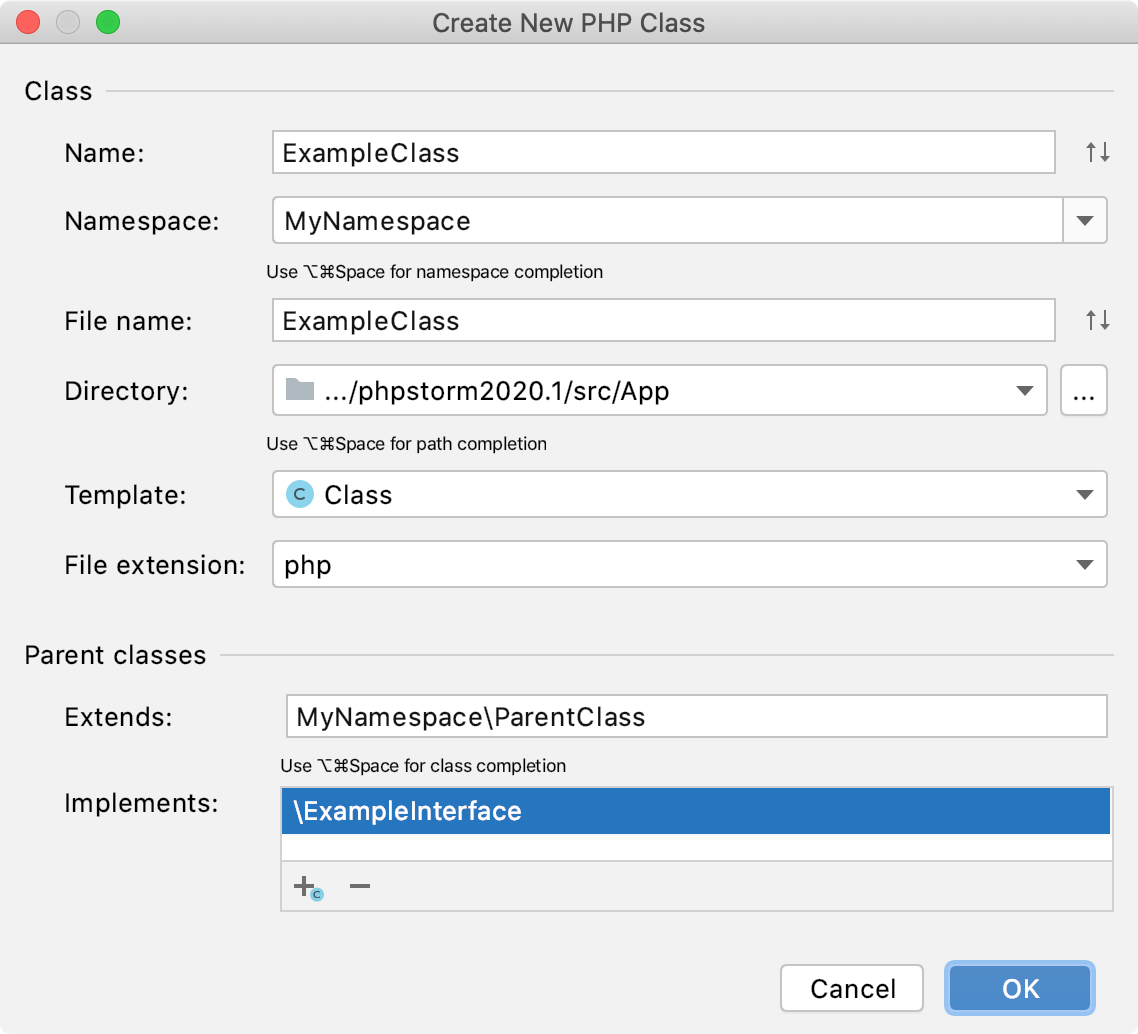
Creating PHP Classes
PhpStorm supposes that the namespaces in your project are arranged in compliance with the PSR0 standard and enforces you to retain the folder structure and the namespace hierarchy in accordance with this standard when creating PHP classes.
When you specify the folder where the file that implements the new class will be stored, PhpStorm automatically updates the namespace for the class.
Do one of the following:
In the Project tool window Alt+1, select the directory in which you want to create a new class, and then choose from the main menu.
Right-click the corresponding directory and select New from the context menu.
Press Alt+Insert.
Choose PHP Class. The Create New PHP Class dialog opens.

In the Name field, type the name of the class to be created. PhpStorm automatically fills in the specified name in the File name field.
Specify the namespace to create the class in. By default, the Namespace field shows the namespace that corresponds to the folder from which the class creation was invoked.
You can choose <global namespace> from the list or change the namespace manually. Keep in mind that this may cause loading problems, since such namespace hierarchy will not meet the PSR0 standards.
You can also change the folder to store the file that will implement the new class, the change will also be reflected in the Namespace field.
In the Template list, specify the template from which to create the file. The available options are as follows:
The set of PhpStorm bundled templates:
Your own set of manually created file templates having the PHP file extension.
To set such a template as a default, select the Use as a default template checkbox. The default template will be selected automatically the next time you invoke the creation of a new class.
Refer to File templates for details.
Choose the file extension from the list.
If you are creating a class or an interface, optionally choose the parent classes for it in the Parent classes area.
In the Extends field, type the name of the parent class that the current class extends. To use code completion, press Ctrl+Space.
In the Implements area, choose the interfaces that the created class implements (or the created interface extends):
To add an interface, click
or press Alt+Insert. In the Choose Class dialog that opens, search for the desired interface either by name or by using the project tree view.
To remove an interface, click
or press Delete.
When you click OK, a new class is created according to the selected template, with the specified namespace declaration added automatically.