Configure a pipenv environment
Pipenv is a tool that provides all necessary means to create a virtual environment for your Python project. It automatically manages project packages through the Pipfile file as you install or uninstall packages.
Pipenv also generates the Pipfile.lock file, which is used to produce deterministic builds and create a snapshot of your working environment. This might be particularly helpful for security sensitive deployment, when project requirements and packages versions are critical. For more information about pipenv, refer to the project documentation at pipenv.pypa.io.
To use pipenv with PyCharm, you need to implement several preparation steps.
Install pipenv
Run the following command to ensure you have pip installed in your system:
$ pip --versionYou should expect to receive a system response indicating the pip version. If no pip is discovered, install it as described in the Installation Instructions. Alternatively, you can download and install Python from http://python.org.
Install
pipenvby running the following command:$ pip install --user pipenvWhen installation completes, you will see the following message:

For your convenience, you might add the user base’s binary directory to your
PATHenvironmental variable. If you skip this procedure, PyCharm will prompt you to specify the path to the pipenv executable when adding a pipenv environment.Run the following command:
$ py -m site --user-siteA sample output can be:
C:\Users\jetbrains\AppData\Roaming\Python\Python37\site-packages
Replace
site-packageswithScriptsin this path to receive a string for adding to thePATHvariable, for example:$ setx PATH "%PATH%;C:\Users\jetbrains\AppData\Roaming\Python\Python37\Scripts"
Run the following command to find the user base's binary directory:
$ python -m site --user-baseAn example of output can be
/Users/jetbrains/.local (macOS) or /home/jetbrains/.local (Linux)
Add bin to this path to receive a string for adding to the ~/.bashrc file, for example:
$ export PATH="$PATH:/Users/jetbrains/.local/bin"Run the following command to make the changes effective:
$ source ~/.bashrcEnsure you have enabled bashrc in your bash_profile.
At any time you can alter the specified path to the pipenv executable in the project settings. In the Settings dialog (Ctrl+Alt+S) , navigate to , and type the target path in the Path to Pipenv executable field.
After the preparation steps are done, you can use pipenv to create a virtual environment for new or existing projects.
You can also set up pipenv for any of your earlier created projects.
Configure pipenv for an existing Python project
Do one of the following:
Click the Python Interpreter selector and choose Add New Interpreter.
Press Ctrl+Alt+S to open Settings and go to . Click the Add Interpreter link next to the list of the available interpreters.
Click the Python Interpreter selector and choose Interpreter Settings. Click the Add Interpreter link next to the list of the available interpreters.
Select Add Local Interpreter.
In the left-hand pane of the Add Python Interpreter dialog, select Pipenv Environment.

Choose the base interpreter from the list, or click
and find the Python executable in your file system.
If your project contains Pipfile, you can choose whether you want to install the packages listed in it by enabling or disabling the Install packages from Pipfile checkbox. By default, the checkbox is enabled.
If you have added the base binary directory to your
PATHenvironmental variable, you don't need to set any additional options: the path to the pipenv executable will be autodetected.If the pipenv executable is not found, follow the pipenv installation procedure to discover the executable path, and then specify it in the dialog.
Click OK to complete the task.
When you have set the pipenv virtual environment as a Python interpreter, all available packages are added from the source defined in Pipfile. The packages are installed, removed, and updated in the list of the packages through pipenv rather than through pip.
PyCharm can create a pipenv environment for your project based on the project requirements recorded in Pipfile.
Create an environment using the Pipfile
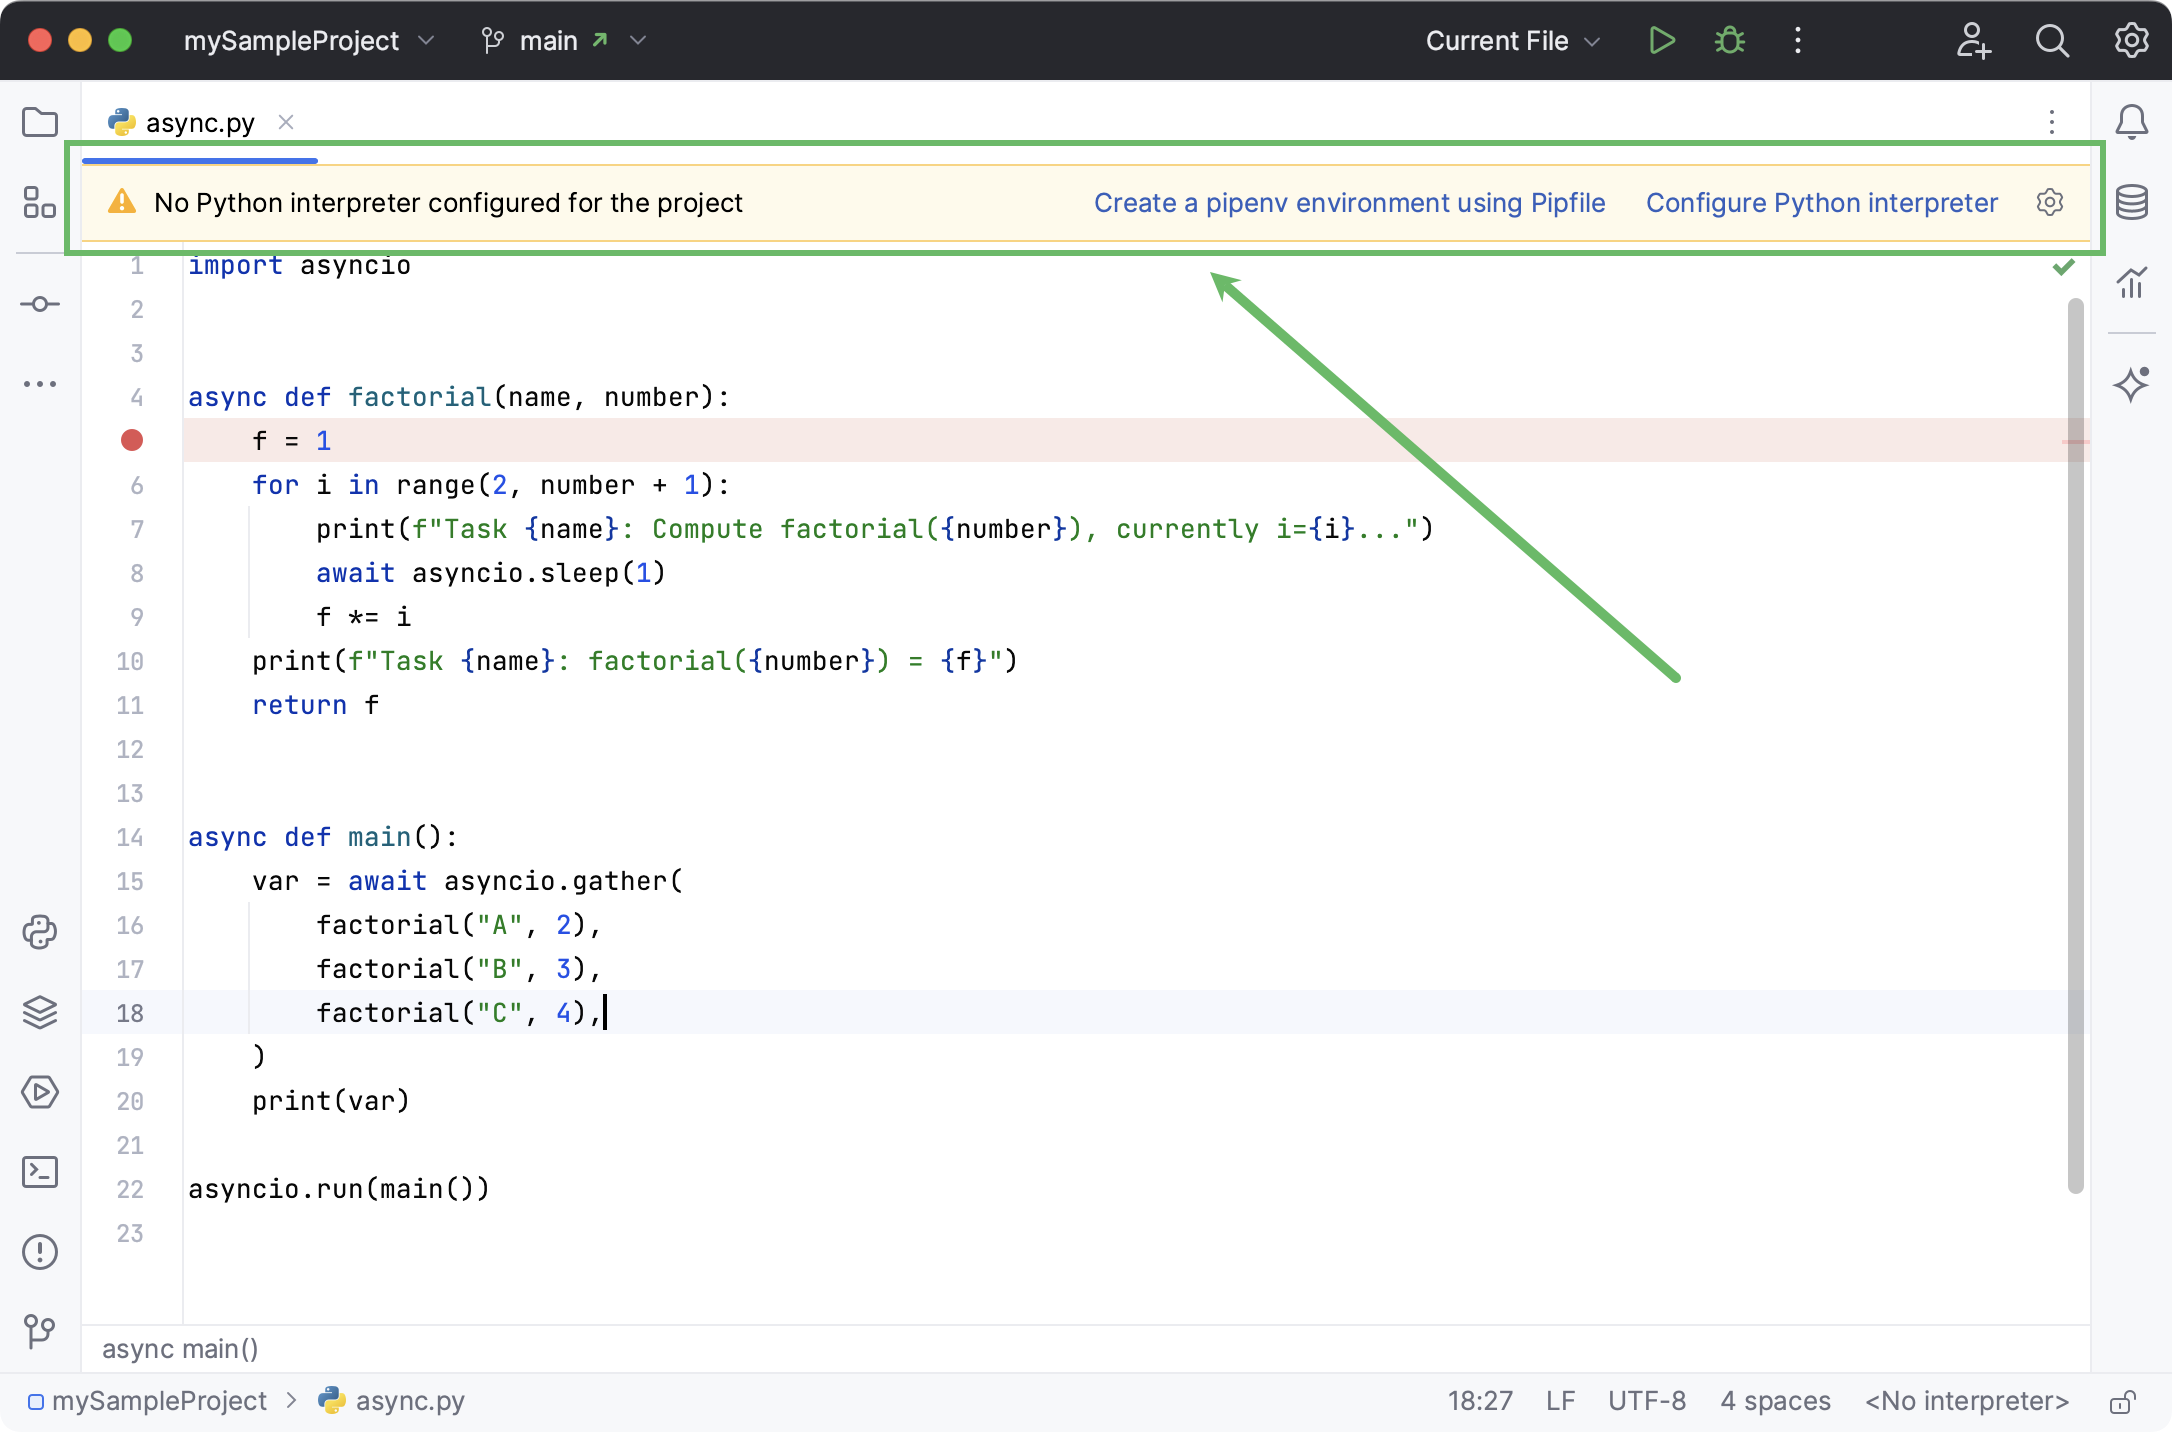
When you open a project that contains Pipfile, but no project interpreter is configured, PyCharm suggests that you create a pipenv environment.

Click Create a pipenv environment using Pipfile if you want PyCharm to configure pipenv for you automatically. Alternatively, you can click Configure Python interpreter to follow the standard workflow.
If PyCharm cannot autodetect the pipenv executable, specify the path to it and click OK.
A new pipenv environment will be configured for your project and the packages listed in Pipfile will be installed.
For any of the configured Python interpreters (but Docker-based), you can: