Docker Compose
Available only in PyCharm Professional: download to try or compare editions
Docker Compose is used to run multi-container applications. For example, you can run a web server, a backend database, and your application code as separate services. Each service can be scaled by adding more containers if necessary. This enables you to perform efficient development and testing in a dynamic environment, similar to production.
This functionality relies on the Docker plugin, which is bundled and enabled in PyCharm by default. If the relevant features are not available, make sure that you did not disable the plugin.
note
The Docker plugin is available by default only in PyCharm Professional. For PyCharm Community Edition, you need to install the Docker plugin as described in Install plugins.
Press CtrlAlt0S to open settings and then select Plugins.
Open the Installed tab, find the Docker plugin, and select the checkbox next to the plugin name.
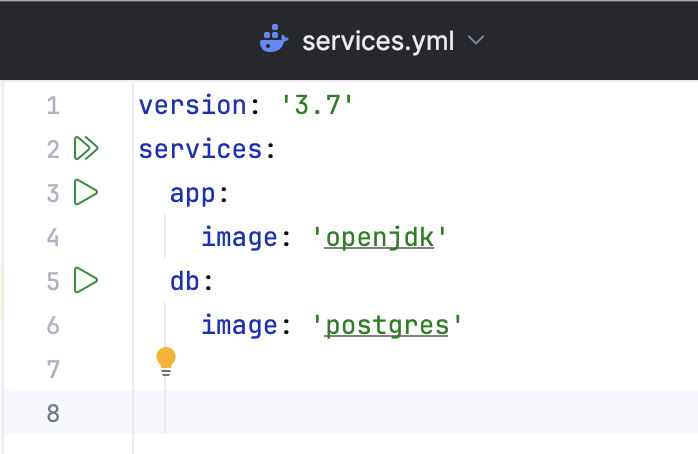
PyCharm recognizes Docker Compose files and marks them with the icon. It also adds gutter icons to run various services defined in the Docker Compose file.

Define necessary services in one or several Docker Compose files.
In the main menu, go to Run | Edit Configurations.
Click
, point to Docker and then click Docker Compose.

Specify the Docker Compose files with your service definitions. If necessary, you can define the services that this configuration will start, specify environment variables, and force building of images before starting corresponding containers (that is, add the
--buildoption for the docker compose up command).For more information about the available options, refer to Docker compose run configuration.
Click OK to save the Docker Compose run configuration, select it in the main toolbar and click
or press ShiftF10 to start the configuration.
note
To quickly create a Docker Compose run configuration and run it with default settings, right-click a Docker Compose file in the Project tool window and click Run in the context menu. You can also use gutter icons and the context menu in the Docker Compose file to run and manage services.
When Docker Compose runs your multi-container application, you can use the Services tool window to control specific services and interact with containers. The containers that run as part of Docker Compose are listed under the dedicated Compose nodes, not under the Containers node (which is only for standalone containers).
In the Services tool window, select the service you want to scale and click
or select Scale from the context menu.
In the Scale dialog, specify how many containers you want for this service and click OK.
In the Services tool window, select the service and click
or select Stop from the context menu.
In the Services tool window, select the Compose node and click
or select Stop from the context menu.
In the Services tool window, select the Compose node and click
or select Down from the context menu.
This stops and removes containers along with all related networks, volumes, and images.
In the Services tool window, right-click the Compose node or a nested service node and then click Jump to Source in the context menu or press F4.
Create a Run/Debug Configuration for your application.
Select your configuration from the Run/Debug Configurations list on the toolbar, and press ShiftF9.
Thanks for your feedback!