AI chat
Use the AI Assistant tool window to have a conversation with the LLM (Large Language Model), ask questions about your project, or iterate on a task.
AI Assistant takes into consideration the language and technologies used in your project, as well as local changes and version control system commits. You can search for files, classes, types, and element usages.
Click AI Chat on the right toolbar to open AI Assistant.
In the input field, type your question.
If you have a piece of code selected in the editor tab, use
/explainand/refactorcommands to save time when typing your query.Use the
/docscommand to ask AI Assistant-related questions. If applicable, AI Assistant will provide a link to the corresponding setting or documentation page.Use the
/webcommand or clickto search for information on the internet. AI Assistant will provide an answer and attach a set of relevant links that were used to retrieve the information.
If you want to attach a particular file or function to your query to provide more context, use
#:#thisFilerefers to the currently open file.#selectionrefers to a piece of code that is currently selected in the editor.#localChangesrefers to the uncommitted changes.#commit:adds a commit reference into prompt. You can either select a commit from the invoked popup or write the commit hash manually.#file:invokes a popup with selection of files from the current project. You can select the necessary file from the popup or write the name of the file (for example,#file:Foo.md).#symbol:adds a symbol into prompt (for example,#symbol:FieldName).#jupyter:for PyCharm and DataDrip, adds a Jupyter variable into prompt (for example,#jupyter:df).#schema:refers to a database schema. You can attach a database schema to enhance the quality of generated SQL queries with your schema's context.
Alternatively, click
above the input field and select files, symbols, commits, or other items to add them to the context of the current chat.

In the input field, select your preferred AI chat model from the list of currently available models by clicking
 .
.If you want to connect the AI Assistant chat to your local model, refer to this chapter.
Depending on the nature of your question, select the chat mode that best fits your needs by clicking
 or pressing Ctrl0\:
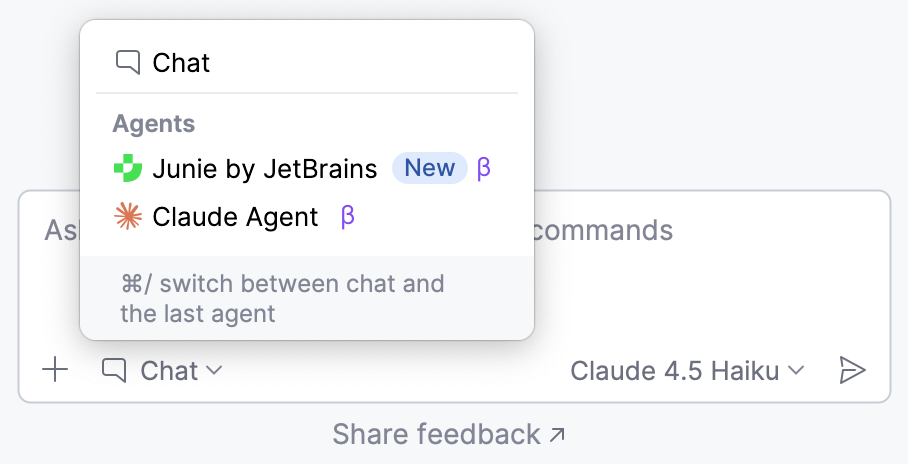
Chat – use this mode to ask general or project-related questions. In this mode, you can either attach context manually via
#,@, or, or enable the Codebase setting to let AI Assistant gather the required context automatically.
Edit – use this mode when working on your code. In this mode, AI Assistant focuses on providing adjustments for the code in the current project. The required context is gathered automatically but can also be added or removed manually if needed.
warning
Context is not gathered from files listed in
.gitignoreand.aiignore.Press Enter to submit your query.

tip
Each generated code snippet or a selected fragment within it can be quickly inserted into the editor at the caret position by clicking
in its top right corner.
In PyCharm, each generated code snippet can be also run in the Python console separately from the rest of the project by clicking
.
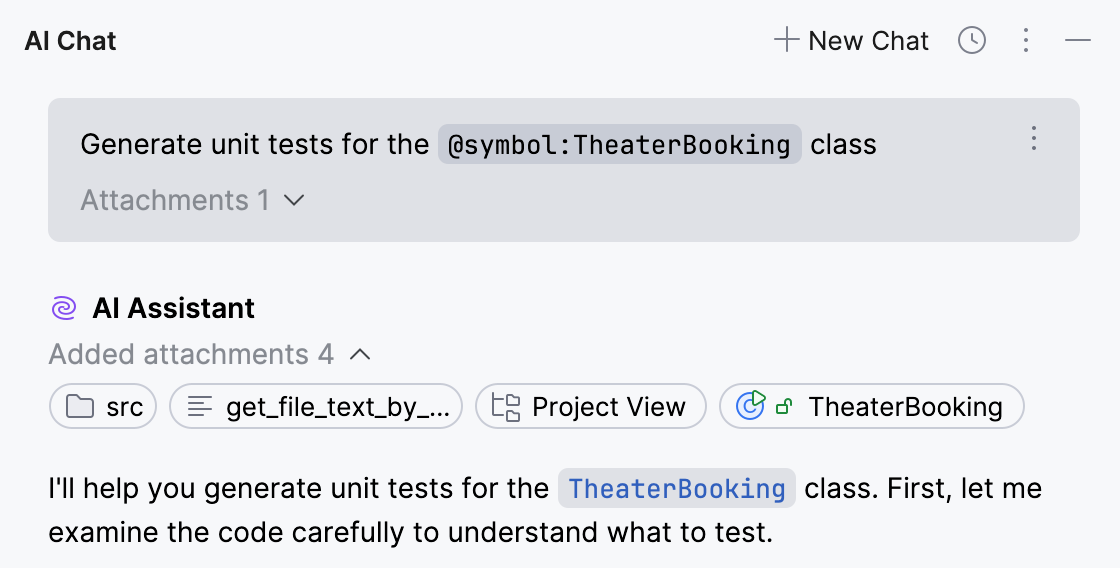
If you want to review the attachments added to your request, click
. The attachments provided by AI Assistant are always shown but can be hidden if needed by clicking
.
Click
Regenerate this response at the beginning of the AI Assistant's answer to get a new response to your question.
Click
More tool windows in the header and select
AI Assistant to open AI Assistant.
In the input field, type your question.
If you have a piece of code selected in the editor tab, use
/explainand/refactorcommands to save time when typing your query.Use the
/docscommand to ask AI Assistant-related questions. If applicable, AI Assistant will provide a link to the corresponding setting or documentation page.If you want to attach a particular database schema or file to your query to provide more context, use
#:#schema:refers to a database schema. You can attach a database schema to enhance the quality of generated SQL queries with your schema's context.#thisFilerefers to the currently open file.#selectionrefers to a piece of code that is currently selected in the editor.#localChangesrefers to the uncommitted changes.#commit:adds a commit reference into prompt. You can either select a commit from the invoked popup or write the commit hash manually.#file:invokes a popup with selection of files from the current project. You can select the necessary file from the popup or write the name of the file (for example,#file:my_script.sql) to provide a particular script to AI Assistant as context.
#symbol:adds a symbol into prompt (for example,#symbol:FieldName).
Alternatively, click
above the input field and select the files, symbols, or commits to add them to the context of current chat.
In the input field, select your preferred AI chat model from the list of currently available models by clicking
 .
.If you want to connect the AI Assistant chat to your local model, refer to this chapter.
Press Enter to submit your query.

tip
Each generated code snippet or a selected fragment within it can be quickly inserted into the editor at the caret position by clicking
in its top right corner.
Click
Regenerate this response at the beginning of the AI Assistant's answer to get a new response to your question.
AI Assistant keeps the chats' history separately for each project across IDE sessions. You can find the saved chats in the Chat History list.

Names of the chats are generated automatically and contain the summary of the initial query. Right-click the chat's name to rename it or delete it from the list. Search for a particular chat name using Ctrl0F.
Click AI Chat on the right toolbar to open AI Assistant.
Use natural language to request information based on the context of your workspace. Here are some examples:
Request recent files: to retrieve a list of files you have recently viewed.
Ask for the current file: to display the full content of the currently opened file.
Request visible code: to retrieve the code currently visible in your editor.
Ask for local changes: to display uncommitted changes in your file tree.
Find information in README: to search for relevant information within README files.
Check recently changed files: to list files modified in the ten latest commits.
You can configure AI Assistant to provide responses in a specific language.
Press CtrlAlt0S to open settings and then select Tools | AI Assistant.
In the Natural Language section, enable the Receive AI Assistant chat responses in a custom language setting.
In the text field, specify the language in which you want to receive chat responses.

Click Apply.
After that, AI Assistant will use the specified language in its responses.
note
Enabling this feature updates the active chat to use the selected language. New chats will also use the selected language; however, existing ones will remain in a language that was selected previously.
If you do not want to use cloud-based models while working with the AI Assistant chat, you can connect your local LLM available through Ollama or LM Studio.
note
On macOS, Ollama can be installed directly from the IDE. To do this, open the Terminal tool window and run the
brew install ollamacommand.
Click the
JetBrains AI widget located in the toolbar in the window header.
Hover over the Offline Mode option and click Set Up Models.

Alternatively, you can go to Settings | Tools | AI Assistant | Models.
In the Third-party AI providers section, select your LLM provider, specify your local host URL, and click Test Connection.

When working with the AI Assistant chat, select your model from the list of available LLMs.

To give more precise answers, AI Assistant has the smart chat mode enabled by default.
In this mode, AI Assistant might send additional details, such as file types, frameworks used, and any other information that may be necessary for providing context to the LLM.
To disable the smart chat mode, clear the Enable smart chat mode checkbox in Settings | Tools | AI Assistant.

note
Learn more about data sharing from How we handle your code and data
Sometimes, working on your code requires updating multiple files across the project, which can be tedious and time-consuming. AI Assistant can help you apply these changes directly in the chat, making the process faster and easier.
In the chat, switch to Edit mode.

Enter the prompt describing your issue.
tip
In the Edit mode, the context is gathered automatically, but you can also add it manually if needed.
Review the provided answer. Along with an explanation of the issue, AI Assistant will display a list of affected files and let you choose how to proceed.
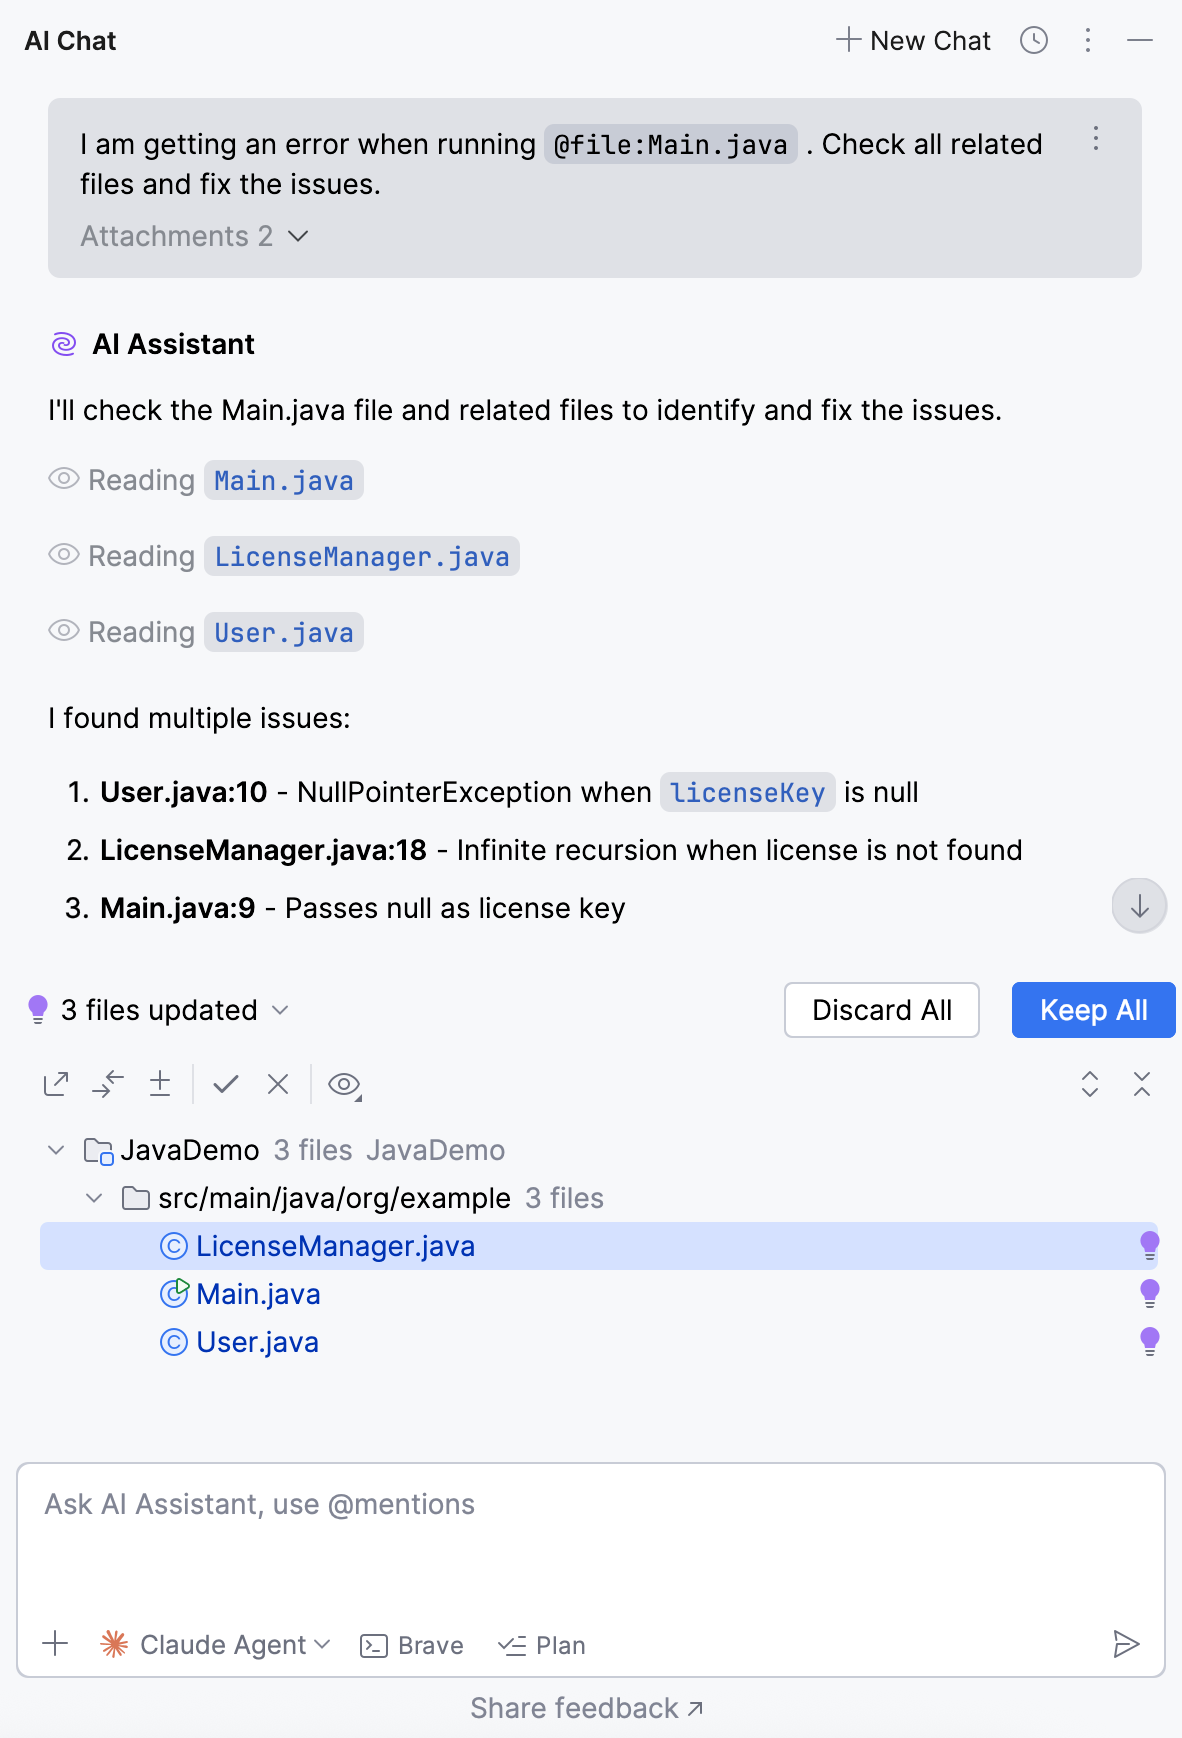
Discard All – click to discard the proposed changes.
Accept All – click to apply changes to all affected files.
Show Changes in Toolbar – click to display the list of affected files in a separate toolbar.
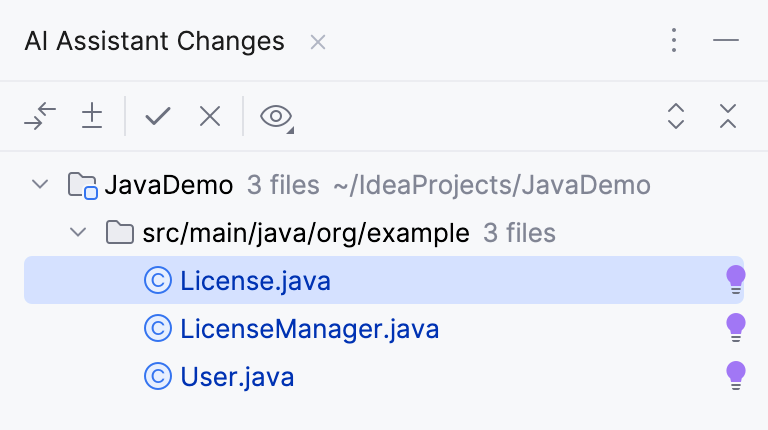
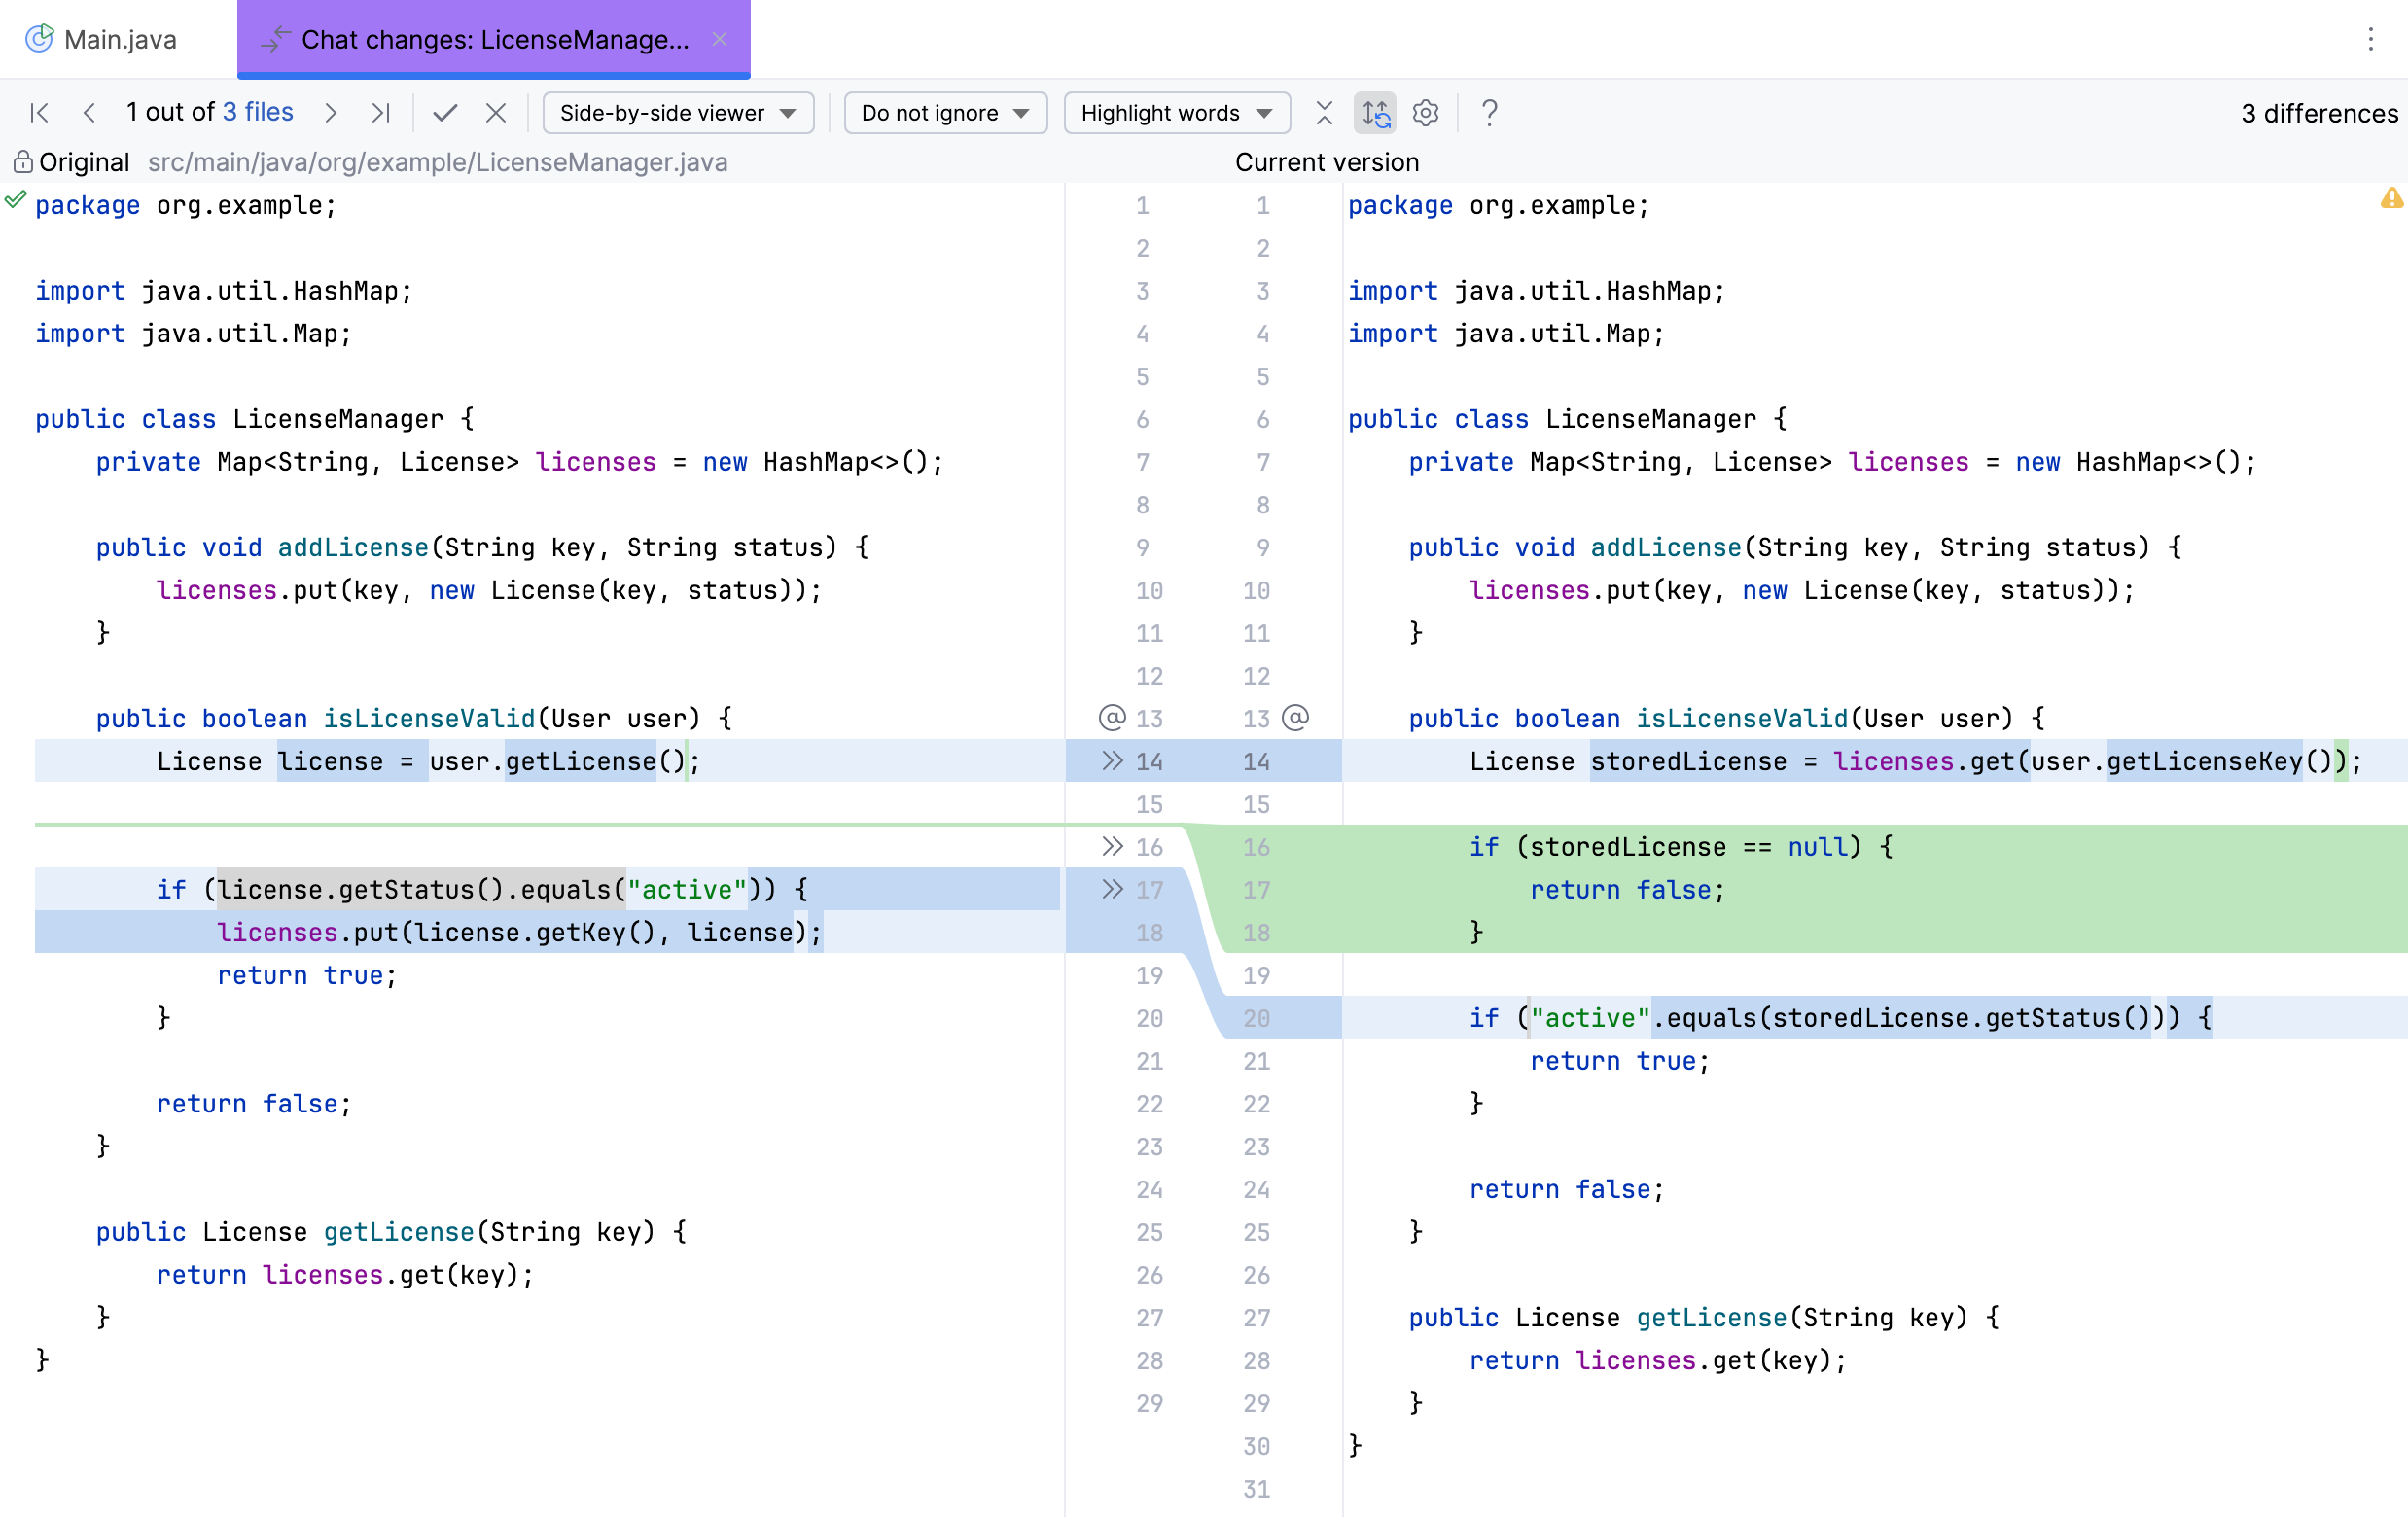
Show Diff – click to open the diff viewer for the selected file. Diff viewer is used to visually compare and review differences between the file versions, helping you to understand what has changed.
note
AI Assistant also displays a tip explaining the proposed changes.
± Create Patch – click to create a .patch file containing the changes. This file can be applied to your sources later.
Accept – click to apply changes to the selected file.
Discard – click to discard changes proposed for the selected file.
Group By – click to select how you want to group the modified files - by directory or module.
Expand All – click to expand all nodes in the file tree.
Collapse All – click to collapse all nodes in the file tree.
Apply the appropriate action.
When asking questions in the chat, you can add context to your query directly from a UI element. It can be a terminal, tool window, console, etc. For example, you can attach a build log from the console to ask why your build failed.
In the chat, click
Add attachment.
Select the Add context from UI option from the menu.

Select the UI element that contains data that you want to add to the context.
warning
When adding context this way, be mindful of the files you include, as some may be explicitly marked as restricted in the
.aiignorefile. Adding them as context bypasses this restriction, allowing AI Assistant to process them.Type your question in the chat and submit the query.
AI Assistant will consider the added context when generating the response.
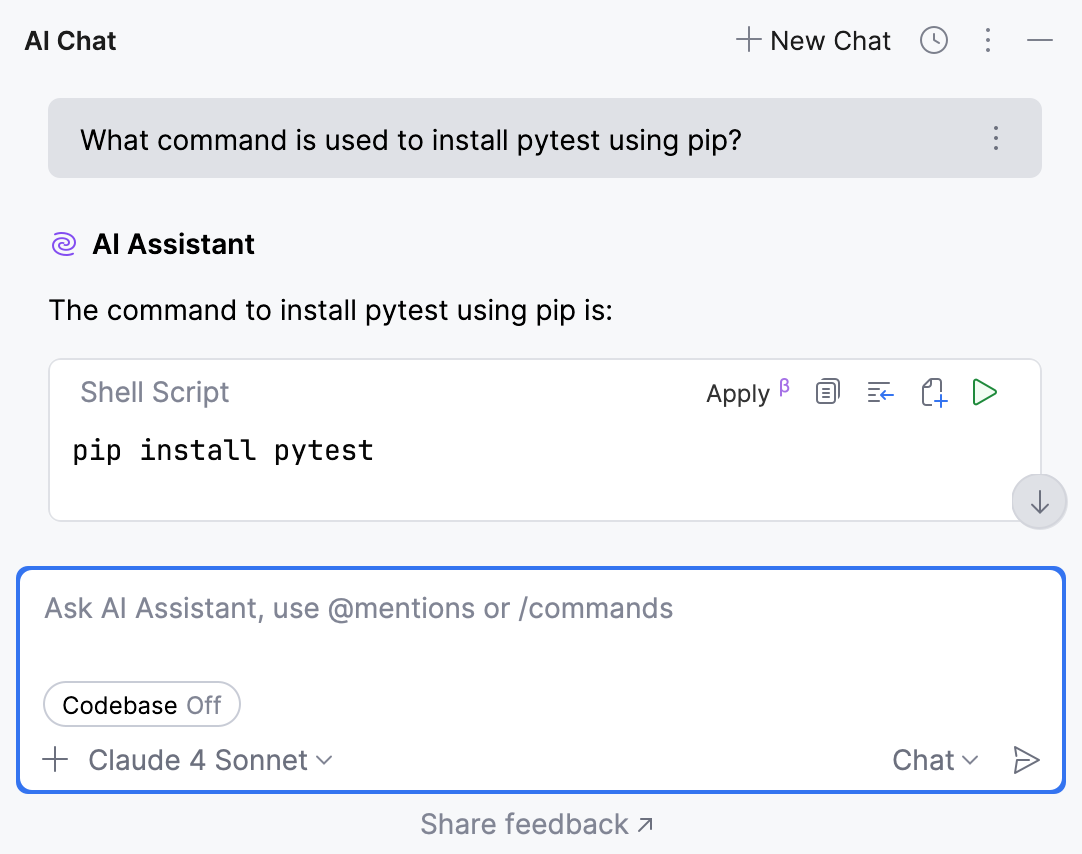
AI Assistant can generate script commands based on your input. The generated command can be executed instantly, saving you the trouble of manually copying and pasting it into the terminal.
Ask AI Assistant to provide an appropriate script command for your task.
In the upper-right corner of the field with the generated command, click
Run Snippet.
You can create a new file with the AI-generated code right from the AI Assistant chat.
In the upper-right corner of the field with the generated code, click
Create File from Snippet.
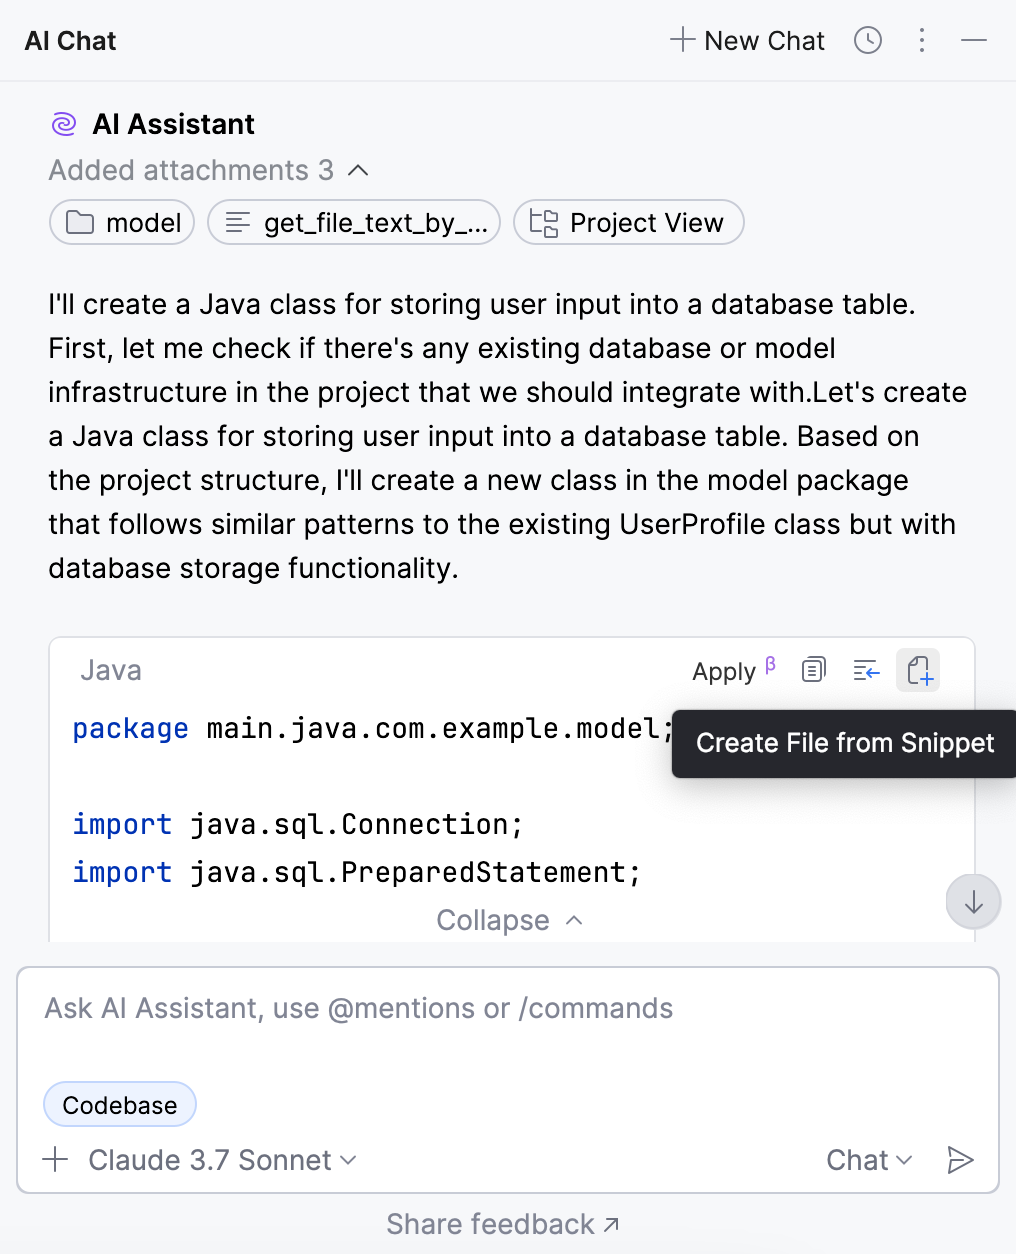
AI Assistant will create a file with the AI-generated code.
If you have any file opened or selected in the Project tool window Alt01, the new file will be created in the same folder (or project for Rider) as the selected file.
In other cases, the new file will be created in the root project folder.
tip
If you want the new file to be added to a specific folder (or project for Rider), select it in the Project tool window Alt01 before creating the new file.
note
This functionality relies on the Database Tools and SQL plugin, which you need to install and enable.
You can enhance the quality of generated SQL queries with the context of a database schema that you are working with. To do that, attach the schema in the AI Assistant tool window. AI Assistant will get access to the structure of the attached schema, providing the LLM with information about it.
To use this feature, you need to grant AI Assistant consent to access the database schema.
Here is an example of how more precise is the answer of AI Assistant with an attached schema in DataGrip:
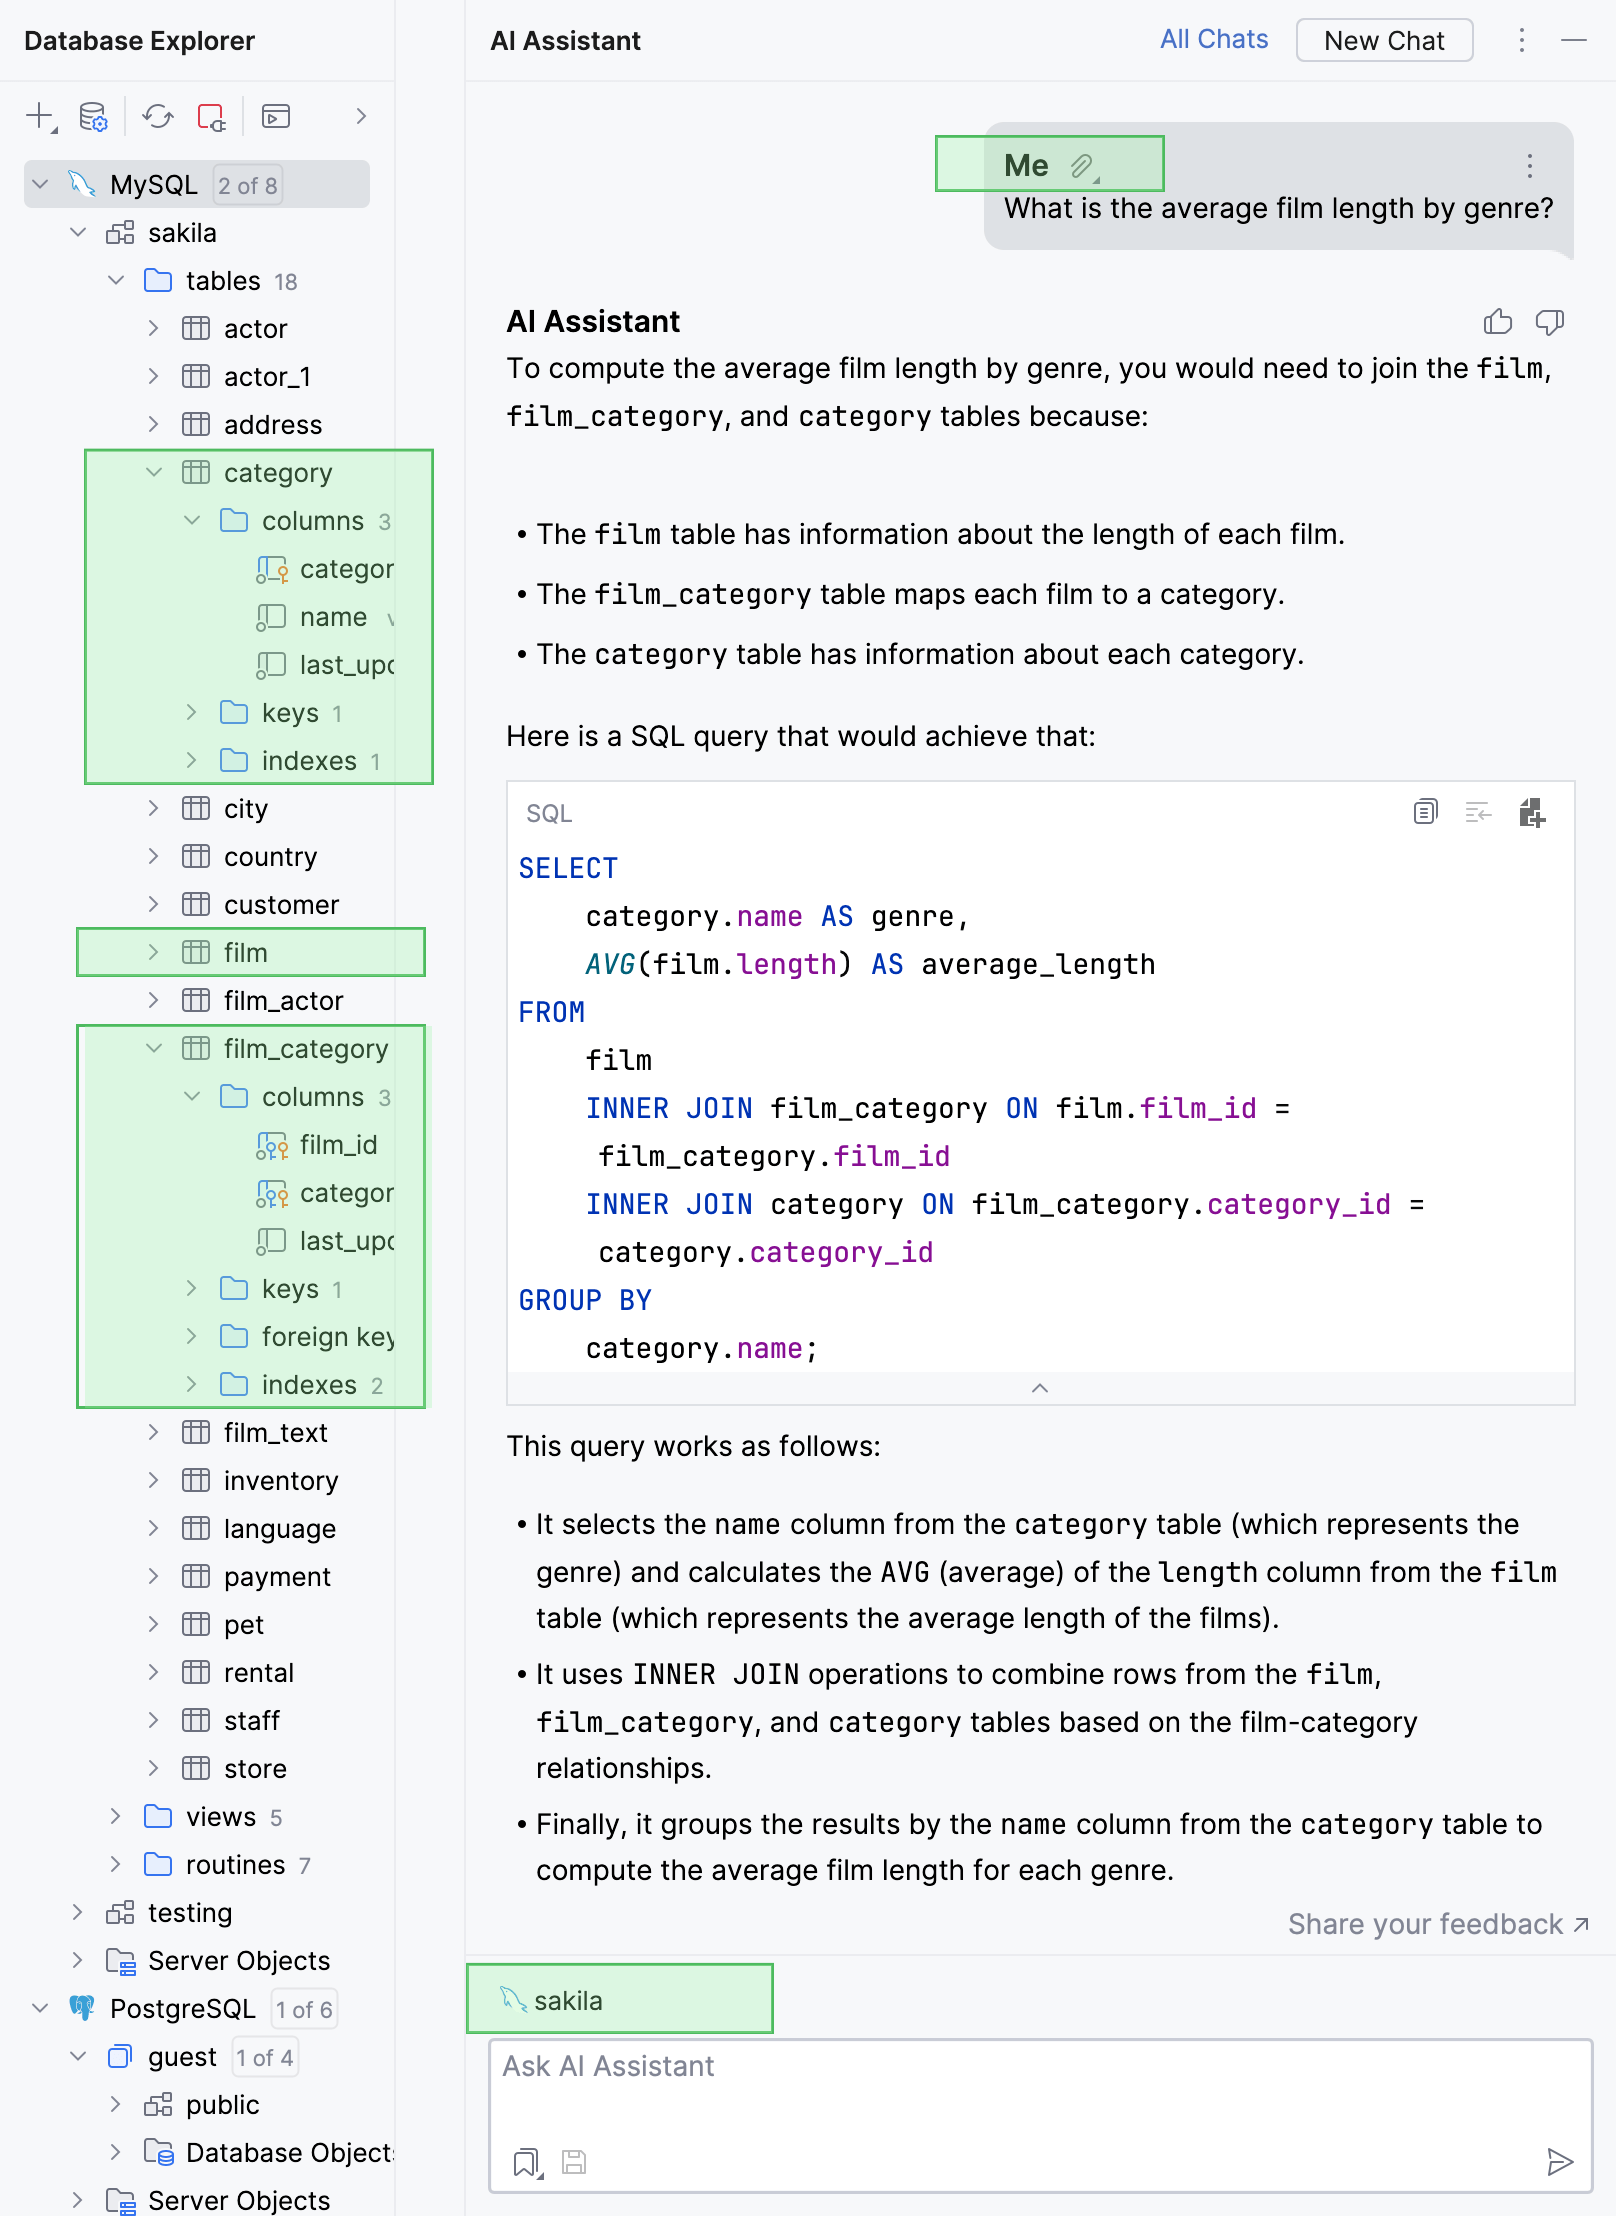
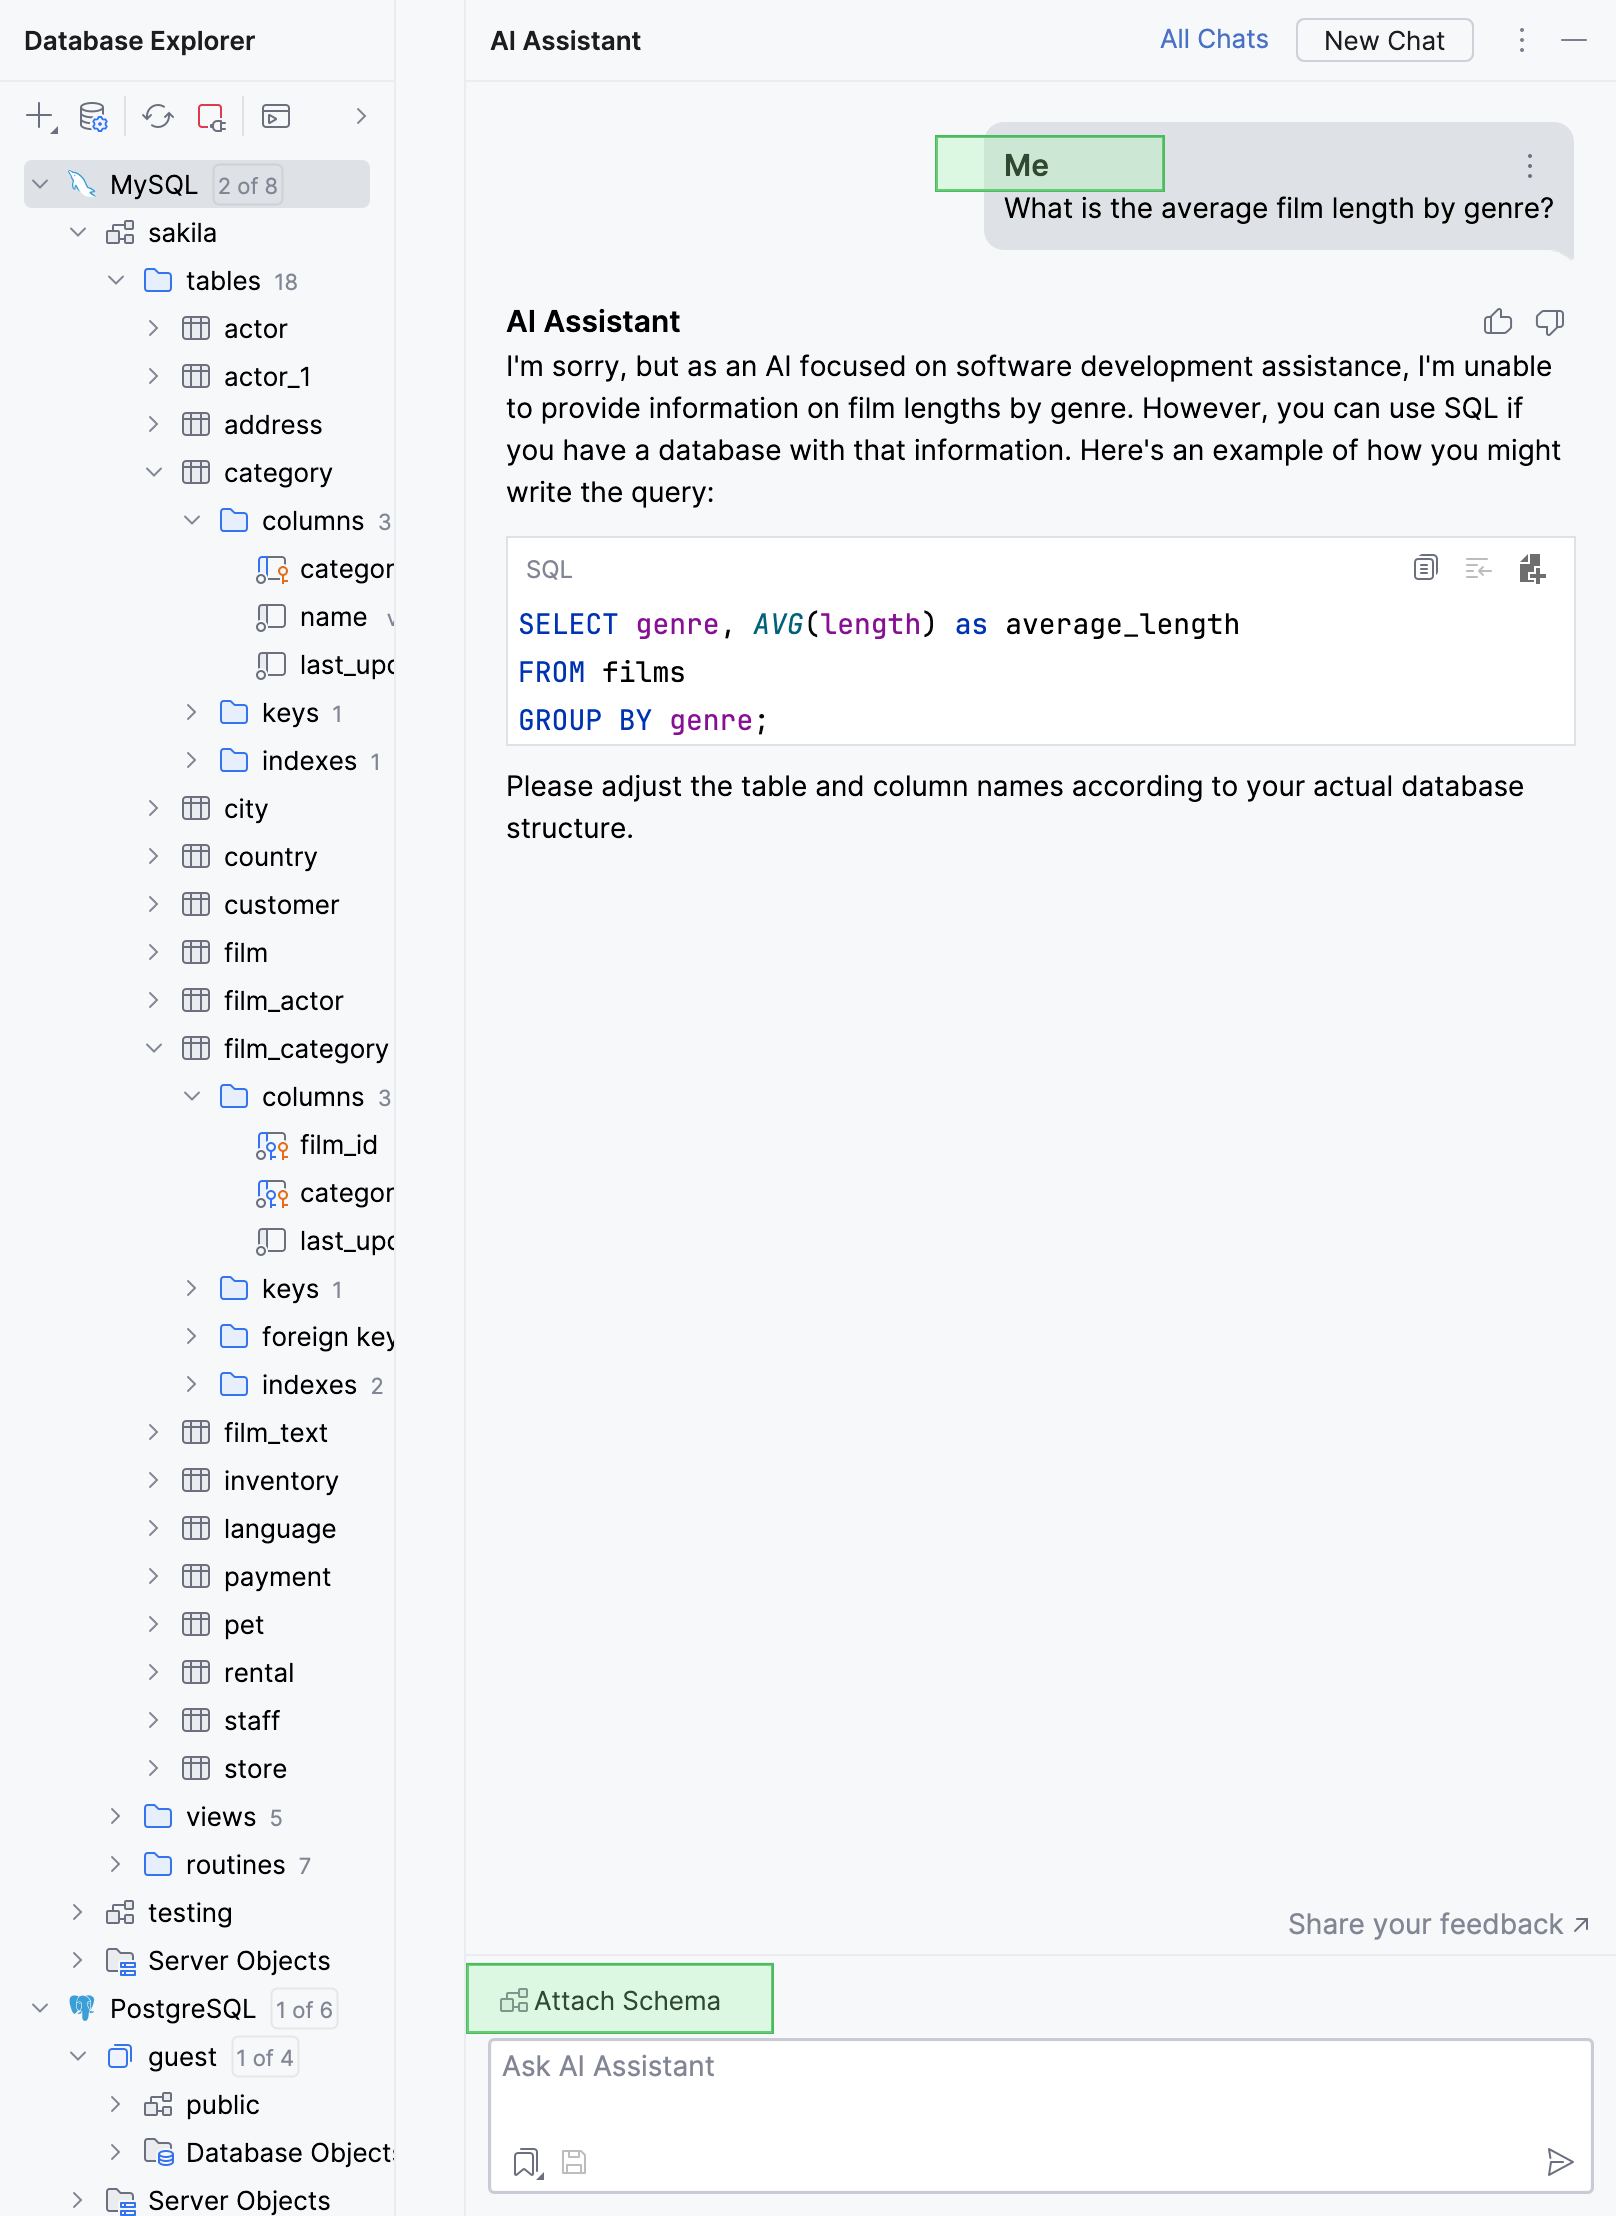
Attaching a schema will also improve the results of the context menu AI Actions actions group, for example, Explain Code, Suggest Refactoring, and so on. For more information about those actions, refer to Explain code with AI.
In the AI Assistant tool window input field, enter your prompt with
#followed by the schema name. For example:Provide a query to retrieve the email addresses of all active users from #public.
Press Enter.
AI Assistant will analyze your schema and generate the result.
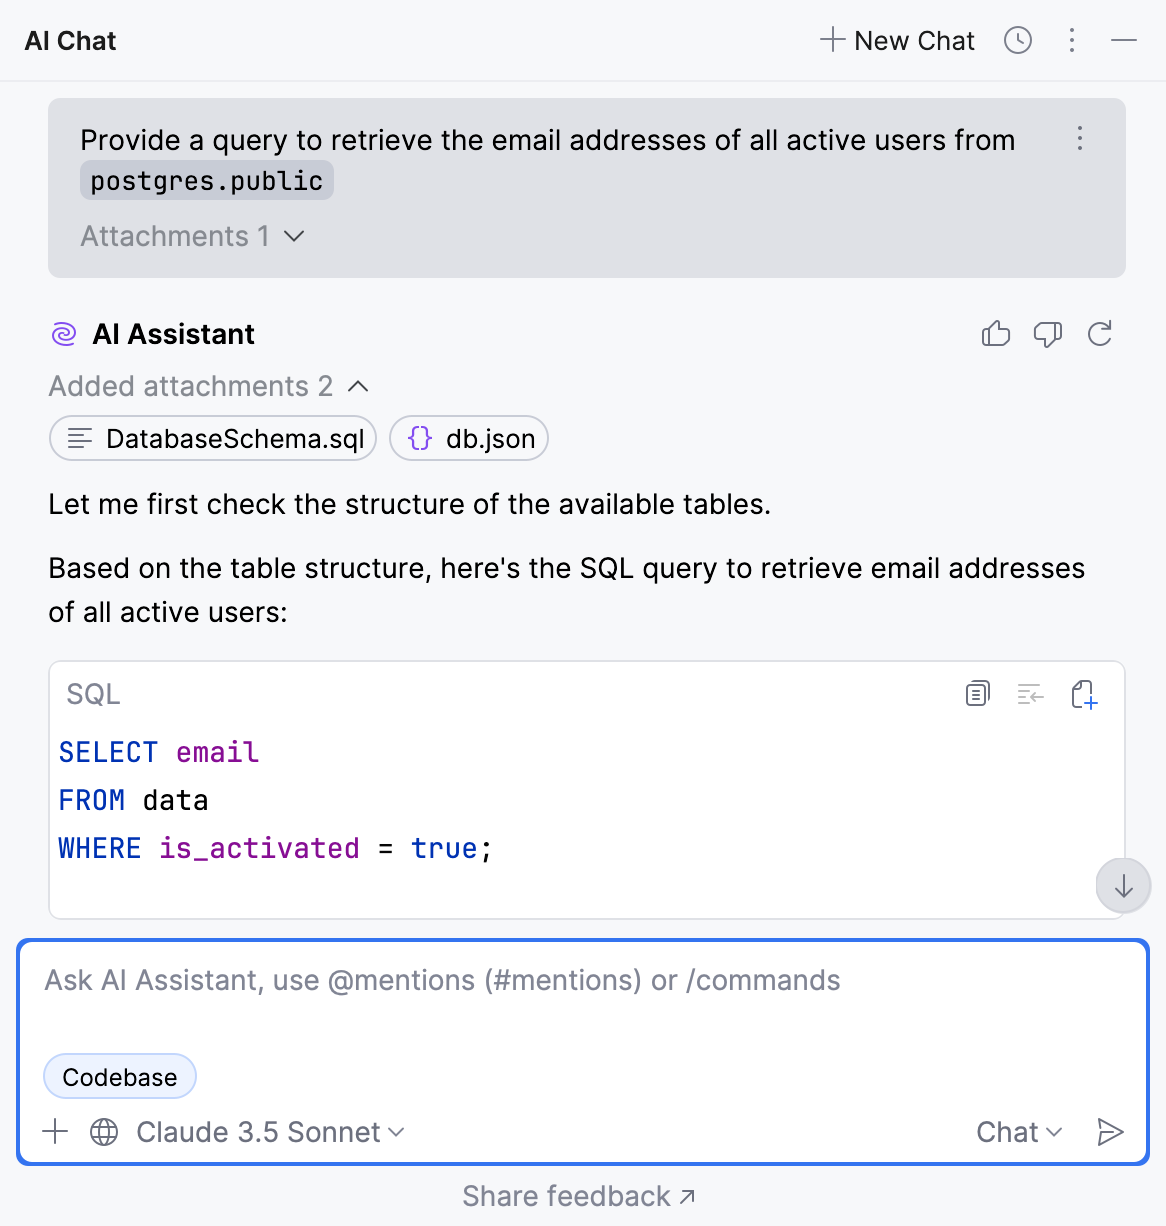
You can attach schema either by using schema selector or by mentioning.
In the AI Assistant tool window, click
Attach Schema above input field and select the schema that you want to attach.
If the Attach Schema dialog appears, click Attach to attach the schema.

In the AI Assistant tool window input field, enter your prompt with
#followed by the schema name. For example:Give me a query to get all actor names from #public. Press Enter.
AI Assistant will analyze your schema and generate the result.
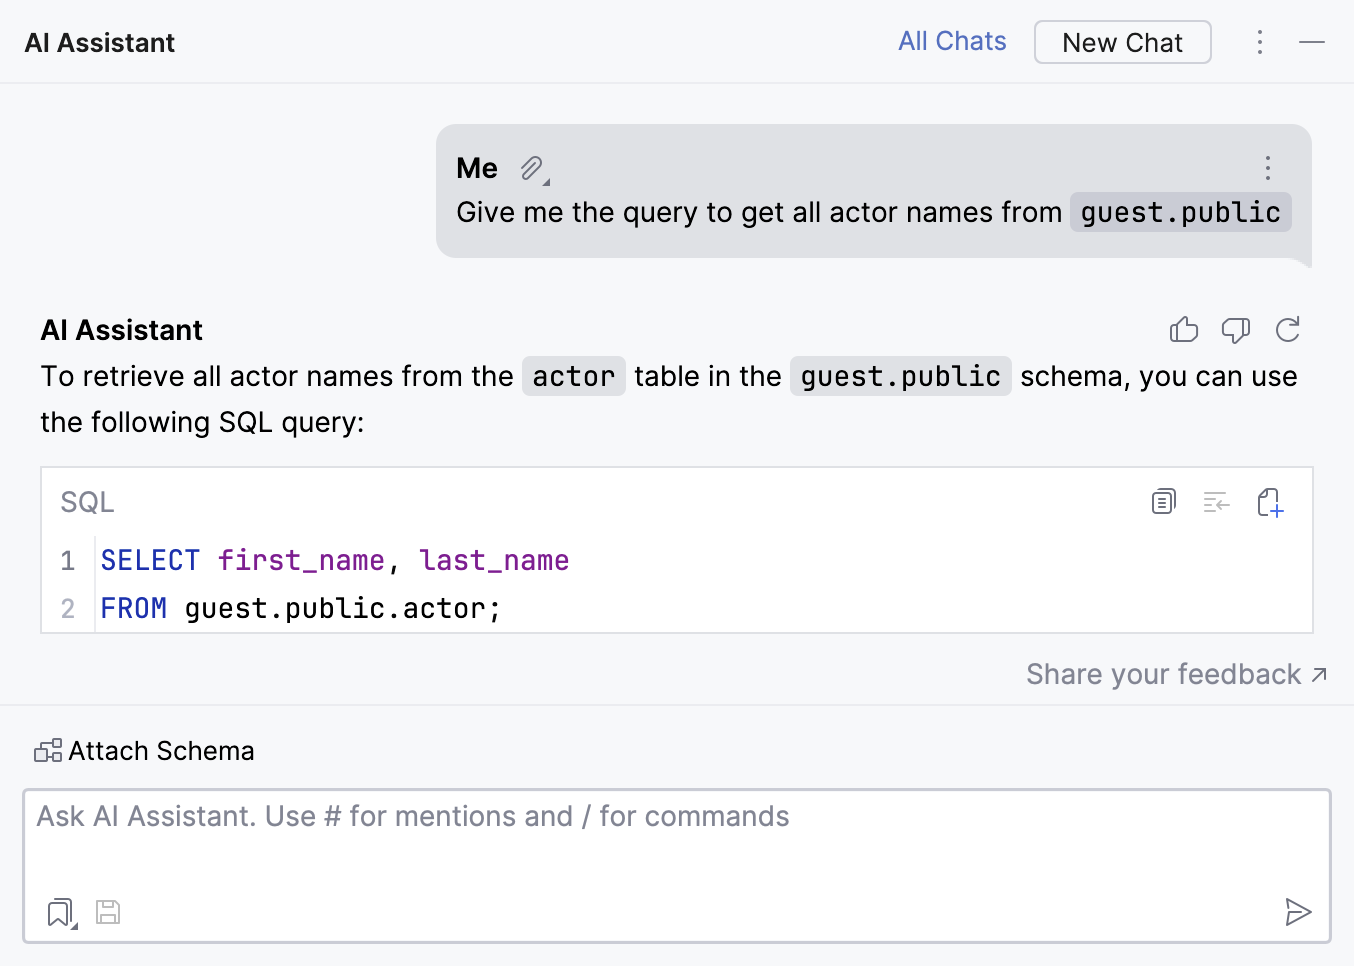
You can see which schema was attached to your message, and also navigate to that schema in Database tool window. To do that, click ![]() in your message, then click the schema name.
in your message, then click the schema name.
If you want to allow AI Assistant to always attach the selected schemas, select the Always allow attaching database schemas checkbox in the Attach Schema dialog. Alternatively, enable the Allow attaching database schemas setting in Settings | Tools | AI Assistant.
Thanks for your feedback!
