Import
Enable the Database Tools and SQL plugin
This functionality relies on the Database Tools and SQL plugin, which is bundled and enabled in PyCharm by default. If the relevant features are not available, make sure that you did not disable the plugin.
Press Ctrl+Alt+S to open settings and then select .
Open the Installed tab, find the Database Tools and SQL plugin, and select the checkbox next to the plugin name.
Import data
In the Database tool window, right-click a data source, or a schema and select .
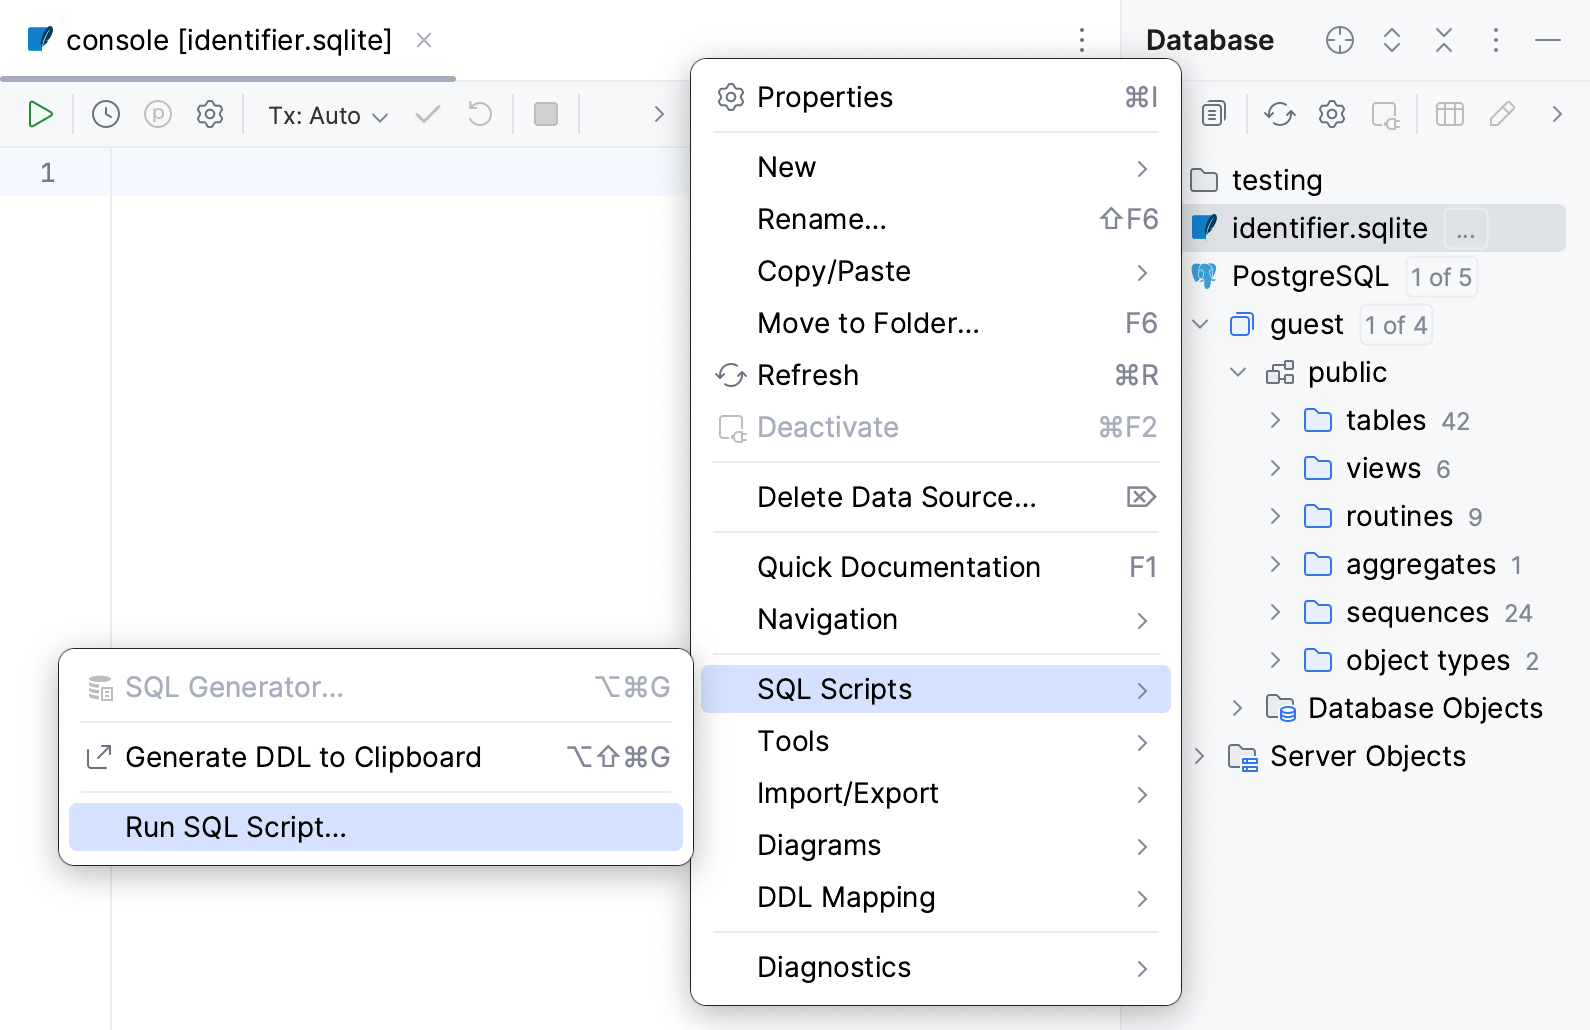
In the file browser window that opens, navigate to the SQL file that you want to run.
Click Open.
You can view the output in the Run tool window. For more information about tool window controls, refer to Run tool window.
Import data from CSV files
PyCharm uses data extractors to import data from CSV files. For more information about data extractors, refer to the Data extractors topic.
In the Database tool window, right-click a schema or a table and select .
Navigate to the CSV files and select them.
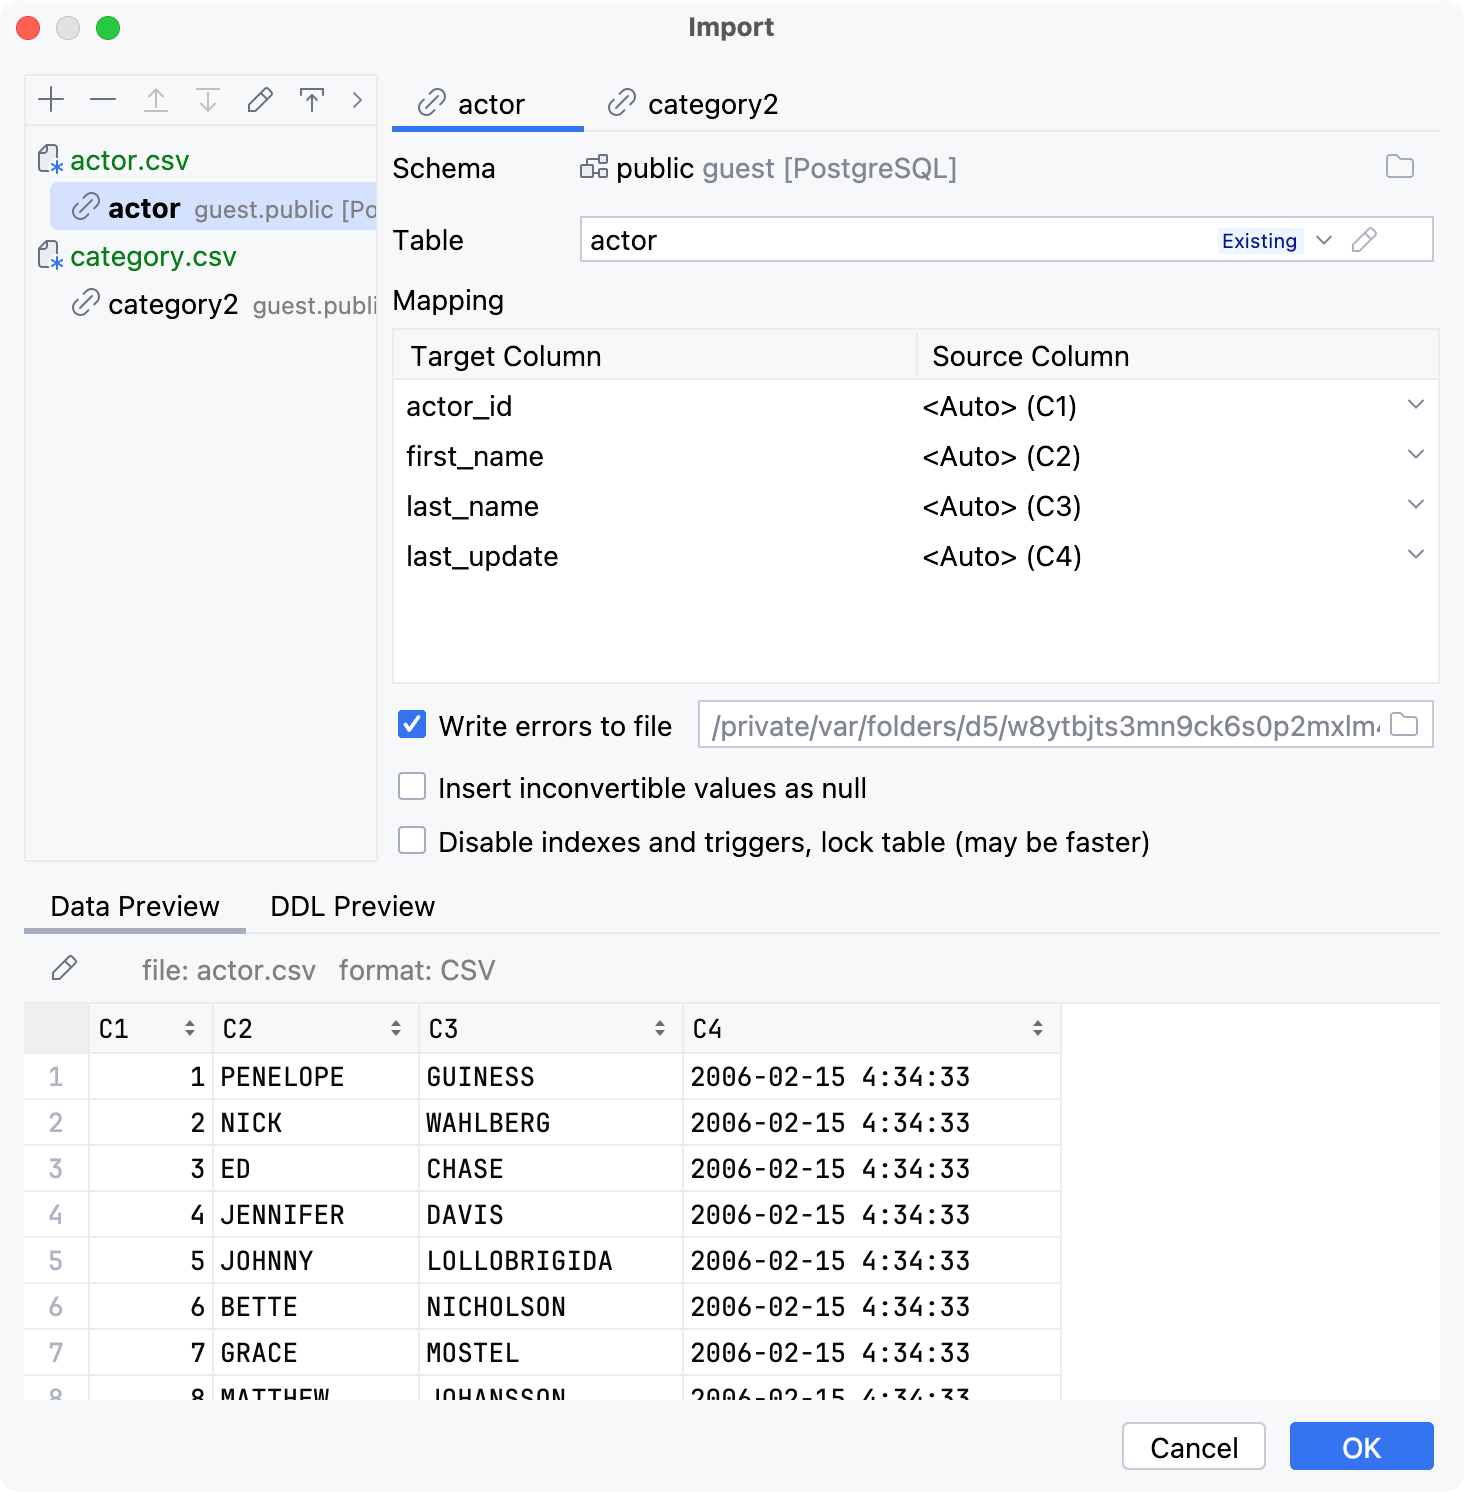
In the mapping tree of Import dialog, select the mapping node (
) and specify the data conversion settings.
You can select in which schema to create a table and whether to import data to a new table or an existing one. To select a schema or a table, use Schema and Table fields.
In the mapping tree, select the source file to configure its settings. To mark the first row as a header, select First row is header.
Apply the changes and close the dialog.

Import data from tabular data files
PyCharm uses scripted data loaders to import data from tabular data files. For more information about scripted data loaders, refer to the Data loaders topic.
In the Database tool window, right-click a schema or a table and select .
Navigate to the tabular data files and select them.
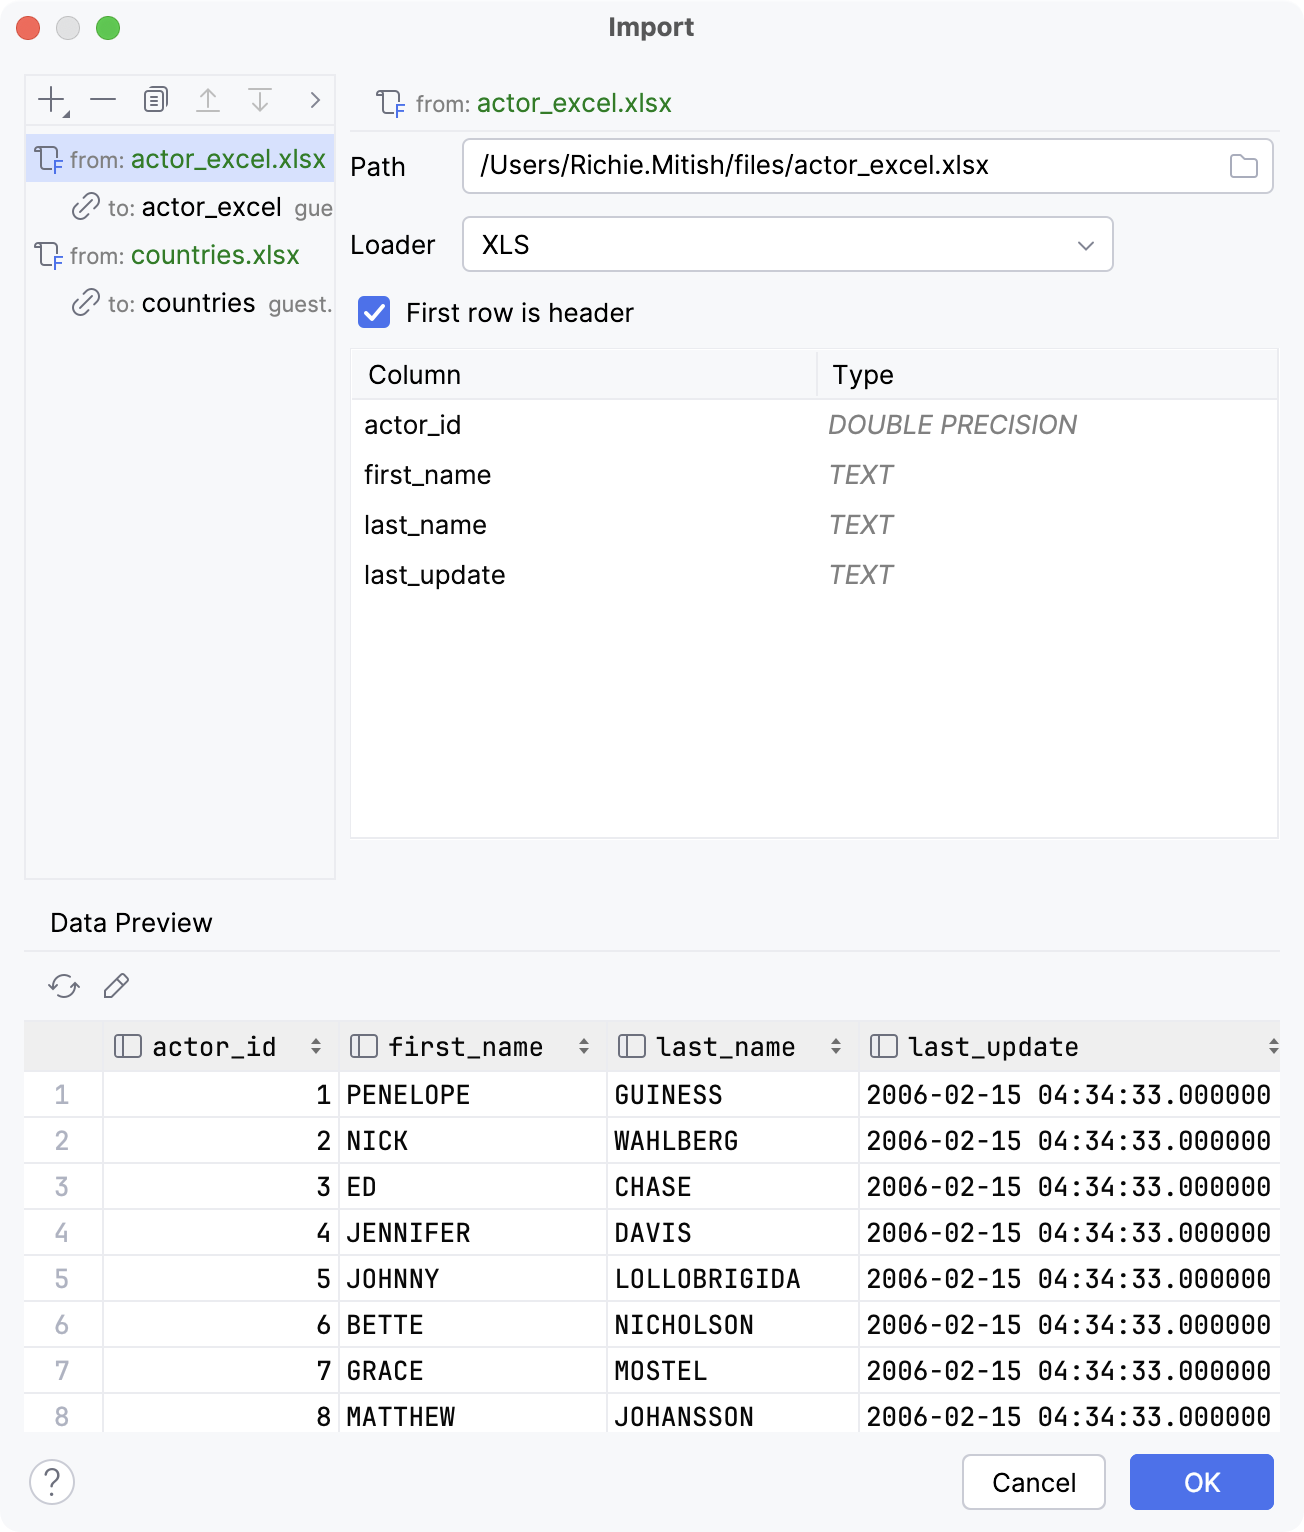
In the mapping tree of Import dialog, select the mapping node (
) and specify the data conversion settings.
You can select in which schema to create a table and whether to import data to a new table or an existing one. To select a schema or a table, use Schema and Table fields.
In the mapping tree, select the source file to configure its settings. To mark the first row as a header, select First row is header.
Apply the changes and close the dialog.

Import tables
Select the tables that you want to copy to a different schema, database, or existing table.
Open the Import dialog. To do that, you can use the following actions:
Right-click the selection and navigate to .
Drag the selection to a schema or a database.
Press Ctrl+Shift+A, type
copy tables toand press Enter.
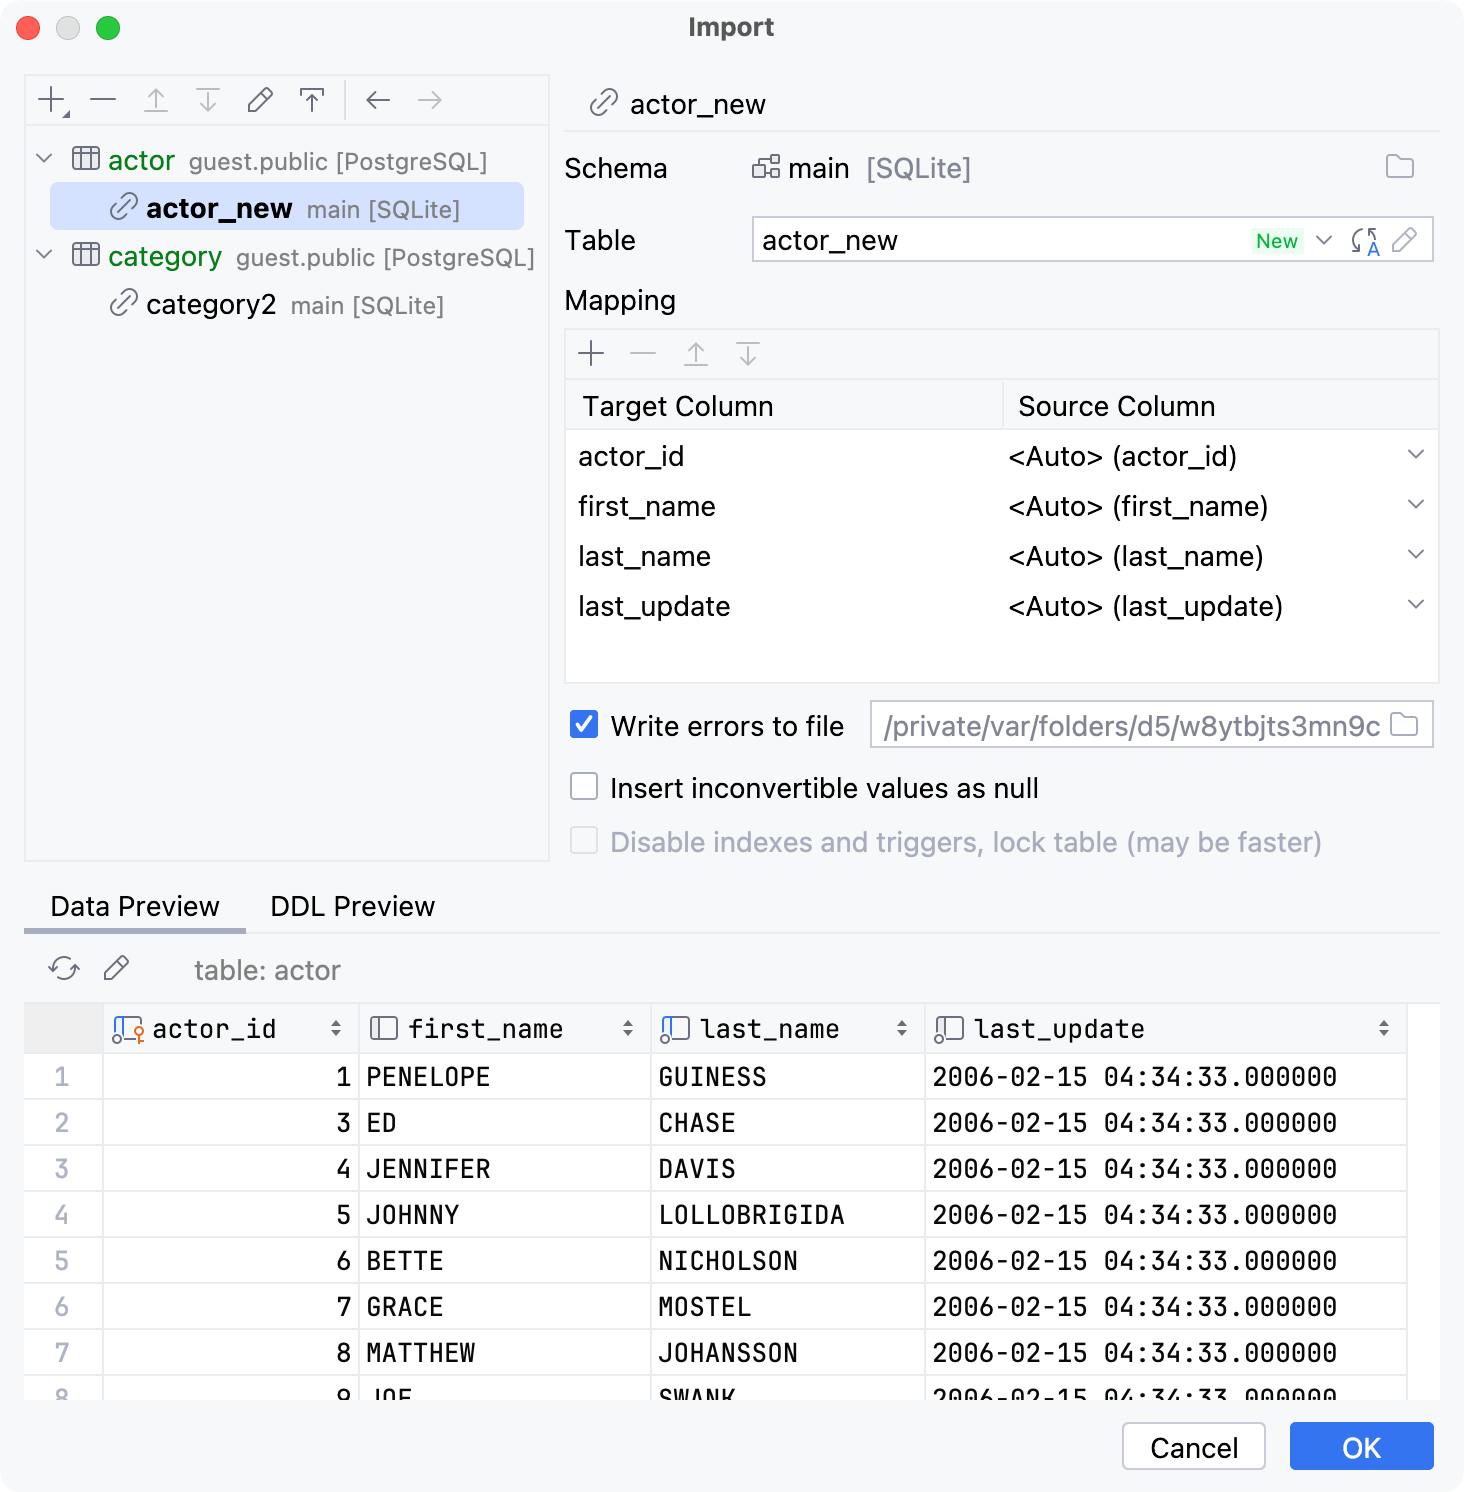
In the mapping tree of Import dialog, select the mapping node (
) and specify the data conversion settings.
You can select in which schema to create a table and whether to import data to a new table or an existing one. To select a schema or a table, use Schema and Table fields.
In the mapping tree, select the source file to configure its settings.
(Optional) Select Insert inconvertible values as null if you want to insert NULL when the IDE meets an inconvertible value.
Apply the changes and close the dialog.

Restore Microsoft SQL Server table data
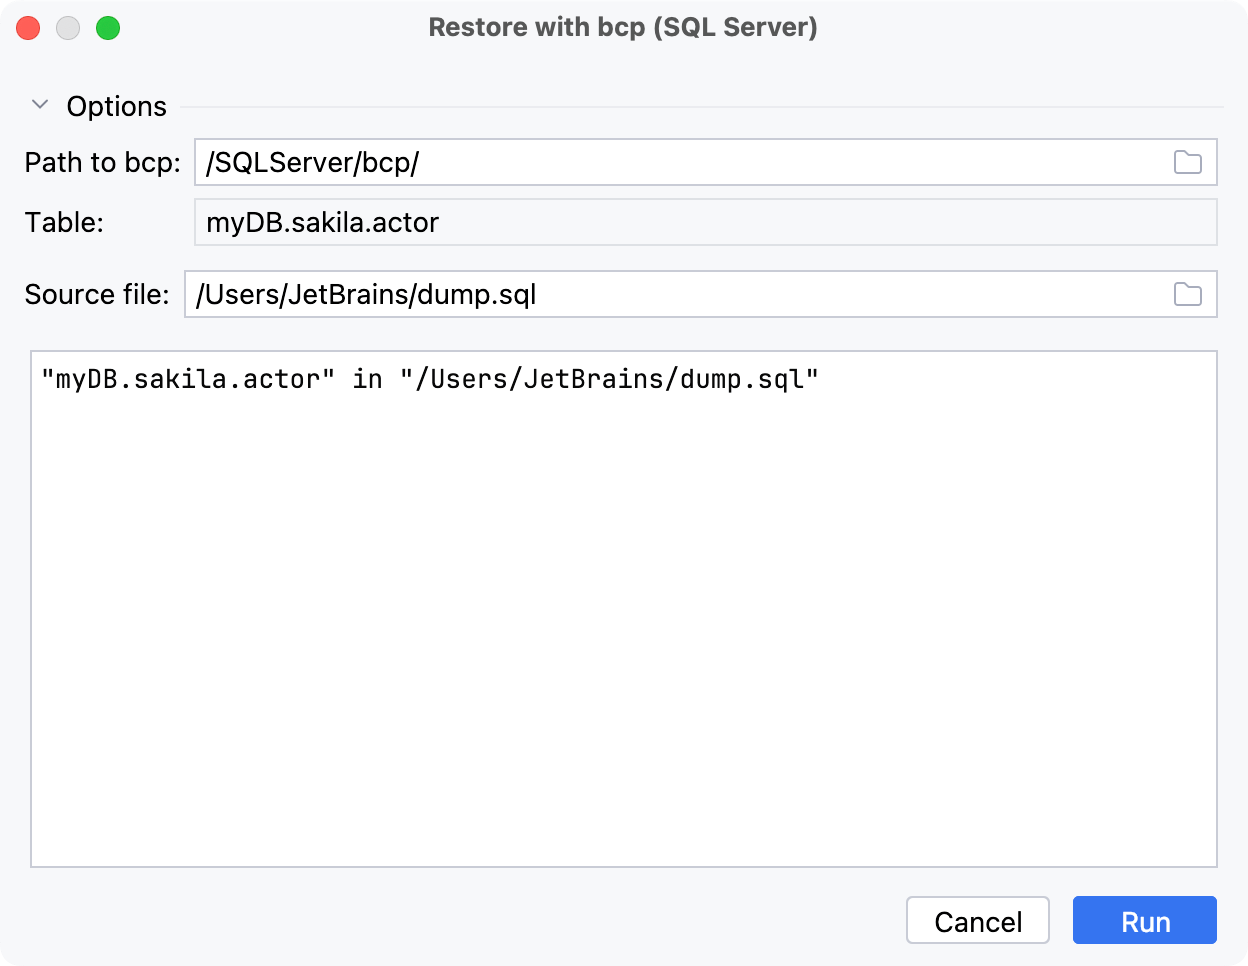
You can restore a Microsoft SQL Server table data by using the bcp utility. The tool is not integrated into PyCharm. You can read about it at learn.microsoft.com.
In the Database tool window, right-click the table that you want to import your data to and select .
In the Restore with bcp (<data_source_name>) dialog, specify the path to the bcp executable in the Path to bcp field.
In the Source file, specify the path to the file that you want to restore the data from.
Click Run.
Restore a full data dump for MySQL and PostgreSQL
You can restore data dumps by using the mysql client utility for MySQL, or pg_restore or psql for PostgreSQL. The pg_restore option is used for custom-format pg_dump -Fc or directory-format pg_dump -Fd dumps. The psql option is used for SQL-format dumps.
If you see no restore options in the context menu, verify that you use a correct JDBC URL for the data source.
Restore data with mysql or pg_restore
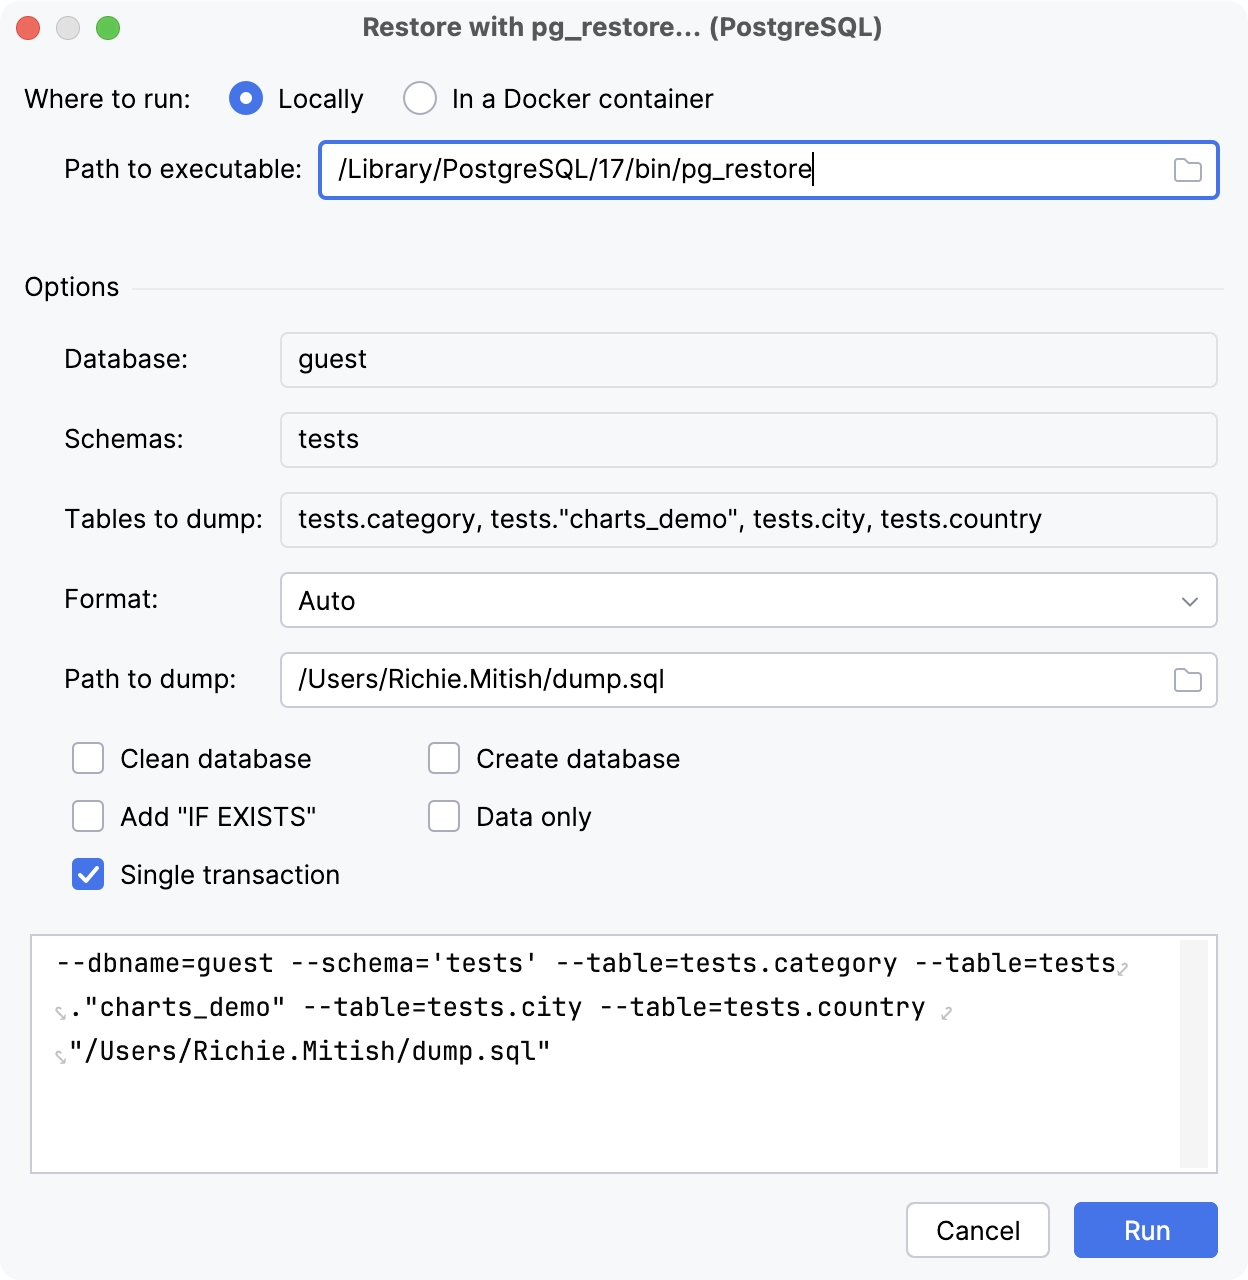
In the Database tool window, right-click a schema or a database and navigate to the Import/Export group:
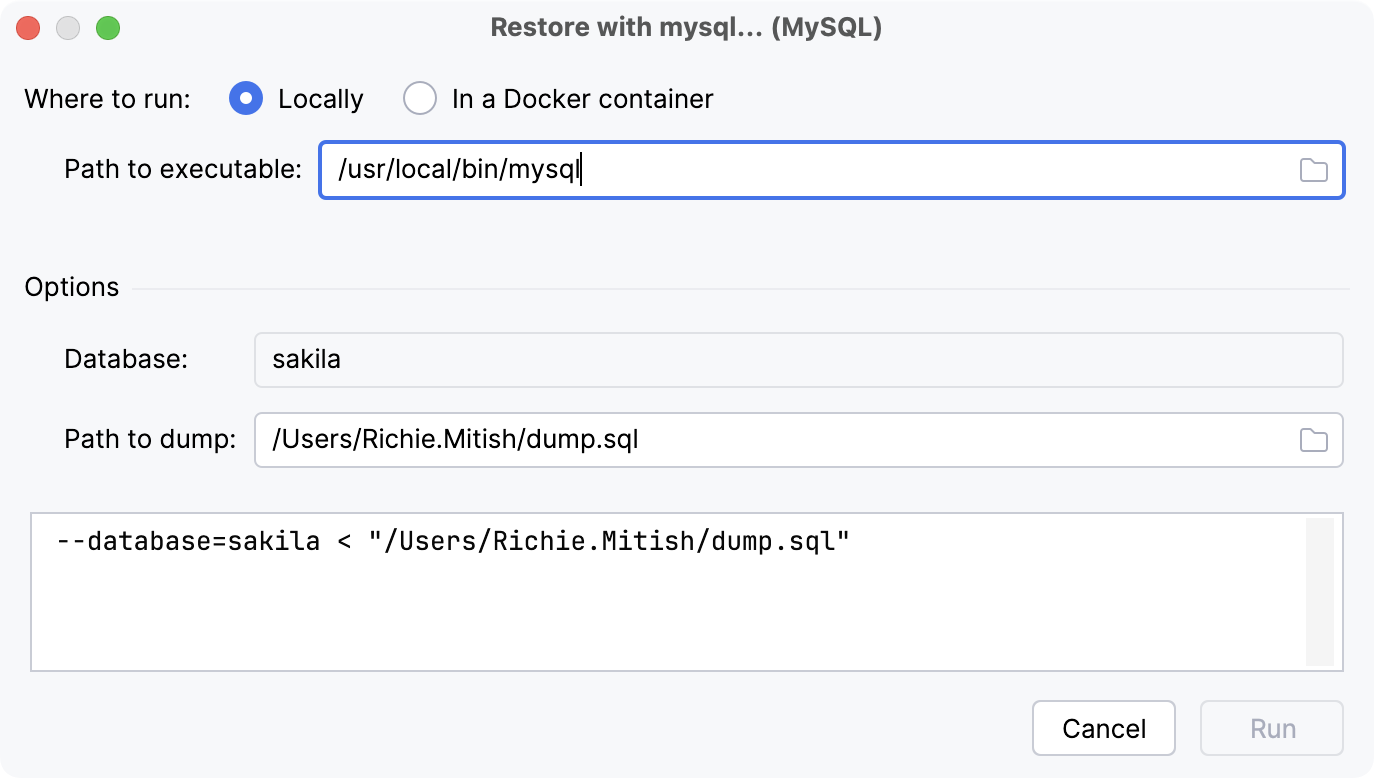
Restore with 'mysql': for MySQL data sources. In the Path to executable field, specify the path to the mysql executable (for example, C:\Soft\mysql-8.0.19-winx64\bin\mysql.exe).
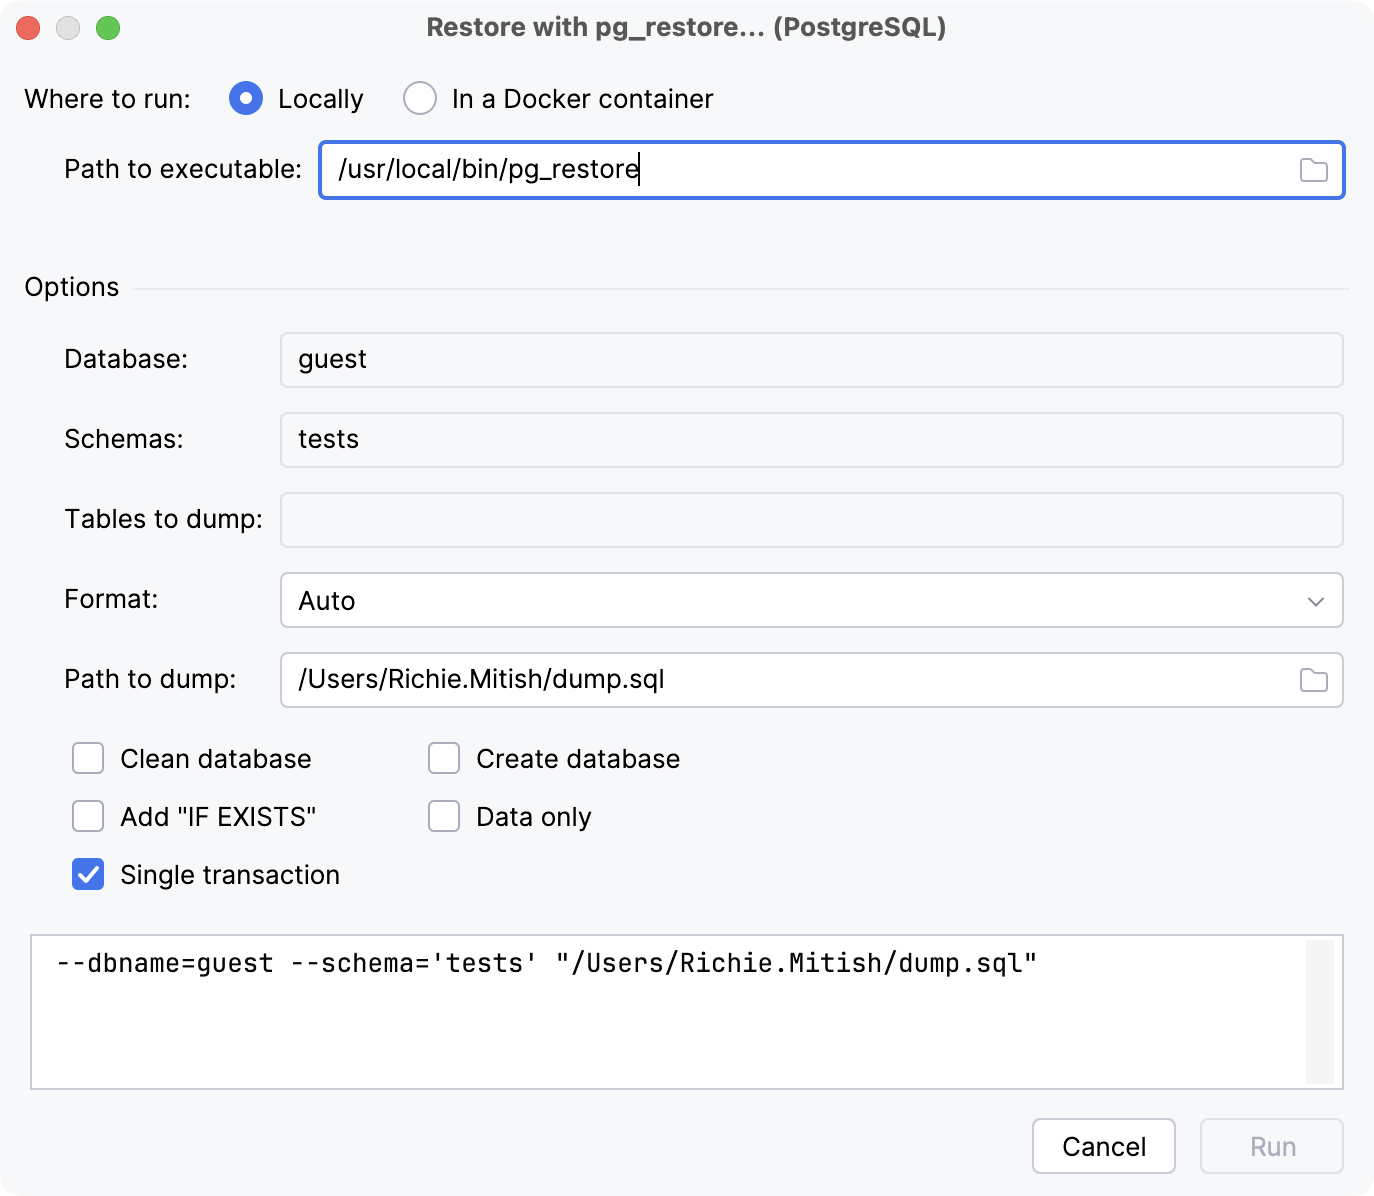
Restore with 'pg_restore': for PostgreSQL data sources. The pg_restore option is available for the most database objects except for the data source level.
Restore with 'psql': for PostgreSQL data sources. The psql option is available for data sources.
Restore with 'pg_restore'/'psql': for PostgreSQL data sources. Includes two tabs: pg_restore and psql. The option is available for databases.
In the Restore with <dump_tool> dialog, specify the path to the restore tool executable in the Path to executable field.
(Optional) Edit the command-line options in the lower part of the dialog.
Click Run.
'Restore with' dialogs reference
Item | Description |
|---|---|
Where to run | Sets where to run the tool. You can either run it locally or in a Docker container.
|
Options | |
Database |
Name of the database to connect to. |
Path to dump | Defines the path to the dump file on your machine. |
Item | Description |
|---|---|
Where to run | Sets where to run the tool. You can either run it locally or in a Docker container.
|
Options | |
Database |
Connect to the specified database and restore directly into it. |
Schemas |
Restore only objects that are in the specified schema. |
Tables to dump |
Restore only the specified tables. |
Format |
Format of the output:
|
Path to dump | Defines the path to the dump file on your machine. |
Clean database |
Drops all the database objects that will be restored before restoring them. |
Add "IF EXISTS" |
Uses |
Create database |
Creates a new database first and then restores into it. If Clean database is enabled, drops and recreates the target database before connecting to it. |
Data only |
Restores only the data, not the schema. |
Single transaction |
Performs the restore within a single transaction by wrapping it in |
For more information about export options, refer to the pg_restore documentation.
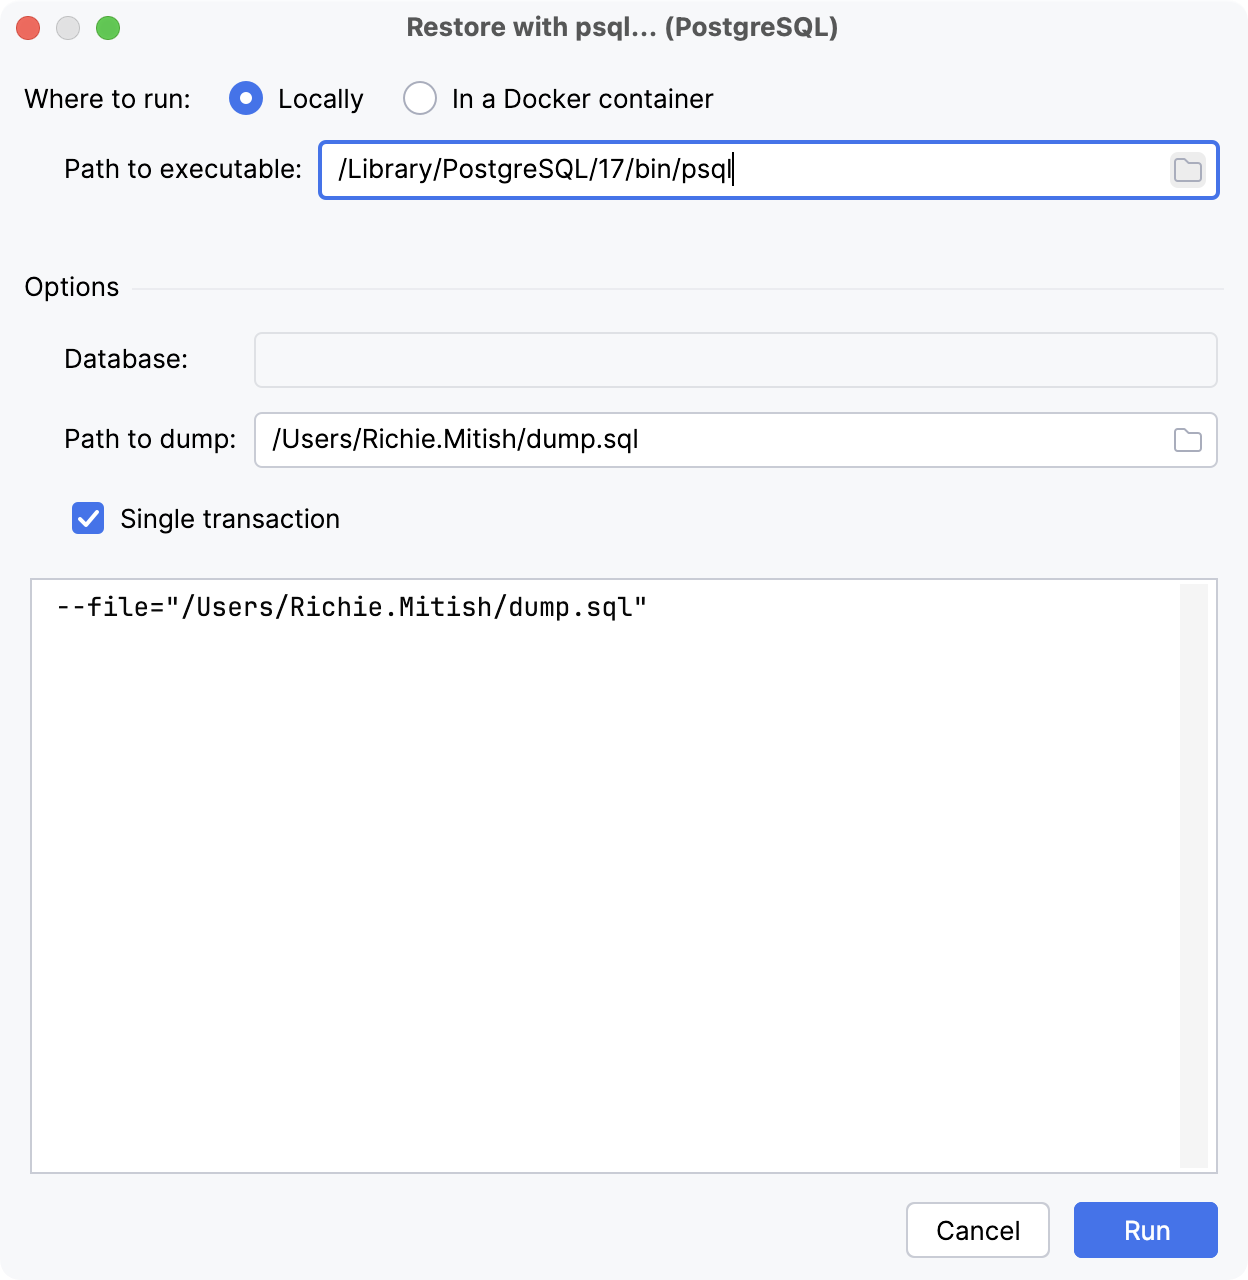
Item | Description |
|---|---|
Where to run | Sets where to run the tool. You can either run it locally or in a Docker container.
|
Options | |
Database |
Connect to the specified database and restore directly into it. |
Path to dump |
Defines the path to the dump file on your machine. |
Single transaction |
Performs the restore within a single transaction by wrapping it in |
For more information about export options, refer to the psql documentation.
Import dialog
The Import dialog appears when you import a file, a table, or a query result set into your database.
In the mapping tree that is in the upper-left pane of this dialog, you can create file-to-table, table-to-table, and query-to-table mappings (). In the settings pane in the upper-right part of the dialog, configure mapping settings and change settings of the sources (CSV file, table, and query). The preview pane in the bottom part of the dialog displays generated previews of your data, of the source data with different source settings, and of DDL statements.
Mapping tree
Icon | Item | Shortcut | Description |
|---|---|---|---|
Add | Alt+Insert | Create a new object. | |
Remove | Alt+Delete | Delete the selected object. | |
Edit | F4 | Open selected object in the object editor. | |
Edit On Selection | Toggle between opening the object in object editor on selection and by double-clicking it. | ||
Back | Ctrl+Alt+Left | Previous object. | |
Forward | Ctrl+Alt+Right | Next object. |
Settings
Item | Description |
|---|---|
Path | Defines the path to source file. |
Charset | Determines which charset is used to read the file. |
Format | Determines which format to use to read the file. Click |
First row is header | Treat the first row as a row that contains column names. |
First column is header | Treat the first column as a column that contains row names. |
Trim whitespaces | Ignore or remove whitespace characters. If this checkbox is cleared, the whitespace characters are treated as parts of the corresponding values. |
Column | Source file column name. |
Type | Source file column data type. |
Item | Description |
|---|---|
Path | Defines the path to source file. |
Loader | Determines which scripted data loader is used to import the file data. |
First row is header | Treat the first row as a row that contains column names. |
Column | Source file column name. |
Type | Source file column data type. |
Item | Description |
|---|---|
Table | Defines the source table. |
Item | Description |
|---|---|
Target | Defines the target object against which the query is run. |
Query | Defines the source SQL query. |
Item | Description | |
|---|---|---|
Schema | Schema in which you want to create or to copy a table. You can select schemas in another data source. | |
Table | Name of a new table or an existing table in case you want to add data to the existing table.
| |
Mapping |
| Use these buttons to add items, remove them, and move them up and down the list. |
Target Column | Column name in the target table. | |
Source Column | Column name in the source table. | |
Encoding | Select the character encoding for your data in the source file. | |
Write errors to file | Write errors that occur during the import in a text file. | |
Insert inconvertible values as null | Insert the | |
Disable indexes and triggers, lock table (may be faster) | Disable indexes and triggers during the import. Note that if you selected this option, it might lead to a situation when a trigger does not fire and fails to pass its results. Though it might improve the performance of the importing process. The option is available only when the target table (to which you copy values) has indexes or triggers. | |
Data Preview pane
Item | Description |
|---|---|
and file: <file_name> format: <file_format> | Opens the CSV Source section with source file settings. |
Data Preview | The generated preview of how the data is read using the configured settings. |
Item | Description |
|---|---|
| Selects the source file path in the Path field. |
| Reloads the generated preview. |
Data Preview | The generated preview of how the data is read using the configured settings. |
Item | Description |
|---|---|
| Reloads the table preview. |
and table: <table_name> | Opens the Table Source section with source table settings. |
Data Preview | The generated preview of how the data is read using the configured settings. |
Item | Description |
|---|---|
| Reloads the query result set. |
and table: <table_name> | Opens the Query Source section with source query settings. |
Data Preview | The generated preview of how the data is read using the configured settings. |
Item | Description |
|---|---|
Data Preview | The generated preview of how your data will be imported to the database. |
DDL Preview | A statement or statements that PyCharm will run to create a table. You can edit the statements in the DDL preview field. |