Use Built-in SSH terminal and remote SSH external tools
What this tutorial is about
This tutorial describes how to make use of the PyCharm built-in SSH terminal and remote tools.
SSH basics are out of scope of this tutorial.
Prerequisites
Before you start, make sure that:
You are working with PyCharm 3.0 or later. This tutorial has been created with PyCharm 2016.2
You have access to a SSH server.
Working with SSH client
Let's see how we can work with the PyCharm's built-in SSH client.
Start connection
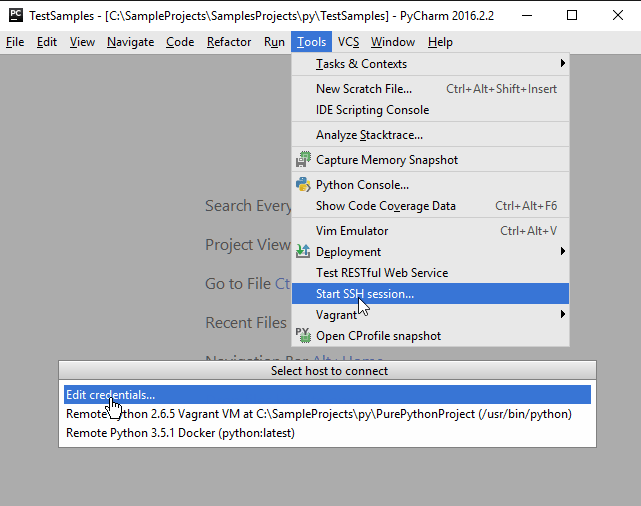
From the main menu, choose , and then click Edit credentials:
Provide connection information
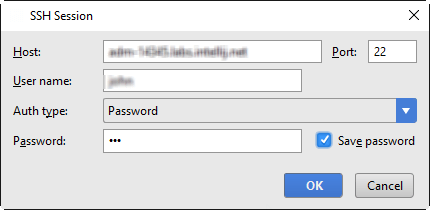
In the SSH Session dialog, specify the connection information: host (local or remote), port, login name and password:
Lo and behold!
After clicking OK, the SSH session starts in the dedicated tab of the Terminal tool window:

What can we do in a SSH session?
As usual for an interactive session... run commands remotely, copy and paste, scroll through the history of commands using up and down arrow keys.
Working with remote SSH external tool
Let's define an external tool that will run a command over SSH, for example, show a calendar.
Configuring a SSH external tool
Open the Settings dialog ( on the main toolbar), and under the Tools node, select the page Remote SSH External Tools. Click
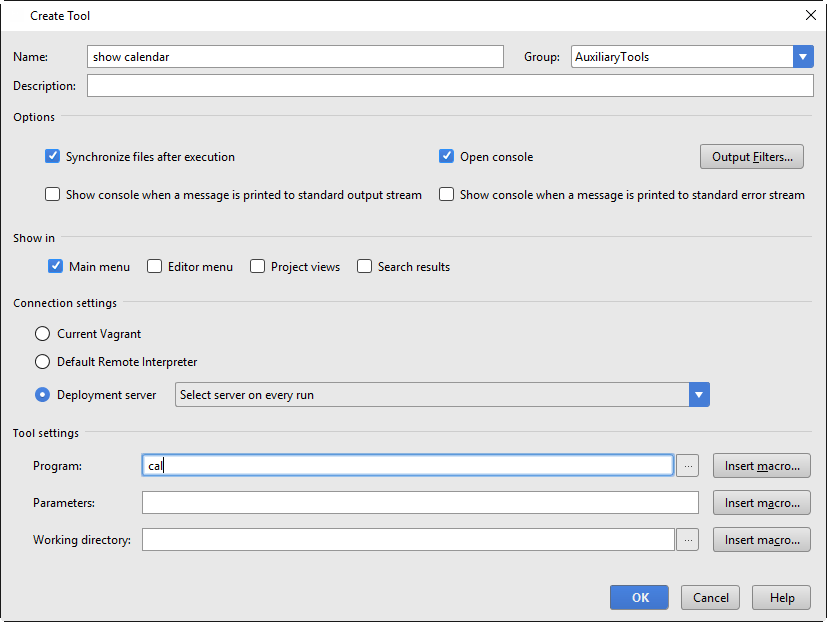
to create a new remote tool, and in the Create Tool dialog specify the new tool settings:
The field Name helps specifying some visible name of the new tool. The next two fields are optional:
In the Description field type some meaningful description.
The field Group denotes a group with the specified name that will be created in the Tools menu, and the new SSH external tool will be placed under this group.
In the Show in area, specify where do you want to see the new tool. In this case, select the checkbox Main Menu only.
In the Connection settings area click the radio button Deployment server and choose Select server on every run. It means that every time you want to run this external tool, you will have to specify the connection settings.
Finally, in the Tool settings area, specify the tool to be executed remotely. In the screenshot below we are running a bash command; parameters and working directory are optional. We can also make use of macros to inject the current command name.
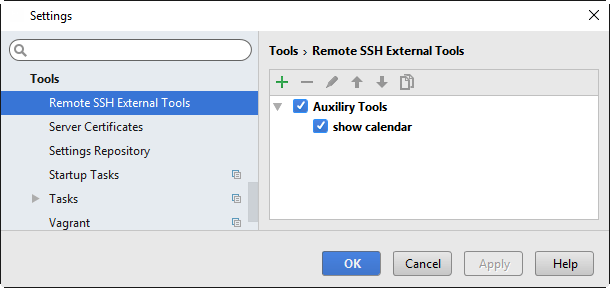
Click OK to close the Create Tool dialog and return to the page Remote SSH External Tools. We can see the new tool in the list:
Launching SSH external tool
Once a tool has been set up, it will be shown in the menus selected earlier. In this case, this is the menu that will display the newly created remote SSH external tool under the group, defined in the previous section:
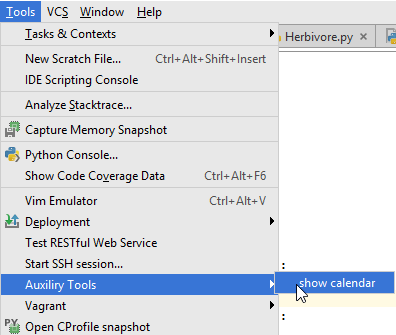
Let's choose this command and see what happens. First of all, you are suggested to choose the server to connect to. Having chosen Edit credentials, specify the connection settings.
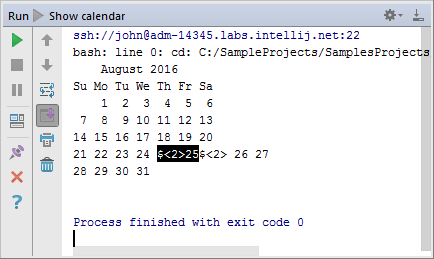
And finally, you see the calendar! Here it is:
