Fix inconsistent namespace naming
You have probably seen that, when the namespace declaration does not match the file location and/or project settings, ReSharper warns you about it and allows you to correct it:

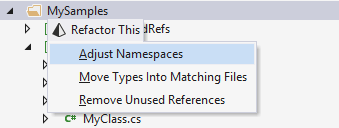
However, if you have several files with incorrect namespaces, going through them one by one can be a pain. Luckily, you can just press Control+Shift+R on a node in the Solution Explorer and select Adjust Namespaces:

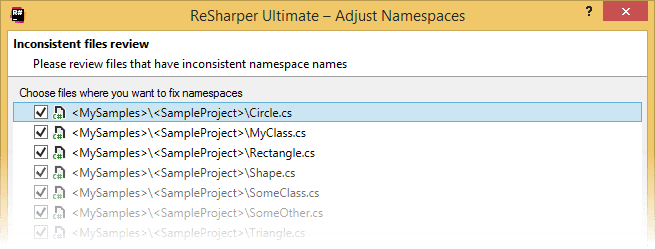
This will pop up a dialog letting you select all files where namespaces need to be adjusted:

After you pick the namespaces to fix, they will be adjusted to their expected values (dependent upon project settings and file location).
By default, ReSharper assumes that the namespace each class appears in matches its location in the project. The 'root' namespace for the project is defined in the project properties:

As a result of the above, all code elements at the project level are expected to appear in the Nancy.Embedded namespace, and a warning will be issued otherwise.
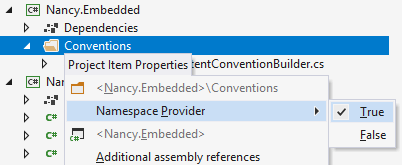
Namespaces are made deeper with the introduction of folders. In the example below, a folder called Conventions will necessitate all items it contains to appear in the Nancy.Embedded.Conventions namespace. However, there are cases where you do not need the folder to append an extra namespace element. In such cases, you can set Namespace Provider to False in the Project Item Properties popup, which you can invoke by selecting Edit project item properties from the context menu of the folder in the Solution Explorer.

A folder which is not a Namespace Provider will not influence the namespace of elements it contains, and ReSharper will analyze and refactor the related code accordingly.