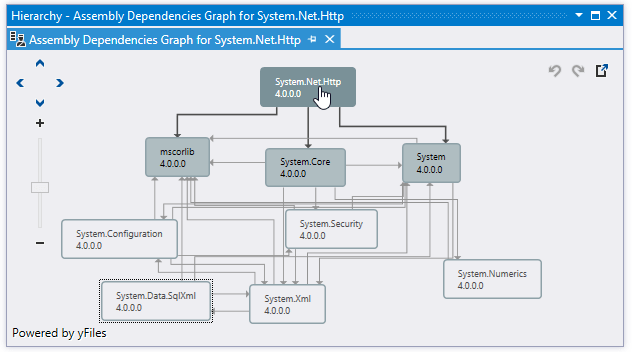
Explore assembly dependency diagram
ReSharper helps you visually explore dependencies between compiled assemblies. You can create a diagram from any number of assemblies and explore how these assemblies reference each other.

Create initial diagram
Select one or more assemblies in the Assembly Explorer window, right click the selection and choose Show Assembly Dependency Diagram in the context menu . The diagram will include all selected assemblies as well as all assemblies referenced from them. References between assemblies are represented with arrows.
Show and hide items
There are several ways to show/hide items on the diagram:
To show some assemblies in the diagram and hide others, Ctrl-click assemblies you want to select, then right-click the selection and choose Show only selected items.
To display the dependent or referenced assemblies for some assemblies, select one or more assemblies using Ctrl-click, then right-click the selection and choose Show Only This/These and Dependent/Referenced Items. Note that these commands only hide the irrelevant items and do not add any referenced/dependent assemblies, which are currently hidden.
To reverse changes made in the diagram (shown/hidden assemblies) step by step, click Undo
.png) or press Ctrl+Z. To reverse the Undo commands, click Redo
or press Ctrl+Z. To reverse the Undo commands, click Redo .png) or press Ctrl+Y.
or press Ctrl+Y.
Pan and zoom the diagram
To pan and zoom the diagram, use the controls in the upper left corner of the diagram area. Alternatively, you can pan the diagram using your touchpad, scroll bars or click anywhere in the diagram area outside the diagram items and drag while the hand cursor ![]() is shown. You can also use the mouse wheel for zooming.
is shown. You can also use the mouse wheel for zooming.
Rearrange items on the diagram
The diagram layout is calculated automatically, but you can change it if necessary: all items can be moved. To move an item, first click it to select, and then click and drag it while the cross cursor ![]() is shown.
is shown.