Find, explore, and install NuGet packages
With ReSharper, you can search for types or namespaces in the NuGet package gallery, check the matched packages, analyze their contents, and install the desired packages - all without leaving Visual Studio.
Find NuGet packages
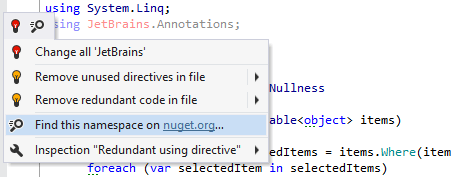
The easiest way to start the search for a NuGet package is to use the corresponding Alt+Enter action that becomes available for unresolved namespaces:

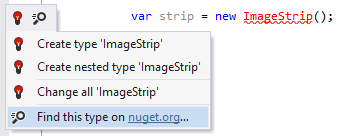
... and types:

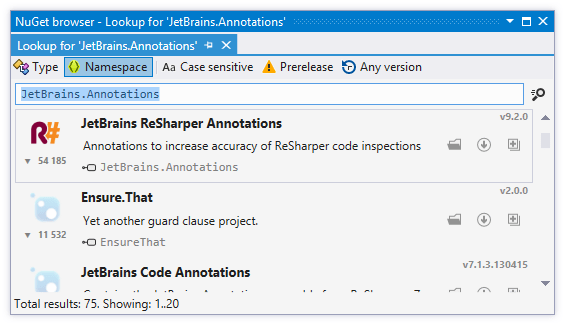
In any case, ReSharper will open the NuGet Browser window, where you will see all packages that contain the desired type or namespace.

The NuGet Browser window can also be opened from the main menu , and you can also start the search right there. Depending on what you are looking for, click either Type or Namespace on the window's toolbar, and then enter the type or namespace in the search field.
If necessary, you can refine the search by using the toolbar buttons:
Case Sensitive — By default, the search is case-insensitive. Click this button to take the case of the search query into account.
Prerelease — By default, the search results only include release versions of packages. Click this button to add pre-release versions to the search results - all pre-release packages will be marked with the special icon:
.png)
Any version — By default, the search results only include latest versions of the matched packages. Click this button to display all available versions - all versions but latest will be marked with the corresponding warnings.
Explore a NuGet package
For more information about any found package, click More ![]() next to the package. ReSharper will display description and other details of the package. If necessary, you can click to the Package id link to open the package page on the NuGet website. To hide the package details, click Less
next to the package. ReSharper will display description and other details of the package. If necessary, you can click to the Package id link to open the package page on the NuGet website. To hide the package details, click Less ![]() .
.
You can also study the hierarchy of namespaces and types in any found package. To do so, click Browse ![]() next to the package.
next to the package.
Install a NuGet package
As soon as you find the desired package, you can install it by clicking Install ![]() next to it. If you have started the search in the NuGet Browser window, you will have to select the project where the package should be installed. If your search originates from a context action in the editor, you can just click Install in the confirmation dialog to install the package in the current project. However, you can always select any other project by clicking Select another project.
next to it. If you have started the search in the NuGet Browser window, you will have to select the project where the package should be installed. If your search originates from a context action in the editor, you can just click Install in the confirmation dialog to install the package in the current project. However, you can always select any other project by clicking Select another project.