Get Started with Unit Testing
With JetBrains Rider, you have all necessary tools for unit testing — from unit test projects templates through to test results analysis. In this tutorial, we'll take the NUnit framework as an example, create unit tests, run them, and see the results.
Step 1. Add unit test project
In our example, we have a solution with a single project called Sandbox, which has a class that implements a primitive calculator:
To test our calculator, let's start by creating a project for our unit tests.
In the Solution Explorer, right-click the solution node and choose
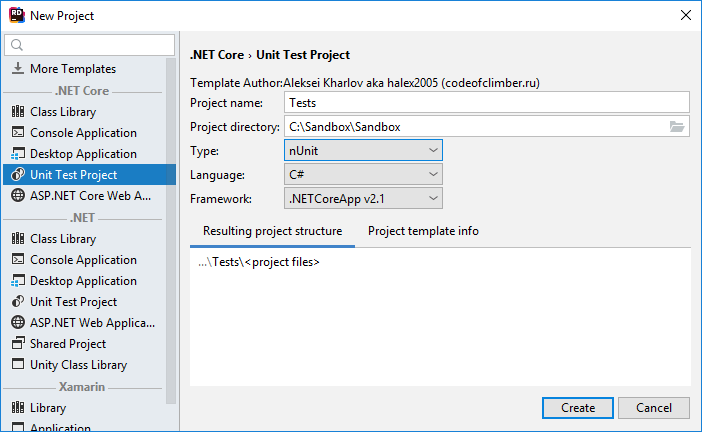
Choose the Unit Test Project template.
Select NUnit as the project type, and provide some telling name for it, for example,
Tests.
When you click Create, the new test project with all necessary configurations and references will be added to our solution.
Step 2. Write your first tests
In the test project, JetBrains Rider automatically created a file named UnitTest1.cs with a stub for our first test and opened it for you. We are ready to test our calculator.
Unit testing frameworks include a lot of functions to check how the target code works. The most straightforward way is to compare function's actual output against the expected value. NUnit provides Assert.AreEqual method for that.
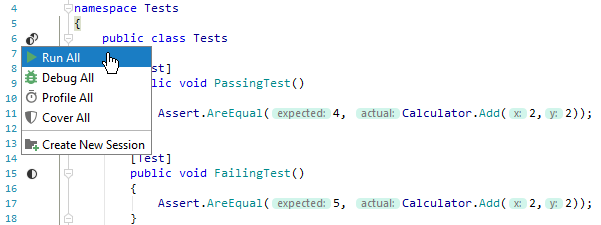
Let's create two tests, PassingTest() that will compare the result of Add(2,2) against 4 and FailingTest() that will compare the result of Add(2,2) against 5:
Step 3. Run the tests
Now that you've written the first tests, let's run them. You can click the unit test icon next to the test class and choose Run All to run all tests in that class.

JetBrains Rider will start the tests and bring up the Unit Tests window where you can see test progress and results.

Step 4. Analyze test results
As expected, the PassingTest has passed and the FailingTest has failed. Normally, you want to focus on failed tests.
Click the
 icon on the toolbar to show failed tests and hide all the others.
Check the output to find out why the test is failed. The problem is either in the code being tested or — as in our case — in the test itself.
Fix the problem and run tests once again. You can click
 on the toolbar or press Ctrl+;, F to rerun only the failed tests — this will save you time if you have plenty of tests.
Step 5. Next steps
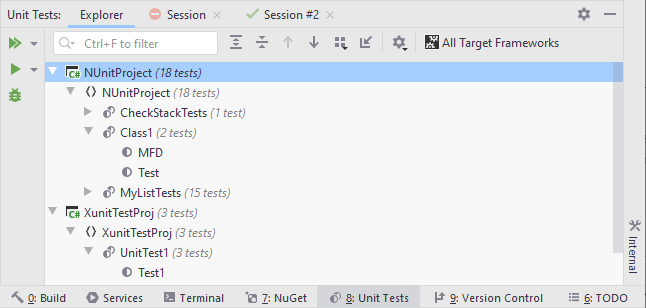
As you write more tests, you may end up having lots of files in your test project, or you can even have multiple test projects in your solution. In such situation, using editor controls (as demonstrated above) will not be the most convenient way to run multiple tests. Instead, you can locate a solution, project, or any node containing unit tests in the Solution Explorer, right-click it and choose Run Unit Tests ![]() Ctrl+;, R. Or alternatively, you can browse all tests in the solution on the Explorer tab of the Unit Tests window and run tests from there:
Ctrl+;, R. Or alternatively, you can browse all tests in the solution on the Explorer tab of the Unit Tests window and run tests from there:
