Design Windows Forms
If your project includes Windows Forms, you can use JetBrains Rider's visual Windows Forms designer and also create new Windows Forms projects.
Create Windows Forms projects
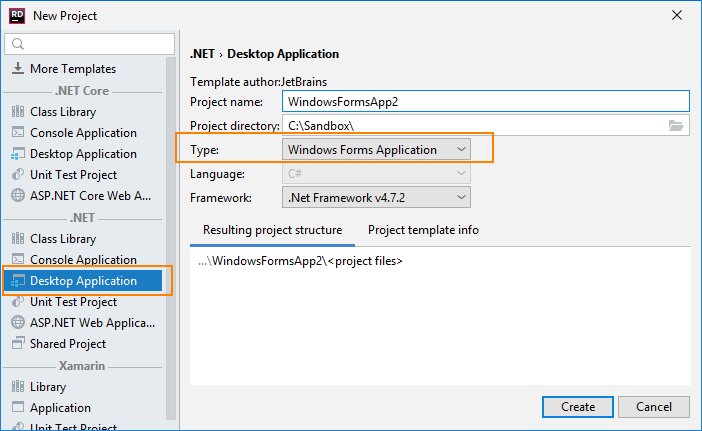
You can create a new project in a new solution using or add a new project to the existing solution by right-clicking the solution or solution folder node in the Solution Explorer, and choosing .
Choose Desktop Application project template and then Desktop Application as the project type.

Create and edit Windows Forms
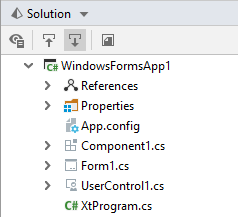
You can add Windows Forms items in any project which have a reference to System.Windows.Forms. To add a new Windows Form item, right-click the project in the Solution Explorer and choose Add. You will be then able to select one of the Windows Forms templates — Windows Form, User Control, or Component. Windows Forms items are displayed with the corresponding icons in the Solution Explorer tree:

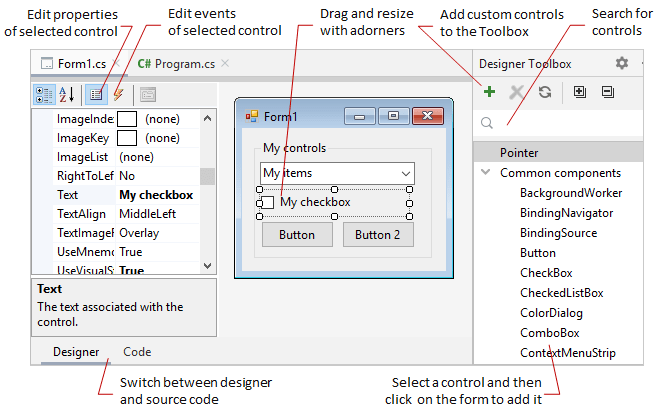
When you double-click a Windows Form item, it opens in a new editor tab and additionally opens the Designer Toolbox window. Use the Designer and Code tabs at the bottom of the editor to switch between the visual designer and code editor views.
When working in the designer view, you can select the desired component in the Designer Toolbox and then without dragging it, draw a rectangle area on the canvas where the component should be added.
To edit a component added to the canvas, select it with a click, and then:
Use its adorners to move and resize it.
Use the property grid and the event list to manipulate available properties like Text, Items, and Fonts, and subscribe to available events.
Double-click the component to add a default event handler. For example, it will add the Click event handler for a button.
Use Ctrl+X, Ctrl+C, paste Ctrl+V shortcuts to cut, copy, and paste components within the canvas and also between multiple Windows Forms items.
