AngularJS
AngularJS also known as Angular 1 is a framework for developing single page web applications. JetBrains Rider suggests AngularJS-aware completion options for predefined and custom ng directives and for controller and application names, as well as code insights for data bindings inside curly-brace expressions {{}}. You can use built-in AngularJS live templates and navigate between the name of a controller in HTML and its definition in JavaScript or between ngView or &routeProvider and the template. For AngularJS entities, use the Go To Symbol navigation.
Before you start
Download and install Node.js.
Make sure the Angular and AngularJS plugin is enabled on the Settings/Preferences | Plugins page, tab Installed, see Managing plugins for details.
To open an application that is organized in the directory structure and does not have a solution file, press Ctrl+O or choose from the main menu, and then specify the root folder of the application.
Create a new AngularJS application
You can install AngularJS in a solution either manually, by downloading the AngularJS framework, or using the Bower package manager.
Install and configure AngularJS in an empty solution manually
Download the AngularJS framework at http://angularjs.org/.
Configure AngularJS as a JetBrains Rider JavaScript library, to let JetBrains Rider recognize AngularJS -specific structures and provide full coding assistance:
In the Settings/Preferences dialog Ctrl+Alt+S, go to . The Settings: JavaScript Libraries page opens.
In the Libraries area, click the Add button.
In the New Library dialog that opens, specify the name of the library.
Click
next to the list of library files and select Attach Files or Attach Directory from the context menu, depending of whether you need separate files or an entire folder.
Select the Angular.js, or Angular.min.js, or an entire directory in the dialog that opens. JetBrains Rider returns to the New Library dialog where the Name read-only field shows the name of the selected files or folder.
In the Type field, specify which version you have downloaded and are going to add.
If you added Angular.js, select Debug. This version is helpful in the development environment, especially for debugging.
If you added the minified Angular.min.js, select Release. This version is helpful in the production environment because the file size is significantly smaller.
Learn more from Configure JavaScript libraries.
Install AngularJS in an empty project with Bower
Start with an existing AngularJS application
If you already have Angular sources in your project (for example, in the bower_components folder), just open your project and start working. If these sources are excluded from project, then you only need to configure AngularJS as a JavaScript library.
Check out the application sources from your version control
Click Get from VCS on the Welcome screen or select from the main menu.
In the invoked dialog, select your version control system from the list and specify the repository to check out the application sources from.
Download the dependencies
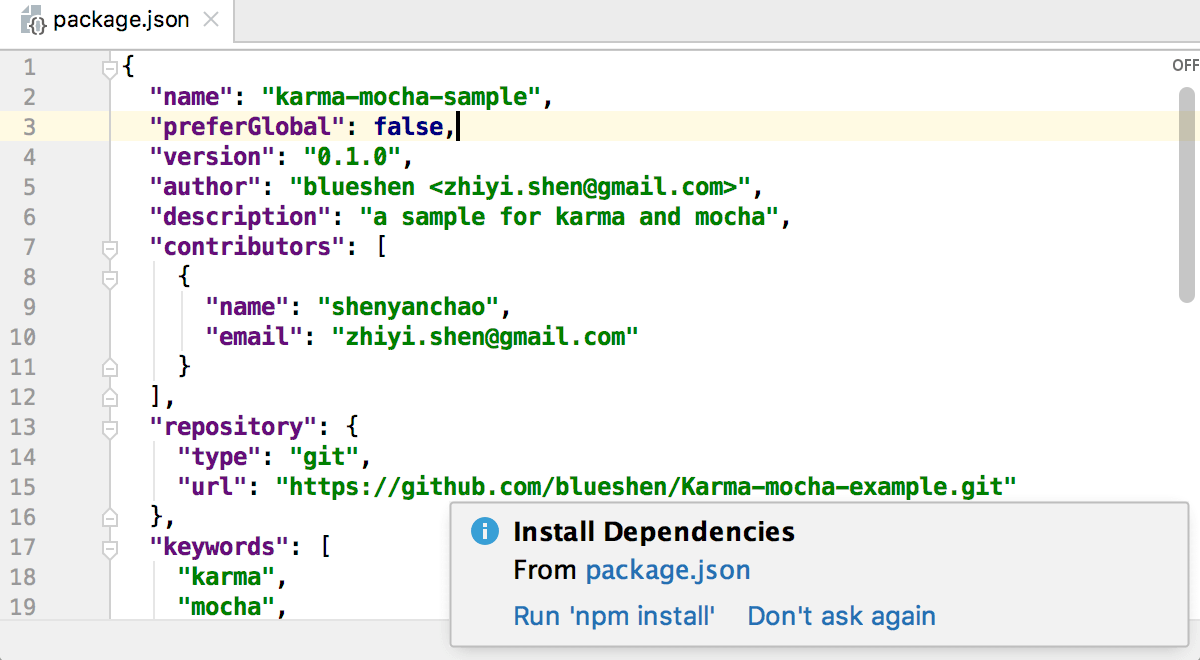
Click Run 'npm install' in the popup:

Use AngularJS Router state diagrams
You can see a diagram illustrating the relations between views, states, and templates in AngularJS applications that use ui-router.
Generate and view a diagram
Open the desired file in the editor, and then choose from the context menu. JetBrains Rider generates a diagram and shows it in a separate editor tab.
Navigate from an element in the diagram to the code that implements this element
Select the element and choose Jump to Source from the context menu.