Minifying JavaScript
Minification or compression means removing all unnecessary characters, such as spaces, new lines, comments, without changing the functionality of the source code. During development and debugging, these characters make code easier to read. At the production stage, they only increase the size of code to be transferred.
Most often compression is done as a step in your build process, with build tools like webpack. If you're not using build tools, you can use a stand-alone tool, such as UglifyJS.
To compress your code automatically, you need to configure a UglifyJS File Watcher which will track changes to your files and run UglifyJS.
By default, minification starts as soon as a JavaScript file in the File Watcher's scope is changed and saved. You can specify other events that invoke UglifyJS. Learn more from File Watchers.
The generated minified code is stored in a separate file with the name of the source JavaScript file and the extension min.js. The location of this generated file is defined in the Output paths to refresh field of the New Watcher dialog. However, in the Project Tree, the file with the minified code is shown under the source JavaScript file which is displayed as a node. To change this default presentation, configure file nesting in the Project tool window.
Before you start
Make sure you have Node.js on your computer.
Make sure the JavaScript and TypeScript and File Watchers required plugins are enabled on the Settings/Preferences | Plugins page, tab Installed, see Managing plugins for details.
Install UglifyJS globally
In the embedded Terminal (Alt+F12), type:
npm install --g uglify-jsLearn more from the UglifyJS official website.
Create an UglifyJS File Watcher
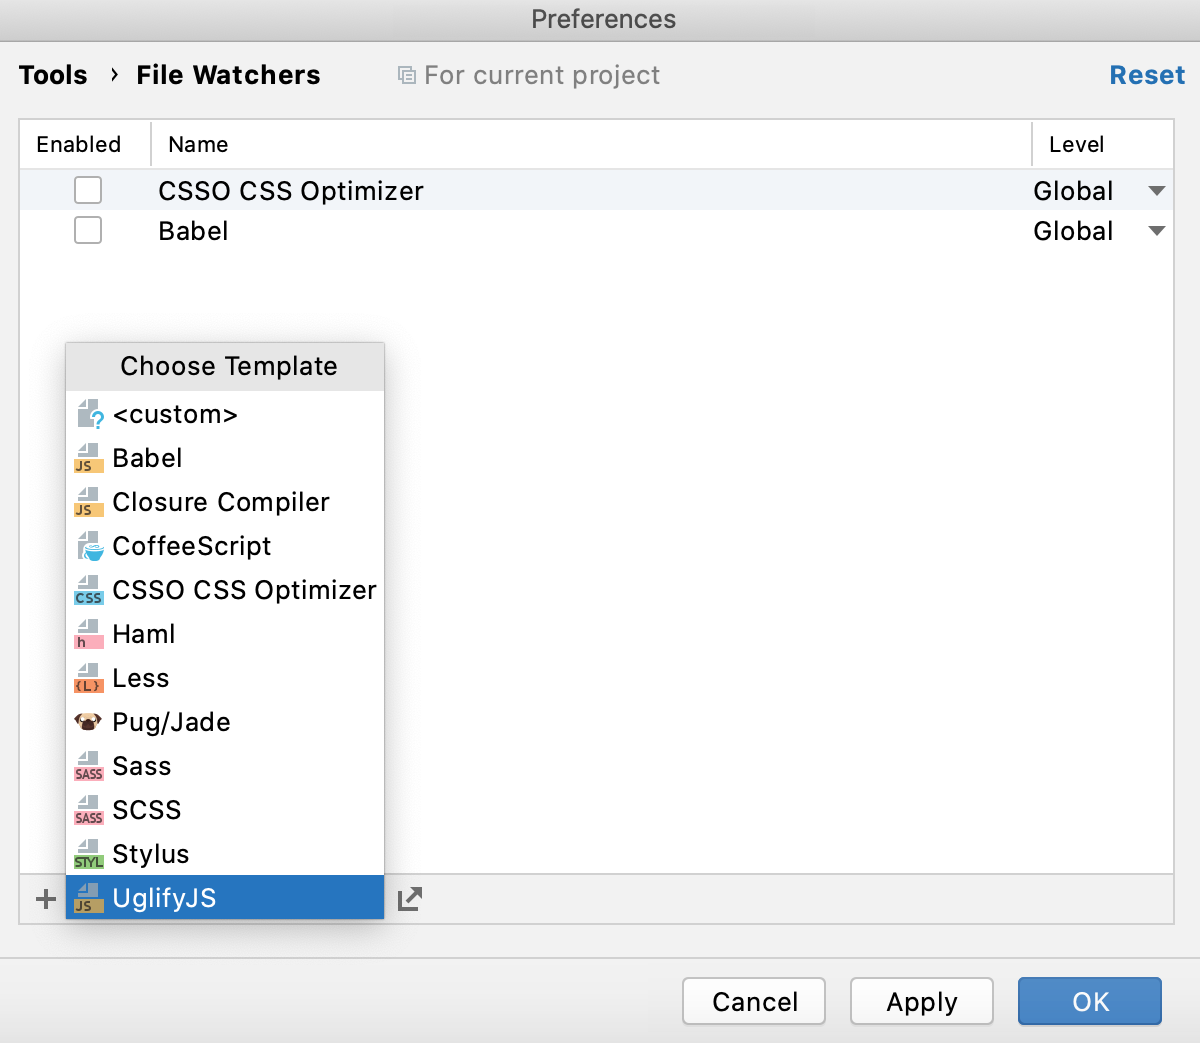
In the Settings/Preferences dialog Ctrl+Alt+S, click File Watchers under Tools. The File Watchers page that opens shows the list of already configured File Watchers.
Click
or press Alt+Insert and select the UglifyJS predefined template from the list.

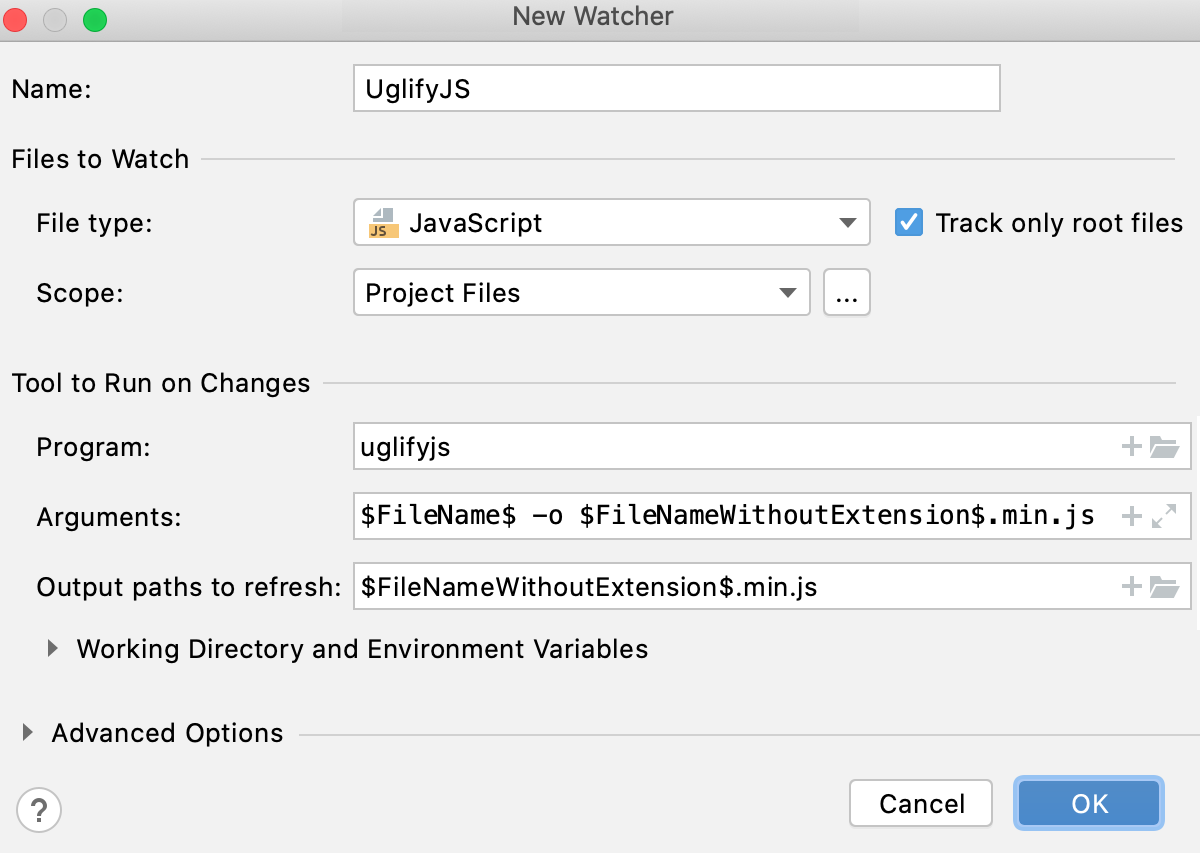
The New Watcher dialog opens.

In the Program text box, specify the location of the UglifyJS executable file.
If you installed UglifyJS through the Node Package Manager, JetBrains Rider locates the package itself and fills in the field automatically with the
uglifyjsalias. Otherwise, type the path manually or clickand select the file location in the dialog that opens.
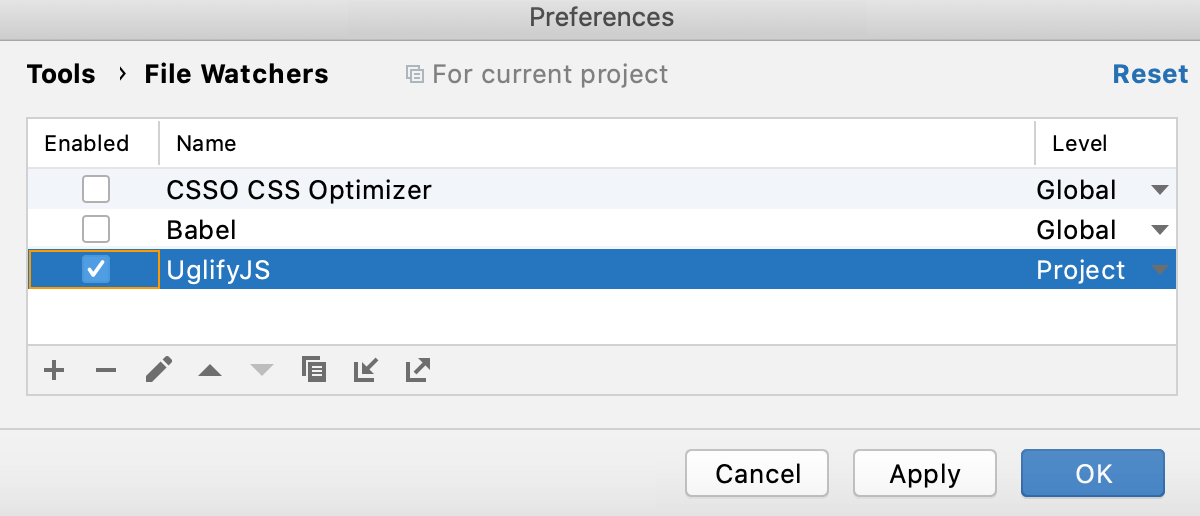
Accept the default File Watcher settings or reconfigure them, if necessary, as described in File Watchers, and click OK. JetBrains Rider brings you back to the File Watchers page where the new File Watcher is added to the list:

Make sure the Enabled checkbox is selected.
By default, the File Watcher will be available in the current project. To use it in other projects, select Global from the Level list.