Import
To import data from a script file, run the file as it is described in Database code. In addition to script files, you can import a CSV, TSV, or any other text files that contain delimiter-separated values.
Import data to a database
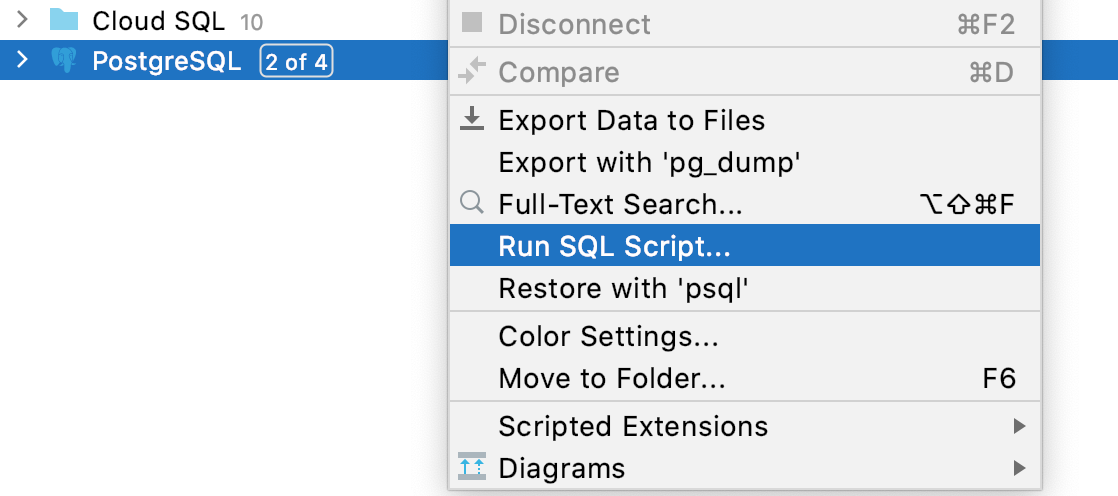
In the Database tool window (), right-click a data source.
Select Run SQL Script….
In the Select Path window, navigate to the SQL file that you want to apply.

Import delimiter-separated values into a database
In the Database tool window (), right-click a schema or a table and select Import Data from File.
Navigate to the file that contains delimiter-separated values and double-click it.
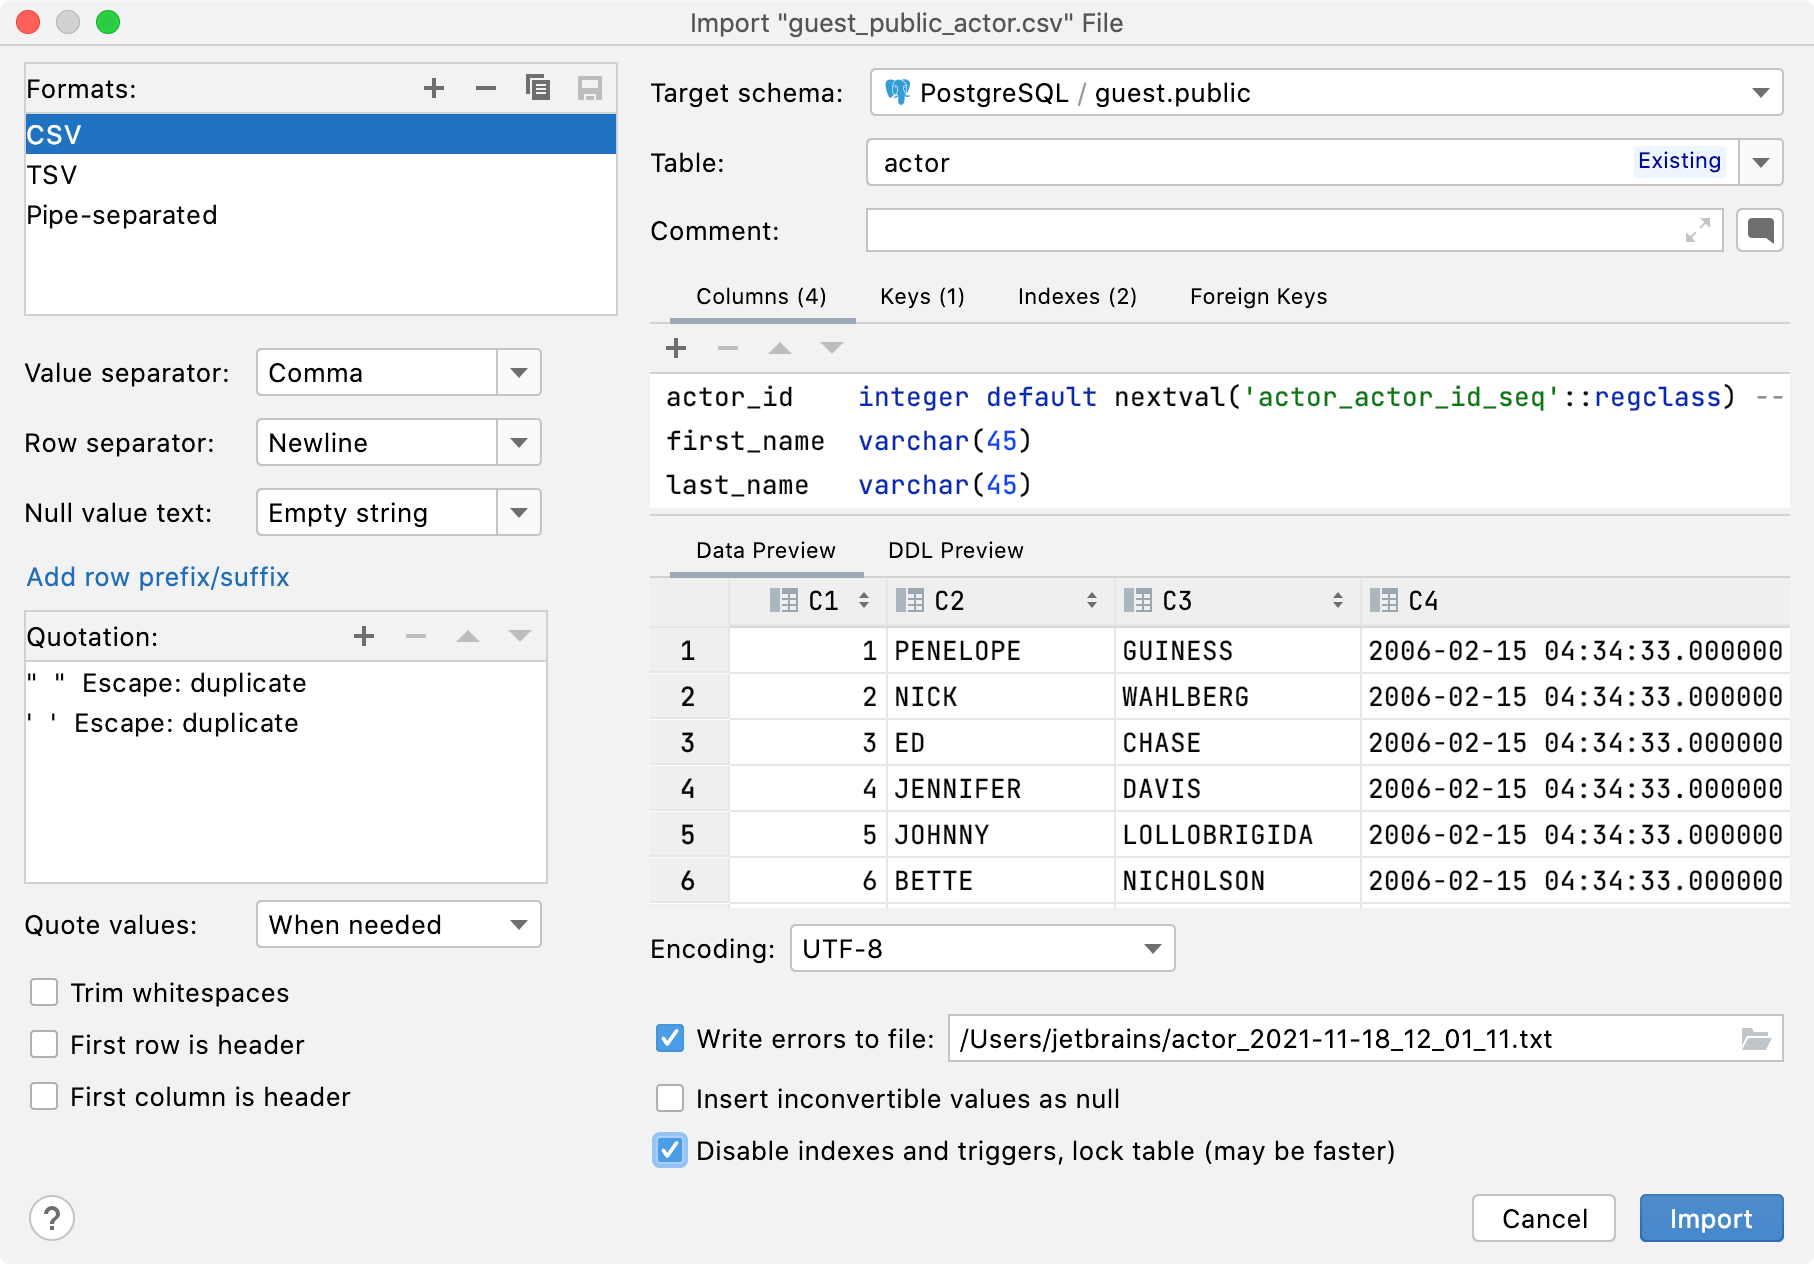
In the Import "file_name" File dialog, specify the data conversion settings and click Import.
You can select in what schema to create a table and whether to import data to a new table or an existing one. To select a schema or a table, use Table and Schema lists.
To mark the first row as a header, right-click the row in the Data Preview pane and select First Row Is Header.

Import a table to a different schema, database, or an existing table
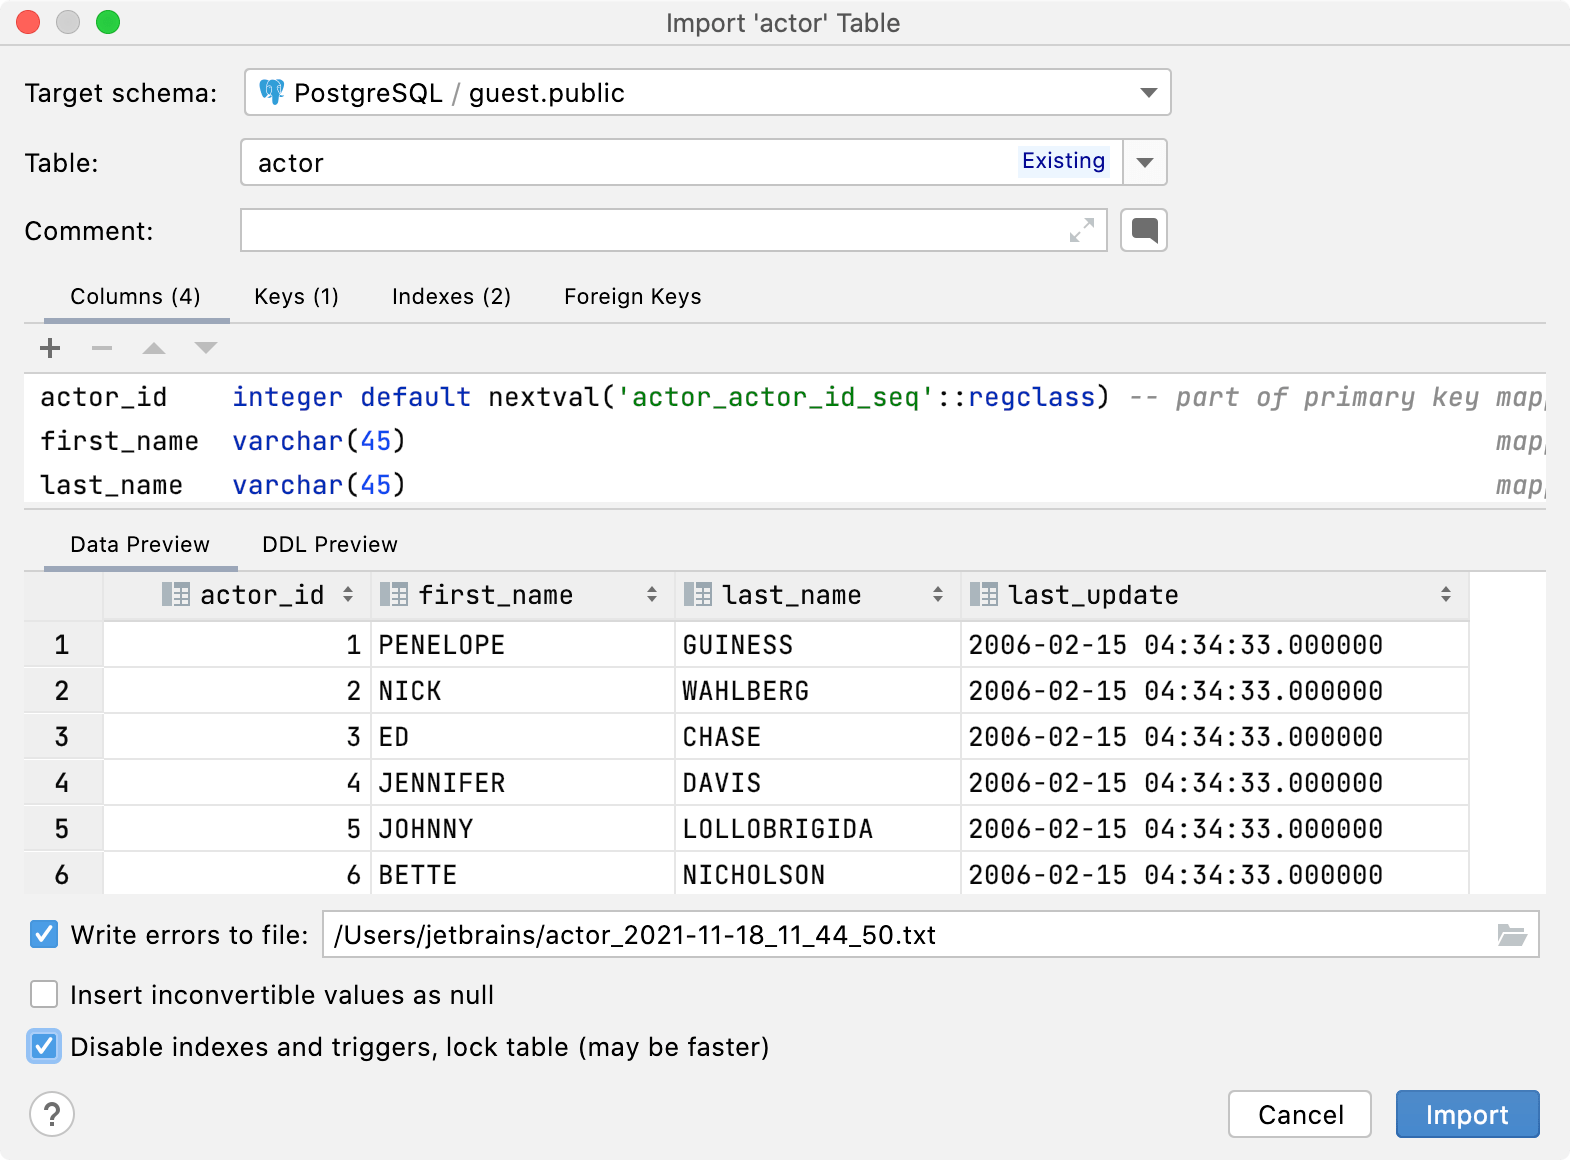
To open the Import 'table_name' Table, you can use the following actions:
Right-click a table, and select Copy Table to….
Drag a table to a schema or a database.
Press Ctrl+Shift+A, type
copy table toand press Enter.
In the Target schema list, select a schema in which you want to create a table.
In the Table list, type a name of a new table or select an existing table to add data to the selected table.
If you need, click the Add icon (
) to add columns, keys, and indexes.
(Optional) If needed, select Insert inconvertible values as null if you want to insert NULL when the IDE meets an inconvertible value.
Select Disable indexes and triggers, lock table (may be faster) if you want to disable indexes and triggers during the import. Note that if you selected this option, it might lead to a situation when a trigger does not fire and fails to pass its results. Though it might improve the performance of the importing process. The option is available only when the target table (to which you copy values) has indexes or triggers.
Click Import.

Restore a full data dump for MySQL and PostgreSQL
You can restore data dumps by means of the mysql client utility for MySQL, or pg_restore or psql for PostgreSQL. The pg_restore option is used for custom-format pg_dump -Fc or directory-format pg_dump -Fd dumps. The psql option is used for SQL-format dumps.
If you see no restore options in the context menu, verify that you use a correct JDBC URL for the data source.
In the Database tool window (), right-click a schema or a database and navigate to:
Restore with "mysql": for MySQL data sources. In the Path to mysql field, specify the path to the MySQL executable (for example, C:\Soft\mysql-8.0.19-winx64\bin\mysql.exe).
Restore with "pg_restore": for PostgreSQL data sources. The pg_restore option is available for the most of database objects except for the data source level.
Restore with "psql": for PostgreSQL data sources. The psql option is available for the most of database objects except for table and schema levels.
Restore: for PostgreSQL data sources. Includes two tabs: pg_restore and psql.
In the Restore with <dump_tool> dialog, specify the path to the restore tool executable in the Path to <dump_tool> field.
(Optional) Edit the command-line options in the lower part of the dialog.
Click Run.