Create new Unreal Engine entities
JetBrains Rider offers a set of predefined templates for Unreal Engine classes and dedicated actions to create a new plugin and module, allowing you to automate boilerplate code generation and switch between the IDE and Unreal Editor less often.
New Unreal Class
All predefined templates for Unreal Engine classes are available in the list of JetBrains Rider file templates.
You can see it in action in this short demo:
Create a new Unreal Engine class
Do one of the following:
In the Solution Explorer, select a folder where you want to create a new class.
Place the caret at a code file open in the editor. In this case, the new class will be created and placed next to the current file.
Press Ctrl+Alt+Insert.
Choose an Unreal Engine template from the list.
In the Create: [name of template] dialog that appears, specify the name for the new class and click OK.
The newly generated header and source files with template code will be added to the corresponding folders depending on the private or public context and opened in the editor.
If the template has editable parameters (that is, requires user input), JetBrains Rider deploys a hot spot session in the editor and sets the input position at the first parameter. Then you can do the following:
If JetBrains Rider suggests some values for the current parameter, use Up and Down arrow keys to navigate through the list of suggested values, or just type in a desired value.
Press Tab or Enter to accept the value and move to the input position of the next parameter. If this is the last parameter, the hot spot session completes and the caret moves to the end position defined for the session.
Press Shift+Tab to move the input focus to the input position of the previous parameter.
Press Esc to exit the hot spot session. In this case, all session parameters will be initialized with default values.
New Unreal Module
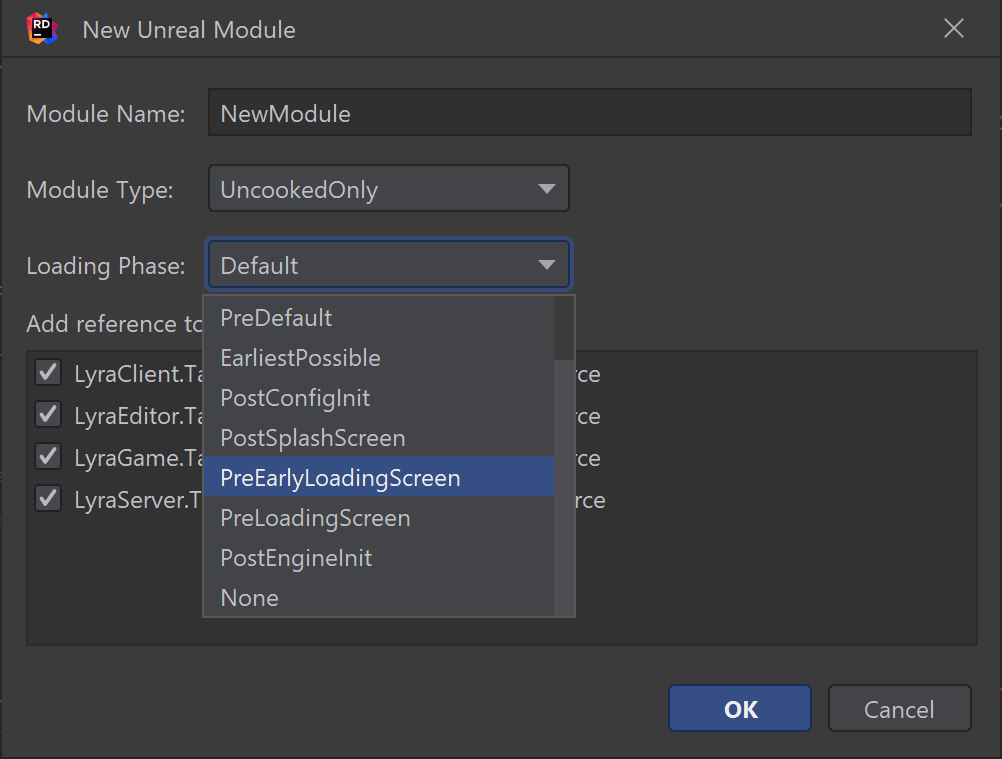
When creating a new module with game logic, you regularly do many things: add a folder, add a Build.cs file into this folder, create a class that initializes the module, and update the .uproject and Target.cs files. JetBrains Rider helps you automate these tasks.
Create a new Unreal Engine module
In the Solution Explorer, select a source folder where you want to create a new module.
From the context menu, select .

Specify the name for the new module.
Choose a module type from the list.
Select the loading phase.
Choose
Target.csfiles where you want to add module references.
Click OK. Depending on the selected module type, JetBrains Rider will generate the
Build.csfile and the module’s source and header files.
New Unreal Plugin
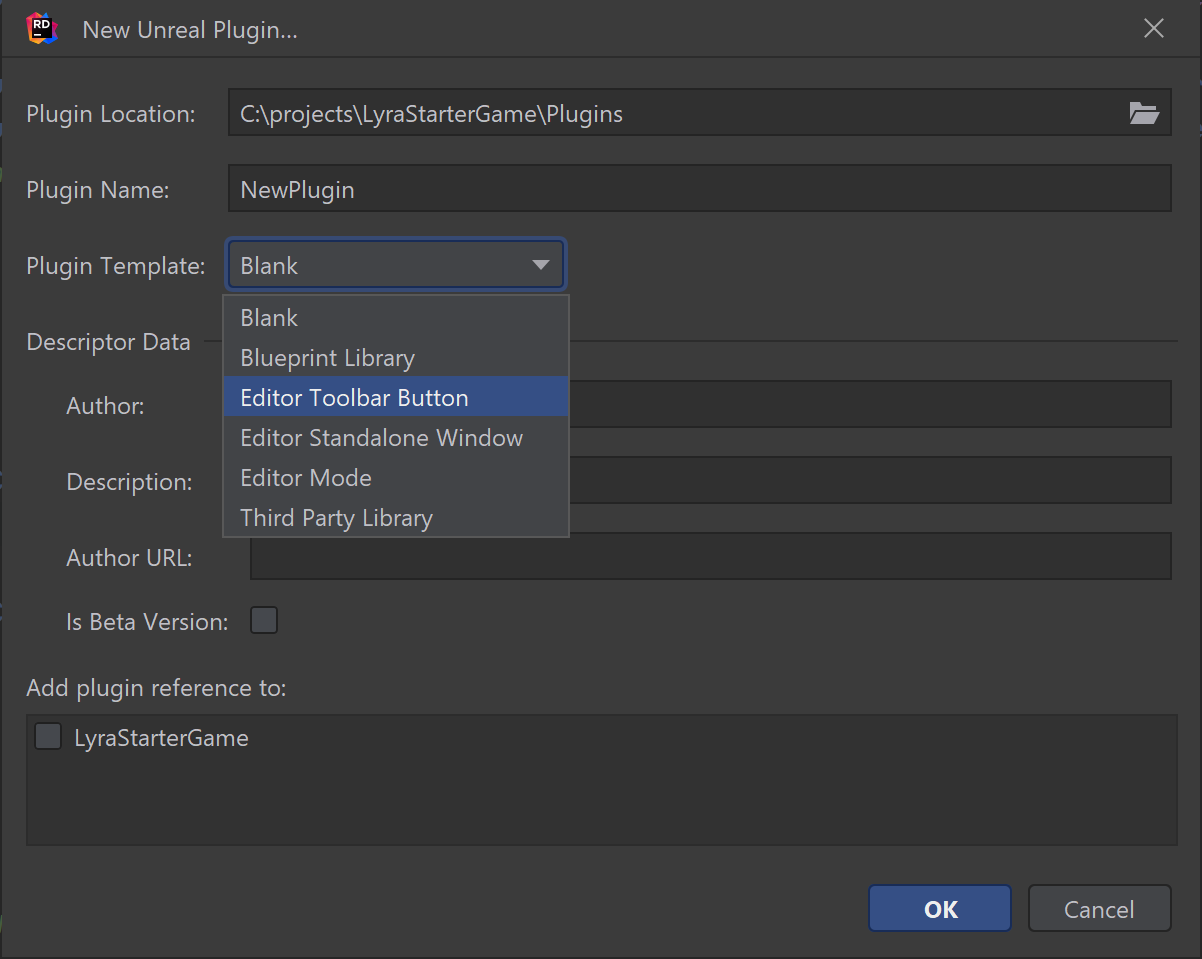
JetBrains Rider allows you to create several different types of plugins, similar to using the New Unreal Plugin button in the Unreal Editor's Plugin Browser but right in the IDE.
Create a new Unreal Engine plugin
In the Solution Explorer, select a project ot folder where you want to create a new plugin.
From the context menu, select .

Specify the name for the new plugin.
Choose a plugin template from the list.
Specify Descriptor Data.
Choose projects where you want to use a new plugin and add references.
Click OK. Depending on the selected plugin template, JetBrains Rider will generate the
.upluginfile that describes the plugin and modules with all the required source files.