Cannot find a database object in Database tool window
If you see no objects below the schema level, cannot find changes in objects, experience broken tables or any other visualization problems, try the following steps to resolve the problem.
Step 1. Refresh the database state
If someone changed the remote database data or view, the local view of the database might differ from the actual state of the database.
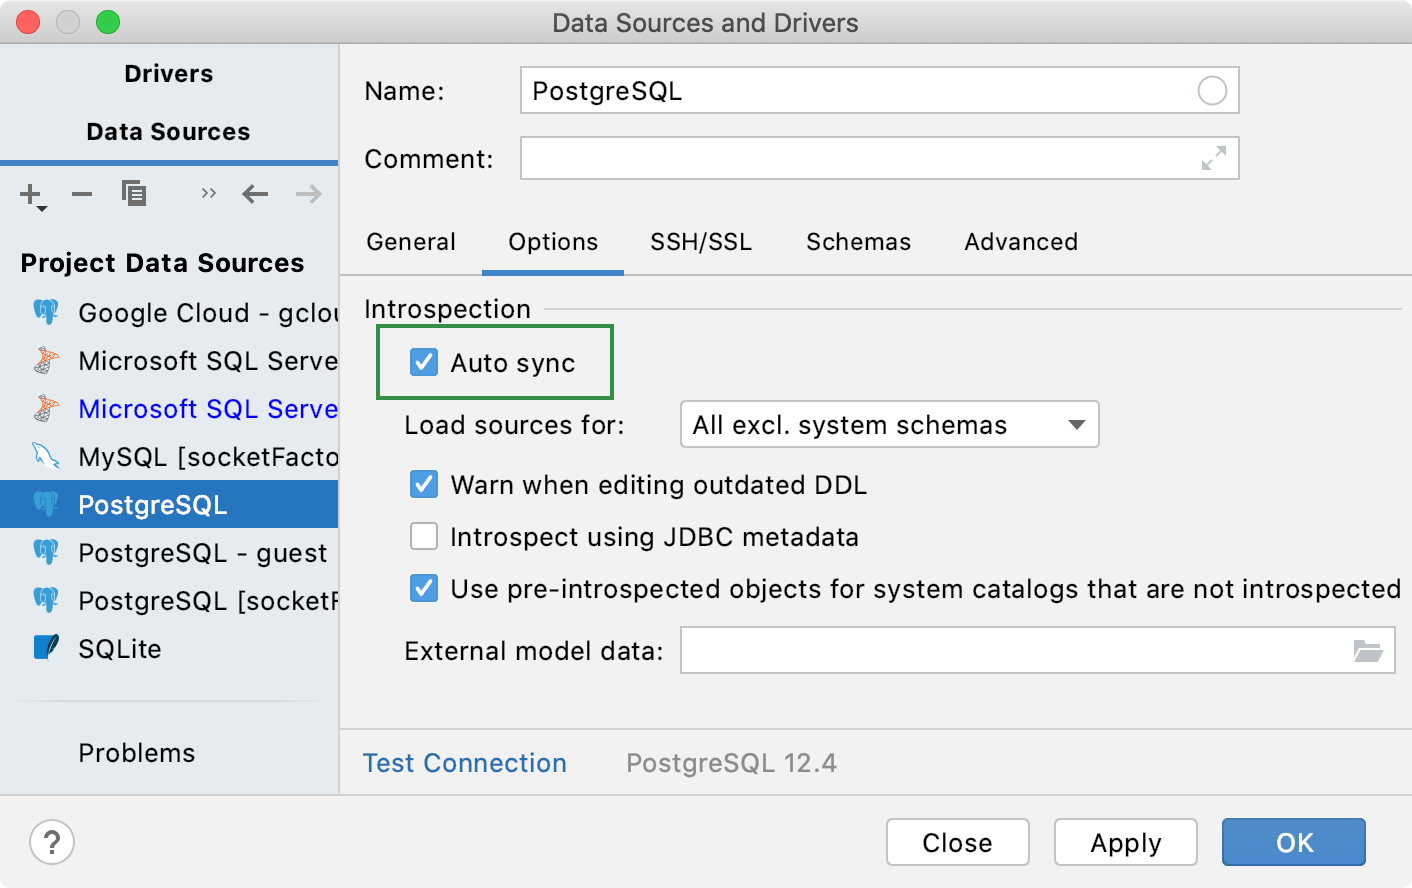
To synchronize the database state automatically, in the Database tool window ( ), click the Data Source Properties button
and select the data source that you want to change. On the Options tab, select the Auto sync checkbox.
If the Auto sync checkbox is cleared, the view of the data source in the Database tool window ( ) is synchronized with the actual state of the database only when you click the Refresh icon
or press Ctrl+F5.
Step 2. Verify that the necessary schemas are selected
When you create a data source, the data source is created with no schemas selected. You need to select schemas with which you plan to work.
To select the schemas, do one of the following:
In the Database tool window ( ) , right-click a data source and navigate to . Select or clear checkboxes of schemas that you want to enable or disable. Press Enter.
Click the N of M link near the data source name. In the database and schema selection window, select or clear checkboxes of databases and schemas that you want to enable or disable. Press Enter.
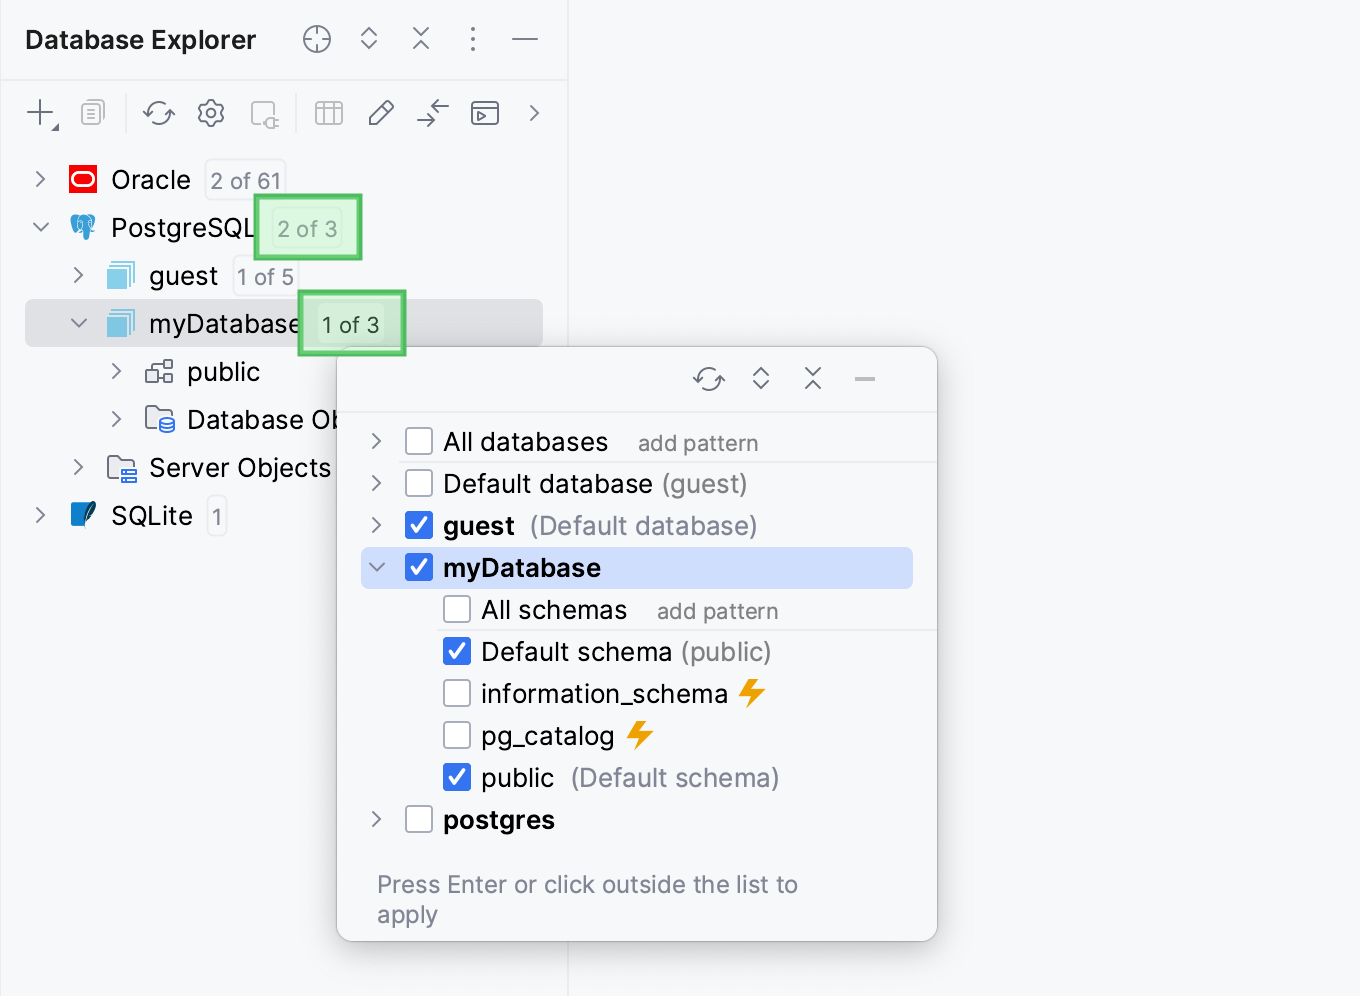
The Default schema or Default database is a schema or a database that will be current on connection to a data source. The current schema is a schema that is current in a session. You can change the current schema by using SET CURRENT_SCHEMA. The default schema depends on database settings and data source settings that you set in the JDBC URL.
You can change this default in connection settings of a data source. To change the default, click the Data Source Properties icon in the Database tool window ( ). In the data sources list, select your data source. In the Database field, type the name of a schema or a database that you want to use as a default.
Step 3. Force refresh schema information
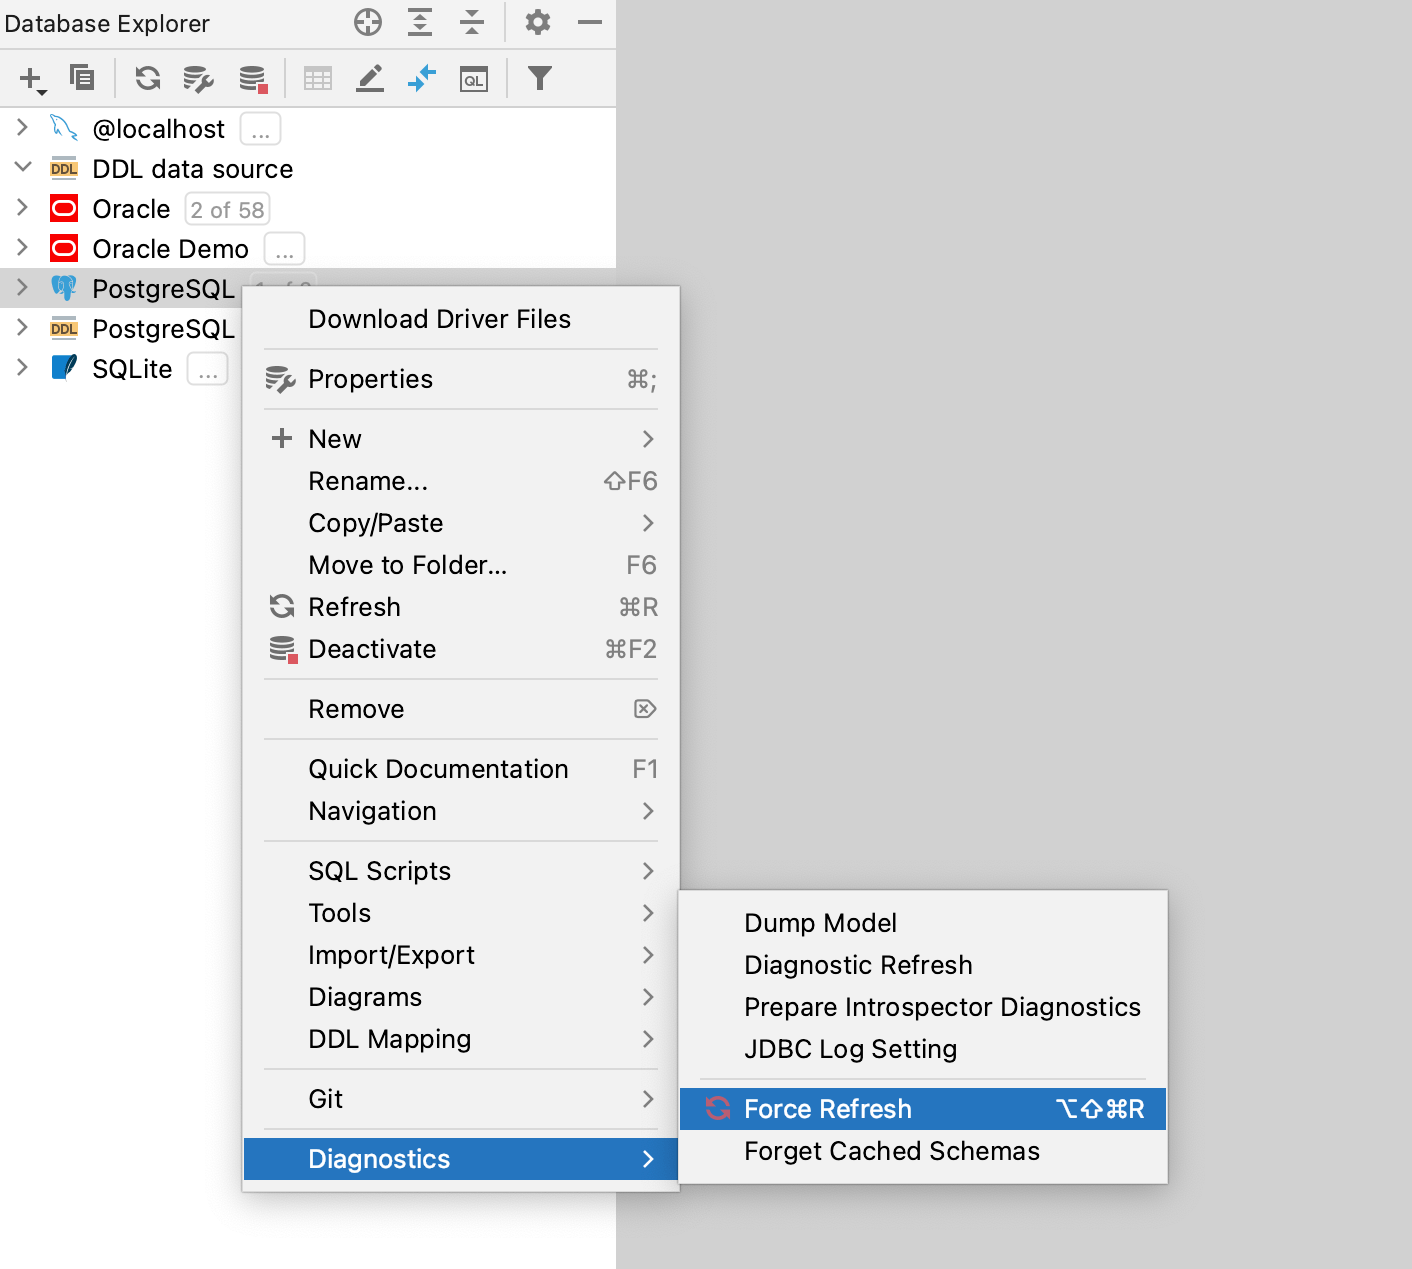
The Force Refresh action clears the data source information from cache and loads it again from scratch.
In the Database tool window ( ) , right-click a data source and select .
Step 4. Clear and synchronize the schema cache
Clear the JetBrains Rider schema cache (right-click a data source and select ). Synchronize the view (see Step 1. Synchronize the database state).
Step 5. Switch to the JDBC-based introspector
Consider this step as a temporary workaround. If you cannot see objects in the database explorer, you might have a bug. Collect troubleshooting materials and send them to our support team.
Temporary enable introspection with JDBC metadata
In the Database tool window ( ) , click the Data Source Properties icon
.
On the Data Sources tab, select the data source that you want to modify.
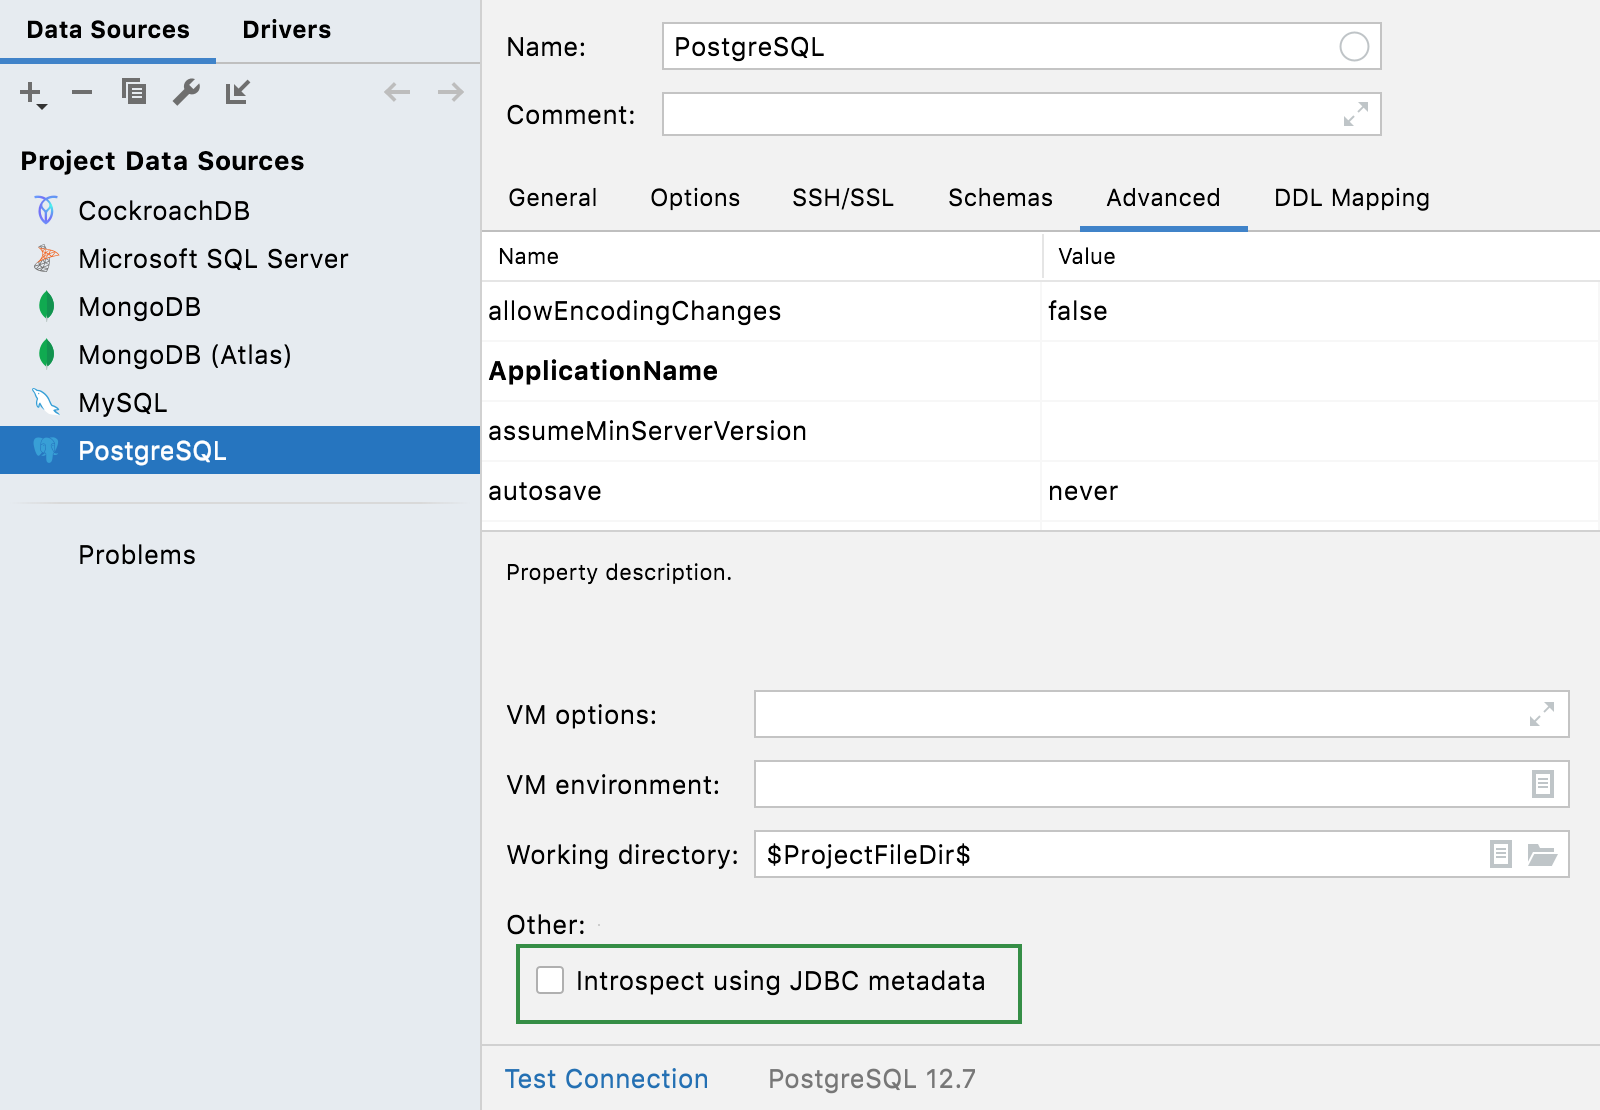
Click the Advanced tab and select the Introspect using JDBC metadata checkbox.
Synchronize the view (see Step 1. Synchronize the database state).
Collect information by using Diagnostic tools
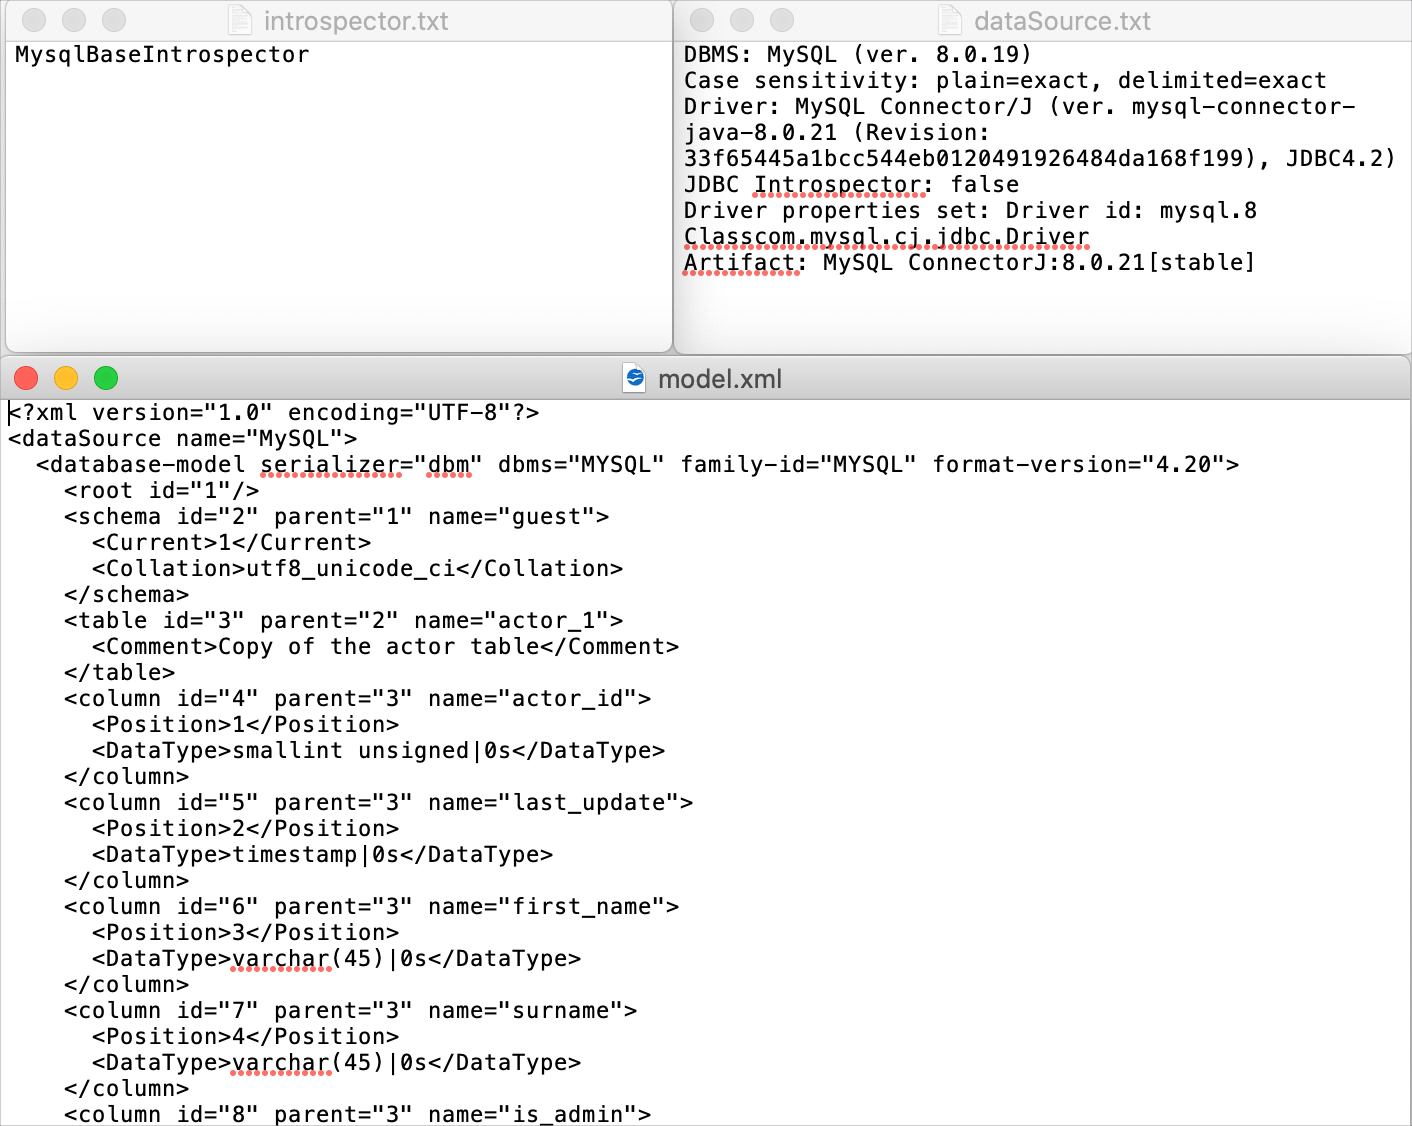
To profile the introspection and diagnose possible issues, JetBrains Rider can generate three files that include information about the following:
dataSource.txt: the data source.
introspector.txt: a module that was used to load the metadata from the database.
model.xml: a part of the database model.
This information might be helpful when introspection works incorrectly. For example, when you see something outdated or do not see new objects.
Run an introspection profiling
Right-click a data source and navigate to .
Find the three generated files in the file browser window or by clicking their location link in the notification message.

Share the generated files with the support team.
The following screenshot shows the example output of these three files. 