Annotations in source code
Last modified: 15 July 2022The easiest way to benefit from JetBrains Rider's code annotations is to add the annotation attributes to symbols of your source code and make JetBrains Rider analyze your solution with greater accuracy and insight.
By default, all annotation attribute classes are marked with [Conditional("JETBRAINS_ANNOTATIONS")] attribute so the compiler will ignore the attribute usages in your code, which means that no binary reference to the 'JetBrains.Annotations.dll' assembly will be produced. However, you can define 'JETBRAINS_ANNOTATIONS' conditional compilation symbol in your projects to preserve the attributes in the metadata.
Enable code annotations support in your project
To make use of the annotation attributes in your project, you should reference them in your project:
The recommended way is to install the NuGet package with the
JetBrains.Annotationsassembly.Actually, you do not even need to go to the NuGet website to get the package. Just add the
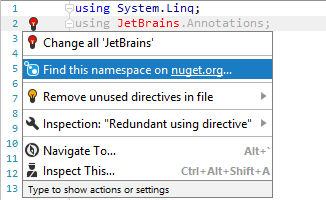
using JetBrains.Annotations;directive, and use the corresponding Alt+Enter action to automatically fetch the package.
You can add a project reference to the JetBrains.Annotations.dll, which you can find in the JetBrains Rider installation directory under lib\ReSharperHost.
You can also embed attribute declarations anywhere in your project, using the default
JetBrains.Annotationsnamespace, or any other namespace.
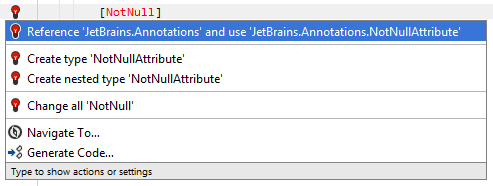
If the JetBrains.Annotations is referenced or attribute declarations are embedded in any of the projects within your solution, you can type the desired annotation attribute and press Alt+Enter to invoke the quick-fix that will reference this module in the current project and add the missing using directive:

Embed declarations of code annotations in your source code
You can get a copy of the code-annotations declarations on the Editor | Inspection Settings | Code Annotations page of JetBrains Rider settings Ctrl+Alt+S. Optionally, when copying you can choose to make the declarations internal and/or add the [Conditional("JETBRAINS_ANNOTATIONS")] attribute to the declarations.
The default implementation of the annotation attributes are declared in the JetBrains.Annotations namespace, but this namespace is not required for the annotations to work. You can put the declarations anywhere in your solution — JetBrains Rider will detect them automatically. However, if the declarations are in a different namespace you should explicitly specify the namespace with annotation attributes as described below.
There also may be cases when your solution contains several implementations of the annotation attributes, for example, you have classes with the same names as JetBrains Rider annotations classes (CanBeNullAttribute, NotNullAttribute, and so on) or you are using a third-party assembly that contains JetBrains Rider annotation classes. In such cases, you can choose namespaces where JetBrains Rider should look for the proper set of the annotations-attributes classes.
Change sources of code annotation attributes
Press Ctrl+Alt+S or choose File | Settings (Windows and Linux) or JetBrains Rider | Preferences (macOS) from the menu , then choose Editor | Inspection Settings | Code Annotations on the left.
All namespaces (from both source code and referenced assemblies) other than
JetBrains.Annotationswith the annotation classes (JetBrains Rider will only look forCanBeNullAttributeandNotNullAttributedeclarations) are shown in the Namespaces with code annotation attributes list. Check the entry that contains the desired implementation.If there are several namespaces in the list, select the one that should be used by the JetBrains Rider code analysis engine it in the Default annotation namespace list.
Click Save in the Settings dialog to apply the modifications and let JetBrains Rider choose where to save them, or save the modifications to a specific settings layer using the Save To list. For more information, see layer-based settings.
Use Context Actions to add annotation attributes
As soon as JetBrains Rider is aware of annotation classes location, you can use context actions to add the most popular annotation attributes:
[NotNull][CanBeNull][UsedImplicitly]
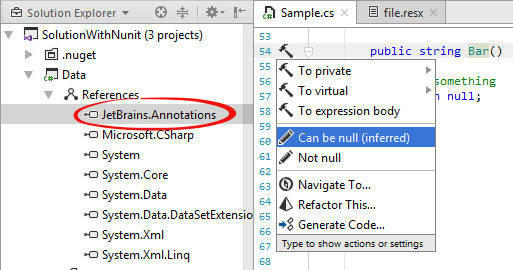
To add these annotations, press Alt+Enter on the symbol you want to annotate, and JetBrains Rider will suggest an attribute depending on the context:
