Compare and update database schemas
warning
This feature only works on Windows and requires Visual Studio 2017 or later to be installed on your computer.
JetBrains Rider helps you compare two database schemas, review their differences, and fully or partially update one schema using the other one as a reference. Both source and target schemas can be taken from an SQL project, connected database, or a .dacpac file.
This functionality relies on the Database Tools and SQL plugin, which is bundled and enabled in JetBrains Rider by default. If the relevant features aren't available, make sure that you didn't disable the plugin.
Press CtrlAlt0S to open the IDE settings and then select Plugins.
Open the Installed tab, find the Database Tools and SQL plugin, and select the checkbox next to the plugin name.
Right-click an SQL project in the Solution Explorer and choose Schema Compare.
The comparison opens in a new editor tab. You can open multiple comparison tabs this way, each tab will be handled separately.
In the top-right corner of the tab, select the source (left) and the target (right) database schemas. Both source and target can be of the following types:
An SQL project. To use this type of the schema, choose any SQL project included in the current solution.
A connected database. To use this type of schema, choose a connected MS SQL Server database. You can see all connected data sources and connect new ones in the Database window.
note
When connecting to an MS SQL Server database, make sure that you don't change the default driver Microsoft SQL Server (JetBrains)
A Data-tier application (DAC). To use this type of schema, select a .dacpac file on disk. The recently opened .dacpac files are listed in the dialog.
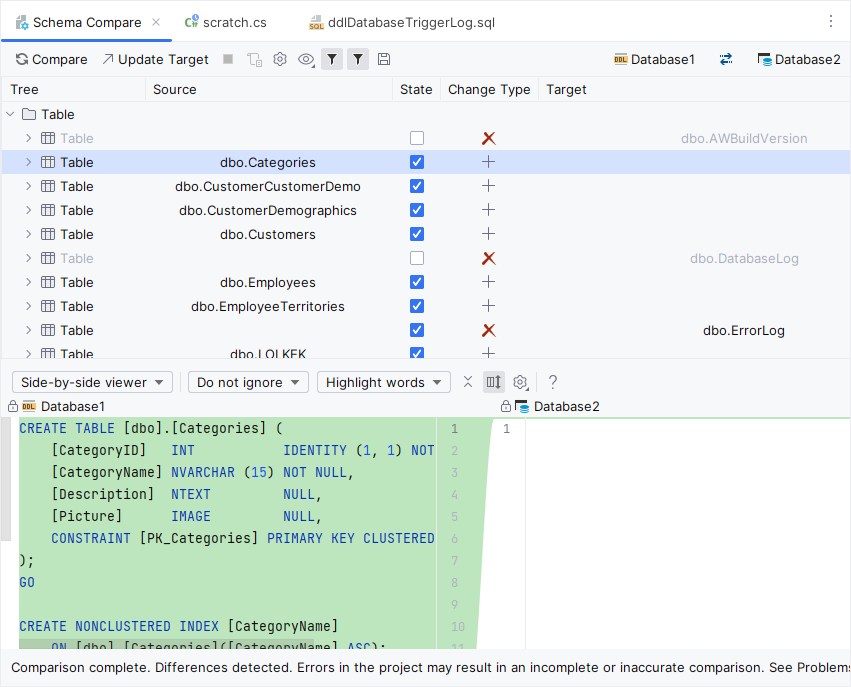
Click Compare in the top-left corner of the tab. Processing data sources can take some time, and you can click Cancel on the toolbar to stop the operation.
When processing is finished, you will see all objects grouped by the action that can be applied to them:
Delete — contains objects that exist in the target schema but do not exist in the source schema.
Change — contains objects that exist in both source and target schemas and have some differences.
Add — contains objects that exist in the source schema but do not exist in the target schema.
Objects without differences are hidden by default. To view them, click Show Equal Objects on the toolbar.
Some objects, such as built-in objects, cannot be updated and are therefore also hidden by default. To view them, click Show Unsupported Objects on the toolbar.
You can change the grouping and arrange objects by schema or by type. To do so, use the Group Results selector on the toolbar.

Use the Include column to select the differences that should be applied. To select all or none of the items in a category, right-click the category and chose Include or Exclude.
Once you've selected all changes that you want to apply, click Update Target on the toolbar.
Alternately, you can click Generate Script on the toolbar to generate the update script.
tip
If you work with databases other than MS SQL Server or with DDL data sources, you can add them to the Database window, and use the Migration dialog compare these data sources and generate update scripts.