Configure JavaScript libraries
Required plugin:
Javascript and TypeScript - The plugin is bundled with JetBrains Rider and enabled by default.
In context of the language and the IDE, a library is a file or a set of files. Functions and methods of these files are added to JetBrains Rider's internal knowledge in addition to the functions and methods that JetBrains Rider retrieves from the project code that you edit. In the scope of a project, its libraries by default are write-protected.
JetBrains Rider reserves two predefined auto-generated library folders:
node_modules for keeping Node.js packages listed in the
dependenciesobject of your project package.json. For more information, refer to Configuring node_modules library.External Libraries for storing downloaded TypeScript definition files or libraries referenced via CDN links as well as Node.js Core nodules or any custom third-party libraries.

note
JetBrains Rider uses libraries only to enhance coding assistance (that is, code completion, syntax highlighting, navigation, and documentation lookup). Note that a library is not a way to manage your project dependencies.
tip
TypeScript community stubs are also known as TypeScript definition files, or TypeScript declaration files, or DefinitelyTyped stubs, or just d.ts files.
In JetBrains Rider, DefinitelyTyped stubs can be configured and used as libraries, which is in particular helpful in the following cases:
To improve code completion, resolve symbols for a library or a framework that is too sophisticated for JetBrains Rider static analysis, and add type information for such symbols.
To resolve globally defined symbols from test frameworks.
The example below shows a piece of code from an Express application where the post() function is not resolved:

JetBrains Rider successfully resolves post() after you install a TypeScript definition file:
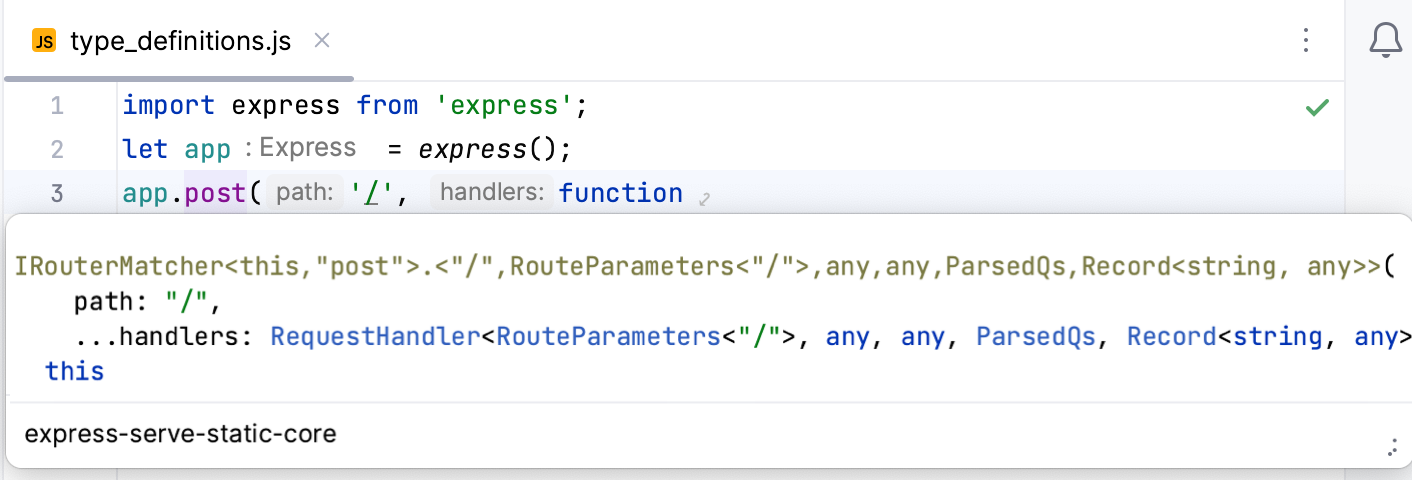
With JetBrains Rider lets you download TypeScript definition files right from the editor, using an intention action, or you can do it on the Settings: JavaScript Libraries page.
Place the caret at the
importorrequirestatement with this library or framework, press AltEnter, and choose Install TypeScript definitions for better type information:
JetBrains Rider downloads the type definitions for the library and adds them to the list of libraries on the JavaScript. Libraries page:
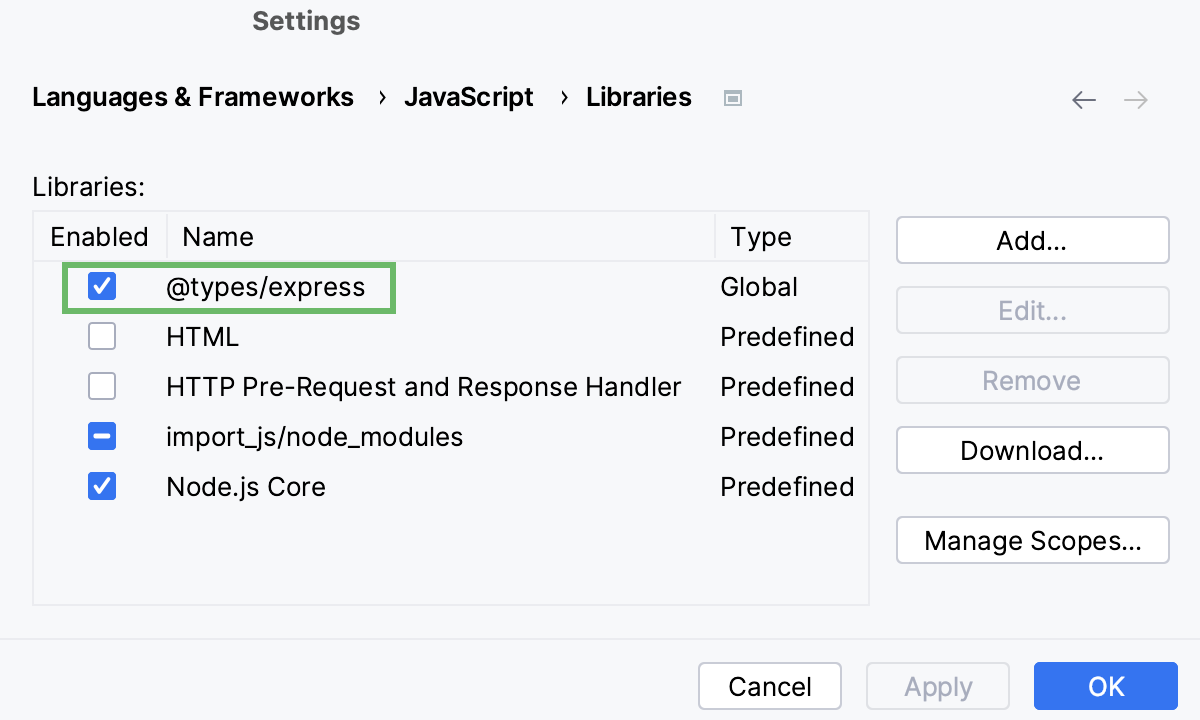
Alternatively, open your package.json, place the caret at the package to download a type definition for, press AltEnter, and select Install '@types/<package name>'.

Press CtrlAlt0S to open settings and then select Languages & Frameworks | JavaScript | Libraries.
On the Libraries page that opens, click Download and in the Download Library dialog that opens, select the required library, and click Download and Install.

JetBrains Rider shows the downloaded type definitions in the Solution Explorer, under the External Libraries node.

JetBrains Rider enables the downloaded type definitions in the scope of the current project. You can change this scope as described in Configuring the scope of a library below. See also Example: Configuring the scope for HTML and Node.js Core libraries.
To get code completion and reference resolution for fs, path, http, and other core modules that are compiled into the Node.js binary, you need to configure the Node.js Core module sources as a JavaScript library.
Press CtrlAlt0S to open settings and then select Languages & Frameworks | Node.js.
Select the Coding assistance for Node.js checkbox.
Note that the Node.js Core library is version-specific. So if you change the version of your Node.js on the Node.js page, you need to select the checkbox again. After that JetBrains Rider creates a new library for this new version.
To provide code completion for project dependencies, JetBrains Rider creates a node_modules library automatically so Node.js modules are kept in your project but no inspections are run against them, which improves performance.

In the Solution Explorer, the node_modules is also marked as a library:
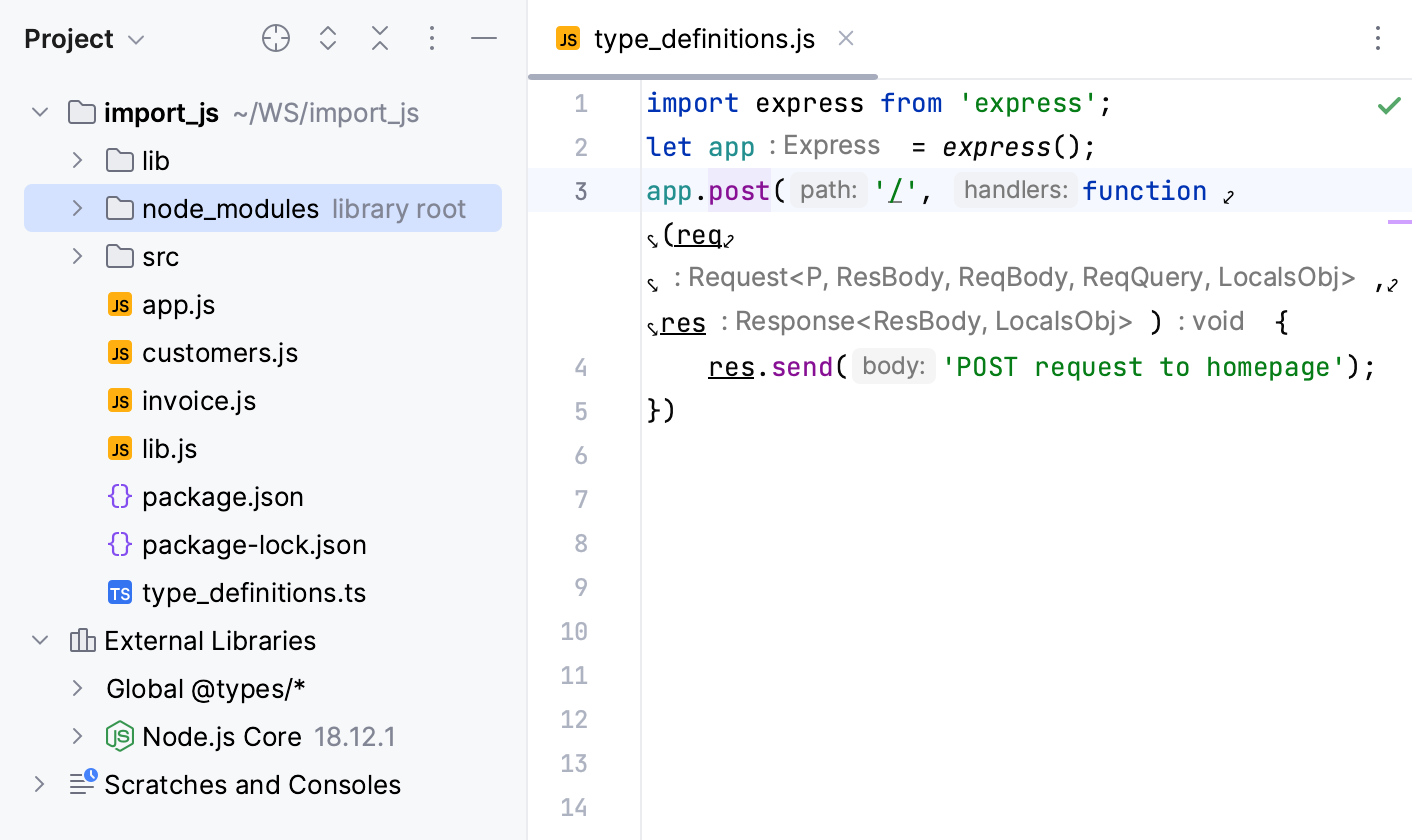
However, the node_modules library contains only the modules that are listed in the dependencies object of your project package.json file. JetBrains Rider does not include the dependencies of dependencies into the node_modules library but actually excludes them from the project.
From time to time you may notice that JetBrains Rider suggests irrelevant completion, for example, Node.js APIs in your client-side code. This happens because by default JetBrains Rider uses a library for completion in the entire project folder. JetBrains Rider lets you tune code completion by configuring scopes for libraries.
Press CtrlAlt0S to open settings and then select Languages & Frameworks | JavaScript | Libraries.
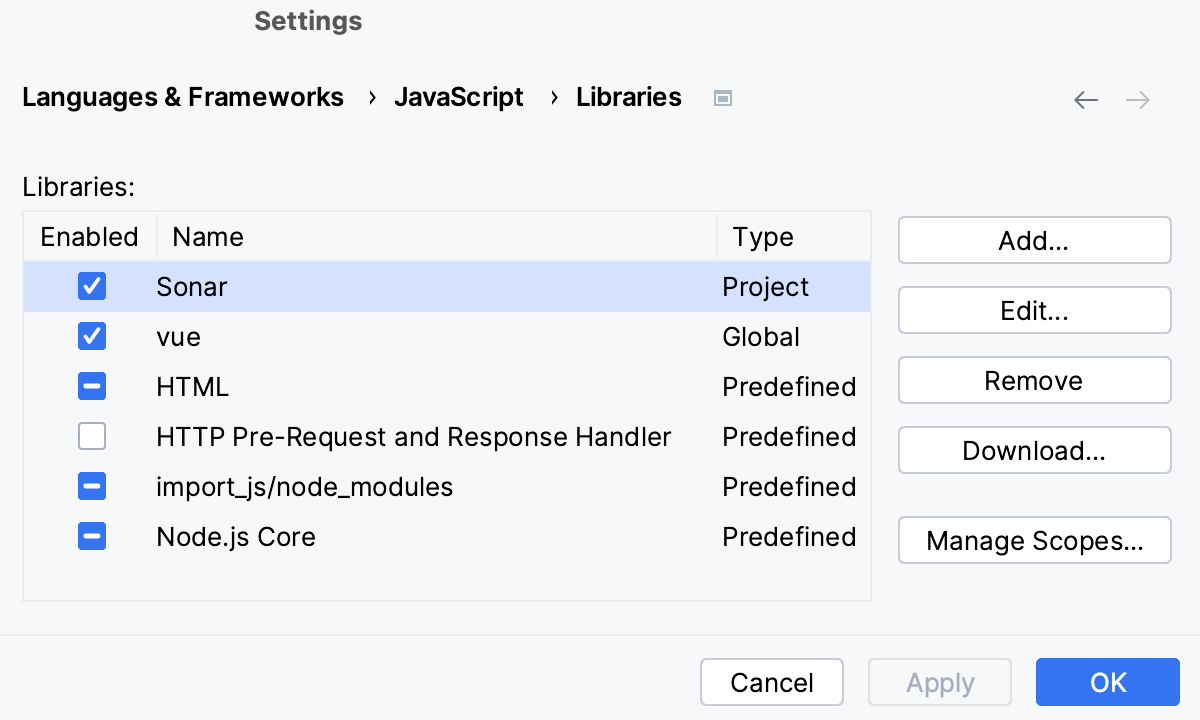
The Libraries page shows a list of available libraries.
Clear the Enabled checkbox next to the required library, and click Manage Scopes. The JavaScript Libraries. Usage Scope dialog opens.
In the JavaScript Libraries Usage Scopes dialog, click the Add button (
) and select the files or folders that you want to include in the library scope. In the JavaScript Libraries Usage Scopes dialog, the Path field shows selected files or folders.
For each added file or a folder, from the Library list, select the library that you are configuring.
When working on a full-stack JavaScript application in JetBrains Rider, you often notice that code completion suggests some Node.js API in your client-side code and DOM API in the Node.js code. This happens because the HTML library with DOM API and the Node.js Core library with Node.js API are by default enabled in the whole project. To get rid of irrelevant completion suggestions, you need to configure the scope for these libraries.
Press CtrlAlt0S to open settings and then select Languages & Frameworks | JavaScript | Libraries.
The Libraries page shows a list of available libraries.

Clear the Enabled checkboxes next to HTML and Node.js Core items.

Click Manage Scopes. The JavaScript Libraries Usage Scopes dialog opens.
To configure the scope for the HTML library, click
.

In the dialog that opens, select the folders with the client-side code and click Open.

You return to the JavaScript Libraries Usage Scopes dialog where the selected folders are added to the list.

From the Library list next to each folder, select HTML.

To configure the scope for the Node.js Core library, click
again, add the folders with the server-side code, and for each of them select Node.js Core from the Libraries list.
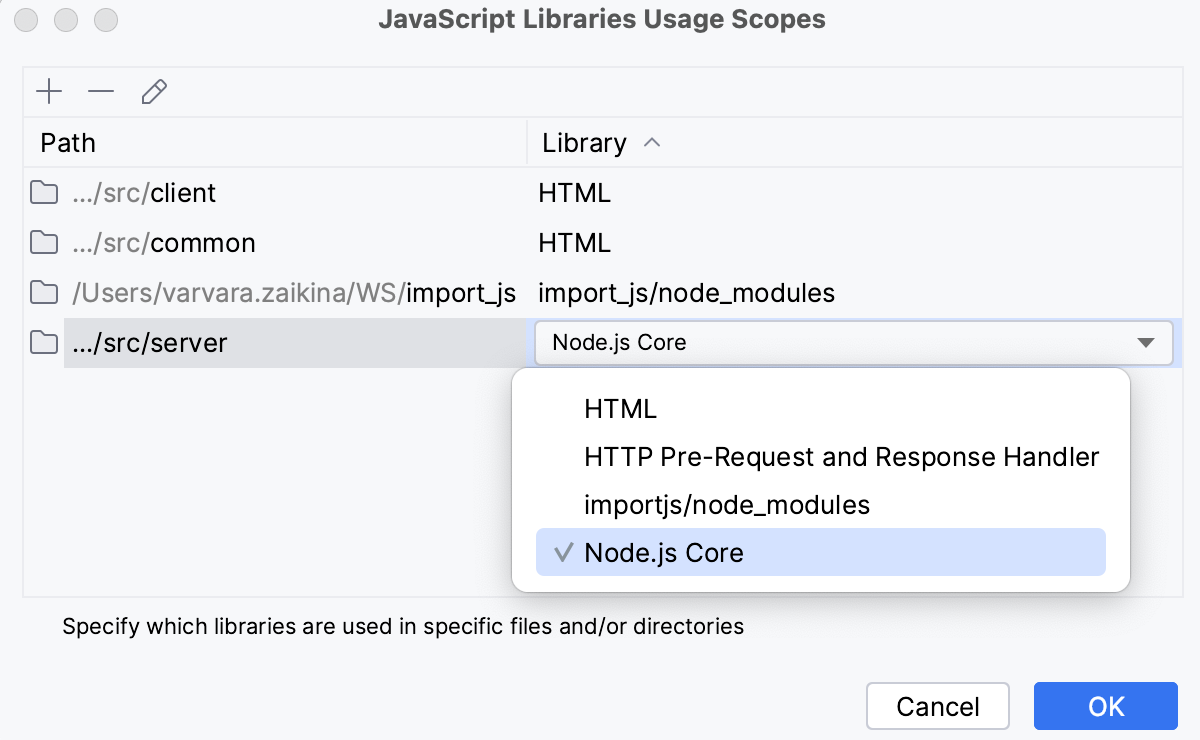
Now JetBrains Rider resolves items from the HTML and Node.js Core libraries and suggests them in completion only in files from these chosen project folders.
In the same way, you can configure the scope of the automatically created node_modules library, refer to Configuring node_modules library.
When a library .js file is referenced through a CDN link, it is available for the runtime but is invisible for JetBrains Rider. To add the objects from such library .js file to completion lists, download the file and configure it as an external library.
Place the caret at the CDN link to the library, press AltEnter, and choose Download library from the list:

The library is downloaded to JetBrains Rider cache (but not into your project), and a popup with an information message appears:

On the JavaScript Libraries page, the downloaded library is added to the list:

In the Solution Explorer, the library is shown under the External Libraries node:

By default, JetBrains Rider marks the downloaded library as Global, which means that you can enable and re-use it in any other JetBrains Rider project. To change this default setting, select the downloaded library in the list, click Edit, and choose Project in the Edit Library dialog that opens.

Suppose you have a JavaScript framework file in your project or elsewhere on your machine, and you want JetBrains Rider to treat it as a library and not just as your project code that you edit.
Download the required framework file.
Press CtrlAlt0S to open settings and then select Languages & Frameworks | JavaScript | Libraries.
On the Libraries page, click Add.
In the New Library dialog, specify the name of the external JavaScript library.
Click the Add button (
), and select Attach Files or Attach Directories from the list.

In the file browser, select the file or folder with the downloaded framework.

When you click OK, you return to the Libraries page where the new library is added to the list.
In the Solution Explorer, the library is shown under the External Libraries node.

By default, the library is enabled in the scope of the whole current project. You can change this default setting as described in Configuring the scope of a library.
In the Documentation URLs area, specify the path to the official documentation of the library or framework. JetBrains Rider will open this URL when you press ShiftF1 on a symbol from this library.
Open the file in the editor, press Ctrl0Q, and select Use JavaScript Library from the list.

JetBrains Rider displays a list with the available configured libraries. The libraries associated with the current file are marked with a tick.

To remove the current file from the scope of a library, clear the tick next to this library.
To associate a library with the current file, set a tick next to this library.
Press CtrlAlt0S to open settings and then select Languages & Frameworks | JavaScript | Libraries.
The Libraries page displays a list of available libraries.
Select a library and click Remove.