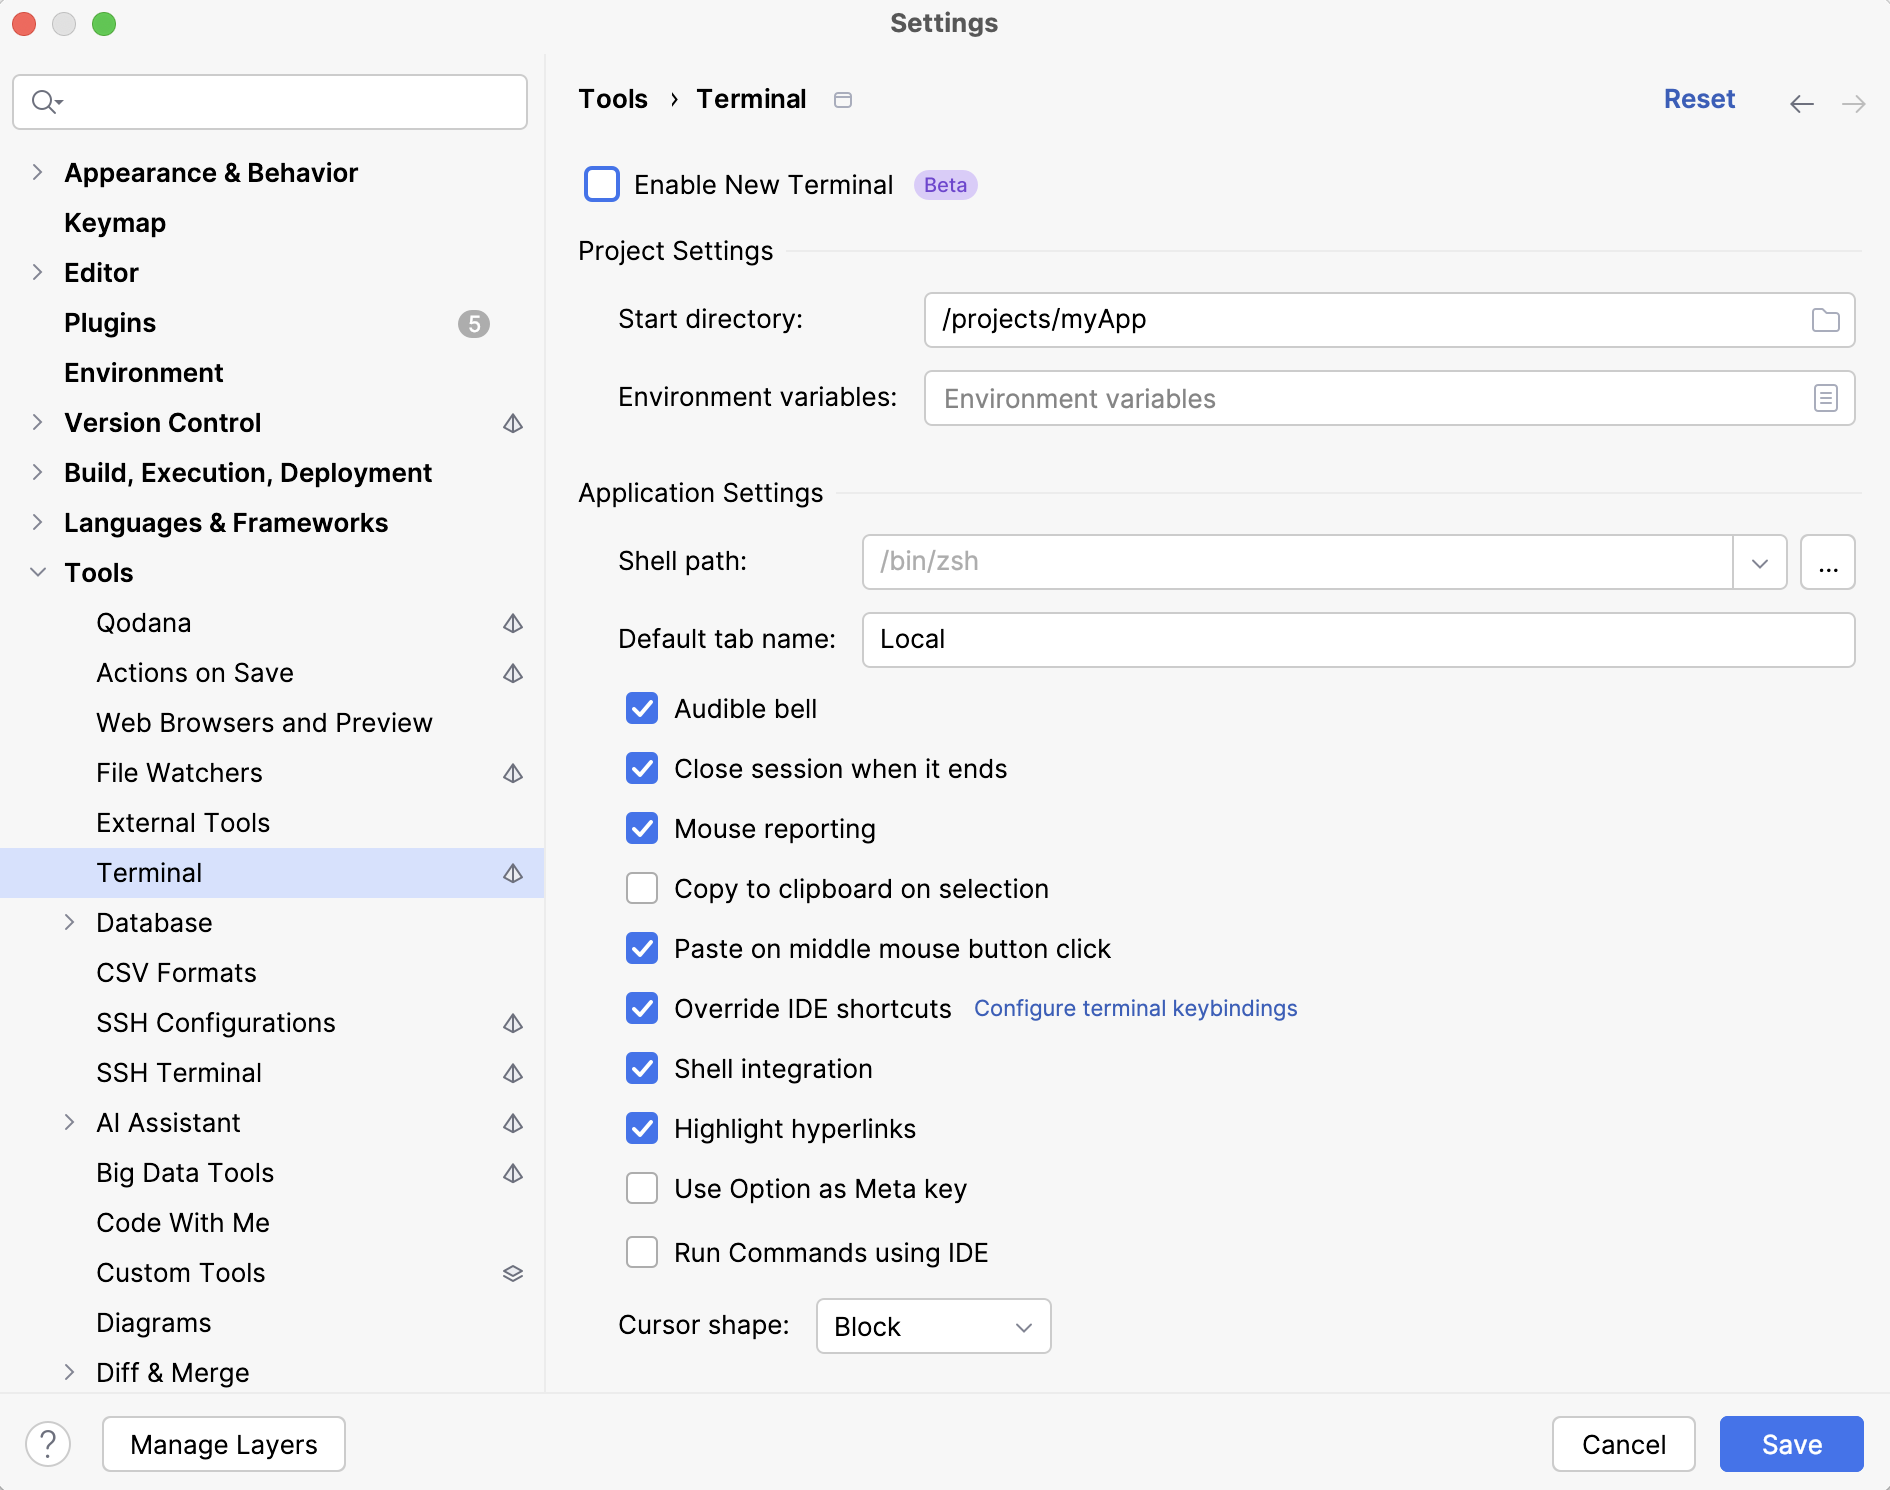
Terminal settings
File | Settings | Tools | Terminal for Windows and Linux
JetBrains Rider | Settings or Preferences | Tools | Terminal for macOS
CtrlAlt0S
note
Preferences configurable on this page are saved using the mechanism of directory-based settings.
Use this page to customize the settings of the embedded terminal emulator.

note
For the less frequently used settings, refer to Advanced Settings: Terminal.
This functionality relies on the Terminal plugin, which is bundled and enabled in JetBrains Rider by default. If the relevant features aren't available, make sure that you didn't disable the plugin.
Press CtrlAlt0S to open settings and then select Plugins.
Open the Installed tab, find the Terminal plugin, and select the checkbox next to the plugin name.
Starting with the 2024.1 release, a beta version of the new terminal is available in the New UI of JetBrains Rider.
Select the Enable New Terminal checkbox to enable it. For more information about the new terminal, refer to New Terminal.
These settings affect the terminal only for the current project:
- Start directory
Specify the working directory where every new shell session should start. By default, it starts in the root directory of the current project.
- Environment variables
Specify custom environment variables for every new shell session.
These settings affect the terminal in any project that you open with the current JetBrains Rider instance:
- Shell path
Specify the shell that will run by default. JetBrains Rider should automatically detect the default shell based on your environment. Here are some examples of different shells:
Bash:
/bin/bashZ shell:
/bin/zshBash for Windows:
bash.exeWSL:
wsl.exePowerShell:
powershellCommand Prompt:
cmd.exeCygwin:
"C:\cygwin\bin\bash.exe" --login -i
- Default Tab name
Specify the default name for new tabs.
- Audible bell
Play the bell sound on various events.
- Close session when it ends
Close the current session when the corresponding process ends (for example, by
kill).- Mouse reporting
Enable the mouse pointer support in the embedded local terminal.
- Copy to clipboard on selection
Copy text selected in the terminal to the clipboard.
- Paste on middle mouse button click
Paste clipboard contents by clicking the middle mouse button.
- Override IDE shortcuts
Use shell-specific shortcuts instead of IDE shortcuts when the Terminal tool window is active.
Click Configure terminal keybindings to open the Keymap settings page and configure the shortcuts that are available in the Terminal tool window under Plugins | Terminal. For example, Switch Focus to Editor is mapped to Esc by default, which means that if you don't override the IDE shortcuts, Escape will switch focus from the terminal to the editor.
- Shell integration
Integrate the terminal with the system shell to properly keep track of your command history for sessions and load a custom config file with required environment variables.
Shell integration works for
sh,bash,zsh, andfishshells.- Highlight hyperlinks
Highlight HTTP links in the terminal and make them clickable.
- Use Option as Meta key
On macOS, use the Option key as the Meta key.
- Run Commands using IDE
Detect and highlight commands that can be used as IDE features instead of running them in the terminal and reading console output.
When enabled, instead of pressing Enter, which runs the command in the terminal, press CtrlEnter to open the corresponding GUI element.
- Cursor shape
Select the shape of the cursor: block, underline, or vertical.
The embedded terminal emulator also inherits the following IDE settings:
On the Keymap settings page, you can configure the copy Ctrl0C and paste Ctrl0V shortcuts.
On the Editor | General | Appearance page, you can configure blinking frequency for the caret. The Terminal does not inherit the Use block caret option because there is a separate option for that: Cursor shape.
On the Editor | Color Scheme | Console Font page, you can configure line spacing and fonts.
On the Editor | Color Scheme | Console Colors page, you can configure font colors.
On the Editor | Color Scheme | General page, you can configure the selection foreground and background colors.