Auto-import
In JavaScript and TypeScript files, RubyMine automatically adds import statements for modules, classes, components, and any other symbols that can be exported, as well as for XML namespaces. Learn more from Auto-import in JavaScript, Auto-import in TypeScript and Importing an XML namespace.
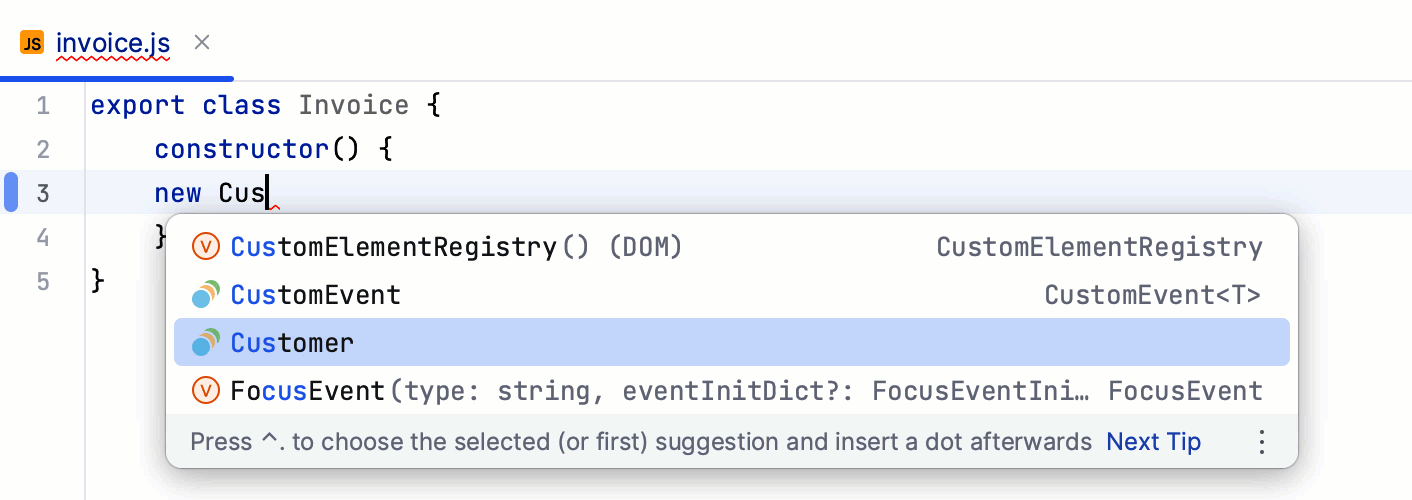
When you complete a ES6 symbol or a CommonJS module, RubyMine either decides on the style of the import statement itself or displays a popup where you can choose the style you need. Learn more from Auto-import in JavaScript.
Add import statements on code completion
RubyMine adds import statements when you complete exported JavaScript or TypeScript symbols.
You can disable auto-import on completion and use quick-fixes instead:
In the Settings dialog (Ctrl+Alt+S) , go to .
On the Auto Import page that opens, use the checkboxes in the TypeScript/JavaScript area to enable or disable import generation on code completion.
Use a quick-fix
For JavaScript symbols from your project dependencies, RubyMine has a quick-fix for adding import statements when they are missing or when auto-import is disabled.
RubyMine marks the symbol as unresolved and shows a tooltip with the suggested quick-fix:

Alternatively, press Alt+Enter:

If there's more than one possible source of import, RubyMine shows a list of suggestions:

If you don't want to see Missing import statement warnings, disable the inspection in the current file or in the entire project. For more information, refer to Disabling and enabling inspections.

Alternatively, change highlighting level for the file: hover over the widget in the top-right corner of the editor and select None or Syntax from the Highlight list.
Add import statements using the auto-import tooltip
In TypeScript, RubyMine shows you an auto-import tooltip. To accept the suggestion, press Alt+Enter.

To disable the popup, hover over the inspection widget in the top-right corner of the editor, click ![]() , and clear the Show Auto-Import Tooltip option.
, and clear the Show Auto-Import Tooltip option.
Optimize imports
RubyMine helps you remove unused imports and organize import statements in the current file, in all files in a directory, or in the entire project at once.
Optimize all imports
Select a file or a directory in the Project tool window ().
Do any of the following:
Go to (or press Ctrl+Alt+O).
From the context menu, select Optimize Imports.
(If you've selected a directory) Choose whether you want to optimize imports in all files in the directory, or only in locally modified files (if your project is under version control), and click Run.
Optimize imports in a single file
Place the caret at an import statement and press Alt+Enter or use the
 icon. Then select Remove unused 'import'.
Open the file in the editor or select it in the Project tool window and press Ctrl+Alt+O.
Optimize imports when reformatting a file
You can tell RubyMine to optimize imports in a file every time it is reformatted.
Open the file in the editor, press Ctrl+Alt+Shift+L, and make sure the Optimize imports checkbox is selected in the Reformat File dialog that opens.
After that every time you press Ctrl+Alt+L in this project, RubyMine will optimize its imports automatically.
Optimize imports before committing changes to your VCS
If your project is under version control, you can instruct RubyMine to optimize imports in modified files before committing them to VCS.
In the Commit tool window Alt+0, click
 and select the >Optimize imports checkbox in the Commit checks area.
You can also optimize imports only in the updated code. In the Project tool window, select a folder, and press Ctrl+Alt+O. In the Optimize imports dialog, select the Process only VCS changed files and click Run.
Automatically optimize imports on save
You can configure the IDE to optimize imports in modified files automatically when your changes are saved.
Press Ctrl+Alt+S to open settings and then select .
Enable the Optimize imports option and apply the changes.
Additionally, from the All file types list, select the types of files in which you want to use automatic import optimization.
