Next.xml
WebStorm integrates with the Next.js React framework.
Before you start
Make sure you have Node.js on your computer.
Make sure the JavaScript and TypeScript and Next.js Support required plugins are enabled on the Settings | Plugins page, tab Installed, see Managing plugins for details.
Create a new Next.js application
The recommended way to start building a new Next.js application is the create-next-app package, which WebStorm downloads and runs for you using npx. As a result, your development environment is preconfigured to use Next.js.
Of course, you can still download create-next-app yourself or create an empty WebStorm project and install Next.js in it.
Generate a Next.js application with create-next-app
Click Create New Project on the Welcome screen or select from the main menu. The New Project dialog opens.
In the left-hand pane, choose Next.js.
In the right-hand pane:
Specify the path to the folder where the project-related files will be stored.
In the Node Interpreter field, specify the Node.js interpreter to use. Select a configured interpreter from the list or choose Add to configure a new one.
From the create-next-app list, select npx create-next-app.
Alternatively, for npm version 5.1 and earlier, install the
create-next-apppackage yourself by runningnpm install --save-dev next react react-domin the Terminal Alt+F12. When creating an application, select the folder where thecreate-next-apppackage is stored.Optionally:
To use TypeScript instead of JavaScript, select the Use TypeScript template checkbox. WebStorm will generate .ts files for your application and a tsconfig.json configuration file.
When you click Create, WebStorm generates a Next.js-specific project with all the required configuration files and downloads the required dependencies. WebStorm also creates an npm start and JavaScript Debug configurations with default settings for running or debugging your application.
Install Next.js in an empty WebStorm project
In this case, you will have to configure the build pipeline yourself. Learn more about adding Next.js to a project from the Next.js official website.
Create an empty WebStorm project
Click Create New Project on the Welcome screen or select from the main menu. The New Project dialog opens.
In the left-hand pane, choose Empty Project. In the right-hand pane, specify the application folder and click Create.
Install Next.js in an empty project
Open the empty project where you will use Next.js.
In the embedded Terminal (Alt+F12) , type:
npm install --save-dev next react react-dom
Start with an existing Next.js application
To continue developing an existing Next.js application, open it in WebStorm and download the required dependencies.
Open the application sources that are already on your machine
Click Open on the Welcome screen or select from the main menu. In the dialog that opens, select the folder where your sources are stored.
Check out the application sources from your version control
Click Get from VCS on the Welcome screen.
Alternatively, select or from the main menu.
Instead of Git in the main menu, you may see any other Version Control System that is associated with your project. For example, Mercurial or Perforce.
In the dialog that opens, select your version control system from the list and specify the repository to check out the application sources from. See Check out a project (clone) for details.
Download the dependencies
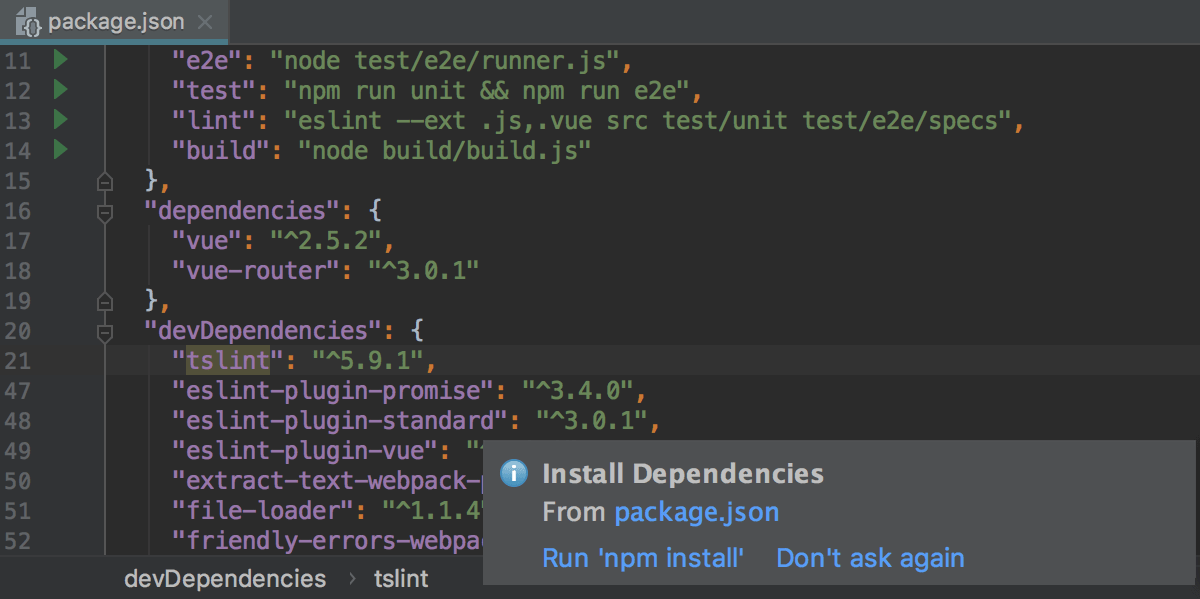
Click Run 'npm install' or Run 'yarn install' in the popup:

You can use npm, Yarn 1, or Yarn 2, see npm and Yarn for details.
Select Run 'npm install' or Run 'yarn install' from the context menu of package.json in the editor or in the Project tool window.
Project security
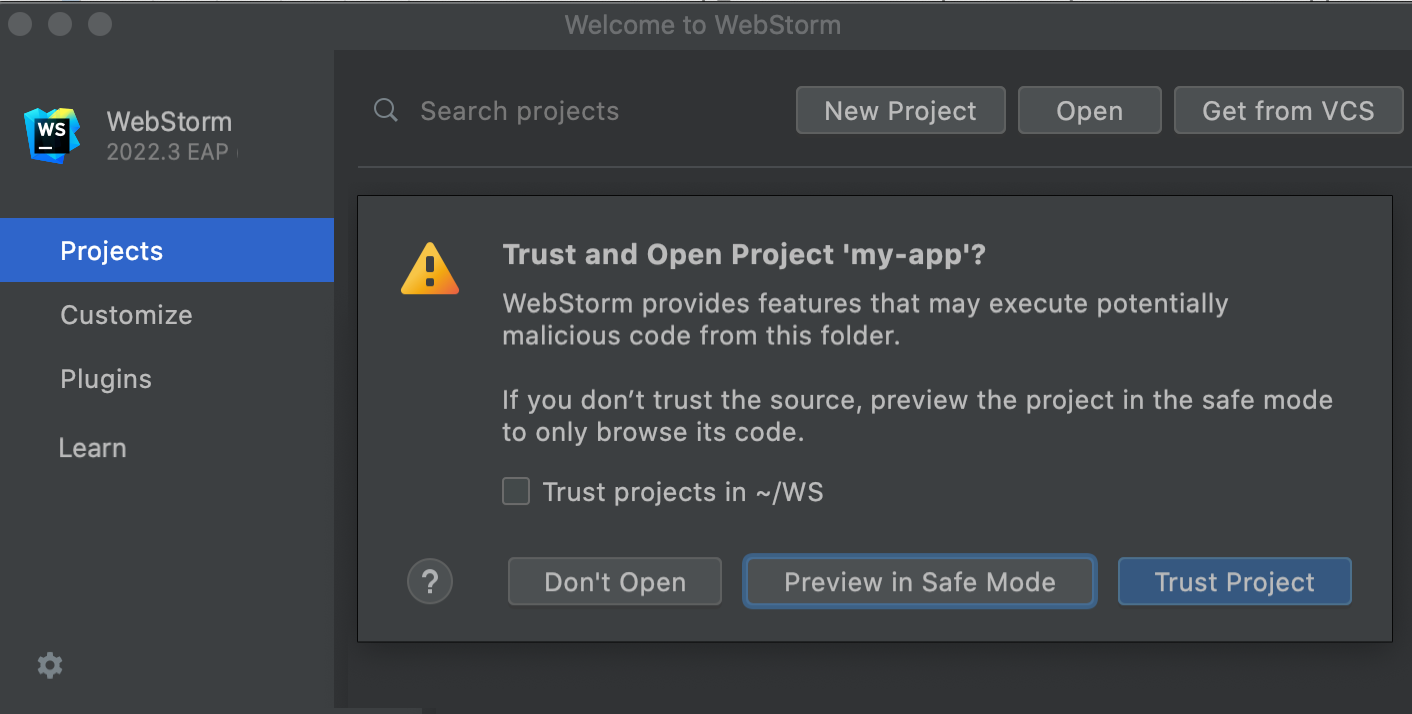
When you open a project that was created outside WebStorm and was imported into it, WebStorm displays a dialog where you can decide how to handle this project with unfamiliar source code.

Select one of the following options:
Preview in Safe Mode: in this case WebStorm, opens the project in a preview mode. It means that you can browse the project's sources but you cannot run tasks and script or run/debug your project.
WebStorm displays a notification on top of the editor area, and you can click the Trust project… link and load your project at any time.
Trust Project: in this case, WebStorm opens and loads a project. That means project is initialized, project's plugins are resolved, dependencies are added, and all WebStorm features are available.
Don't Open: in this case WebStorm doesn't open the project.
Learn more from Project security.