External tools
The recommended way to use third-party standalone applications, such as compilers, linters, code compressors, and so on, is to configure a tool-specific File Watcher. This File Watcher will track changes to your files and run the application automatically when required. For more information, refer to File Watchers.
Alternatively, you can configure a standalone third-party application in WebStorm as an external tool. As a result, a tool-specific command is added to the main menu and possibly to context menus, so you can run the tool right from WebStorm. You can also configure to run the tool before a run/debug configuration. And of course you can run it from the built-in Terminal AltF12.
WebStorm allows you to pass contextual information from your project to the external tool as command-line arguments (for example, the currently selected file or the sourcemap directive) and view the output produced by the tool.
WebStorm supports the following types of external tools:
Local tools run locally on your computer.
Remote tools are executed on a remote server over SSH.
This example demonstrates how to add ImageOptim as an external tool and use it to optimize images in your project.
Press CtrlAlt0S to open the IDE settings and then select Tools | External Tools.
Click
and specify the tool's settings.

For more information, refer to External Tools.
tip
Click
to insert a built-in IDE macro with the name or path of the current file, path to the project source, and so on. This example uses
$FilePath$and$FileDir$.In our case,
ImageOptimwill be run with the-o4 $FilePath$arguments. You can use macros that can refer to the project name, the current file path, and so on. Clickingwill open the Macros dialog that lists all available macros and their values.
Click OK to add the tool and then apply the changes.
To open the selected file in the newly added toolimage, do one of the following:
Go to Tools | External Tools | Optimize Image in my app.
Right-click a file in the Project tool window and select External Tools | Optimize Image in my app from the context menu.

Create a shortcut to run the tool.
Press CtrlAlt0S to open the IDE settings and then select Keymap. Find the Optimize Image in my app action under the External Tools node, and assign a shortcut for it.

Add an icon to run the tool from the toolbar.
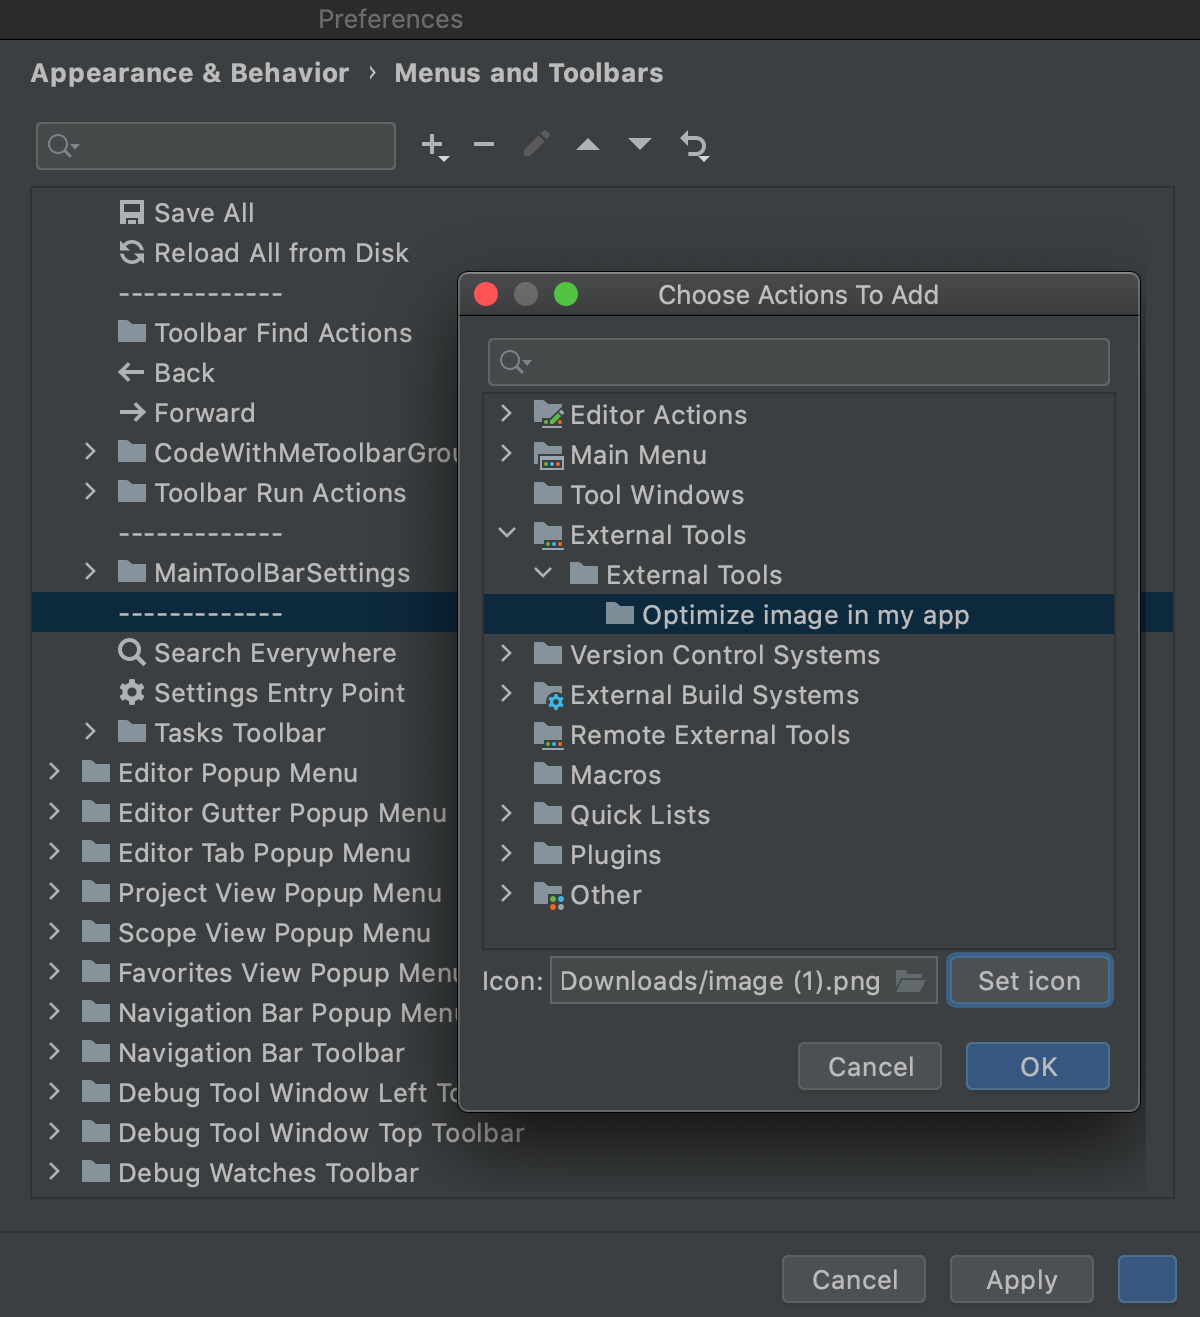
In the Settings dialog (CtrlAlt0S), go to Appearance & Behavior | Menus and Toolbars. In the list of available menus and toolbars, expand the Main Toolbar node, select the item after which you want to add the ImageOptim icon, and click
.
In the dialog that opens, select External Tools | Optimize Image in my app, specify the icon to indicate it in the Icon field, and click Set icon, when ready.

The icon appears on the toolbar.

When you run the tool, the output is displayed in the Run tool window.
warning
Make sure the FTP/SFTP/WebDAV Connectivity and HTTP Client plugins are installed and enabled. Press CtrlAlt0S to open the IDE settings and then select Plugins.
Remote SSH external tools are configured similarly to local external tools, but also define the remote server on which they are executed and require credentials for connecting to it via SSH. For more information about working with the built-in SSH terminal, refer to Run SSH terminal.
Press CtrlAlt0S to open the IDE settings and then select Tools | Remote SSH External Tools.
Click
to open the Create Tool dialog.
This dialog provides the same set of settings as when you add a local external tool, but also allows you to select a remote connection. If you don't specify the connection settings, WebStorm will ask you for the host, port, and relevant SSH credentials every time you run the tool on the server. For more information, refer to Remote SSH External Tools.
tip
You can use built-in IDE macros to specify the name of the current file, paths relative to the project root, and other contextual information for the tool.
Click OK to add the tool and then apply the changes.
Do one of the following:
Go to Tools | Remote Tools and the name of the added remote external tool.
Create a shortcut to run the tool.
Press CtrlAlt0S to open the IDE settings and then select Keymap. Find the action with the name of your configured remote external tool, and assign a shortcut for it.
After you specify the host, port, and credentials, WebStorm will connect to the server via SSH and run the command, returning the output to the Run tool window in WebStorm.
Thanks for your feedback!