New Instances
The process for setting up a new YouTrack Cloud instance is simple. Whether you start using YouTrack for free or jump straight into a commercial subscription, all you need to do is register.
Register for the Free Plan
To start using YouTrack with free support for up to ten standard users and 3 helpdesk agents, follow these steps:
Fill in the registration form. All fields are mandatory.
Field
Description
Instance name
Enter the site name that you want to use for your YouTrack Cloud instance. This is used as the local hostname for your instance on the youtrack.cloud domain.
For example, if you enter
time-travel, the hostname is set totime-travel.youtrack.cloud.If you decide to change the hostname later, contact the YouTrack support team. To learn about other options you can use to customize your instance domain, see Domain Settings.
Your Email
Enter a valid email address. Otherwise, you won't be able to confirm the creation of the hosted instance.
Select the option to confirm that you have read and accept the terms of service and privacy policy.
Click the Get Started Free button.
As soon as you submit the registration data, we send a confirmation email to the address you specified in the registration form.
If you register with the free plan and would like to see how YouTrack scales for larger organizations, you have the option to start a 14-day trial. The free trial supports up to 100 standard users and 50 agents.
You can switch to the free trial directly on the Global Settings page of your YouTrack Cloud instance. For more information, see Activate a Trial.
Register for a Commercial Subscription
If you have already decided that you want to work with YouTrack, you can purchase a subscription with a commercial license without participating in a free trial.
To register for a new commercial license, follow these steps:
Access the Buy YouTrack page at jetbrains.com.
If you aren't already registered for a JetBrains Account, register for an account with your email address.
If you already have an account with JetBrains, sign in.
Click the Buy Now button.
The eStore Identification page opens.
Confirm that the correct email address and customer are selected for the purchase, then click Next.
Select the commercial subscription that you want to purchase and click the Subscribe button that corresponds to your preferred billing cycle.
The eStore Order Checkout page opens.
Fill in the fields on the checkout form.
In the Your site name field, enter the site name that you want to use for your YouTrack Cloud instance. This is used as the local hostname for your instance on the youtrack.cloud domain. For example, if you enter
time-travel, the hostname is set totime-travel.youtrack.cloud.If you want to change the hostname later, contact the YouTrack support team.
When ready, click the Place Order button.
As soon as you place your order, we process the transaction and send a confirmation email that is registered in your JetBrains Account.
Confirm Instance Creation
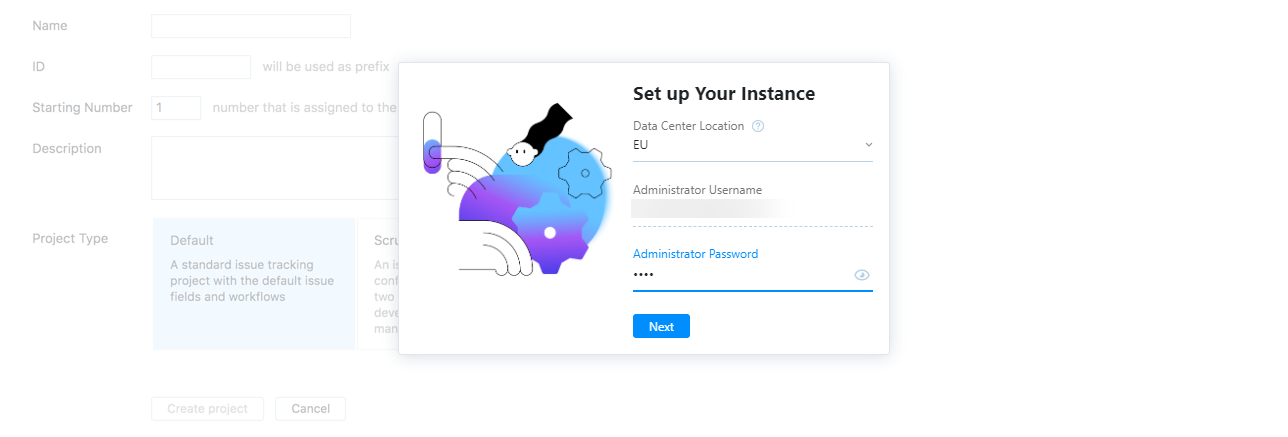
Once you have registered for your instance, you need to confirm its creation. Here, you also set the password for your user account, which is the default administrator account for your instance.
To confirm your instance creation, follow these steps:
Click the link in the email message to confirm the creation of your YouTrack Cloud instance.
The start page for the YouTrack hosting site opens in your browser.
A new YouTrack instance with the requested URL is created.
Set the password for the administrator account and choose the location of your data center. Choose the data center that is closest to you.

Click the Next button to continue.
Access your YouTrack instance.
While your instance is loading, you can answer a quick survey. Once the instance is ready, submit your answer or skip the survey to open YouTrack.
At this point, you're probably the only person who knows that this YouTrack instance exists, so don't forget how to log in.
When you log in, the instance opens to the Projects page where you can create your first project. For a comprehensive list of setup tasks, read the Quick Start Guide for System Administrators.
Who Has Access to My Instance?
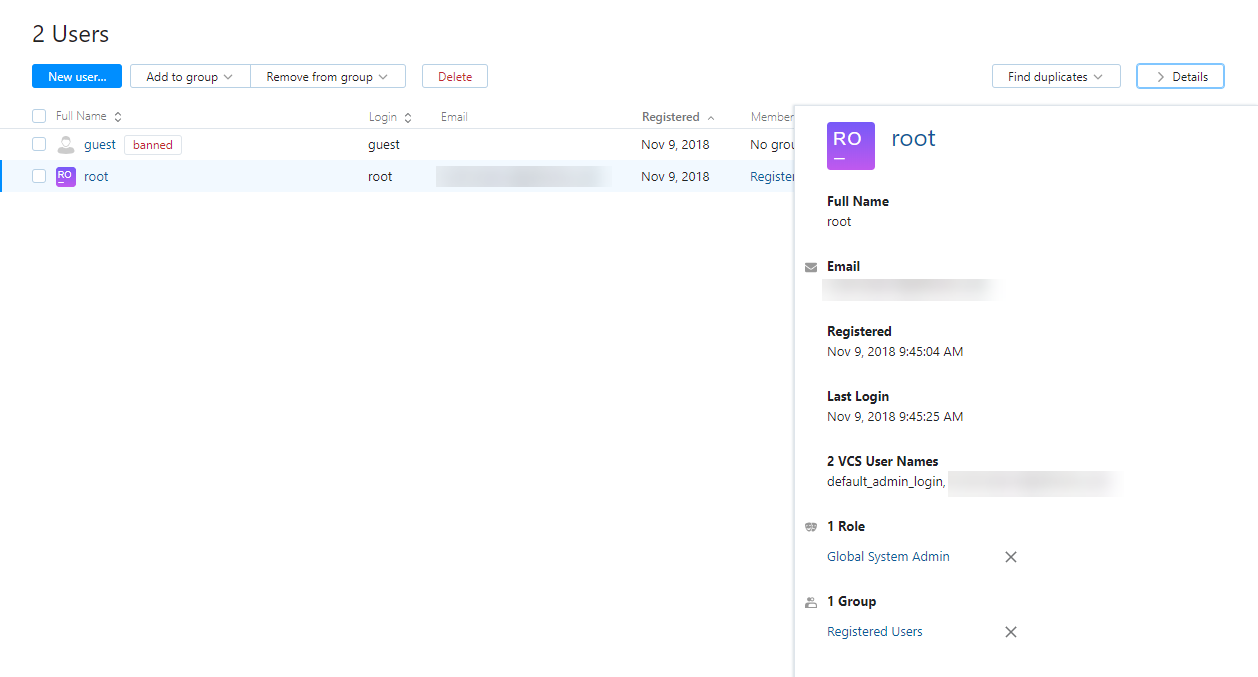
Your new instance contains two user accounts: admin and guest.

Your credentials are assigned to the admin user account. This is the default administrator account for your YouTrack instance.
This account is granted the default System Admin role in the Global project.
This is the only user account in your new YouTrack instance that has administrative access. One of the first things you should do is create accounts for other users who require administrative access and give them similar role assignments. For more information, see Access Management.
The guest user account is also created automatically, but is banned by default. This account isn't assigned any roles.
If you want to allow anonymous access to your YouTrack instance, you can grant roles to the guest user in one or more projects.
To allow anonymous access to issues in all projects, you can grant roles to the guest user in the Global project.
For more information, see Manage the Guest User Account.
As long as the guest account remains banned, you are the only person who has access to this instance. To give other people access, you can either create accounts for other users or enable registration so users can create their own accounts. For more information, see Create User Accounts.