Import from FogBugz
This document covers importing issues from a FogBugz instance to YouTrack server using the Python Client Library.
To import issues from a FogBugz server to YouTrack:
- Download the latest version of YouTrack's Python Client Library and unzip it.
- Ensure that Python is installed in your system.
- In the mapping file, specify names of the FogBugz projects to be imported in YouTrack as follows:
You can either specify the comma-separated list of projects to be imported in the default
fbugz.PROJECTS_TO_IMPORT = [u'Project1_name', u'Project2_name', ..., u'ProjectN_name']defaultFBugz.pymapping file or create a new mapping file. The new mapping file should be created in the<library install directory>\python\fbugzdirectory. - FogBugz allows its users to create new categories for issues. If you have defined any categories in your FogBugz instance,
then to import issues successfully you have to correct the default mapping file (or created new one (see the previous step of this procedure)
to set the correspondence between categories in FogBugz and YouTrack issue's attributes.
fbugz.CATEGORY = { 'Feature' : 'Feature', 'Bug' : 'Bug', 'Inquiry' : 'Feature', 'Schedule Item' : 'Task', 'FB Category' : 'YT Type' } - If you have created a new mapping file, you should specify a path to it in the
fb2youtrack.pyscript file. In this case, don't forget to comment out the defaultdefaultFBugz.pymapping file. - Execute the following command:
Enter values for the following command-line parameters:
python fb2youtrack.py target_url target_login target_password source_url source_login source_password max_issue_id
Issues with HTML Content
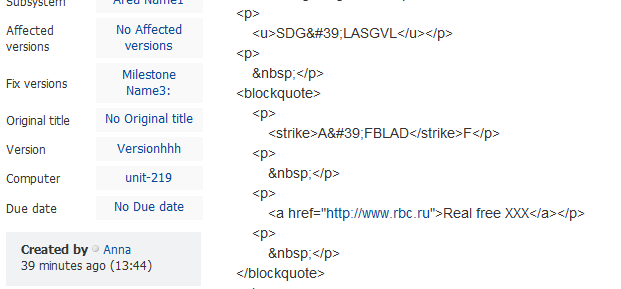
YouTrack does not render an HTML content in FogBugz issues, so HTML content in imported issues will be displayed as source HTML code with all tags. For example:

Last modified: 18 April 2017