Manage Workflows for Multiple Projects #
As a system administrator, you can manage workflows in all of the projects for your YouTrack instance. Users who have a project administrator role can only manage workflows in the projects for which they have permission to view and update the project. For more information, see Manage Workflows.
Attach a Workflow to a Project #
To use a workflow, you need to attach it to one or more projects. From the Administration menu, you have access to all of the projects in YouTrack.
To attach a workflow: #
In the Project-related Settings section of the Administration menu, select Workflows.
Select the workflow from the list.
If the sidebar is hidden, click the Show Details button.
- In the sidebar, click the + icon next to Projects and select the projects where you want to apply the workflow.
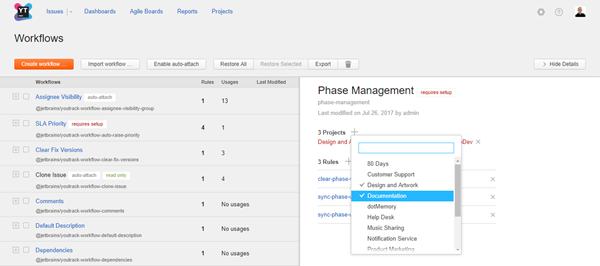 +
+The workflow is attached to all of the selected projects.
If there are projects that do not meet the workflow requirements, the requires setup flag is shown.
The requires setup flag indicates that there are requirements that are specified in the workflow that are not available in one or more projects to which the workflow is currently attached. This can mean that the project does not use the required custom fields, values are missing from the set of values in a custom field, or there are issue link types that have not been created in YouTrack. The names of each of the projects that require setup are displayed in red in the Details sidebar.
In most cases, these fixes can be applied without leaving the workflow administration page.
To fix setup problems with workflows: #
Expand the workflow in the list.
Select the first rule that is marked with the requires setup flag without opening the module in the workflow editor. Meaning, select the rule without clicking the link for the module name.
If the sidebar is hidden, click the Show Details button.
- Move the pointer over any of the projects that are displayed in red text.
A tooltip displays the changes that are required to activate the workflow in each project.
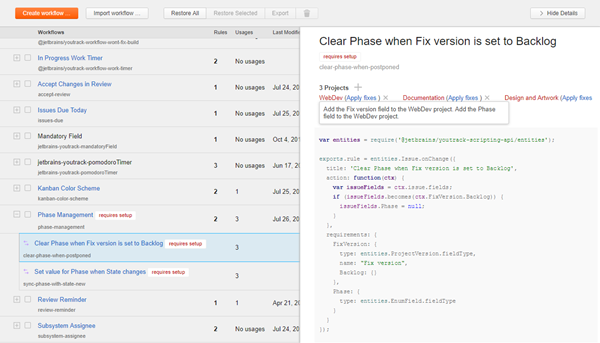 +
+ - Click the Apply fixes link.
The Apply fixes dialog opens.
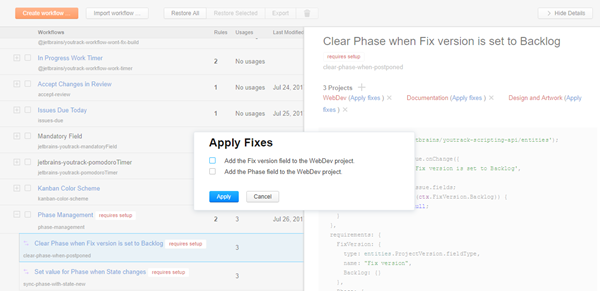 +
+ Select all of the required fixes, then click the Apply button.
- Repeat steps 5 and 6 for all of the projects that require setup.
When done, the requires setup flag is automatically removed from each rule.
When you refresh the page, the requires setup flag is removed from the workflow.
Detach and Attach Workflow Rules #
When you attach a workflow to a project, all of the rules are attached and enabled. You can customize the workflow on a per-project basis by detaching and attaching specific rules.
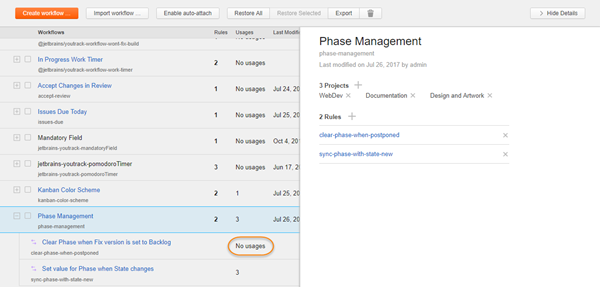
To view a the list of rules for a workflow, click to expand the workflow. Rules that have been detached from all projects show No usages in the Usages column.
To detach individual rules in a project: #
In the Project-related Settings section of the Administration menu, select Workflows.
Expand the workflow to display the list of rules.
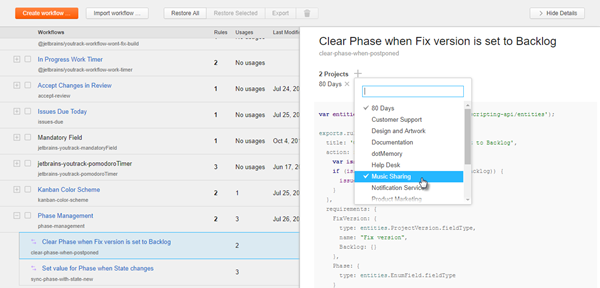
- Select the rule that you want to deactivate.
The selected rule is displayed in the sidebar.
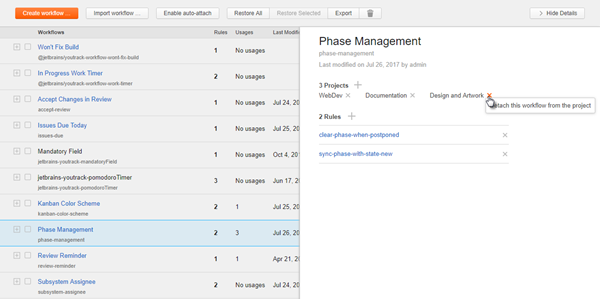
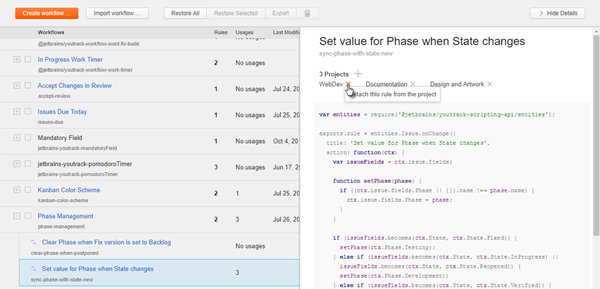
Click the x icon next to the project name to detach the rule in the selected project.
 +
+
When you detach all of the rules in a workflow, the workflow is detached from the project automatically.
To attach individual rules in a project: #
Detach Workflows #
If you no longer want to use a workflow, you can detach it from one or more projects.
To detach a workflow: #
Alternatively, you can detach all of the rules in the workflow. The workflow is detached from the project automatically.
