Create a Project
To start tracking issues for a new product or service, create a new project.
When you create a project, the following operations are performed automatically:
You are granted the Project Admin role in the project.
You are set as the Project lead in the general project settings.
You are added to the project team. This assignment grants you the Developer role in the project.
You are added to the set of values for the Assignee field for issues in the project.
To create a project:
Click the Projects link in the main menu.
On the Projects page, click the Create Project button.
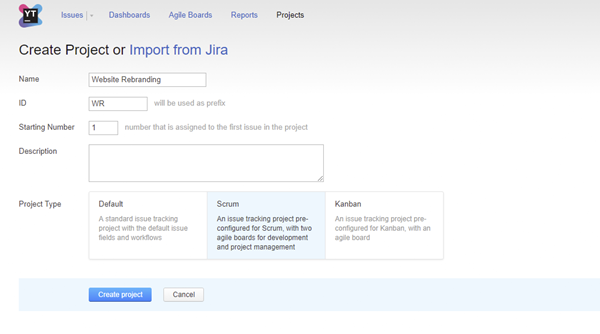
On the Create Project page, enter a name and unique project ID.

To start numbering issues with a number other than 1, enter a value in the Starting Number input field.
Enter an optional description of the project.
In the Project Type section, select a project template. For a description of each project type, see Project Templates.
- Click the Create project button.
A new project with the specified settings is created.
The project profile page opens. Here, you can add users to the project team.
To configure advanced project settings, click the Edit project link.
For more information, see Configure a Project.You are granted the Project Admin role in the new project.
You are set as the Project lead in the general project settings.
You are added to the project team. This assignment grants you the Developer role in the project.
You are added to the set of values for the Assignee field for issues in the project. Any user or group that is later added to the project team is also added to the set of values for the Assignee field.