Manage Fields in Projects
As an administrator, you can manage custom fields in all of the projects in YouTrack. In addition, you can configure a field to attach it automatically to all new projects. For more information, see Global Default Settings.
Project administrators can attach custom fields to their own projects. For more information, see Manage Custom Fields.
Add Fields to a Project
On the Custom Fields Settings page, you can add custom fields to any project in the system.
To add a custom field to a project:
Open the tab.
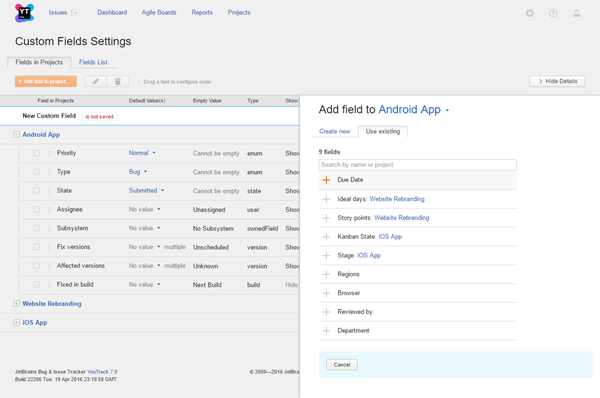
- Select the target project in the list and click the Add field to project button.
The Add field to project dialog opens in the sidebar.
Select the field you want to use in the project. Use the search box to filter the list of custom fields.
- Click the + icon next to the field name to add it to the project.
The settings for the selected field are displayed in the sidebar.
Clone a Custom Field in a Project
As a system administrator, you can update the base properties for any custom field. This includes changes to the field name, the property for the field type that determines whether the field stores single or multiple values, and the field aliases.
However, changes to these base properties affect all of the projects that use the field. For custom fields that are auto-attached or used in multiple projects, you may want to edit the base properties of the field for a single project without affecting other projects in the system.
As an alternative, you have the option to clone the field. When you clone a field, you create a copy of the field with its base properties and assign it a unique name. You can then edit the base properties of the field without affecting the usage of the original field in other projects.
The Clone field operation is only available for custom fields that meet one of the following criteria:
The auto-attach option is enabled for the field.
The field is used in two or more projects.
To clone a custom field:
Open the tab.
Expand the list of fields for the project that you want to update.
Select the field that you want to modify from the list.
If the sidebar is not visible, click the Show Details button in the header.
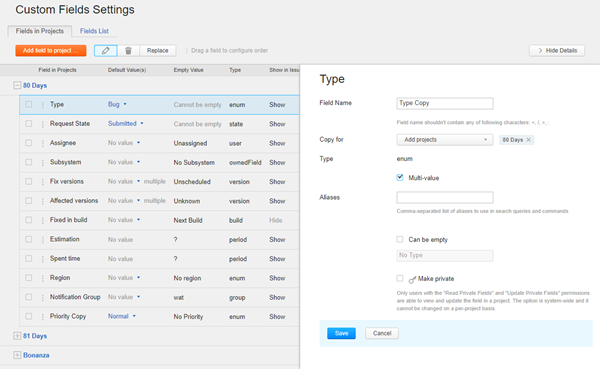
- Next to the field name in the sidebar, click the Clone field icon.
The form for editing field properties opens in the sidebar.

Modify the base properties of the cloned field. Note that the Field Name must be unique.
- Click the Save button.
The usage of the original field is replaced with the cloned field in the project.
The set of values that was used in the original field is used as the set of values for the cloned field.
The values in the original field that are assigned to issues in the project are updated to use the same values in the cloned field.
The usage of the original field in other projects is not affected.
