Manage Custom Widgets
The Custom Widgets page lets you manage the status of custom widgets in a central location. Here, you see all of the widgets that have been uploaded manually to YouTrack and a collection of compatible widgets from the JetBrains Plugins Repository.
To access this page, open the Administration menu and select Custom Widgets from the Server Settings section.
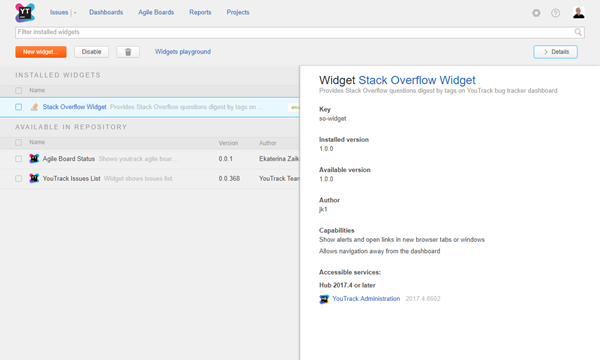
The following actions are available in the header of the Custom Widget page:
Action | Description |
|---|---|
New widget | Opens the New widget dialog in the sidebar. Here, you can upload a new custom widget to YouTrack. For instructions, see Upload a New Custom Widget. |
Disable/Enable | Toggles the status of all of the selected widgets. For more information, see Disable a Custom Widget. |
Delete | Deletes all of the selected widgets. For more information, see Delete a Custom Widget. |
Update | For widgets that were installed from the JetBrains Plugins Repository, this button updates the widget to the latest available version. |
Widgets playground | Opens the widgets playground page. Here, you can test the functionality of widgets that are under construction. For more information, see Test a Custom Widget. |
Details | Shows and hides the Details panel in the sidebar. |
Widgets List
The widgets list is divided into two sections.
The Installed Widgets section displays the widgets that are currently installed in YouTrack. This can be a combination of widgets that have been uploaded manually or installed from the JetBrains Plugins Repository.
The Available in Repository section shows widgets that are available for installation from the JetBrains Plugins Repository.
The list is filtered to show only widgets that are compatible with the version of YouTrack that you are working with. If your YouTrack installation is out of date, there may be additional widgets in the repository that are only compatible with later versions. To see a complete list of available widgets, browse the plugins repository online.
The following attributes are displayed for each widget in the list:
Attribute | Description |
|---|---|
Icon | The image that is shown as the widget icon on the dashboard. |
Name | The name of the custom widget. This attribute is shown in the Add widget drop-down list on a dashboard. The first part of the widget description is shown next to the name. To see the full description, open the Details panel in the sidebar. |
Widget status | A collection of badges to the right of the name provide various status indicators. The following badges are used:
|
Version | The current version of the custom widget. |
Author | The name and email address of the developer who created the widget. |
Allowed Applications | A list of the applications that allow the custom widget to pull and display information from a connected service. The complete list of accessible services is displayed in the Details panel. |
Upload a New Custom Widget
If you want to use a widget that has not been uploaded to the JetBrains Plugins Repository, it must be uploaded manually to YouTrack. You can also use this option to install widgets that you have downloaded from the repository when YouTrack is installed on a private network.
To upload a new custom widget:
In the Server Settings section of the Administration menu, select Custom Widgets.
- Click the New widget button.
The New Widget dialog opens in the sidebar.
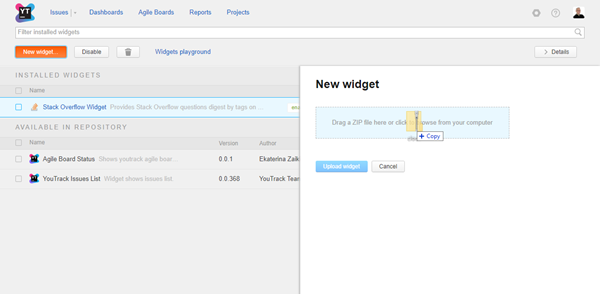
- Drag the ZIP file for the custom widget to the drop zone or click the drop zone to select the ZIP file from your local directory.
Hub checks the ZIP archive to make sure that it conforms to the size limitations. These limitations apply to all uploads, including custom widgets that have been downloaded from the JetBrains Plugins Repository. For details, see Size Limitations.
YouTrack displays the attributes that are specified in the widget manifest file. This includes a list of all of the services that are accessed by the widget and the supported versions of each application.
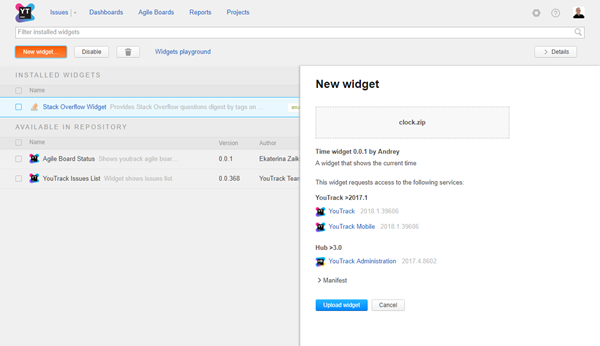
- Click the Upload widget button.
The Custom Widgets page for the new widget opens.
The custom widget is enabled and available for use.
Install a Widget from the Repository
The JetBrains Plugins Repository is integrated directly with YouTrack. This means that you can install widgets from the repository without leaving YouTrack. A list of widgets that are compatible with your YouTrack installation version is shown in the Available from Repository section of the widgets list.
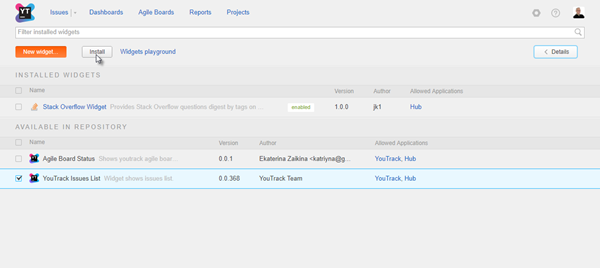
To establish a connection to the repository, your YouTrack installation must have access to the Internet. If your YouTrack Standalone installation is only accessible from inside a private network, you cannot access the repository directly. However, you still have the option to download widgets from the repository and upload them manually to your YouTrack installation.
To install a widget from the repository:
In the Server Settings section of the Administration menu, select Custom Widgets.
Select a widget in the Available from Repository section of the widgets list. You can select multiple widgets.
- Click the Install button in the header.
The selected widget or widgets are added to the Installed Widgets section of the widgets list.
The selected widget or widgets are enabled and available for use.
Update a Custom Widget
The process for updating a custom widget differs for widgets that have been uploaded manually and widgets that were installed from the repository.
Update Manual Uploads
When you have extended the functionality of a custom widget, you can apply these updates to an existing widget. This means that users can access updated features without having to replace the widgets on their dashboards.
The manual upload badge in the widgets list indicates that the widget has been uploaded manually and must be updated manually as well.
To update an existing custom widget manually:
In the Server Settings section of the Administration menu, select Custom Widgets.
- Click the name of the widget that you want to update.
The widget profile opens in the Custom Widgets page.
- Click the Update button.
The Upload new version dialog opens.
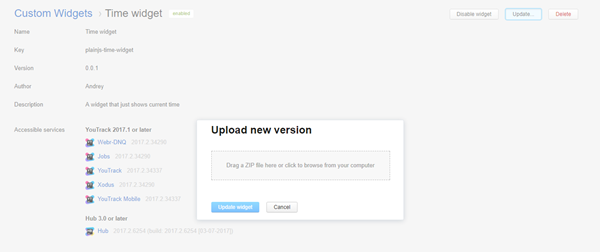
- Drag the ZIP file that contains the updated version of the custom widget to the drop zone or click the drop zone to select the ZIP file from your local directory.
YouTrack displays the attributes that are specified in the widget manifest file. This includes a list of all of the services that are accessed by the widget and the supported versions of each application.
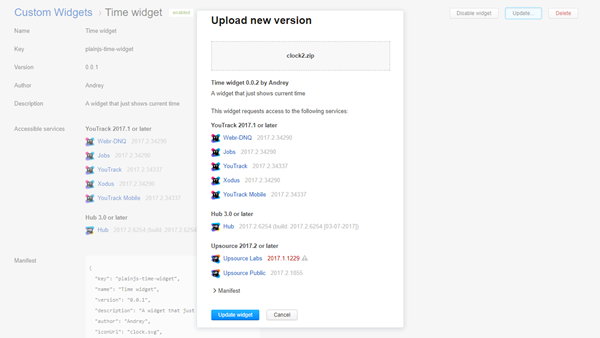
- Click the Update widget button.
Updates are applied to the existing widget.
Any additional functionality that is supported in the new version is immediately available.
Update Widgets from the Repository
For widgets that have been installed from the JetBrains Plugins Repository, the procedure is simplified. When a new version has been uploaded to the repository, you can pull updates directly into YouTrack.
The outdated badge in the widgets list indicates that a newer version of the widget is available. The Available version is shown in the sidebar.
To update a widget from the repository:
In the Server Settings section of the Administration menu, select Custom Widgets.
Select the widget that you want to update. If you have multiple widgets that are marked as outdated, you can select and update them all at once.
- Click the Update button in the header.
Updates are applied to the existing widget.
Any additional functionality that is supported in the new version is immediately available.
Disable a Custom Widget
If you no longer want users to work with a custom widget, but don't want to delete it from YouTrack, you can disable the widget indefinitely.
For example, there are problems or bugs with an existing widget that the developer would like to fix. You can disable the custom widget so users don't experience problems with the current behavior and enable the widget when the problems have been fixed in an updated version.
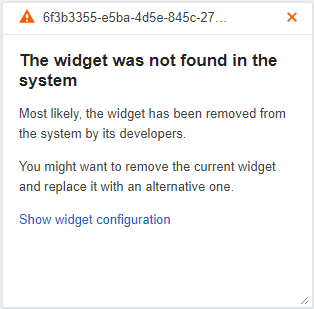
When a widget is disabled, users who have installed the widget on their dashboards see a message that the widget was not found in the system. The edit and refresh controls are not visible. Instead, users see the option to remove the widget from their dashboard.
To disable a custom widget:
In the Server Settings section of the Administration menu, select Custom Widgets.
Select the widget or widgets that you want to disable in the list.
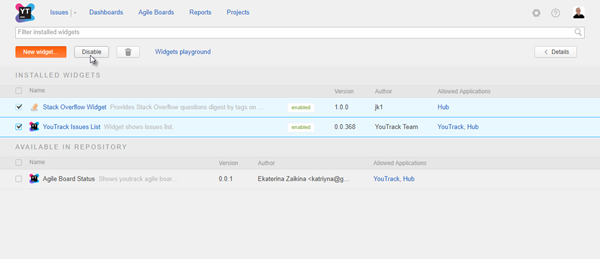
- Click the Disable button.
The selected widgets are disabled.
This action is also available on the profile page for the custom widget.
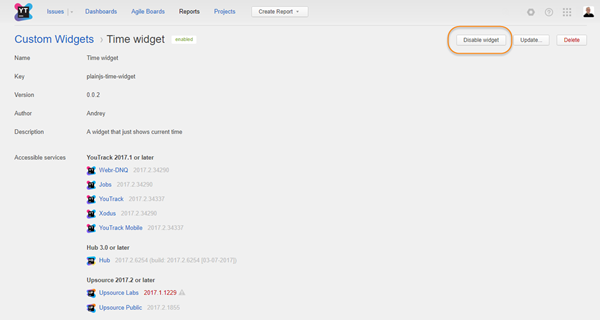
For disabled widgets, the option in the header and widget profile page changes to Enable and Enable widget respectively. Use these controls to reactivate disabled widgets.
Delete a Custom Widget
If you have custom widgets in YouTrack that are no longer supported, you can delete them. For example, when a custom widget displays information from an application that your team no longer uses.
When you delete a widget, users who have installed the widget on their dashboards see a message that the widget was not found in the system. The edit and refresh controls are not visible. Instead, users see the option to remove the widget from their dashboard.
To disable a custom widget:
In the Server Settings section of the Administration menu, select Custom Widgets.
Select the widget or widgets that you want to delete in the list.
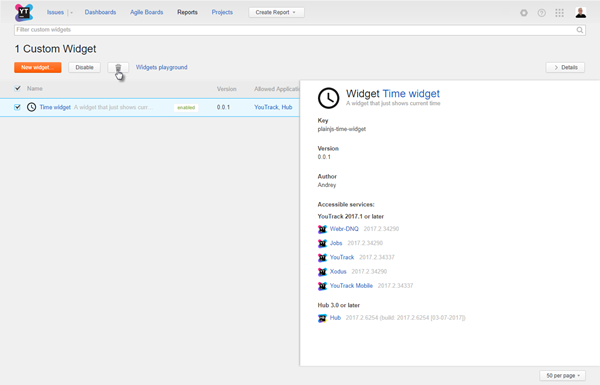
Click the Delete button.
- Confirm the action in the dialog.
The selected widgets are deleted.
If the widget was uploaded manually, it is removed from YouTrack completely.
If the widget was installed from the repository, it is removed from the list of installed widgets and returns to the list of widgets that are available from the repository.